Whether you just bought your first Mac or found a great deal on a printer, you’re going to want to connect the two. Printing PDFs, images, or documents from Mac is easy, but until you add a printer, you’re in a pickle.
Be sure that you follow the instructions for your printer for any necessary setup ahead of adding it to your Mac, such as connecting it to your local network or setting up Bluetooth. When you're ready, though, here's how to add a printer to a Mac.

How to add a printer to a Mac
Like most settings on MacOS, you’ll find those for adding a printer in System preferences.
Step 1: Select the Apple icon and pick System preferences, or choose the System preferences icon in your Dock.
Step 2: On the main screen, open Printers and scanners. You’ll see any connected printers listed on the left. So, if you plug a USB printer into your Mac, you should already see it listed and ready for use.
If you don’t see the printer you need, select the Plus sign button at the bottom of the list to add it.
Step 3: You can then add a Wi-Fi or Bluetooth printer, a network printer using its IP address, or a printer connected to Windows. Select one of the sections below per your printer type.

Add a Wi-Fi or Bluetooth printer
If you have a printer connected to your home network or via Bluetooth, you can add it to your list in a few steps.
Step 1: Choose the Default tab at the top of the Add printer window.
Step 2: Pick the printer in the list or use the Search box at the top to locate it.
Step 3: Enter a name and, optionally, a location for the printer.
Open the Use drop-down box to pick the software for your printer, or choose Select software to find it in the list.
Step 4: Select Add.
Add a network printer with its IP address
If you have a network printer but it does not appear in the list of available options, you can add it using its IP address.
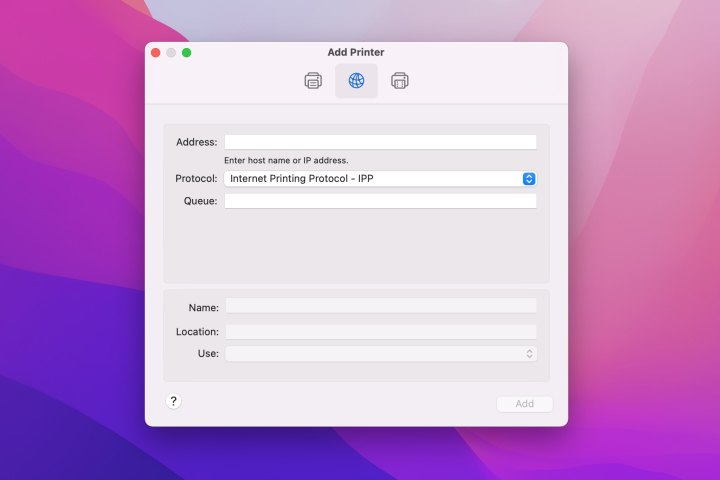
Step 1: Choose the IP tab at the top of the Add printer window.
Step 2: Enter the following details for the printer:
- Address: Enter the IP address or host name for the printer.
- Protocol: Choose the protocol that your printer supports, such as AirPrint, Internet Printing Protocol, or another option.
- Queue: If you have a queue name for your printer, enter it here. If not, check with your network administrator or leave it blank.
Step 3: As with the above printer types, enter a name and (optionally) a location, then choose the software from the Use drop-down list.
Step 4: Select Add.
Add a printer connected to Windows
If you plan to use a printer connected to a Windows computer, be sure that the printer is set up for sharing. Obtain the workgroup name along with the username and password if required.
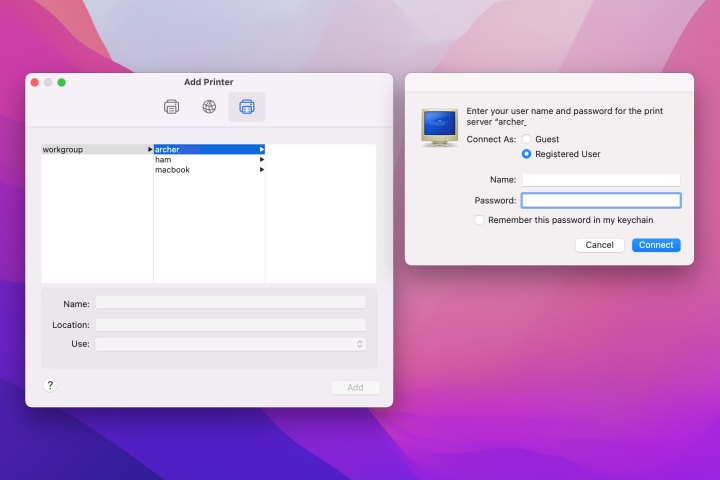
Step 1: Choose the Windows tab at the top of the Add printer window.
Step 2: Select Workgroup on the left, and then pick the corresponding name to the right for the print server. If prompted, enter the username and password.
Step 3: Enter a name, optionally add a location, and then choose the correct software from the Use drop-down list.
Step 4: Select Add.
Finish setting up the printer
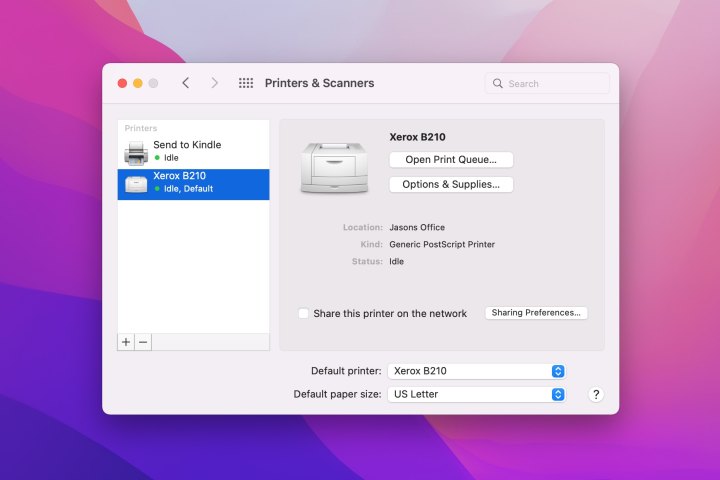
Once you successfully add your printer to the list, it should be ready to use. You can, however, adjust more settings if you like.
To set the default printer and paper size, use the drop-down lists at the bottom of the Printers and scanners window.
For additional settings, double-click the printer in the list and then pick Settings. You can view options for checking supply levels, using generic printer features, and accessing the printer web page. The settings may vary depending on your specific printer.
If you also own one of Apple’s mobile devices, learn how to print from your iPhone or iPad, too!
Editors' Recommendations
- How to allow pop-ups on a Mac
- How to change where screenshots are saved on a Mac
- How to check the storage space on your Mac
- How to create a Memoji on a Mac
- How to create a bibliography in Word on Windows and Mac