Using emojis is a great way to add flair and personality to what would just be a plain ole’ text message. But if you’re an Apple devotee, you’ll also be able to liven your chats up with Memojis. Introduced on iOS 12, Memojis are custom avatars that you make in your likeness. Choose from numerous clothing, facial hair, and other cosmetic filters to dial in your appearance. When finished, your Memojis can be used with a few iOS apps, including Messages and FaceTime.
Fortunately, making your very own Memoji isn’t too difficult. To make the learning curve even simpler, we’ve written this step-by-step guide to help.
Make a Memoji on Mac
When you create your Memoji on Mac, the cute little you syncs across your devices. So, you can use the Memoji on an iPhone and iPad in Messages or FaceTime. It all starts in the Messages app.
Step 1: Open Messages and select any conversation or start a new one.
Step 2: Click the Apps button, which looks like the letter A, and choose Stickers.
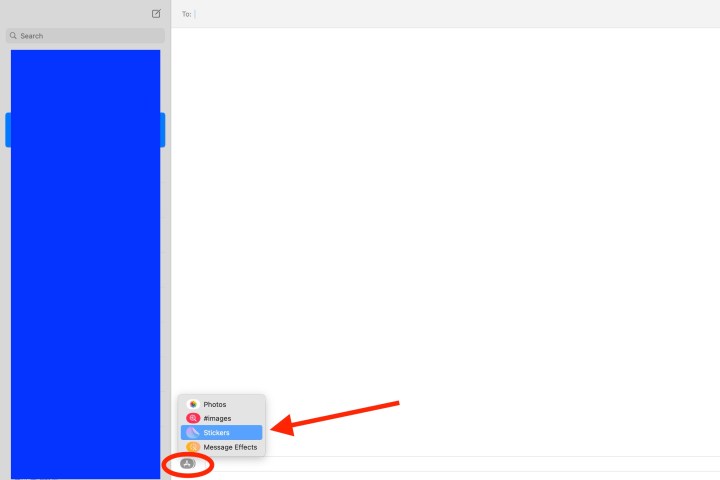
Step 3: Click the Plus sign on the top-left of the pop-up window.

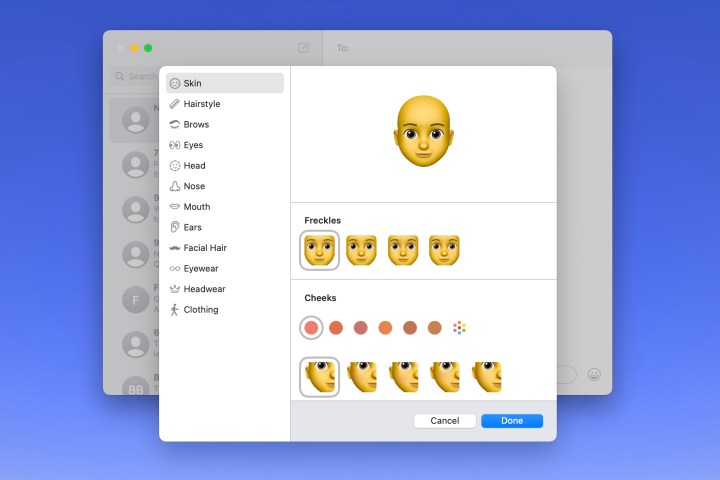
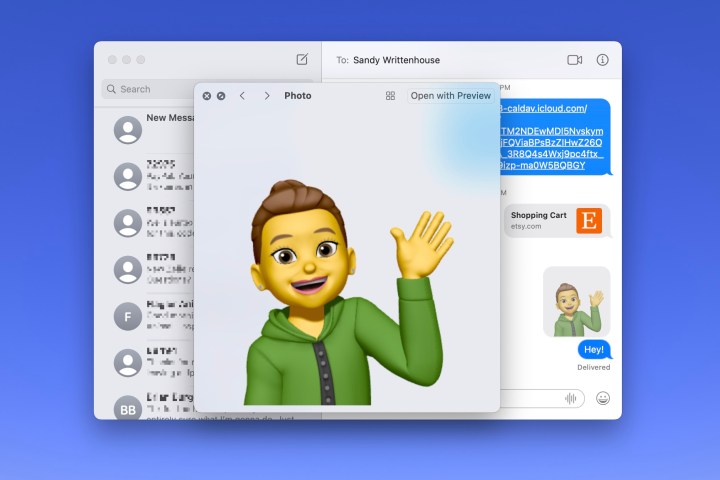
Step 4: In the subsequent pop-up screen, you’ll use the tools on the left to customize each part of your Memoji. Apple gives you detailed options too, not just basic skin colors and hairstyles.
For example, you can add freckles or beauty spots to the skin, piercings or an oxygen tube to the nose, and eyeliner or eyeshadow to the eyes. You can even age your Memoji with the head tool to make it look older or younger.
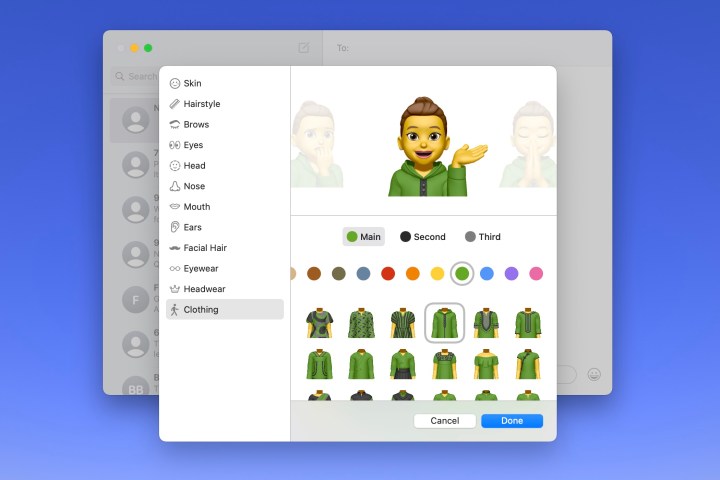
When you’re choosing colors for things like hair, eyes, and brows, you can go all the way to the right and pick the Palette icon to display more colors. Then, use the slider to adjust the shade of the color you choose.
As you make each selection, you’ll see a preview at the top. This lets you add features and elements to see how it will look as you go, and you can choose and customize the items in any order you like.
Step 5: When you finish, click Done to save your Memoji.
Edit a Memoji on Mac
Once you create a Memoji, you aren’t stuck with it forever. Maybe you grew a beard or got a new hairstyle. You can edit your Memoji anytime.
Step 1: Open Messages, click the Apps button, and select Memoji stickers.
Step 2: Choose your current Memoji in the pop-up window.
Step 3: Click the Three dots on the top-right and pick Edit.
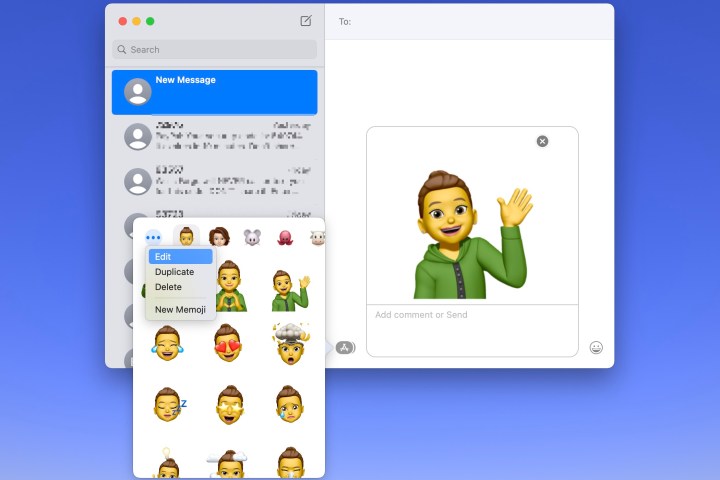
Step 4: You’ll then see your current Memoji with the same tools as before. Simply make your changes and click Done when you finish.
Using your Memoji
As mentioned, you can use a Memoji in Messages and FaceTime.
In Messages, click the Apps button, select Memoji stickers, and then pick one of the expressions for your Memoji in the pop-up window. This places it into your message, ready for you to send.
In FaceTime, you can add a Memoji sticker or use the animated Memoji as your face during a video call. Click the Effects button, which looks like a star. Select the Memoji sticker icon to add the sticker to the screen or the Memoji icon to use the animated version.
Creating a Memoji is fun, and using it to represent yourself in Messages, FaceTime, or even as your Apple profile picture is a terrific alternative if you don’t want to use an actual photo.
Editors' Recommendations
- iMac deals: New, renewed and refurbished iMac computers
- I ask again: Will Apple ever merge the Mac and iPad?
- How to choose between a MacBook and a Windows laptop
- You can play almost any Windows game on Mac — here’s how
- How to play Fortnite on a Mac: all methods, explained