If you’re just getting started as a front-end developer or need to debug errors while testing web applications, Safari is likely in your list of browsers to check for compatibility. With this comes the need for a tool called Inspect Element.
Going beyond just checking the source code of a page, Inspect Element lets you view everything going on behind the scenes of a webpage. You can see the HTML, style sheets, media, and other elements, all in one spot. Here’s how to use Inspect Element on Mac.
Enable Inspect Element for Safari on Mac
Before you can use the Inspect Element tool on Mac, you need to enable it in Safari.
Step 1: Open Safari and click Safari > Preferences from the menu bar.
Step 2: Select the Advanced tab.
Step 3: Check the box for Show Develop menu in menu bar.
Inspect Element is now available and ready for you to use in Safari on Mac.


Open Inspect Element in Safari
With the tool enabled. you can access it a couple of different ways. If you want to look at a particular element on the page, you can select it first. Otherwise, you can simply open Inspect Element and select it from there.
Either click Develop > Show Web Inspector from the menu bar or right-click the page and pick Inspect Element from the shortcut menu.
How to Use Inspect Element on Mac
Once you open Inspect Element, you’ll have all the tools you need to review every item on the webpage. And there are a lot of tools at your fingertips. Let’s take a look at the basics of using Inspect Element.
Step 1: Move and resize Inspect Element.
You can dock the tool at the bottom or on the side of the page or pop it out to a separate window. Use the icons on the top left of the inspector toolbar to move it where you want. If you dock the tool, you can drag the border to increase or decrease its size.

Step 2: Customize the tabs.
Inspect Element provides nine tabs for you to work with across the top of the toolbar. These include Elements, Storage, Layers, and Timelines. You can hide those you don’t need if you like. Right-click a tab and then select the ones you want to see. This places checkmarks next to them and puts the tabs in the toolbar.

Step 3: Inspect an element.
To select items on the page to display in the tool, click the compass icon in the toolbar. Then, drag through or click the element on the page. You can also select the code or item in the tool for that element to display on the page.

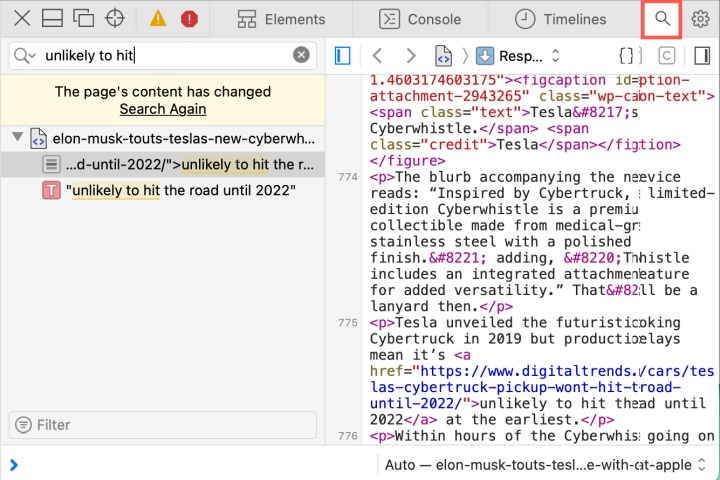
Step 4: Search for an element.
If you want to find a specific item on the page such as a text string, click the search icon on the right of the toolbar. Enter your search term into the box on the left and view your results directly beneath.
Step 5: View warnings or errors.
If the tool detects warnings or errors on the page, you’ll see these icons display in the toolbar as well. Click an icon to view either the warnings or errors.

Step 6: Adjust the settings.
To change the appearance of Inspect Element, show page rulers, enable source maps, zoom, and more, click the gear icon on the far right of the toolbar to open the Inspect Element settings.

When you finish using Inspect Element in Safari, click the X on the top left of the toolbar to close it.
You can take your code inspection, application testing, or debugging to the next level with Inspect Element on Mac for Safari.
Editors' Recommendations
- 5 web browsers you should use instead of Google Chrome or Edge
- How to find a Wi-Fi password on Mac
- How to take a screenshot on a Mac
- How to convert HEIC files to JPEG on a Mac
- How to enable picture-in-picture for YouTube on your Mac