Microsoft PowerPoint offers many features for creating slideshows. Some of those features go a bit unnoticed but can be useful when building your presentation.
Before you create your next PowerPoint, take a look at these tricks. They can save you time, let you customize the show, and stay organized from start to finish.
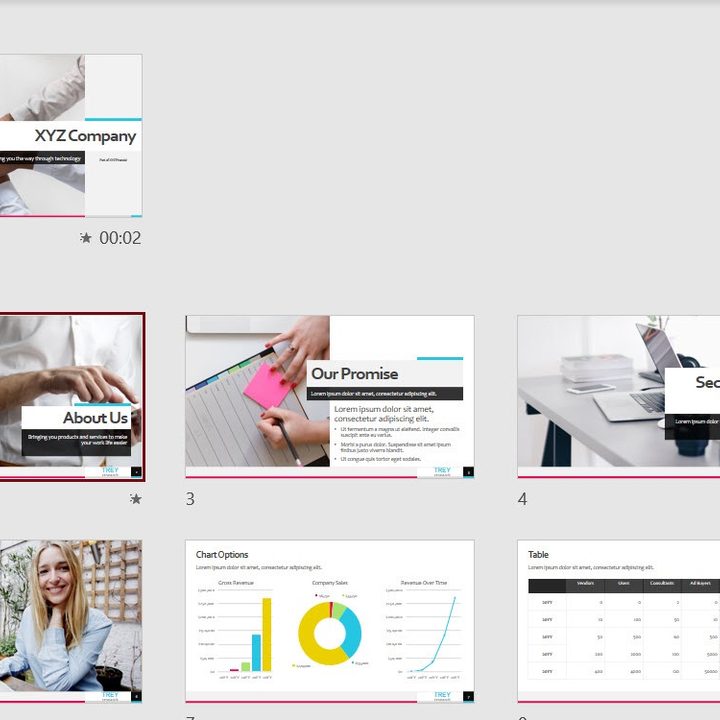
Save time by reusing slides
You may not realize it, but you can reuse slides from other presentations to save time. You might reuse a slide with your company mission, contact information, or details of all your locations.
Step 1: Navigate to the slide in your current presentation where you want to insert slides from another presentation. The slides you add will display after the slide you have selected.
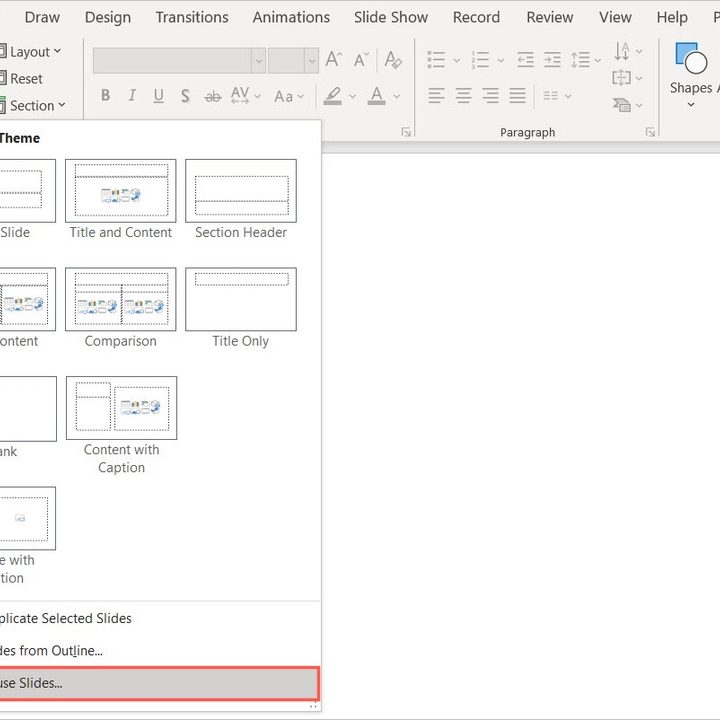
Step 2: On either the Home or Insert tab, select the New slide drop-down arrow and pick Reuse slides.
Step 3: When the Reuse Slides sidebar displays on the right, use either the drop-down box to pick a recent presentation or the Browse button to locate the slideshow. Then, select the arrow on the right to load the slides.
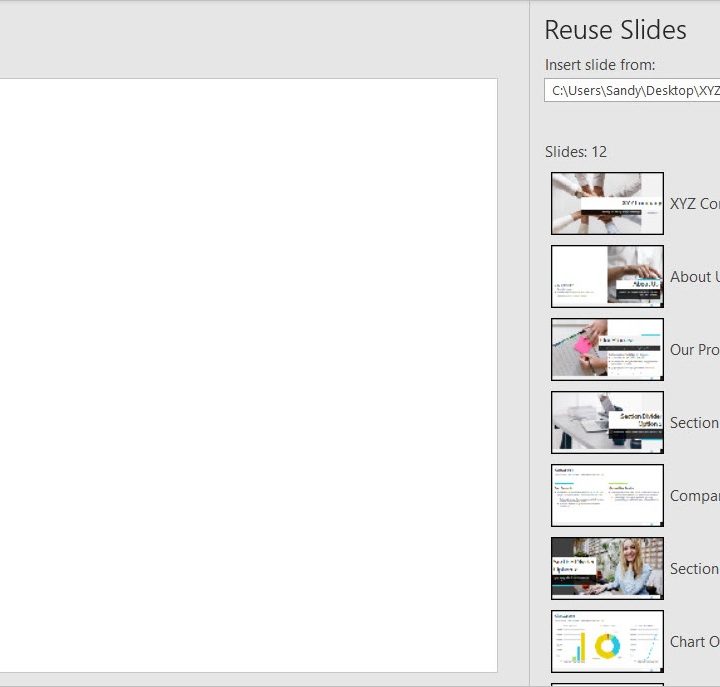
Step 4: Before you choose the slide(s) you want to reuse, you can check the box at the bottom for Keep source formatting if you like. This retains any formatting from that presentation and ignores the formatting in the current presentation.
Step 5: Then, select the slide(s) you want to insert from that slideshow into your current one. You’ll see each slide, if you pick more than one, display in the thumbnail area on the left.
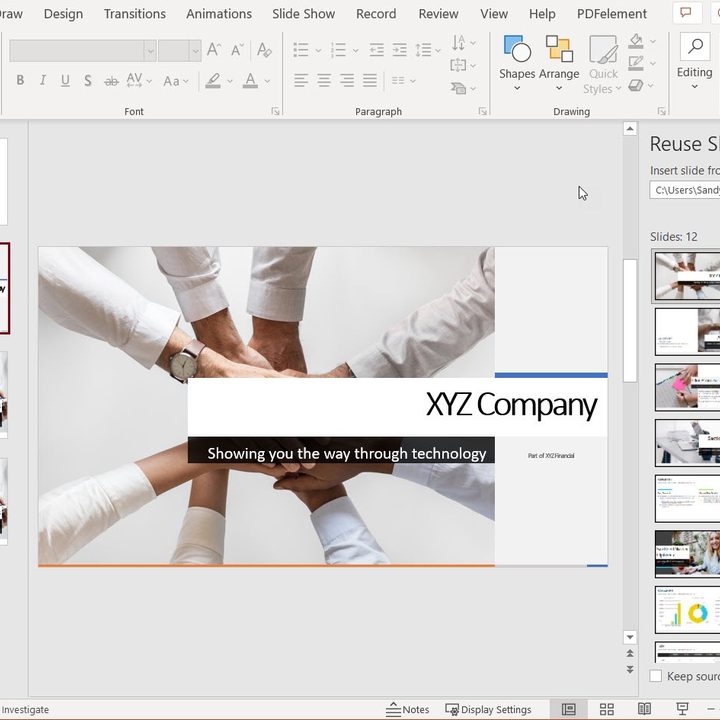
Step 6: When you finish, use the X on the top right of the Reuse Slides sidebar to close it.
You can then use the slides you inserted as-is or make edits as needed. Either way, you can save a lot of time by reusing slides instead of recreating them with each presentation.
Cater to different audiences with custom shows
If you have a lengthy slideshow but only want to present particular slides to specific audiences, you can create custom shows.
For example, you might want to present certain slides to your investors, a different set to your executives, but the entire slideshow to your project team. A custom show allows you to create a subset of slides from your presentation, without needing to delete slides or make an entire new slideshow from scratch.
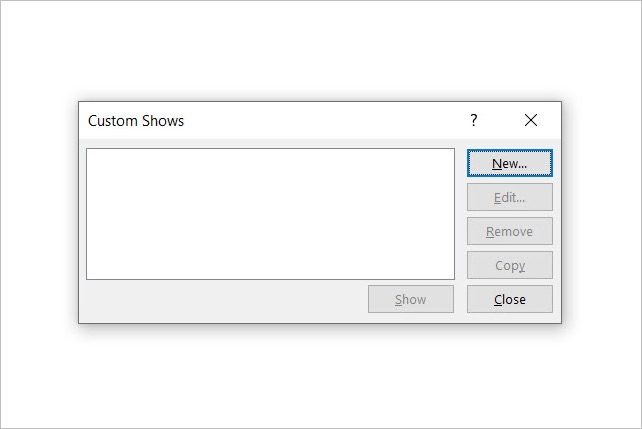
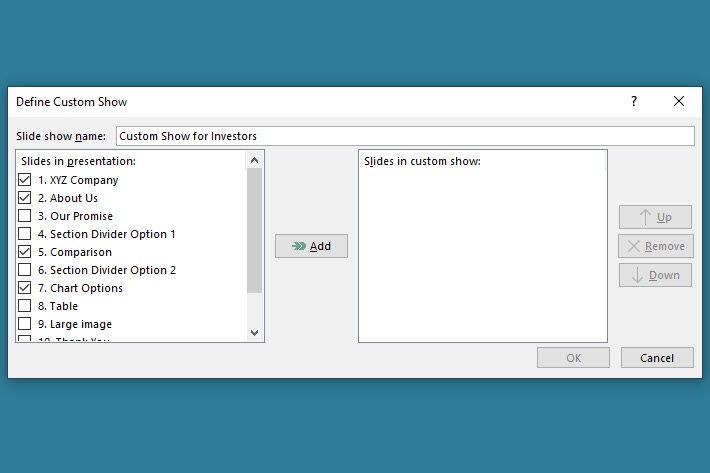
Step 1: Go to the Slide Show tab, select the Custom slide show drop-down arrow, and pick Custom shows.
Step 2: In the Custom Shows pop-up window, choose New. Keep in mind this is the same spot you’ll visit to see and manage your custom shows later.
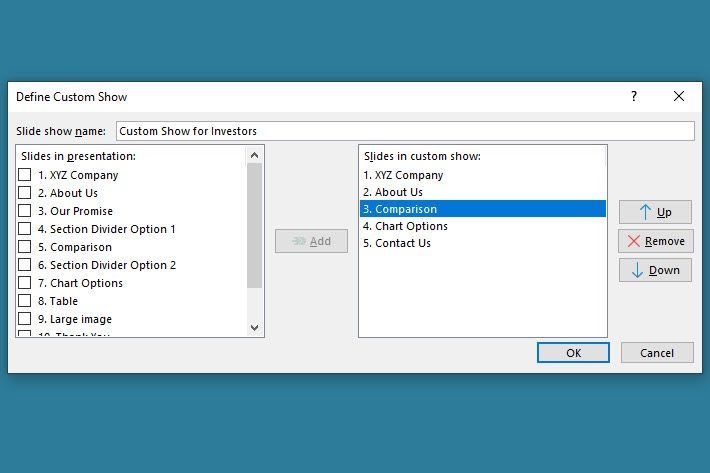
Step 3: Give your custom show a name. Next, select the slides in the box on the left side that you want and use the Add button to add them to the custom show box on the right.
Step 4: Once you have the slides in the custom show box, you can rearrange them if you like. Select one and then use the Up or Down button to move it. Do the same for any others you want to rearrange.
Step 5: When you finish, pick OK at the bottom of the window to save the custom show. You’ll return to the Custom Shows window where you can create another show, Show the custom presentation immediately, or Close the box.
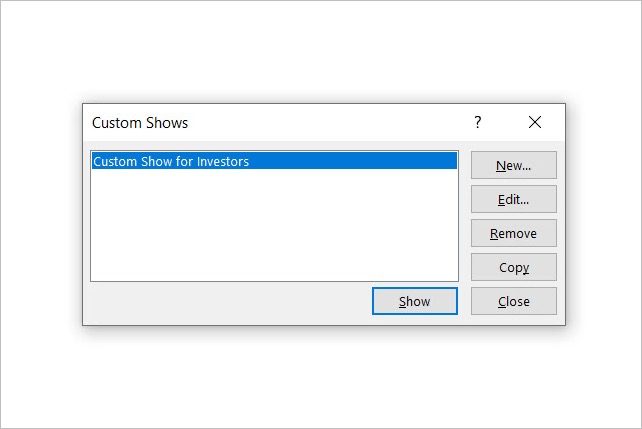
To present a custom show later, you can return to Slide Show > Custom slide show and select the name of the show in the drop-down box. You can also place a link on a certain slide, such as a table of contents slide, to access the custom show.
Organize your slideshow with sections
When you create a PowerPoint presentation, especially a lengthy one, it can become difficult to keep it organized as you add more slides. PowerPoint offers a useful section feature for structuring presentations.
By setting up sections, you can collapse sections you’re not working on to focus on those you are and move an entire section to a different spot in the slideshow instead of moving individual slides.
Step 1: To add a section, select the first slide that you want inside that section. Then either right-click and pick Add section or choose Section > Add section on the Home tab.
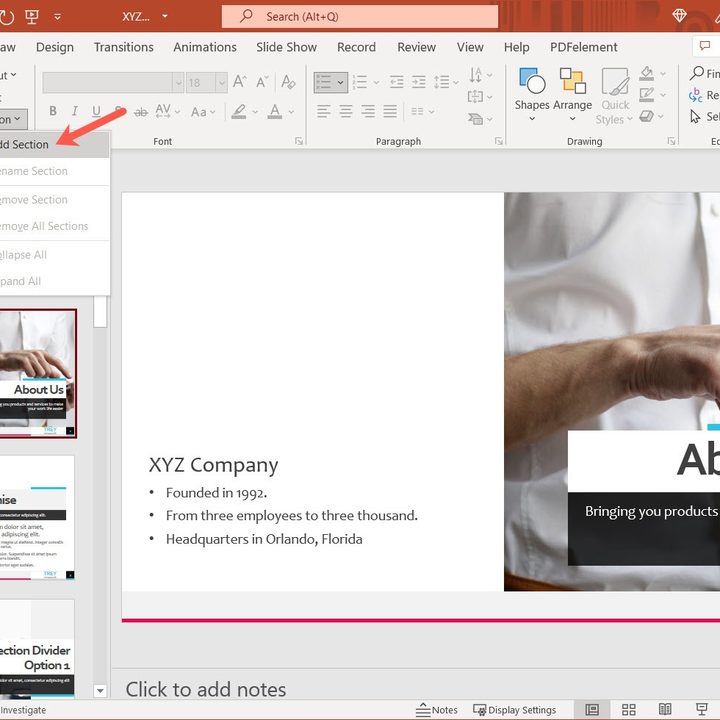
Step 2: If you create a section using any slide other than the first slide, that first slide will become part of a default section. This ensures that all slides in your presentation belong to a section.
Step 3: Continue to add sections to group your slides and stay organized.
You can then take advantage of these features for working with sections:
- Collapse and expand a section using the arrow to the left in Normal or Slide Sorter view.
- Collapse or expand all sections by right-clicking a section and choosing an option in the menu or using the Section drop-down arrow on the Home tab.
- Rename a section by right-clicking the section and selecting Rename section in the menu or using the Section drop-down arrow on the Home tab.
- Move slides between sections by dragging and dropping them into the sections you want.
- Move entire sections using drag-and-drop or by right-clicking the section and choosing Move section up or Move section down.

For additional help with your next slideshow, check out ways to add music to your presentation or how to include notes with your slides.