Finally kicking off the latest Final Fantasy XIV boss battle theme, Ruby Weapon is here to finish what Ultima Weapon started back in 2.0 and usher in an expansion-long homage to Final Fantasy VII. We’ve had plenty of prototypes and poor imitations of Ultima take to the stage since those climactic moments of the base game, but Ruby Weapon is on a whole other level.
You can fight this in both the regular story difficulty and Savage mode. But as you’ll need to clear this fight to progress the main story, this guide focuses on the normal difficulty version for those who are feeling just a little bit anxious going into this huge and explosive battle. If you don’t want to get the second half spoiled for you, we suggest turning back and going in blind. There’s no way I’m skirting around one of the game’s best pieces of fanservice.
Phase 1 – The Ruby Weapon
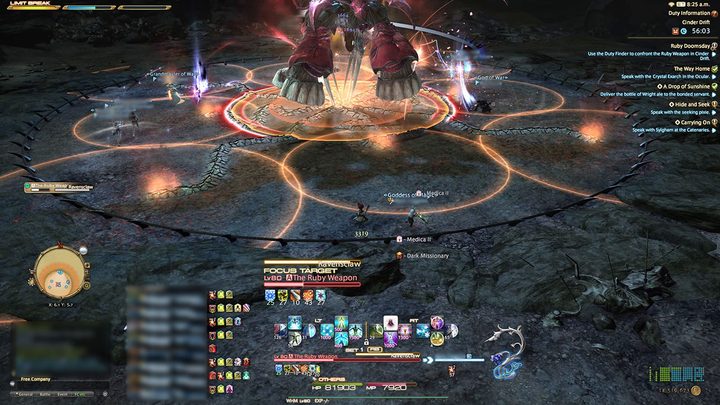
Like any good boss fight, Ruby Weapon introduces you to its two basis attacks: Stamp (a tank buster) and Optimized Ultima (a raid-wide blast). Remember these.
Soon after, Ruby Weapon uses Flexiclaw, the very same talons NPCs described seeing in the cutscenes prior. These dig into the terrain, leaving an elevated pattern in their wake. Ravensclaw, which is channeled at the same time, results in large circular spike blasts originating from the tip of each of these fissures. Look to position yourself far away from these before the cast resolves. Then get yourself on one of the fissures to avoid the dying by the quicksand caused by Liquification right after. Avoid the linear Ruby Ray, survive another Optimized Ultima blast, and get ready for another round of claws.
This time, Flexiclaw is followed with Helioclaw. This displays as three red lines curving out from Ruby Weapon into the arena. Blasts will follow these paths, so sit equally between two of the lines to avoid any overlap. Stack markers then target both healers, so prepare to split the team to soak the two. Right after, Ravensflight plots a path of arrows for Ruby Weapon to roll over at high speed. Take note of its path and avoid getting squished.
Don’t worry if you see Homing Lasers go out soon after. These missiles only land once Ruby Weapon using Ruby Dynamics — which is signaled when it shoots off to the edge of the arena for a wide cleaving attack. Just hug its leg to avoid this and split up to avoid overlapping any incoming lasers. There’s another Optimized Ultima right after, so healers will need to pay close attention here. Before essentially repeating the whole lot until you deplete its HP, there’s an instance where Flexiclaw fissures explode fully after a Ravensclaw. It’s nothing major, but it’s a new quirk to deal with. It will then try for another Flex/Helio combo before treading old ground. Burst it down before a hefty Optimized Ultima run, and you’ll move into phase two.
Phase 2 – Nael deus Darnus
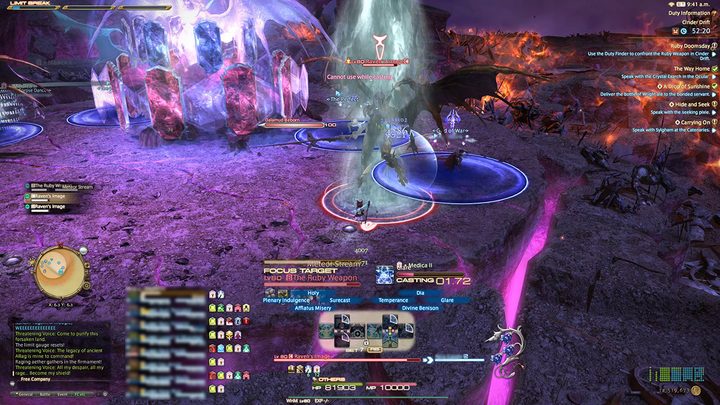
If you have completed “The Binding Coil of Bahamut: Turn 9” raid (or T9 to most), you’ll have a gist of what to look out for here as Nael (or something based on her) bursts out of the Ruby Weapon for one last hurrah. Now that you’re here, you’ll start back at this phase after a group wipe, so don’t worry about a little mistake costing you a lengthy run.
Nael likes meteors. That was her thing. Dalamud was like a child to her, and she wants nothing more than to crush you with a meteor. She’ll immediately cast Meteor Project, ushering in the first of three cycles.
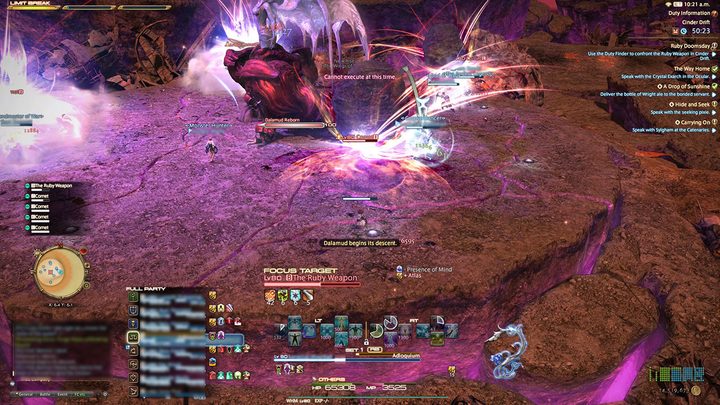
Meteor Project #1
Meteor Project maxes out her “Dalamud Reborn” meter. For this first cycle, she starts by summoning two “Raven’s Image” mobs. The tanks take these while the DPS prepares to split for some quick Meteor Stream divebombs. Whoever has a mob on them (hopefully the tanks) will then get speared five times for moderate damage before another Meteor Stream slaps the DPS again.
This sequence continues until both images are dead, at which time the meter depletes and Dalamud falls somewhere in the distance, dealing raid-wide damage as the heat and debris washes over the area.
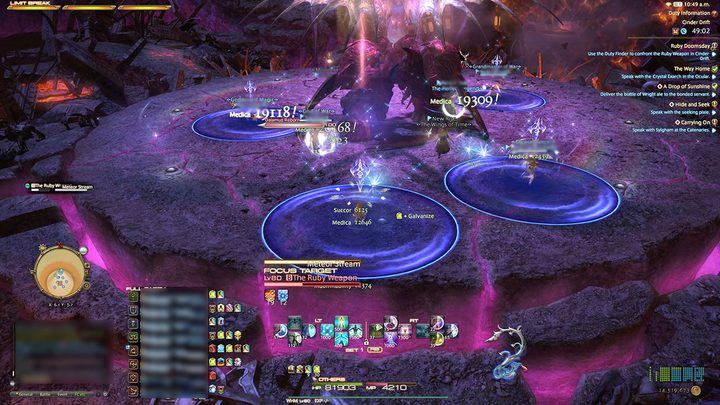
Meteor Project #2
Nael then casts Meteor Project for a second time. With the meter now maxed again, Nael (Ruby Weapon) casts Magitek Comet/Meteor. Just run to the edges to avoid any major damage from the comets falling, and block your sight of the boss by huddling behind one to avoid the meteor falling in the center. Easy stuff.
Next, Mark II Magitek Comet is cast. Four players follow the meteor paths on the ground until it glows, which then stuns the four players as they attempt to stop the comets from crashing down. These do periodic damage to the holder until they’re destroyed. It’s not too strict, but tanks and healers should take the meteors while the DPS work together to free both healers as quickly as possible. Dalamud falls once more as this ends, so extra healing will be necessary.
Meteor Project #3
The third Meteor Project cycle is the last. If you don’t manage to end the fight before Dalamud falls, it’s a wipe. Thankfully, it’s a fairly simple DPS check. The only thing you’ll need to contend with is persistent raid-wide damage and a couple more Meteor Stream divebombs.
Everything is timed down to the last second here, so there’s a strict 3-2-3 sequence of events to make things easier. That’s three casts out Outrage (Nael’s powerful raid-wide attack), two strikes of Meteor Stream, and three more casts of Outrage. A cast out of Outrage takes five seconds. With Dalamud starting its 15-second decent as the second (and final) Outrage combo goes out, that means it’s game over if Nael doesn’t kick the bucket at the end of this sequence.
And that’s it! Too many deaths on the road to this will leave Nael with plenty of HP for her third and final Dalamud crash. But once the team gets the hang of things, you should kill her pretty early into the third phase without too much effort.