Madden NFL 18 offers the most realistic mechanics in the series to date. This means that the game has become more engaging and authentic, but also that you’ll have to be more mindful to move the chains and get into the end zone on a consistent basis. Whether you’re having trouble choosing plays, want to be more accurate slinging the pigskin, or can’t get the run game going, we’ve got you covered. You don’t have to be an obsessive football fan (it doesn’t hurt though) to put up some crooked numbers on your friends. Let’s break down how to excel on the offensive side of the ball in Madden 18.
Choosing plays
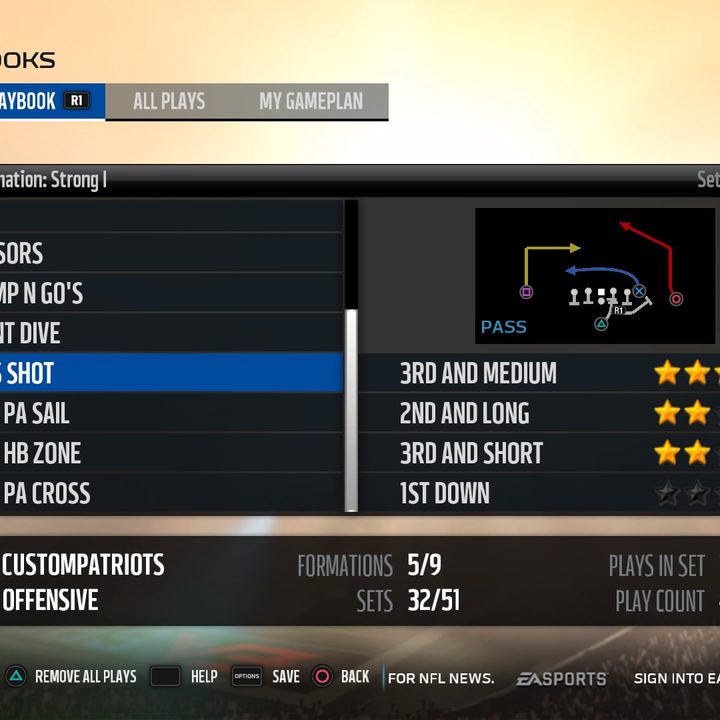
Madden playbooks largely mirror their actual NFL counterparts. There are 32 teams, and each one has its own playbook. In Madden, each playbook contains up to 500 plays across up to nine formations. That sounds daunting, but many plays are minor variations on a common idea, so the number of strongly differentiated plays much lower. You can take a look at playbooks for all teams in Madden 18 (or create your own) by scrolling all the way over on the main menu and selecting “customize.”
The good news is that you do not have to be a former football coach or signal caller to utilize your playbook well. While much of picking successful plays comes from trial and error, learning which and when to call certain plays can be boiled down to a basic formula.
Football fans know that the goal is to move the chains — gain 10 yards in three (or four) plays to get a new set of downs. With that being said, some Madden players are enamored by the long ball. We admit it — chucking the ball 40 yards down the field for your number one receiver to grab is thrilling. That doesn’t mean you should do it three times in a row. That will only lead to incomplete pass after incomplete pass, turnovers, and a predictable offense.
Make sure to mix things up. On first down, we find that either running the ball or short screen passes is the way to go. Eat up a few yards to make second and third down more manageable. If you gain five or six yards on first down, second down becomes more interesting. You can either take a shot downfield, or hammer down for a few more yards on the ground. But say you weren’t successful gaining more than a yard or two on first down, it’s usually a good spot for a pass play. Same with on third and long if you are in that situation.
Know when to go for it on 4th
One more thing about basic playcalling strategies. You have four downs to move the chains, but be wise. Risking a turnover on fourth down, when you aren’t in enemy territory is foolish against a human opponent, and only slightly less foolish against Madden 18‘s improved AI.
That being said, when you are in enemy territory, going for it on fourth and short situations is advisable. If you’re in that gray area between the 50 yard line and field goal range, we think the reward outweighs the risk. Our general rule of thumb is to go for it on 4th and 2 or less, as a typically run play will net you at least two yards.
Formations

Each team’s plays are divvied up between up to nine different offensive formations. Most teams use four to six formations, but it varies widely. Teams like the Miami Dolphins only have three formations, and others, like the Cleveland Browns and Minnesota Vikings feature eight. While you can run or pass out of every formation, each one is well suited to specific types of plays. let’s take a look at how each formation sets up at the line of scrimmage.
I Formation: Almost every team has this one. The Quarterback, Fullback, and Half-back (A.K.A. the runningback) line up in the shape of an I, hence the name. Five linemen and the Tight End take position on the line of scrimmage, and typically one receiver stands on each side of the field. Most teams use the I Formation to run the ball, thanks to the blocking provided by the FB when handing it off to your running back.
Strong I: In Strong I formation, the Fullback lines up offset to the right and behind the QB. The right side wide receiver lines up a few yards before the line of scrimmage. The Strong I creates numbers and leading blockers on the right (strong) side of the field to give the running back room to breathe.
Weak I: The Weak I is a reflection of the Strong I, placing the Fullback on the left (weak) side of the QB.
Shotgun: Rather than standing right behind the line of scrimmage, the QB stands seven yards behind the line of scrimmage. When a defense has been getting to your QB quickly, Shotgun gives you a better chance of getting a pass off without pressure. In Shotgun formation, your QB could either be alone in the backfield, or flanked on either or both sides by running backs.
Shotgun formation is typically where you’ll find an excess of deep pass plays that include up to four wideouts. Since everyone looks at the Shotgun and expects a pass, it can be used to mask certain types of running plays, such as a QB Draw.
Singleback: Singleback formation is like the I, but the Fullback is substituted for an additional wide receiver on either side of the field. Most teams have Singleback, and its fairly balanced on most teams in terms of passing and running plays.
Pistol: The Pistol formation is a hybrid between the Singleback and Shotgun. The QB takes the snap a couple yards behind the line of scrimmage, with the runningback positioned directly behind him. Typically, a pair of offset receivers will stand on either the left or right side of the field, and a lone wideout will appear on the opposite side. Pistol formation gives your QB time to throw while also allowing him to hand it off to his running back quickly. Most option plays — in which the QB runs and decides whether to pitch it to the running back — are performed out of the Pistol.
Full House: The Full House, or T formation, is a seldom seen, but interesting setup that features either one or no receivers. Instead, a tight end lines up on both sides of the ball, the QB is under center, and in a horizontal line in the backfield, a running back stands on each side of a fullback. In a subset of the Full House, one of the tight ends is replaced for a receiver on either side of the field.
Wildcat: The Wildcat formation calls for either a Runningback or wide receiver to line up in the position of the QB (The QB may line up as a WR or not be on the field at all). Typically, the Wildcat is a simple direct snap run, with the RB or WR taking the ball on his own, but you can throw and run option plays out of the Wildcat. As the player isn’t typically a great passer, be careful when doing anything but running out of this formation.
Near: Another rarely seen formation, Near sees two running backs (or a running back and fullback) lined up horizontally in the backfield with the QB under center. It can lead to some misdirection plays seeing as the QB hand off to either back without immediately giving away his choice.
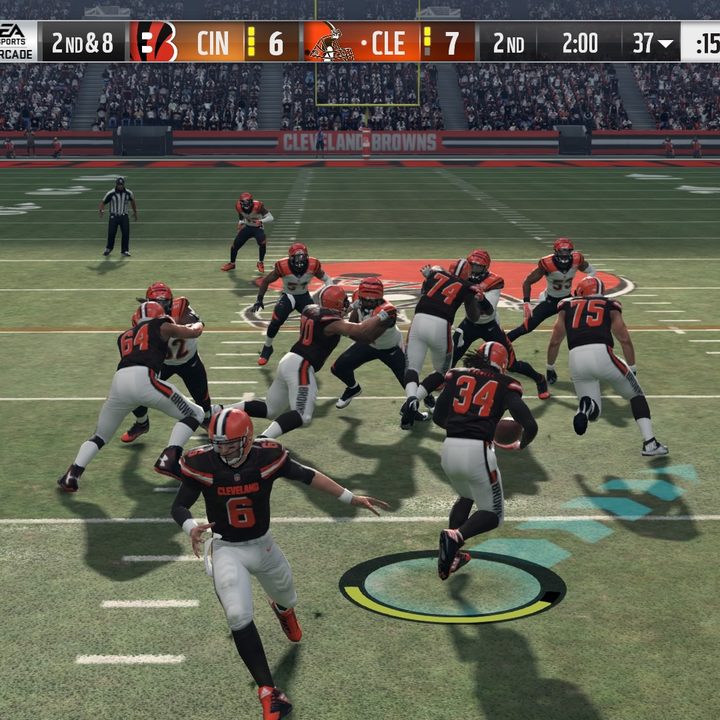
Reading the Defense
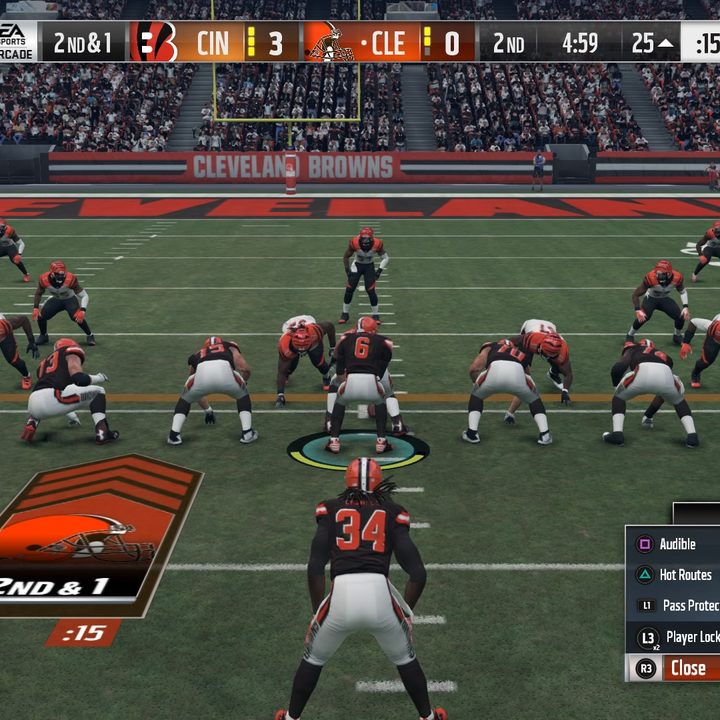
Picking your play is important, but it’s only part of what you need to do before each play starts. When heading up to the line of scrimmage, successful Madden players pay attention to the opponent’s defensive scheme. Depending on how the defense lines up, you can make a fairly decent prediction as to what your opponent’s plans are.
If your opponent’s linebackers are inching towards the line, chances are a blitz is coming. If multiple safeties are far back from the spot of the ball, and linebackers look comfortable, chances are your opponent thinks you will pass. Pay attention to your opponent’s safeties and corners when lining up for a pass play. Does your number one receiver’s route look to be heading towards a safety? If so, you should probably try to the ball to someone else.
If the defense looks to be set to cover your play well, you should think about changing it at the line.
When you’re under Center, press R3 to pull up the adjust offense menu. From here you can audible to completely change the play you are running to get a more favorable matchup. You can also call Hot Routes, which let you pinpoint a receiver and change his designated route. This can be useful if you want your number primary receiver to still be in play. Say your receiver is on a slant route but the defense looks to have the middle of the field bogged down, change the hot route to an out route, and hit him as he creases towards the sidelines.
One other important feature when adjusting plays is designated for when a run is called. A run play either is set for the left or the right side of the field. A simple way to be more successful on the ground is to count the number of defenders near the line on each side of the ball. If your run play is going left, but there are more defenders on that side of the field, flip the right analog stick to the right to change the side of the field the run goes towards (or vice versa).
Keep in mind that the defense can also audible so pay attention to shifts at the line and adjust accordingly.
Passing
One of the biggest changes to Madden 18 is that receivers take longer to get into their routes. This means that, while playing QB, you have to be more patient and let your routes unfold before throwing. We’ve found that adjusting the camera angle on the field allows you a better field of vision as the play unfolds. Press up on the D-pad to cycle through camera positions. The Aerial views are very helpful for seeing where you can and cannot place a ball. Pay attention to your receiver’s momentum — If it’s a long pass, know that your receiver will likely be about ten yards away from where he currently is when the pass is thrown.
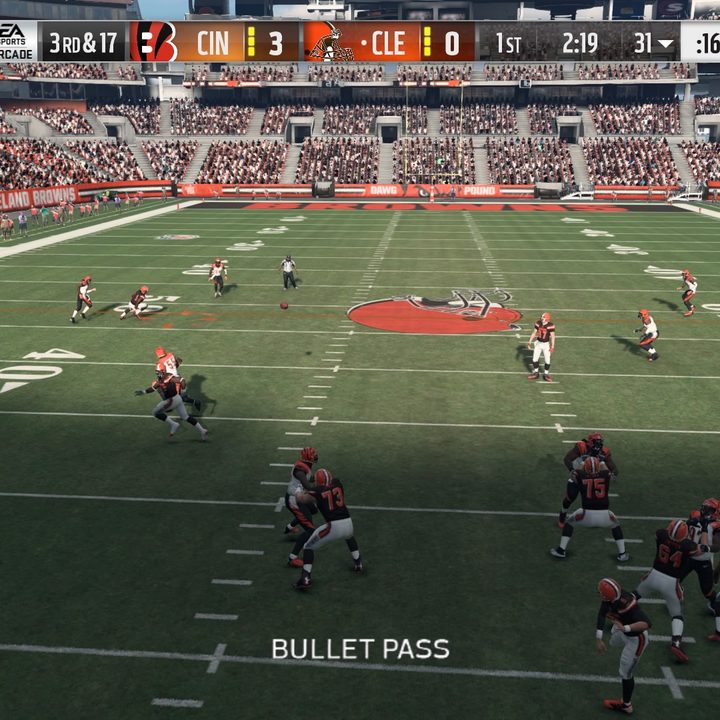
Smart passing decisions base on positioning have always been important, but this time around you’ll also want to throw the kind of throw to make sure the ball ends up in the receiver’s hands. These are the five passing types:
Bullet: To perform a bullet pass, hold down the receiver icon. Bullet passes get the ball there the quickest, and should be used mainly for short yardage pickups, curls, and slant routes.
Touch: To perform a touch pass, double tap the receiver icon. Touch passes put extra finesse on the ball and are optimal for routes that see the receiver streaking for the sideline.
Lob: To perform a lob pass, tap the receiver icon. We found the the lob pass is only useful when a receiver is on a vertical route in man-to-man coverage, as it lets you float the ball out of reach of the defender. This pass has some serious hang time, though, so you need to be wary of other defenders swooping in to break up the play.
High: To perform a high pass, press L1 (LB), move the left stick upwards, and press the receiver icon. A high pass should be used for situations when you have a defensive mismatch. If your receiver is tall, throwing the ball high eliminates the ability of a defender to swat it away. The high pass moves as quickly as the bullet, but make sure you use it when throwing to a receiver with some hops.
Low: To perform a low pass, press L1 (LB), move the left stick downwards, and press the receiver icon. A low pass lets you squeeze the ball near the turf so that your receiver can go down and get it. Keep in mind that yards after the catch are unlikely considering the receiver almost always dives for the low ball.
Receiving
Receivers do much of the work for you when the ball is in the air, but there are still a few things to think about when the ball is in flight.
In recent years, Madden has introduced catch modifiers that let the player tell the receiver the primary goal of the play. You can either press Triangle (Y on Xbox One) to perform an aggressive catch, press Square (X) to focus on the run after the catch, or X (A) to signal a possession catch. Use an aggressive catch when coverage is close. The “run after the catch” modifier works best when your receiver has green grass in front of him. Lastly, a possession catch is made for when you want to fall in place and don’t want to risk dropping the ball. Sometimes an icon will appear on screen when the ball is mid-flight suggesting a specific catch.
Don’t freak out if you forget to press one of these buttons. Your receivers can still make plays without the modifiers, they just help the process a bit.
Running
Whether you have the ball in the hands of your running back or in the open field with a receiver, you should definitely get acquainted with ball carrier moves. Here’s what you need to know.
Sprint: You can sprint by pressing R2 (RT).
Juke: A juke move is done with the right stick. If you flip it right, the runner jukes right. If you flip left, he goes left. This move can fake out the defender, but should be performed only when you have about a yard or two between you, as he won’t fall for it otherwise. You can also perform a quick juke by combining the sprint and juke buttons.
Spin: A spin is exactly what it sounds like, a full 360 that trips up the defender. Press O (B) to spin. Just like the juke, it should be performed close to a defender, and can be combined with sprint. We have found a fair amount of success spinning along the sideline as a defender comes barreling in.
Hurdle: Hurdling lets you jump over an incoming defender. Press Triangle (Y) to hurdle. Since defenders often use the hit stick and come at you low, hurdling is a good way to get clear of them. It’s also beneficial when there are pileups around the line of scrimmage and in goal line situations. You can perform a precision hurdle by pressing L2 (LT) and the hurdle button. The precision hurdle has a better chance of working but with a slightly increased chance of fumbles.
Dive: Diving is helpful when trying to get a first down or when clamoring for the end zone. Press Square (B) to dive.
Stiff arm: Stiff arms block an incoming defender when timed correctly, and are particularly effective with strong running backs. Press X (A) to perform a stiff arm when you are right up against a defender.
Truck/Stumble Recover: The “truck” move has the runner to lower his shoulder and ram through the defense. Perform one by pressing the right analog stick. You can also use the same move to regain balance after almost falling. Like the hurdle, you can perform a precision Truck by throwing L2 (LT) into the mix (again, with a slightly increased chance of fumbling).
Tackle battles: Occasionally when engaging a defender, a tackle battle will ensue. To win a tackle battle and knock your opponent on his bottom, you have to be quick to press the button (always a face button) that appears over his head.
Field goals
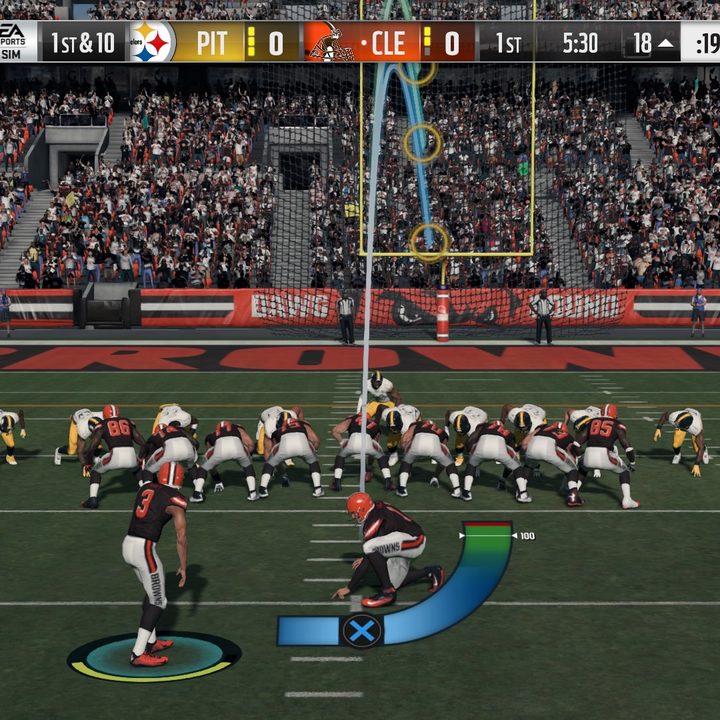
Some Madden players go for it on fourth down deep in enemy territory instead of kicking a field goal. We don’t subscribe to this strategy unless you are in that 4th and 2 or less situation as detailed above. Once you enter field goal range — your opponent’s 35 yard line — your best option on fourth down is to kick a field goal. At the 35 yard line, your field goal attempt will be 52 yards (Add 17 to whichever yardage marker you’re at to figure out the distance).
Madden 18 uses a three-button scheme and analog aiming for field goals. When you line up to kick, the path of the ball, as aimed, will show on screen leading towards the field goal posts. Sometimes it will be a straight line, and other times it will curve, showing the effects that the wind will have on the football. You must adjust the path with the stick so that it ends inside the posts. You can also move the analog stick up and down to alter the trajectory. Once you have the kick lined up, you must hold the analog stick in place, and move onto power and accuracy.
Press X (A) to start the kick meter. To get full power on the kick, you must press X (A) again as close to the white line near the top of the meter (it moves fairly slow). On the way down the meter, you must press X (A) a third time within the accuracy window, as close to the white arrows as possible. There is room to “supercharge” your kick by stopping the meter past the white line at the top, but the further you stray from the white line, the smaller the accuracy window will be at the bottom.
Timing a passable kick isn’t too difficult at close range, but your room for error decreases on longer kicks. Don’t go for anything too crazy until you get your timing down.
Clock management
Madden, just like real football, rewards those who manage the clock well. Madden NFL 18 defaults to six minute quarters. They go rather quickly, thanks to the standard 15 second runoff between run plays or completed passes. Depending on how you’re playing, you may want to try and speed up the game clock, or put it to as much of a standstill as possible.
Under normal conditions, the clock stops after incomplete passes when the ball carrier goes out of bounds, following special teams plays, or after a change of possession. Each team can also stop the clock manually with timeouts. Teams get three timeouts per half. Press the touchpad (or the change view button on Xbox One) to call a timeout.
Timeouts are precious commodities, but sometimes you may run out of them throughout the half. To preserve clock during a pivotal drive (two minutes or less left in a half and in need of points), throw passes that lead towards the sidelines to get out of bounds after the catch. Say you get stopped before making it out of bounds though. If you need points before the clock expires, you have a couple of additional options to speed up getting the next play off.
You can hold O (B) after a play to race to the line of scrimmage to spike the ball, which stops the clock and lets you pick a new play. Or, if you like what happened on the previous play and want a repeat, you can hold Triangle (Y) to initiate a hurry up offense.
On the flip side, if you’re beating your opponent in the second half, finding ways to run down the clock is a smart strategy. Using a run heavy offense can keep the clock moving. Remember, you have 40 seconds in between plays, and almost all of that time can tick off the clock if you want it to. When in the lead and on offense, the goal is to give your opponent as little time as possible to make a comeback.
Tom Brady graces the cover of Madden NFL 18, available on PlayStation 4 and Xbox One. Will he be saved from the Madden curse? Check out our history of the Madden curse to see the troubling odds he is up against.