
It seems like a requirement for superhero games to bring in a villain just to set up challenges for the hero to complete. In the first Spider-Man, this was Taskmaster, but in Spider-Man 2, we get Mysterio and his Mysterium challenges. Not only are they simply fun ways to test your spider skills against some unique trials, but you can also get your hands on some Hero Tokens for performing well. Plus, you also get a little more insight into this unique former villain. That’s all well and good, but by this point in the game, you should know that you won’t be given the exact locations for each challenge right away. If your spider-sense is failing you on where to find all the Mysteriums in Spider-Man 2, we’ll mark your map so you can swing straight to the action.
All Mysterium locations and requirements

Mysteriums, also known as mysterium dev diaries, unlock after you complete Chapter 12 of the main game. This is the chapter where you first meet Mysterio at the carnival while playing as Miles and go through his attraction. Once you beat this chapter, a few Mysteriums will appear on your map, but more will pop up as you continue to go through the story. You need to do them all as Miles, and each rank earns you Hero Tokens. Here is where you can find them all.
Under Construction – Harlem
This is a “defeat all enemies”-style challenge, but these always come with a twist. In this case, around halfway through the challenge, poison gas will fill the arena and constantly drain your health. You can heal to recover, but if you’re on a good pace and have upgraded your health, then you should concentrate on using your Focus for finishers to complete the challenge faster.
Here are the requirements for each rank:
Gold: <1:00
Silver: <1:30
Bronze: >1:30
Everyone’s a Critic – Central Park
Our second take focuses on beating a number of enemies quickly here. The twist this time around is that partway through, Mysterio himself will show up and give all the enemies a buff that makes them invulnerable to damage. Focus only on Mysterio floating around to remove the buff as fast as you can so you can finish off the remaining grunts.
Here are the requirements for each rank:
Gold: <1:45
Silver: <2:15
Bronze: >2:15
Prison Break – Upper East Side
This is just a big fat brawl against waves of enemies. Do what you do best to clear them out as fast as you can.
Here are the requirements for each rank:
Gold: <2:15
Silver: <2:45
Bronze: >2:45
The Invisible Enemy – Midtown
Hey, look at that, another challenge where you need to beat enemies fast! This one has two twists, however. The first is that you need to perform finishers to make the KO count, and the second is that enemies become invisible after a short time, but that doesn’t mean they’re invulnerable. Unless one is about to attack you, it will be hard to locate and smack them around. A great trick here is to use your Gadget that pulls all enemies together to make any enemies around you visible and vulnerable to attack.
Here are the requirements for each rank:
Gold: <2:10
Silver: <2:40
Bronze: >2:40
Fight on Time – Chinatown
Another take on the Finisher challenge, this time you’re fighting under a large clock. After set intervals, the clock will shoot a tracking beam at you that you need to avoid. It won’t instantly kill you, but it does a lot of damage and interrupts anything you were doing.
Here are the requirements for each rank:
Gold: <3:30
Silver: <5:00
Bronze: >5:00
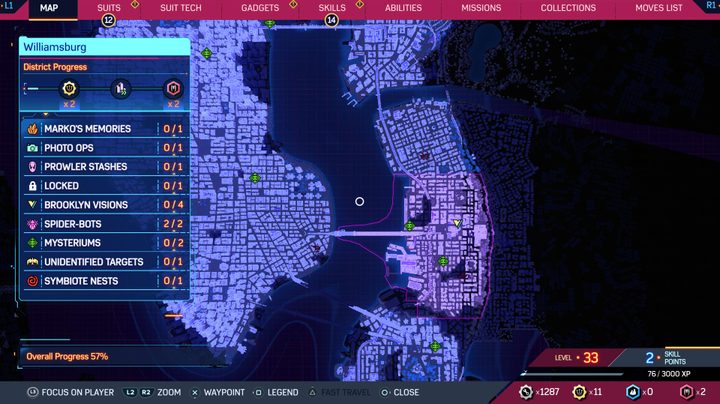
Road Rage – Williamsburg
The more northern challenge in Williamsburg is one of two that is not scored based on time. This challenge has you fighting on a bridge, with a few floating islands nearby, as enemies and traffic spawn in. Your goal is to take out all the enemies while taking as few hits as possible. Each hit will add a point to your score, so the lower your score, the better. Watch out for shooters, as well as when lanes of traffic on the bridge light up to indicate a car will be coming in that lane.
Here are the requirements for each rank:
Gold: 0
Silver: <3
Bronze: >3
Grave Decision – Williamsburg
This challenge is basically the easier version of Road Rage. The parameters are exactly the same – don’t get hit. This time, you’re fighting in a graveyard against the usual enemies. Play it safe, dodge well, and keep an eye out around halfway through as Mysterio himself will show up to add even more chaos to the equation.
Here are the requirements for each rank:
Gold: 0
Silver: <3
Bronze: >3
Fear of Heights – Downtown Brooklyn
This is a simple challenge in concept, but the timing is quite tight if you don’t really optimize your strategy. Positioned on a rooftop, you need to knock the specified number of enemies off the edge as fast as you can. So, forget normal combos, gadgets, and most of your abilities here. In fact, the most efficient way to do this is to spam your swing kick move where you hold square while airborne. This launches enemies up and away better than any other move you have. Focus on the enemies close to the ledge and let others come to you, or combo them with two or more swing kicks to get them to the edge.
Here are the requirements for each rank:
Gold: <1:30
Silver: <2:15
Bronze: >2:15
Punch Your Ticket – Downtown Queens
Your challenge here is to eliminate a number of Brute enemies specifically, though other enemies will appear as well. This is all while a train will occasionally spawn and drive through the arena wherever you happen to be at the time. You get a good amount of warning by seeing the green tracks before the train itself comes, which you need to use to your advantage to bait Brutes into the tracks for easy KOs.
Here are the requirements for each rank:
Gold: <2:00
Silver: <3:20
Bronze:3:20
Grand Finale – Downtown Brooklyn
Once all other challenges are complete, you get one last mission to wrap up this story and get to the bottom of this little mystery once and for all. This is more of a boss battle and not a challenge, so there are no medals or time requirements. Finishing this quest also unlocks the Smoke and Mirrors Suit for Miles.


