Cleaning an oven is a tedious chore. It takes time, it can involve scrubbing, and everyone gets a little uneasy when they have to stick their head inside of an oven. To keep your oven running its best, the task still has to be done from time to time. If you go for a long time without cleaning out the walls and shelves of your oven, it can start to smell funky when you heat it up, and it may eventually pose a fire hazard or start ruining your recipes.
Depending on what type of oven you have, there are a few different ways to go about cleaning your oven. If your oven is of the self-cleaning variety, the cleaning process will be easier for you. If it’s an older model oven without that feature, you’ll have to do a little more work. In either case, we created a quick tutorial on how to clean an oven safely, and without using any harsh chemicals.
Inside the Oven: Self-cleaning ovens
The inside of the oven is one of the most neglected parts of a kitchen. It’s one of those “out of sight, out of mind” kind of things. Gunk can build up on the walls. But, the more you cook, the harder it is to scrape that grime off.
If you don’t know whether or not your oven can clean itself, look on the knobs. See if there’s a setting for cleaning. If so, this process isn’t complicated; all it does is heat the oven to a really high heat, and burn off everything stuck inside. Your oven will emit a pretty terrible smell, so open windows and keep kids and pets away from the kitchen until the process completes and the oven completely cools.
Step 1 – For some ovens, you have to lock it yourself, but others lock automatically whenever you start the cleaning process. Check your oven safety lock to make sure you know how to use it as necessary.
Step 2 – Press the button or move the knob to activate cleaning.
Step 3 – It takes anywhere from two to six hours to complete the process. The door will unlock when it’s finished.
Step 4 – Let it cool for a couple of hours before opening it to avoid scalding grease.
Step 5 – When you open the door, there will be a pile of burned grease and leftover food. All you have to do is sweep or wipe this debris out of your oven. If the racks still have gunk on them, you can take them out and soak them in the sink for half an hour and then wipe them clean.
Alternative option: Steam cleaning
Ovens, especially those with convection settings may offer a “steam clean” mode — Samsung, Whirlpool, GE, and other oven models may come with this feature. This mode asks you to pour about a cup of water directly into the oven before turning on the cleaning mode. The steam helps separate and dislodge baked-on fragments, and makes it easier to wipe down the oven when the cycle finishes (plus, the smell isn’t as bad). If your oven has a steam-clean feature, this can be an excellent way to clean and maintain your appliance.
Inside the Oven: Non-Self-Cleaning Oven
Some older ovens don’t clean themselves, so you have to use elbow grease. There are a few ways to tackle the nooks and crannies of your oven. The first and easiest way is to get oven cleaner, spray it all over everything, let it dry, and wipe it out. If you’re worried about fumes from the cleaner or the environment, you can make your own cleaner using baking soda and water. We will discuss the DIY method in the steps below.
Step 1 – Remove your oven racks, and soak them in warm water and dish soap for a couple of hours. Those with very large oven racks may want to consider using the bathtub, but you may be able to soak the racks in the sink if you have enough space.
Step 2 – Add 4 tablespoons of baking soda to a spray bottle, and fill the rest with water. Shake it up to dissolve the baking soda.
Step 3 – Spray evenly on every surface.
Step 4 – Let the solution soak for an hour. If you go back and the grime is still really stuck on, spray the solution on again, and wait another hour.
Step 5 – Wipe out your oven with a warm water rag. You can also use a car windshield scraper to get off the really stubborn parts. A dedicated stovetop brush is particularly useful for tough scrubbing jobs.
Step 6 – If the walls are still grimy after you’ve removed the baking soda, dilute 2 tablespoons of white vinegar with warm water, and quickly wipe everything down. The vinegar will react with the baking soda and make it come right off with a washcloth, which leaves a nice shine.
After rinsing and drying the soaked oven racks, put them back inside of the oven.
Cleaning the door
You can clean the door of your oven using the same method: Oven cleaner or baking soda. If you have a window in the oven door, you can use glass cleaner on the window. Get rid of any food or grease that has dripped down from the stovetop onto the outside of the door with warm water and soap.
Cleaning the stovetop
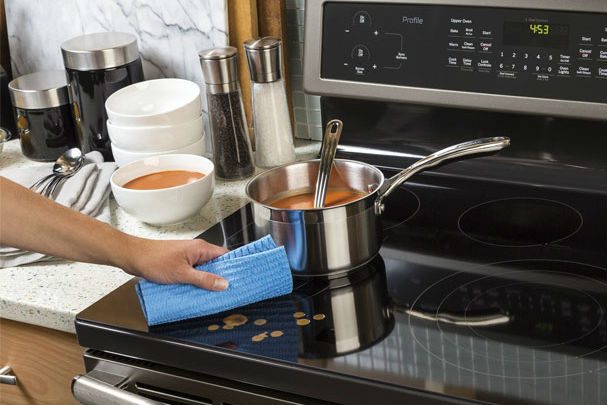
Cleaning the inside of an oven is an ordeal, so take a break before moving onto the stove — you’ve earned it. The outside is much easier.
Step 1 – Remove all of the grates, and let them soak in a mix of water and dish soap (just like you did with the oven racks).
Step 2 – Depending on how dirty your stovetop is and your preferences, use either an industrial-strength cleaner or make your own cleaner. If you’re making your own cleaner, use the same baking soda and water mixture from before, then follow up with vinegar.
Step 3 – Put whichever cleaner you choose onto the entire area of the stove and wash it off with warm water. Some baked-on crusts may need hard scrubbing to remove. When finished, give the stovetop a light spray with a general household cleaner, and wipe it down with a paper towel to help remove any oil streaks.
Step 4 – Replace the grates, and you are ready to start cooking.
For a glass-top stove, you’re going to need a glass-top oven cleaner to avoid streaks. Just place a small amount of cleaner on the top, and use a warm washcloth or green scrubbing pad to scrub the entire top, then use warm water to rinse it off. You can dry it with a towel or let it air dry.
Cleaning the control panel and knobs
Grease, food particles, dirt, and skin oils from your hands accumulate on your oven’s control panel over time. It should come as no surprise that the mixture can make the area one of the grimiest places in your kitchen.
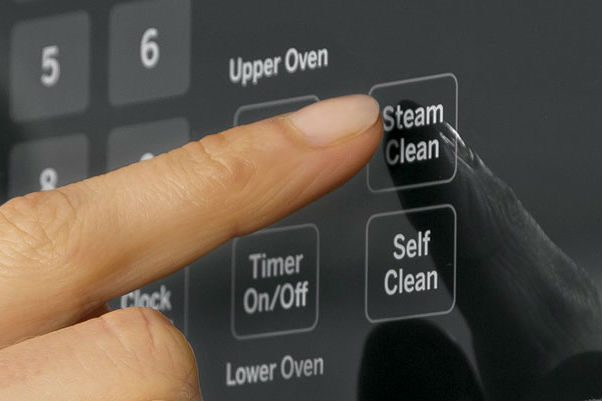
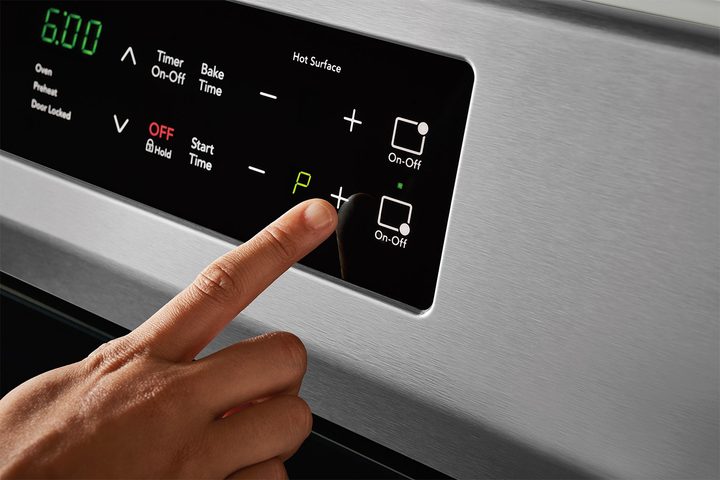
You’ll usually find touch panels on induction ovens, smart ovens, and wall ovens. If you’re lucky enough to have one of these newer ovens, your unit may have touch panel controls like those shown in the picture above. Fortunately, cleaning touch panels is a piece of cake.
Step 1 – Take a clean cloth and dip it into some warm water mixed with a dab of dish soap. Alternatively, use a safe household cleaner or a vinegar and water mix.
Step 2 – If there are really stubborn stains, break out a gentle scrub brush or a sponge. Work up a bit of a lather to help remove more stubborn spots.
Step 3 – Wipe down with a wet cloth, and dry with a cloth or paper towel.
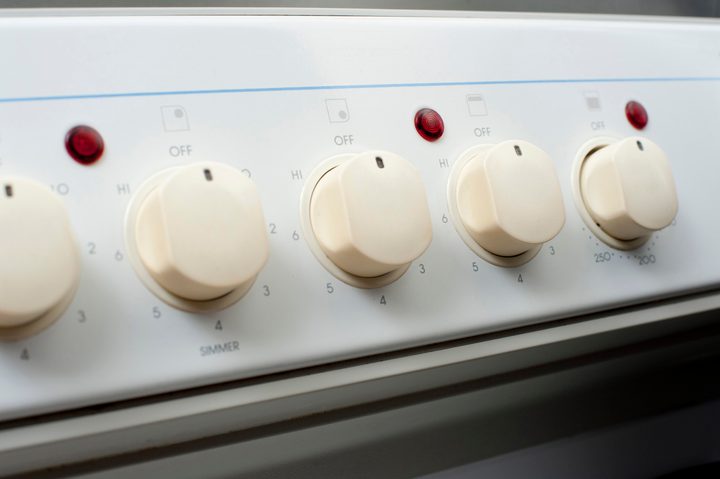
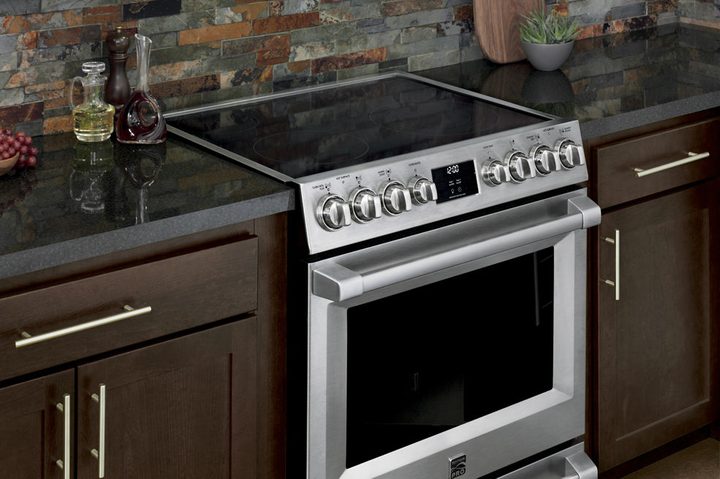
Now, that process is all you need for touch panels and flat buttons, but more common knobs like those pictured above will need a different method if you want to make sure the grime is gone for good.
Step 1 – Remove the knobs from your oven. This should not be a difficult process, as most ovens are designed with detachable knobs for cleaning. They should come off after you gently pull them towards you. However, if you’re having trouble detaching them, we suggest consulting your oven’s instruction manual. Once you have all the knobs detached, put them in a bowl filled with half water and half white vinegar. You also have the option to wash the knobs in the dishwasher; however, this isn’t always needed.
Step 2 – More than likely, you’ll see a decent amount of grime on the knobs, especially if they haven’t been cleaned for an extended amount of time. Before you start to scrub, be sure to spray or wipe it with the vinegar solution you just created in the previous step. After you’ve done this, take a durable sponge or brush and scrub the knobs until the grime disappears. Finally, do a thorough wipe down of all the knobs to eliminate any remaining grime or particles.
Step 3 – Clean the knobs with water and let them sit out on a dish rack or towel to dry. If your knobs are made of metal, you’ll need to hand dry them with a towel to prevent water spots from forming.
Step 4 – Reattach the knobs onto your oven and try them out to make sure they are firmly in place and work properly.