If you, like many of us, have been happily using LastPass’s excellent free tier for the last few years, you’re probably dismayed that LastPass is moving to change the way its free access works. From March 16, you’ll only be able to sync your LastPass database between mobile devices or computers — but not both. So if you want to keep accessing the same passwords on your phone and laptop, you’ll have to pay up and join LastPass’s premium subscription for $3 a month.
Of course, not everyone is wild to pay a subscription fee — or has the free cash to do so. If that’s you, you’re probably looking for a password manager to replace LastPass. But you won’t want to leave all your collected passwords and logins behind. Thankfully, you can quickly and easily export your LastPass passwords and login information and import them into your new password manager of choice. So go check out our list of the best password managers, then dive into our guide on how to leave LastPass and take your passwords with you.
Export your LastPass database
Now that you know you’re moving from LastPass, the first step is to make sure you take everything with you. Thankfully, exporting your database from LastPass is simple. Unfortunately, there’s no way to export your passwords from the mobile app, so you’ll have to use a PC or Mac to complete this action.
Step 1: Head to your LastPass Vault and select Advanced Options > Export.
Step 2: Reenter your password, press Submit, and you’ll either be prompted to download your database or be treated to a full-screen plain text display of your entire database.
Step 3: If you have a full-screen plain text document, copy and paste your data into a program like Notepad and save it as a “.csv” file. Name it something memorable like “passwords.csv” or “export.csv”.
Please note: Some special characters can be altered by the exporting process, especially ampersands (&), so take a moment to look through your data to make sure nothing like this has happened to you.
Explore the alternatives
You have your passwords, so it’s time to start exploring the alternatives available to you. As mentioned earlier, you can find a list of the best password managers we recommend, and we’ll walk you through importing your passwords into two of the more popular alternatives.
Changing to Bitwarden
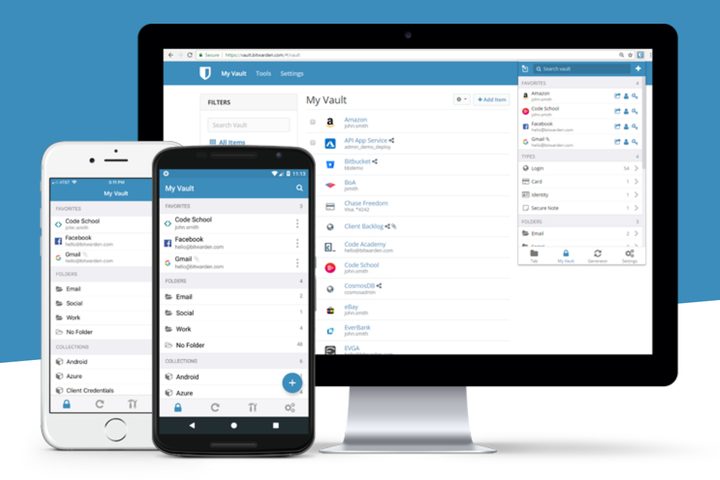
Bitwarden is probably the next big password manager to try if you’re bouncing from LastPass due to the free tier changes. Unlike many competitors, it has a solid free option, and if you do decide to upgrade, it’s only $10 per year. Not per month — per year. That’s pretty great value, and it helps to sugar any subscription-based pill. Importing your passwords into Bitwarden is very simple and can be done in a few moments.
Step 1: Log in to your Bitwarden vault and click Tools > Import Data > LastPass (csv), and select your .csv file.
Step 2: Click Import Data, and you’re done.
Changing to Dashlane
Dashlane offers a good service if you’re looking for a simple password manager that doesn’t cost a penny if you’re a small-time, individual user. However, the free tier gives you space for only 50 passwords and a single device, which makes it much less desirable if you’re jumping ship from LastPass because of the new limits on the free tier. Still, you can swap if you really want to, and it’s easy to import your passwords.
Step 1: Open the Dashlane app on your PC or Mac and select File > Import Passwords > LastPass.
Step 2: Click Next and select the .csv file with your passwords. Click Import.
Step 3: Select the passwords you want to import, and click Import again.
Delete your LastPass account and data
The final step is to delete your LastPass account and the data associated with it. Passwords are precious resources, and you don’t want to leave them strewn around the internet for anyone to find. Therefore, it’s good practice to clear out your LastPass account once you’re done with it.
Step 1: Head to the LastPass Delete Account website. This is your one stop for clearing and deleting your account.
Step 2: The option you want is Delete. Click it, then click Yes to indicate you know your master password.
Step 3: Enter your master password, then click Delete to confirm your deletion.
That’s it — just remember to delete your unsecured text files containing all your passwords, and you’re done.