Have you ever tried to photograph a high-contrast scene, only to be frustrated when you find that the pictures you snapped just don’t do it justice? Don’t worry, it’s not you, or even your camera. Even with the perfect exposure, there are certain scenes that will always tend to get blown-out highlights, flat shadows, or both. Despite the fact that it’s nearly impossible to find a happy medium in these types of situations, there is a solution. This age-old dilemma can be solved through the magic of HDR processing. What is HDR photography? Here’s a quick rundown of what it is and how to get started with it.
What is HDR photography?
HDR stands for “high dynamic range.” For those who aren’t so acquainted with this high-tech shutterbug lingo, dynamic range is basically just the difference between the lightest light and darkest dark you can capture in a photo. Once your subject exceeds the camera’s dynamic range, the highlights tend to wash out to white, or the darks simply become big black blobs. It’s notoriously difficult to snap a photo that captures both ends of this spectrum, but with modern shooting techniques and advanced post-processing software, photographers have devised ways to make it happen. This is basically what HDR is: a specific style of photo with an unusually high dynamic range that couldn’t otherwise be achieved in a single photograph.
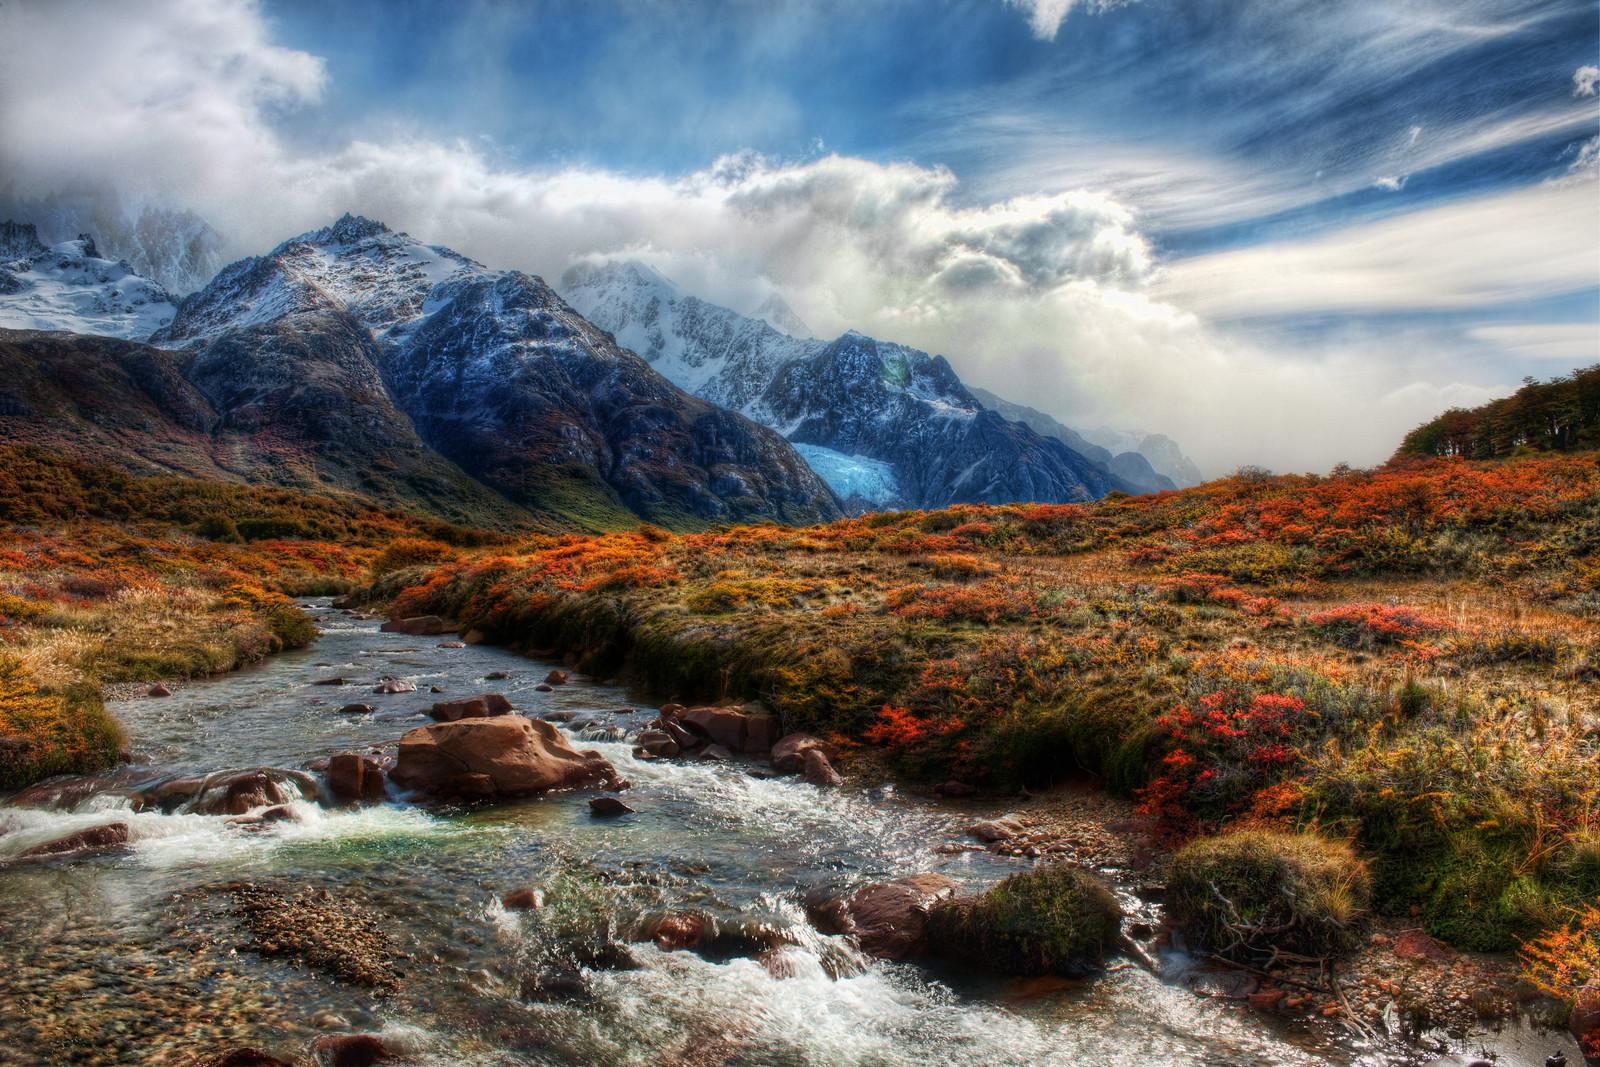
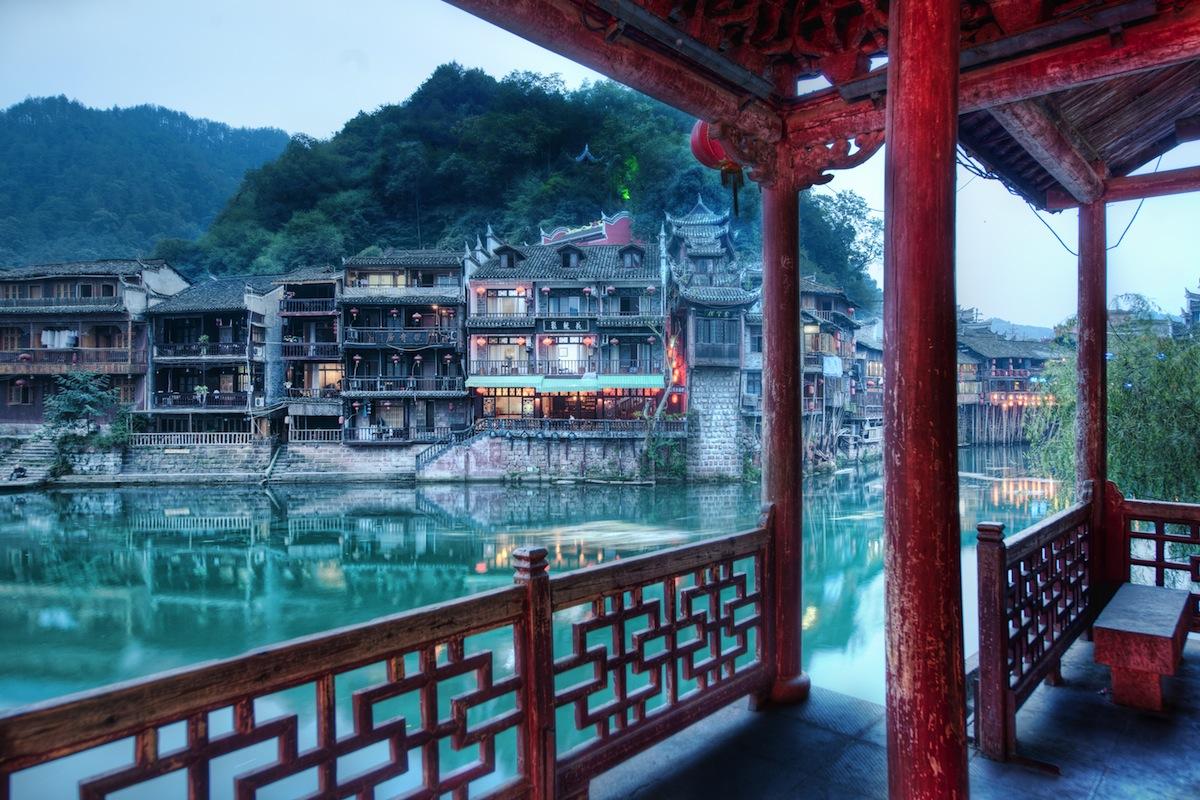
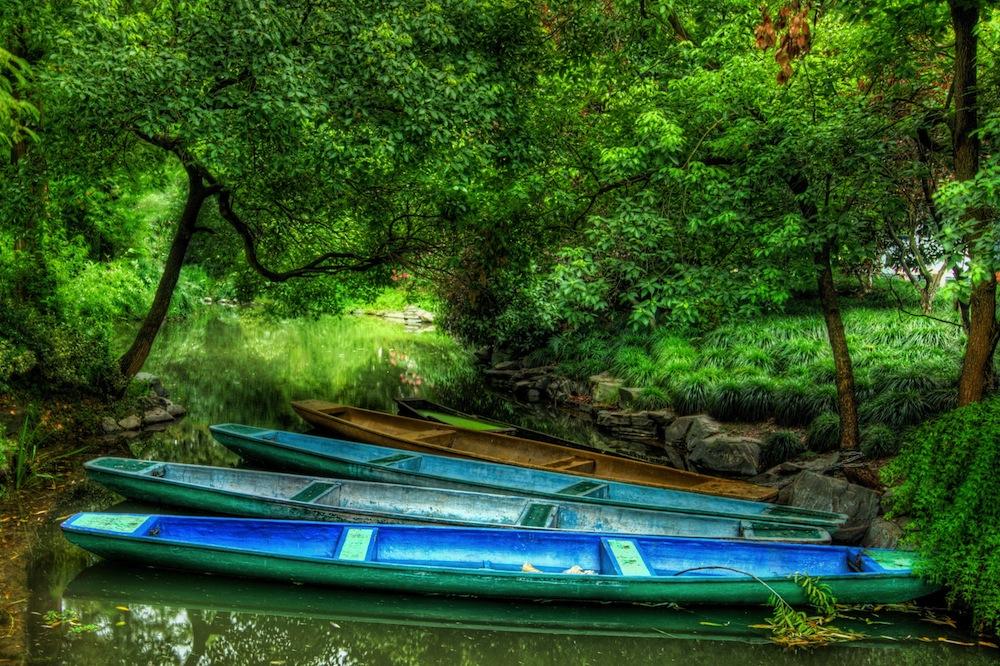
You’ve probably seen these types of images scattered across the web. Depending on how they’re processed, HDR photos can be anything from stunningly accurate reproductions of what your eyes see, to mind-blowing, surreal works of art that transform reality into a high-def dreamscape. Here are a few examples from HDR guru Trey Ratcliff.
How it works
At the most basic level, an HDR photo is really just two (or three, or nine) photos taken at different exposure levels and then mashed together with software to create a better picture. It’s a bit more complicated than that, but not much more — that’s basically the gist of it. Ideally, the photographer takes a range of bracketed photos — that is, photos of the same subject taken with varying shutter speed combinations in order to produce a set of images with varying luminosity. (HDR photography works best with the camera on a tripod and staying completely still, and with landscapes void of moving objects.) Then, with the help of advanced post-processing software, the photographer is able to blend the photos together and create a single image comprised of the most focused, well-lit, and colorful parts of the scene. Check out the images below to see how it looks:
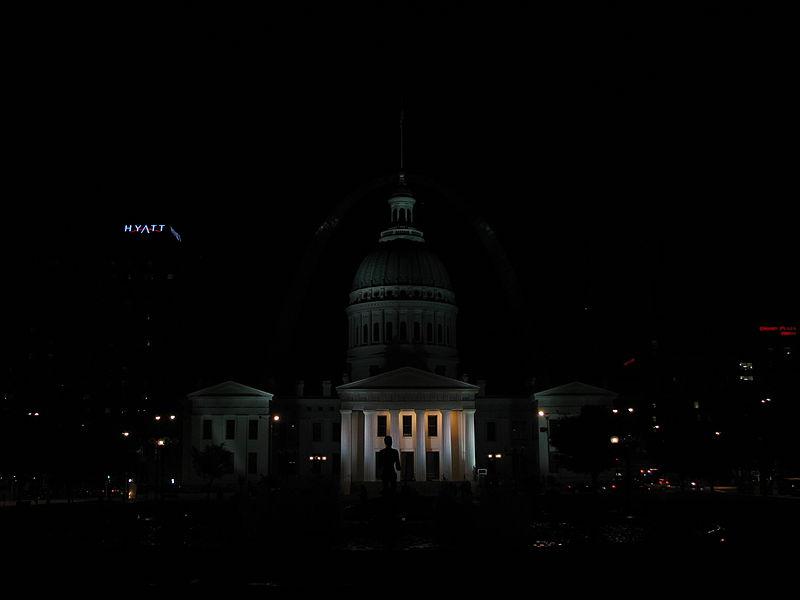
- 1. -4 stops
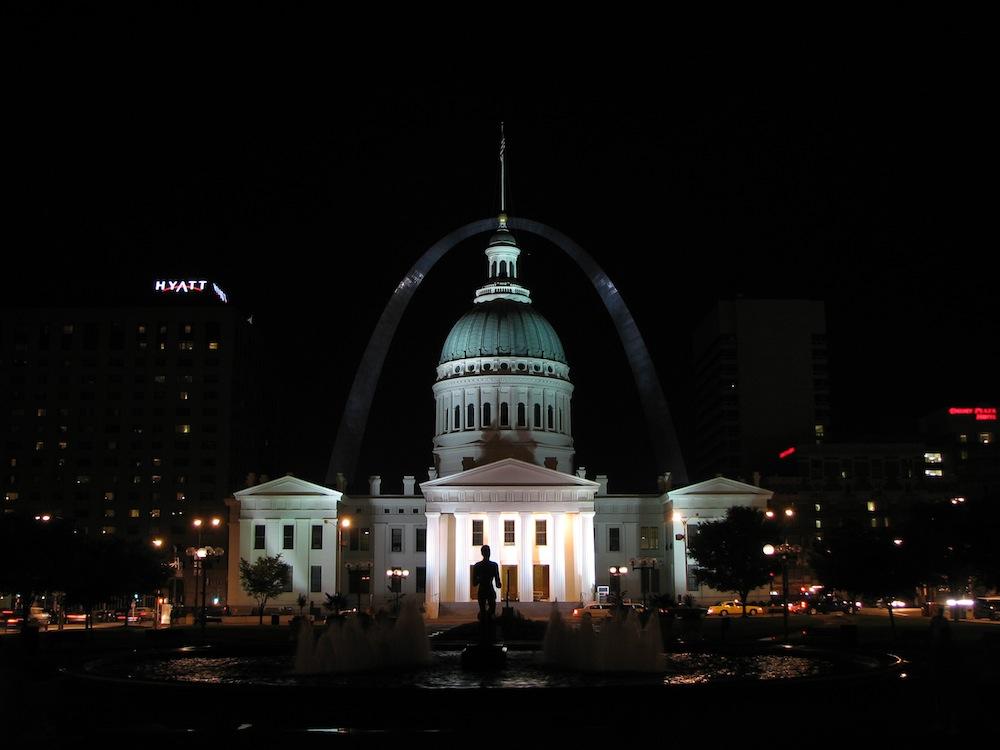
- 2. -2 stops
- 3. +2 stops
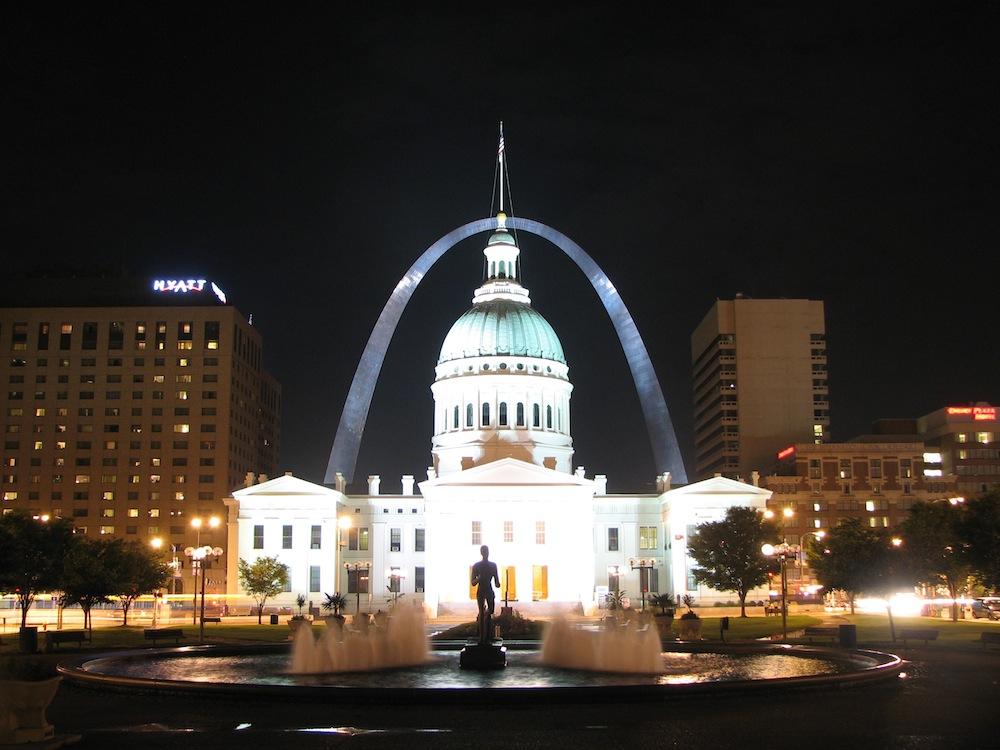
- 4. +4 stops

How to create an HDR image
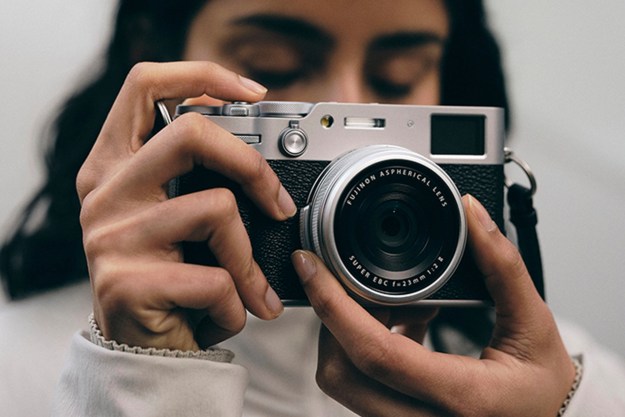
Before you set out on your mission to create a mind-bogglingly beautiful HDR image, you’ll need a few things. For best results, here’s what we recommend:
- A camera, preferably with an Auto Exposure Bracketing (AEB) function. AEB isn’t 100-percent necessary, but without it you’ll have to adjust your camera settings manually between each shot, which increases the chances you’ll move the camera, and the amount of time it takes to shoot the series — increasing the likelihood that your subject will move or change positions. If your pictures don’t line up, the final HDR image will probably come out looking weird. (Not sure if your camera has an Auto Exposure Bracketing feature? Check out this chart from HDR Photography Resources to find out.)
- A tripod. You can shoot by hand if you must, but you’ll likely have trouble aligning your images later on, so a tripod is definitely recommended for best results. It’s true that certain HDR software programs are equipped with image alignment features, but they don’t always work perfectly, so generally speaking the best plan is to take measures necessary to ensure a stable shot. If you’re in the market, check out our seven favorite tripods for DSLRs and smartphones.
- HDR photo-blending software. There are a number of different programs out there that’ll get the job done, but the general consensus amongst the HDR photography community is that Photomatix is one of the better options. It is powerful, fast, and full-featured, but those features do come at a price: $99 for the Pro package and $39 for the Essentials pack. Another very popular software is Aurora HDR ($89). Obviously, these programs aren’t ideal if you’re just looking to dip your toes into the HDR pool and do a bit of experimenting, so for those of you looking for a good free option, we recommend Luminance HDR. Luminance is one of the most capable and flexible HDR programs we know of, despite the fact that it doesn’t cost a dime. It offers six different photo-blending algorithms for you to mess with, so no matter if you’re going for a more realistic or surrealistic look, you should be able to achieve it with Luminance. These programs are a good place to start, but keep in mind that once you’ve stitched the images together and have something to work with, there’s nothing stopping you from using other programs to achieve further effects.

Once you have all the necessary equipment gathered up, it’s time to go out and snap that jaw-dropping, eye-popping National Geographic-worthy photo. Here are a few tips for getting a good shot:
- Due to the nature of HDR and exposure bracketing, you probably won’t be able to capture a moving subject very easily. HDR just isn’t meant for things that move. Stillness is the name of the game here, so do your best to shoot a scene that isn’t going to change very drastically in a 5-10-second period.
- Try to keep an eye out for scenes and subjects that have a large, noticeable contrast between light and dark areas. This is usually easier said than done since our eyes see in HDR already, but if you can spot these types of scenes it totally pays off in the end. These are the kinds of shots that benefit most from HDR post-processing techniques, since you otherwise wouldn’t be able to capture all the full dynamic range in one shot.
- If your memory card is big enough, shoot in RAW format. JPEGs use heavy compression to cut down on file size and will typically result in a noticeable loss of detail in your photos. Shooting in RAW is better for quality, but takes a bit longer for your camera to process and write to your memory card. For best results, snag yourself a class 6 or class 10 SD card — these have faster minimum write speeds and will help reduce the time your camera takes to store RAW images after you shoot them. Of course, get the largest capacity card your budget allows.
- Above all, remember that these tips are nothing more than loose guidelines. It’s all good advice, but don’t let our tips impede your artistic impulses. Experiment and play around lot, and you’ll start to get a feel for it on your own.
Auto HDR mode
As cameras have become more advanced, most manufacturers now install an auto HDR mode into their systems. The technique of creating an HDR image is still the same, the only difference is everything is done in your camera.
The way auto HDR mode works is pretty simple. Your camera will shoot a bracketed sequence of exposures and then automatically combine them into an HDR image. And because your camera takes a quick burst of shots, it removes the importance of needing a tripod as it reduces the differences in alignments between shots — although we would suggest using a tripod if you have one handy to ensure better accuracy.
Depending on which system you shoot with, some cameras delete the original exposure after an HDR image is created, which is saved as a compressed JPEG rather than a RAW file. For full creative control, more advanced users will therefore still want to shoot a bracket of RAW images and manually merge them after the fact in HDR software. But for those new to the technique, auto HDR mode is a great way to get started.
Shooting HDR photos on your phone
DSLR and mirrorless cameras aren’t the only devices capable of capturing HDR images. Nowadays, even the most basic smartphones capture impressive HDR images. In fact, Android and iOS both offer HDR shooting modes in their stock camera applications, while third-party mobile apps, like Adobe Lightroom, are implementing HDR editing as well.
The process for capturing HDR photos on your smartphone is almost identical to capturing them on a dedicated camera — a series of images are captured at varying exposures to ensure the greatest possible dynamic range in a scene. The big difference is that capturing HDR photos on a smartphone is far less complicated, thanks to software.
Rather than capturing three separate images at different exposures, overlaying them, and merging them together for the best tonal range, your smartphone will do all of this for you — and likely with a single click. The only thing you should have to do, besides pressing the shutter, is make sure the HDR mode on your phone is enabled.
HDR on iOS
Apple devices will have three distinct HDR options that can be used with any of the still image modes: On, Auto, and Off. When turned “On,” your iOS device will automatically capture three separate images and merge them together into a single image that will be saved in your camera roll. Setting your iOS device to “Auto” will ensure your phone uses HDR mode when it notices a high-contrast scene. “Off,” of course, will deactivate HDR capture mode. In iOS 11 and later, however, you only have Auto and Off. Note: iOS can save an HDR and a normal exposure version; enable Keep Normal Photo in the camera settings.
HDR on Android
Android also offers an HDR mode, but it’s not always as straightforward. Due to manufacturers adding their own skins and default camera apps, the experience isn’t the same across the board. That said, the experience isn’t much different. Inside the camera app, you will find an HDR shooting mode, although sometimes it’s called something else, such as “Rich Tone.”
When shooting in this camera mode, your Android device will capture multiple exposures in a quick sequence and automatically stitch them together to create a final HDR photo.
HDR video
Still photography isn’t the only form of visual media HDR imagery has impacted. Now, thanks to increasingly capable video cameras and compatible TV sets, HDR video capture is possible as well. But HDR photography and HDR videography use different processes.
While the end result is almost identical to still HDR photography, HDR video is captured by different means. Rather than capturing multiple images and merging them together, either in-camera or via post-production, HDR video is (more often than not) captured as a single exposure.
How is this possible? Two parts: hardware and software. Newer camera sensors are capable of capturing more dynamic range than ever before. Combine the impressive sensor technology with the increasingly-capable color profiles used to capture the video and what you end up with is an out-of-camera image with so much color and exposure information that almost any range of tones is acheivable in post-production.


- 1. Still frame from ungraded footage captured using Red’s proprietary format.
- 2. An edited still taken from video captured using Red’s proprietary format.
As you can see in the above comparison, the image on the left is straight out of camera, captured on a professional cinema camera from Red using the company’s proprietary image profile. It appears flat, almost to the point of it looking gray. But when you import the video into a post-production program and color grade it, a dazzling amount of color and contrast comes through.
Of course, most of us can’t afford a camera on the level of a Red (which can cost tens of thousands of dollars), but there are many cameras at friendlier price points that now offer Hybrid Log Gamma (HLG) profiles. HLG is a way to save color information for both standard dynamic range and high dynamic range TVs in the same video file. Cameras like the Panasonic Lumix GH5S and Blackmagic Pocket Cinema Camera 4K offer this capability.