Most players feel that Madden is at its most exciting when they have the ball. Controlling the pace of the game and hurling touchdowns is extremely fun, but playing defense also presents unique and amazing moments. Is there anything quite as satisfying as picking off an opponent’s pass and running it back for a touchdown? We think not. While it may not be as glamorous as offense, they say “defense wins championships.” In Madden NFL 18, thanks to more realistic mechanics, playing defense has become more intuitive. If you’re struggling to pick plays, to defend the pass or the run, or just want to limit the damage on the scoreboard, our Madden NFL 18 defense guide will help you stop your opponent in their tracks.
Choosing plays
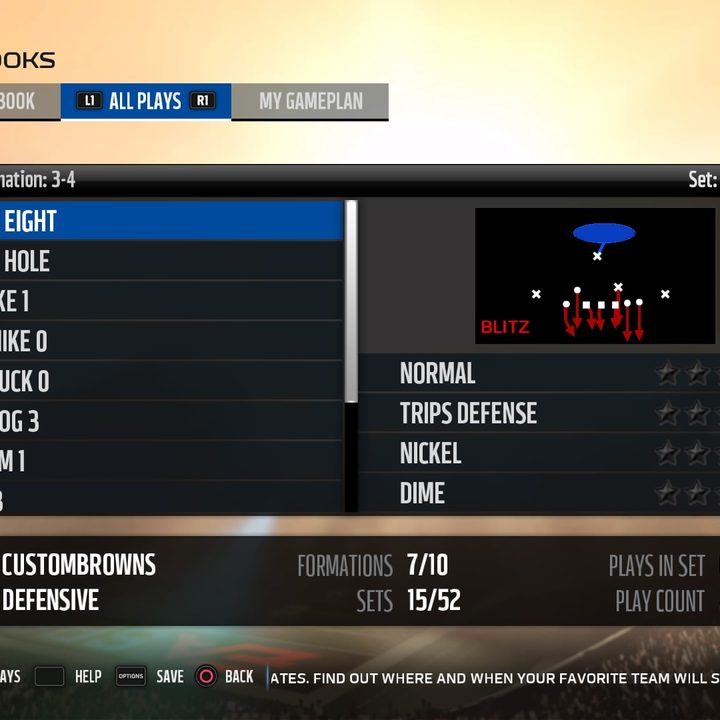
Just like on the offensive side of the ball, Madden’s defensive playbooks are ripped from their NFL counterparts. That means there are 32 different sets of plays for 32 different teams. Defensive playbooks can hold up to 500 plays in Madden, but unlike offense, the typical playbook doesn’t get close to that limit. Each team has between 275 to 300 plays on average. These plays are spread across different formations designed for different kinds of scenarios. Madden NFL 18 has 10 formations, but most teams only use between five and seven in their individual playbooks. You can check out the playbooks for all teams in Madden 18 (or create your own) by heading over to “customize” in the main menu.
The question is: How do you decide which defensive plays to pick? In football, it’s the offense’s job to keep the defense guessing, and if you are playing a quality opponent, it can be quite difficult to guess your opponent’s next move. Luckily, there is a basic formula that many Madden players will use on offense, though, which will help you decide which plays to pick on defense.
On first down, an offense is free to pass or run the ball. We’ve found success using a zone blitz play on first down protects against the run while putting pressure on the quarterback.
If you stop the offense on first down, creating a second and long situation (5+ yards), we like to transition to pure zone coverage. While it’s possible some Madden players will run on second and long, in our experience, people usually can’t resist passing due to the threat of facing a third and long. Even if first down doesn’t go so well, and it’s second and short (less than 3 yards), we employ the same logic, as that’s a situation where the offense often takes a look downfield.
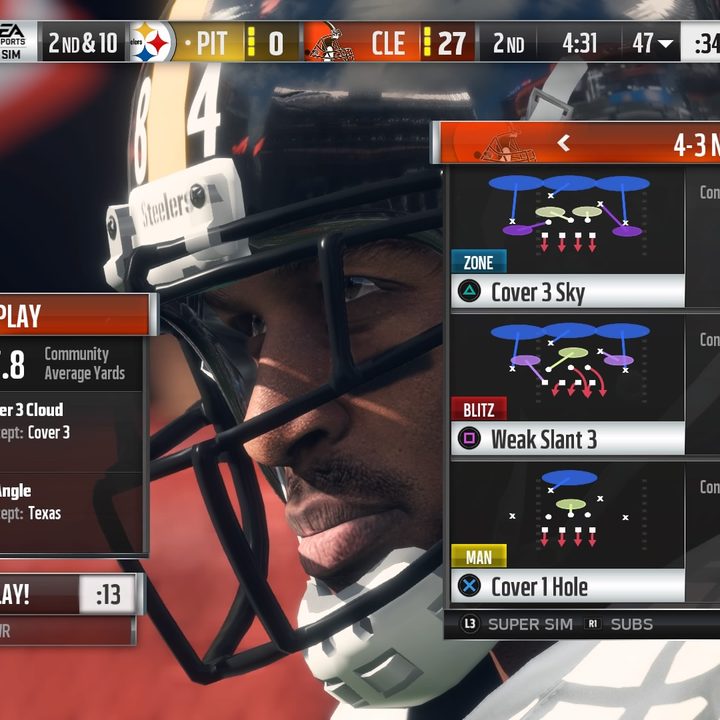
On third and long, we like to either continue using pass-focused zone defense plays, or go for an all-out blitz. Putting a lot of defensive backs on the field to protect against the inevitable pass play is the safe play, but putting intense pressure on the QB in a tense situation like third and long is rarely a bad move. Again, on third and short we go for an all-out blitz play, sending five or man defenders towards the line (red arrows on the play indicate how many defenders will rush the line).
Some Madden players go for it frequently on fourth down. It can be hard to tell whether or not someone is going to take the risk based on the game alone. If it’s 4th and 2 or less, and your opponent is around the 50 yard line, there’s a chance they may choose to go for it. If you know the person you’re playing likes to take big risks, you can cover against this by picking a defensive package that crowds the line (more on that in the formations section). If your opponent is showing punt at the line, you can either just let the punt land without fielding it, or you can run back with your safety to field the punt before the snap. This will set you up to defend your opponent should they choose to go for it. The same goes for your opponent going for it instead of kicking a field goal, only this time, there’s no reason to run back a defender to field the play.
Unlike when calling plays on offense, we think you should avoid changing your play calling up too much on defense. We rely almost solely on zone coverage, blitzing, and plays that combine the two. You will find man coverage plays in your playbook, but we’ve found zone coverage to be the more dominant approach.
Formations
Depending on which team you pick, you’ll see a combination of the following formations. Along with quick breakdowns, we’ve included situations when they are most effective.
4-3: One of the most common formations you’ll see, the 4-3 uses four linemen, three linebackers, two safeties, and two cornerbacks. The 4-3 is a great formation early downs because it covers against the run and pass, giving you enough linebackers to drop back into coverage, or converge on the line of scrimmage.
4-4: The 4-4 uses four linemen, four linebackers, two cornerbacks, and a single safety. The 4-4 is great for stopping running plays and blitzing the QB.
3-4: The 3-4 uses three linemen, four linebackers, two safeties, and two cornerbacks. Like the 4-3, it makes the most sense on first and second down plays. While having fewer lineman makes it harder to stop the run at the line of scrimmage, this setup helps ensure that the running back doesn’t break away for a big play.
5-2: The 5-2 uses five linemen, two linebackers, two safeties, and two cornerbacks. With the heavy presence on the line, this formation is useful during third and short when you plan to stop the run. You won’t see this formation in many playbooks, though.
46: A blitzing package, a 46 defense puts four linemen up front, with three linebackers and a safety in the box for blitz purposes. A cornerback lines up on each side of the field, and a free safety hangs back for pass plays. If you have this package in your playbook, and want to put pressure on the QB, this offers some great ways to do it.
Dime: The Dime package should be used in clear passing situations such as 3rd and long. Four cornerbacks and two safeties are on the field with either four linemen and a single linebacker or two linebackers and three linemen. You won’t create much pressure with this formation, but it greatly reduces the chance at a significant gain through the air.
Dollar: This seldom-used formation features eight defensive backs, typically four corners, two safeties and two linebackers. It’s used to cover large swaths of the field, particularly on plays when you know your opponent needs to take a big shot downfield.
Nickel: The Nickel formation uses five defensive backs, and either four linemen and two linebackers or three linemen and three linebackers. This package is versatile, since the additional defensive back can either drop back into coverage or go in towards the line on running plays. The Nickel package, like the Dime, is ideal for third and long situations, but with the added benefit of an extra linebacker who can hedge against the run (or trick your opponent) by rushing instead of dropping back into coverage.
Quarter: Often referred to as “Prevent” defense, the Quarter formation uses three linemen, one linebacker, and seven defensive backs. It’s meant to cover surefire passing plays, so it’s a poor choice in short yardage situations where running plays are likely.
Goal Line: As suggested by its name, the Goal Line defense is meant for situations when your opponent is a couple of yards from the end zone. Typically four defensive backs stand shortly behind seven defensive linemen. You can also use Goal Line defense on fourth and one situations if your opponent decides to go for it at any mark on the field.
Reading the Offense
It’s much harder to read an offense, than a defense, but it’s pretty apparent when the defense you picked doesn’t match up well against the upcoming play. If your opponent has three or four wide receivers lined up on either side, and you’re in a run protection defense with a lot of defenders in near the line, that’s a problem. Conversely, if the offense only shows one or two receivers, and you’re in preventive formation with more than two cornerbacks, you’re probably overcompensating.
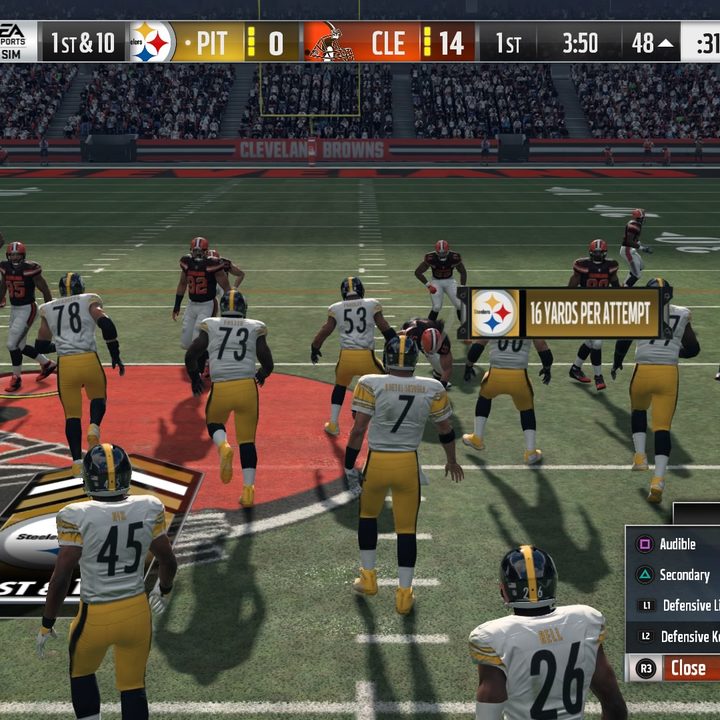
When lining up, you can press R3 to pull up the pre-play menu. From here you can modify your setup and direct defensive players to change their roles.
In the menu, you have a bevy of options. You can press Square (X) to audible and change the play completely for situations like the two examples above.
Usually, though, minor adjustments are sufficient. Pressing Triangle (Y) lets you shift the secondary (your cornerbacks and safeties). Pressing L1 (LB) gives you control of the defensive line, letting you shift them left or right. R1 (RB) lets you do the same for the linebackers. If you press X (A) you can modify single defender’s assignments. And L2 (LT) lets you shift the entire defense with the left analog stick, and if you’re feeling confident, you can even guess the play with the right analog stick. Guessing correctly between the pass and the run will set your defenders up better to handle the situation.
The problem with defensive adjustments on the line is that you are at the mercy of the offense. Once the QB is under Center, you have no control over when the play begins. Sometimes you won’t have time to make adjustments, but once you get used to doing it, you’ll likely be able to make at least one adjustment at the line if need be. Also, remember that the offense can also audible after you make your own adjustments, so there’s a chance you’ll have to try and revert your changes before the snap.
Blitzing the QB
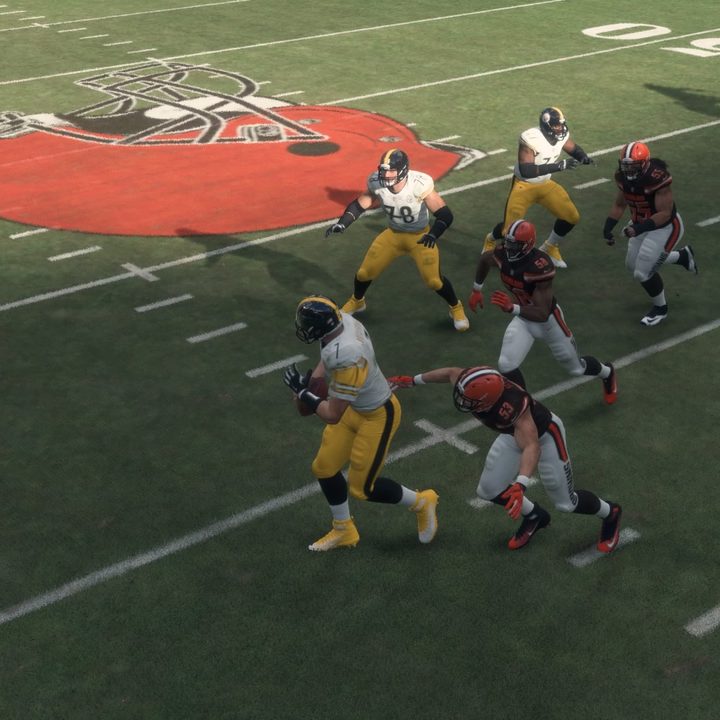
When a QB drops back to pass or when he hands the ball off to a running back, your main priority should be to take him down the ball carrier. Remember, even on obvious pass plays, you will have at least a few defensive linemen. We prefer to control a lineman at the start of the play, letting the computer AI stick with the receivers and tight ends at first.
You can cycle through your controlled player before the snap with O (B). Whether you want to use a inside or outside lineman is a matter of preference, but we recommend looking at your play and picking a lineman who’s supposed to push downfield. Choosing a defensive end who’s supposed to hang back and cover the flat, for example, may leave one of your opponent’s receivers wide open for a screen pass.
As an outside or inside linemen, right when the ball is snapped press R2 (RT) to get a good jump on the play. Even with a good jump, you’ll be met with resistance. To shake off a blocker, press X (A). You can also try to power through the defender by pressing Sqaure (X). We’ve found that it’s easier to shake off a defender when rushing from the outside, and simpler to power through when rushing from the inside.
Once inside the pocket, continue to sprint with R2 (RT) en route to tackle your target. You can perform a few different tackles. A conservative tackle, made with X (A), is harder to shake off, but when blitzing you’re better off using the aggressive tackle by pressing the dive button (Square on PS4 and X on Xbox One). Your last form of tackling is the hit stick, which is controlled via the right analog stick. When going in for a sack, we usually stick with the aggressive tackle, but if the QB hands it off, the hit stick is better for taking down the running back. The running back is faster and has more dodges, and we’ve found that the stick makes it easier to react quickly.
If you put pressure on the QB, but cannot get there in time before he passes the ball, press Triangle (Y) to put your hands up and potentially bat down the pass.
Keep in mind that if the ball carrier gets past the line or if the QB exits the pocket, you can switch over to control a linebacker with better mobility. The computer is, by and large, more consistent in Madden 18 than in previous versions, and will make tackles, but you always want to try and make a play on the ball yourself.
Defending the pass
You aren’t always going to break through the line on a pass play. Often, a QB will get the ball off. With the ball in the air, press O (B) to automatically switch to a defender in the area of the pass target. There are three viable approaches to playing defense once a pass is in the air.
Play the receiver: If it’s a short pass and won’t lead to a first down, your best bet is to play the receiver. Press X (A) to tell your defender to go in for the tackle right when the ball reaches its target. This leads to minimal yards after the catch.
Ball Hawk: If the pass has a lot of velocity and you have time to get in front of it, playing for the interception is a good move. Look for where the ball will land, and press Triangle (Y) to go for the pick.
Swat: If you don’t think you will be in good position to pick off the pass, you might still be able to get a hand on it. Press Square (X) to swat the ball down.
If you try and catch or swat the ball, do press the button until you are in position. If you mess up, it could lead to a big play for the offense.
In order to mitigate the risk imposed by going for a pick, get used to strafing. Holding L2 (LT) as a defender lets you strafe as you follow a receiver and the ball through the air. If you find yourself in man-to-man coverage on a deep pass, you can press L1 (LB) to call for assistance. Defenders in the area will flock towards your position, making it easier to make a play on the ball or the receiver after he catches the pass.
If a receiver catches a pass in the open field, we recommend using the hit stick to take them down. You can also try and force a fumble by stripping the ball during the tackle. To attempt a strip press R1 (RB). Since stripping the ball in NFL games is rare, don’t expect this to work often, but if you’re chasing down a ball carrier, it doesn’t hurt to try to strip the ball anyways. You’ll often end up tackling the runner just from the attempt.
Sometimes a receiver simply runs his route well and will beat you in getting to the ball. When it happens, you want to take him down as soon as possible. Calling assistance is helpful, but don’t expect the AI to take him down as fast as you. If you aren’t already set as the defender closest to the ball carrier, you can automatically cycle to him by pressing O (B). Make sure to use sprint and, ideally, come at the receiver at an angle rather than directly behind him. A player’s Pursuit (PUR) attribute dictates how well he can catch up to a ball carrier. Luckily, most defensive backs are speedy by default.
If you notice that your defender has been beat on a route, remember, you can always help out with a different defensive back. By cycling to a different defender, you may not be able to interrupt the pass, but other defenders may have a better angle on the ball carrier once the initial coverage is blown.
For all of the tips, remember that each defender has a different skill set, and excels at various aspects on the field.
Make sure to check out our offensive guide and blocking guide for more tips to up your game in Madden NFL 18. Do you think Tom Brady will escape the Madden Curse this year? Read our history of the Madden Curse to learn more about the heavy odds he faces.