How to connect an Oculus Quest 2 to a PC

You can connect an Oculus Quest 2 to a PC in two ways: using an Oculus Link cable (or another high-quality USB-C cable) or wirelessly, using Air Link. This will unlock a range of PC-only VR experiences and let you use the power of your PC to deliver greater on-screen visuals.

Here's how to connect your Oculus Quest 2 to a PC in just a few steps.
Difficulty

Easy

Duration

15 minutes

What You Need

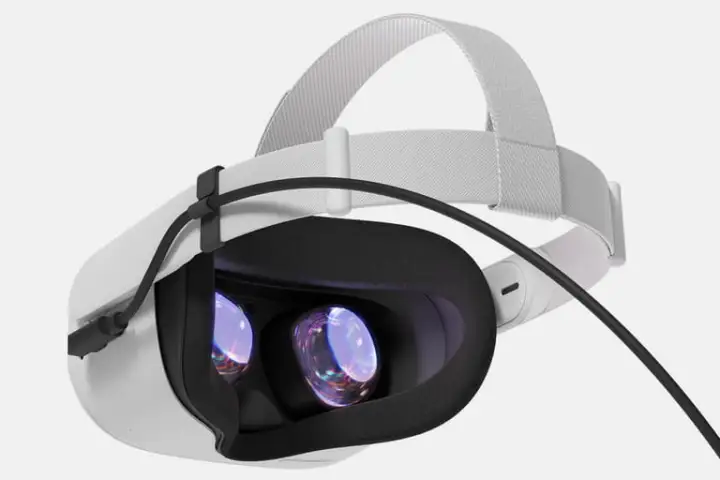
Oculus Quest 2 headset connected with an Oculus Link cable.
Oculus VR / Meta

Connect an Oculus Quest 2 to a PC: Using Oculus Link

If you'd prefer to use a wired connection, follow the steps below to connect your Oculus Quest 2 to a PC via Oculus Link. This method should work for both Oculus Quest and Quest 2 headsets. You can use the official Oculus Link cable, or a high-quality USB-C 3.0 cable. Do check individual reviews of third-party cables, though, as not all of them are rated for VR performance.

Step 1: Review the compatibility requirements to make sure that your PC and headset meet all of the hardware and software requirements.

Step 2: Go to the Oculus app on your computer and power on your headset.

Step 3: You'll need to plug in one end of the USB or Oculus Link cable into your PC's USB 3.0 port. The other end should then be plugged into your headset.

Step 4: In virtual reality, you'll see an "Allow Access to Data" prompt. Be sure to select* Deny*.

Step 5: When you see the Enable Oculus Link prompt, choose Enable.

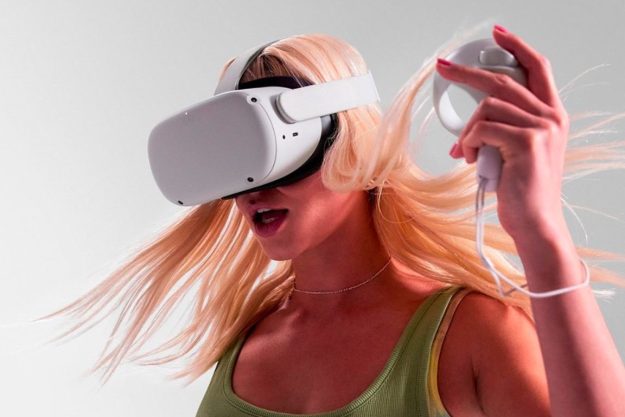
A person wearing and using an Oculus Quest 2 VR headset in front of a gray background.
Meta / Meta

Connect an Oculus Quest 2 to a PC: Using Air Link

If you'd prefer to use a wireless connection and you have a Quest 2 headset, follow the steps below to connect your headset via Air Link. This method only works for Quest 2 headsets. You'll need to make sure that your Quest 2 and that the Oculus app on your PC are both updated to version 28 (v28) or later.

Step 1: Make sure your PC is connected to the same network as your Quest 2. Then, on your PC, navigate to the Oculus app and turn on your Quest 2 headset.

Step 2: Put on your headset and then press the Oculus button on the right Touch controller to bring up the universal menu.

Step 3: Open the Quick Settings panel and select the Settings cog.

Step 4: Select Quest Link from the left-hand menu.

Step 5: Select Launch Quest Link. If necessary, toggle it to On, first.

Step 6: Toggle Use Air Link to On.

Step 7: Select your PC from the list of "Available PCs" and select Pair.

Step 8: A pairing code will be shown in your headset. Take off your headset and confirm that the code is the same on your computer screen. Then select Confirm on the desktop app.

Step 9: Next time you want to launch your Quest 2 using Airlink, you can simply launch it from the Quick Settings menu in the future.

Now that you've had a taste of PC-powered virtual reality, does it make you tempted to upgrade to a dedicated PC VR headset? Here are the best VR headsets you can buy today.

Editors' Recommendations

Anita George
Anita has been a technology reporter since 2013 and currently writes for the Computing section at Digital Trends. She began…
Vision Pro 2: everything we expect from the future of Apple’s headsets
The Apple Vision Pro reveals the wearer's eyes on a front-facing display.

Apple’s Vision Pro headset has been the talk of the tech world since it was unveiled, but Apple is already planning to follow it up with two new models that could take the headset to new heights -- and put it into the hands of more people. That includes a second-generation Apple Vision Pro, as well as a pared-back headset with a lower price.

What exactly should we expect from these devices? What kind of features will they offer, and when will they launch? If you’re seeking the answers to all those questions and more, you’re in the right place, as our rumor roundup will guide you through everything you need to know. Let’s get started.
Vision Pro 2: price and release date

Read more
We have some bad news for Quest owners
The original Oculus Quest 1 appears on a white background.

If you've been holding onto your original Oculus Quest or Quest 1 VR headset, it's time to upgrade because support is ending soon. The Quest 1 came out in 2019, so this headset is nearly five years old and quickly approaching the end of support. In August 2024, the original Quest will stop receiving security updates and bug fixes.

Meta recently emailed developers with an alert that new VR games and apps will be blocked from supporting the Quest 1 next month. Updates to existing apps will also cease. The Quest 1 will still have access to a large library of games, but to enjoy the latest releases, it's time to upgrade. This news follows a slow pullback that started last year when social features were removed.

Read more
This deal gets you a Meta Quest 2 for $200, its cheapest price yet
A woman dives into action with the Meta Quest 2.

There's still a lot of demand for Meta Quest 2 deals, even with the arrival of more virtual reality headsets, including its successor. If you've had an eye on the Meta Quest 2 for a while now, your patience has paid off because it's now down to its lowest-ever price of $200 following a $50 discount by Best Buy on its original price of $250. You need to act fast though -- VR headsets almost always sell out quickly whenever they go on sale, and we don't expect anything different with this bargain.

Why you should buy the Meta Quest 2 VR headset
Even after the launch of the Meta Quest 3, the Meta Quest 2 remains in our list of the best VR headsets as the best budget option because you'll be getting amazing value from this device. It's a wireless headset with a built-in battery and intuitive controllers -- no need to connect to a PC or set up base stations -- so it's all you need if you want to jump into VR and play the best Meta Quest 2 games. You also have the option to wirelessly connect to a PC if you want to access SteamVR titles. The Meta Quest 2 also offers 3D positional audio, hand tracking, and haptic feedback for total immersion.

Read more