
FBI agent Saga Anderson and her partner, Alex Casey, are called into Bright Falls to investigate a murder committed by a strange group calling themselves the Cult of the Trees. These dangerous cultists are your main enemy in Alan Wake 2, and they put up quite a fight despite mostly using basic tools as weapons. They seem mindless and primitive, but the fact that they have a series of Cultist Stashes hidden all around the world suggests otherwise. These treasure troves are very well hidden, and they’re protected with a small puzzle to try and prevent those who may stumble upon one from grabbing all the goodies inside. You’ll find yourself short on supplies essentially all the time in Alan Wake 2, so scooping up some extra ammo and batteries is always welcome. Here is where you can find all the Cultist Stashes in Alan Wake 2 and how to open them.
All Cultist Stash locations
There are a total of 21 Cultist Stashes to find and unlock in Alan Wake 2. Each zone has its own set to find, and they all have different puzzles you need to solve to open them. None are missable, but some can’t be obtained until you make story progress or get specific tools.
Bright Falls Cult Stashes
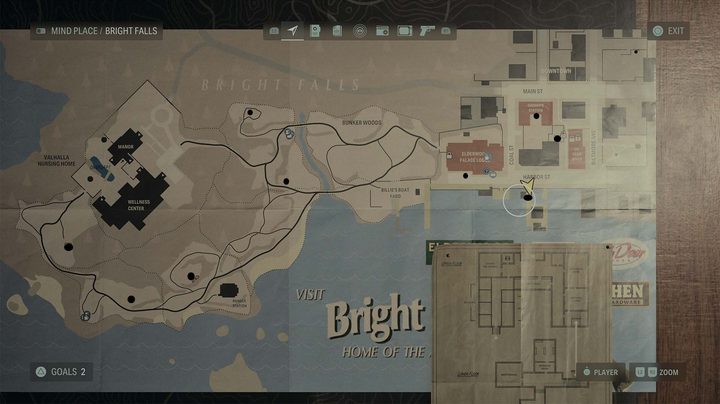
The first Cult Stash you can find comes as soon as you reach the town of Bright Falls for the first time. Instead of going straight to your destination down the block, turn around and head toward the dead end. Behind the truck will be a big locked box. To open this one, all you need to do is play a little game of Simon Says. The keypad will flash three buttons in a sequence that you simply need to repeat to open the box and grab the loot.
Way up out of town to the northwest of Bunker Woods (across the bridge and past the save room) is a little area where the road loops. Another stash is on the north end in the middle of the circle. Follow the sequence to open it.
Back by the safe room, go south down the road until it curves, and look for a wrecked truck on the north side. The stash is in the back. The combination is 177.
The next stash needs the Bunker Woods Stash key. To get it, go behind the Valhalla Nursing Home and follow the main road south, and then look for a bunch of wooden signs with arrows on them. They will lead you to the key. Head slightly northwest and find the rock with a big yellow arrow on it indicating the stash is behind it.
Keep heading down this same main road, but stop before the road splits and head to the north side off the road. You will see arrows pointing to numbers in the environment to give you tohe code, and the box itself will be next to one of the marked trees. Play the little memory game to open it.
Take a stop at the Ranger Station and scoop up the Ranger Station Stash key on the outside near the brick chimney. Take this to the stash itself, which is up on the hill to the east of the station and across the main road.
Back in Bright Falls proper, open the locked fence behind the police station using the bolt cutters. You need to get the code by finding the symbols on the radar dish, by the benches, and in the gazebo to open it.
Go inside the Sheriff Station and downstairs to the Evidence Room. The stash is in the back corner and can be opened with the code 146.
Cauldron Lake Cult Stashes
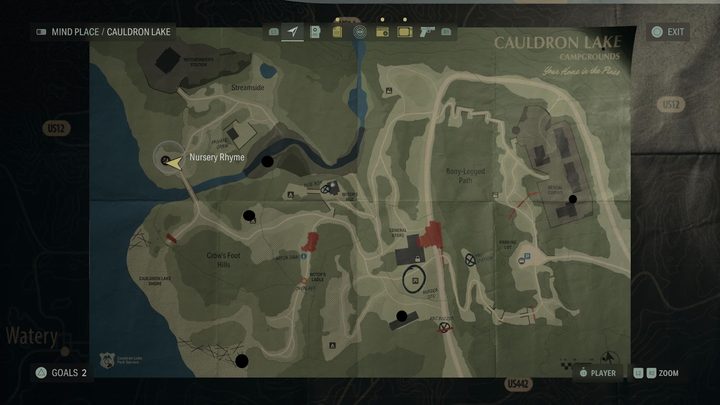
From the murder site, go south to find a trailer with a little picnic area outside. Next to the picnic table and some wooden pallets is the first stash next to one of the cultist symbols. The note will give you a clue as to which symbols you need to put into the lock, which are: Two triangles overlapping at their points facing diagonally left, two triangles pointing up and down, and two triangles pointing away from each other horizontally.
When you are put on Cauldron Lake Shore during the story, go to the absolute far south end to spot this stash near some washed-up logs. This one asks you to do the same Simon Says game as the one in Bright Falls.
After the flood is drained and you can explore the river area of Cauldron Lake, you will find this box up on a small ridge shown above. The paper on the box reads “Rock, Rock, Tree” and gives a clue about being “bright.” Hidden on a nearby pair of rocks and a tree are two numbers — one number and a second that either adds or subtracts from it. You need to do some simple math and then input the numbers in the right order, which is 6,5,8.
From the Witch Sign, go west and keep your light on to see some yellow arrows pointing you toward the Streamside Stash Key on a rock. Pick it up and then go to the campsite to the north on your map and use the key to open it.
At the north end of the Rental Cabins area, you will see some numbered trees. Look behind the one labeled with a 2 to find the Lake Cabins Stash key and take it inside Cabin 1 to unlock the stash itself.
Coffee World Cult Stahes
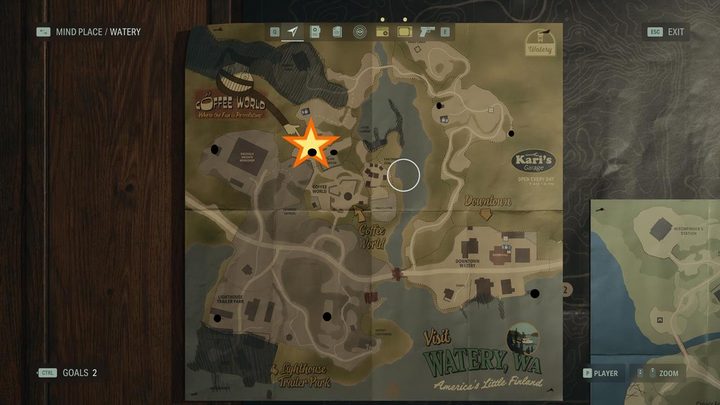
Go north from the Downtown section of Coffee World to the little loop just above the Kari’s Garage logo on your map. This is the next memory game-type stash, so repeat the pattern to unlock it.
Just a bit to the northeast from the last stash, find the shack with a save spot in it. Just outside on the north end is the stash. The combination to the lock is 527.
Right next to the metal barricade outside the Slow Roaster ride in the park proper, you’ll see a crate right out in the open. The code for this one is 147.
You first need to make a stop by the Mr. Drippy statue in the middle of the park. Behind it is the Coffee World Stash Key that you need to grab and bring to the Houtari Well. The stash you can unlock with it is right up against the back cliff.
We need the Trailer Park Stash Key for the next box, but can only get to it after the flooding has receded. Once you get there, the key and the stash are almost on top of each other. The box is in a small shack along a wooden fence, but if you go around behind i,t you can grab the key from the nearby light pole. It is high up, so you need to walk up a wooden board to reach it.
Head over to the lighthouse on the southern part of the map and go to the north side of it. Tucked down by a cliff is the stash that has another glowing paint puzzle where you need to use the numbers to solve the code.
On the little dock sticking out to the east just south of the Downtown Watery section, you’ll fins a stash right behind some blue crates. The combination is 496.
Once you can unlock the gate behind the Kalevala Knights Workshop, the stash is sitting just behind the building. The combination is 542.


