Installing a CPU cooler might feel a little scary since you're interacting directly with chips and paste and metal and some pretty delicate components. But it doesn't have to be. Once you've done it a few times, changing a CPU cooler is one of the most straightforward PC upgrades you can complete.
Here's how to do it.

How to remove an old CPU cooler
Before you can install your new CPU cooler, you need to remove the old one. How you do this will depend on the type of CPU cooler you have in place currently, but it will generally follow these steps.
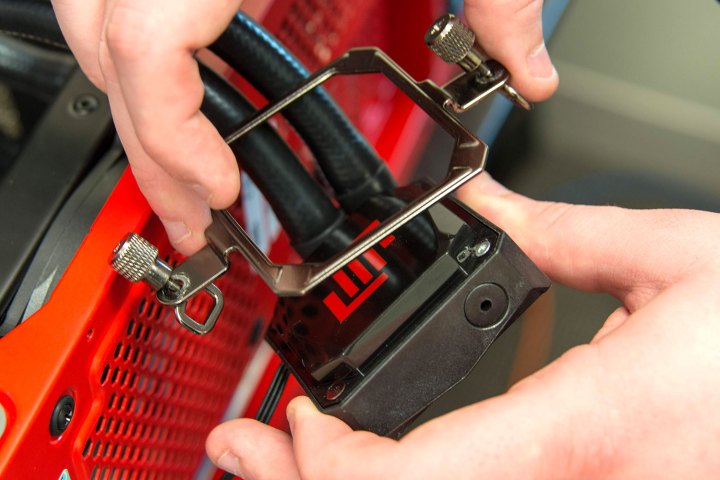
Step 1: Detach the cooler from its retaining brackets. This might mean undoing some screws, or unlatching a locking pin. You might need to remove the fan(s) to even get to the screws or pins that are holding the cooler in place.
If in doubt, follow the instruction manual from the manufacturer's website. If they don't provide removal instructions, perform the installation instructions in reverse.
Step 2: Next you need to remove the old heat paste from the CPU, and unless you are binning it, the old cooler too. You can do this with the CPU in the socket if you prefer, but it is often easier to release the retaining arm on the motherboard and lift the CPU free so that you can hold it while you clean it.
Take your lint-free cleaning cloth (you can use a paper towel in a pinch, but it might scratch your CPU), and soak it lightly in isopropyl alcohol. Then rub that cloth in a circular motion on the old heat paste until it loosens and thins, then wipe it away.
If you need to, soak another portion of the cloth and continue cleaning the CPU and old cooler until the heat paste is gone and the surface is shiny.

Step 3: If you removed the CPU from the socket to clean it, replace it in the socket (making sure it is in the correct orientation — it should fit snugly in the socket). Then firmly lock it in place using the retaining arm.

How to install the new CPU cooler
Installing the new CPU cooler is probably going to be a little more complicated than removing your old one, but it shouldn't be difficult. You can follow the in-depth instructions in your cooler's manual, or on the manufacturer's website for specific instructions for your cooler, but here are some generic steps to help you along the way.
Step 1: First find the mounting hardware that you need for your socket. Most coolers, be they AIO, or air coolers, are designed to work with a range of different sockets from the past few CPU generations. That typically means different brackets and even backplates for some sockets.
Locate all the pieces you need to mount your cooler to your socket.
If you're installing an AIO cooler with a radiator and water block, but sure that you have enough space in your PC to fit the radiator, too. Sometimes memory, hard drive cages, and other components can get in the way and need to be removed first.
Step 2: Install the brackets and plates that you need to mount your cooler. That may mean removing the existing back plate, which will mean at least removing the side panel, and at worst, removing the motherboard entirely to access the back of it (if your case does not have a cutout in the motherboard tray for swapping out CPU backplates).
Step 3: Once you have everything in place, it can be a good idea to do a dry mount of your cooler. Don't screw it in or lock it down, but just place it gently on top of your CPU so that you can see if will have proper clearance from your memory and other components. Be careful not to move it around too much of you can scratch your cooler and/or CPU.
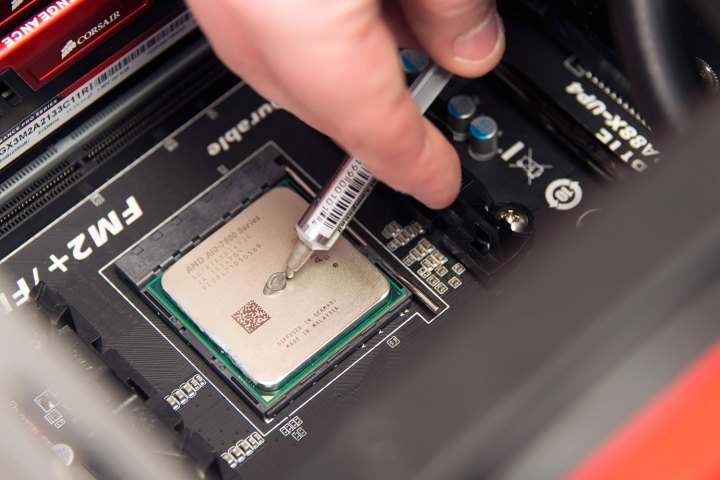
Step 4: Once you're happy that the cooler can be mounted, it's time to put some thermal paste on. You can use heat pads if you don't want to replace the paste in the future, but they can be a little tricky to get right. Traditional heat paste is tried and tested and you can always repaste if it something goes wrong.
Take your heat paste and squeeze out a pea-sized blob in the middle. There are a lot of opinions about how best to do this, but a blob in the middle is almost always fine, and it's easy to replicate.
Step 5: Take the cooler and place it gently on top of the CPU, then press it into place so that it compresses and spreads the heat paste. While holding it in place, use its retaining brackets, arms, or screws, to lock it in place.
If using screws, be sure to tighten them all slightly, then continue to tighten them by a few turns at a time so that you don't over tighten one part and put too much pressure on the CPU. The golden rule is to tighten a screw by a couple of turns, then do the diagonally opposite screw, then move around clockwise and tighten that screw, and finally do diagonally opposite screw again. Repeat until they're all snug and tight and the cooler doesn't move when you give it a light push.
Step 6: If you're installing an air cooler, attach any fans that are necessary to the heatsink, and plug them into their respective ports on your motherboard. Make sure that they face the right way so that any push-pull configuration works correctly. Remember that fans push towards the side that has the central plastic arms.
If you're installing an AIO water cooler, you now need to carefully mount the radiator in an appropriate spot. Use the included screws so that you don't accidentally punch through into the radiator fins. Then attach any included fans and plug them in, paying careful attention that they exhaust in the right direction.

Step 7: Double check all the connections and mounting points, and then restore any components you removed for access purposes.
Step 8: When ready, plug your PC back in and power it on. Sometimes when changing the CPU around, or swapping the CPU cooler, it can take it a bit longer to post, so don't fret if it takes a minute. You might need to reset your BIOS, too, but that's not guaranteed.
Make sure the fans are spinning correctly, and if you're using an AIO, that the pump is working. You can confirm this by touching the exterior of it and feeling for the vibrations of the pump motor, as well as listening out for any bubbles in the loop moving around it.
Once you've installed your new CPU cooler, it can be a good idea to check your CPU temperatures. Firstly, so that you know you mounted it properly and your CPU is not overheating, but secondly to see if your temperatures are better after installing the new cooler.
It might even let you do a little more overclocking if you have some new thermal headroom.


