Unfortunately, Google does not offer downloads of ChromeOS — at least, not in a form that’s easy to use with a virtual machine. The popular ChromeOS builds once offered by Hexxah seem to have disappeared, too. Even Neverware’s CloudReady version has limitations.
That said, your choices for running ChromeOS in a virtual machine are extremely narrow. Here’s how to run Neverware’s older ChromeOS build in VirtualBox. If you want something newer, the company offers a build for VMware ESXi 6.5, Workstation 14.1.1, and Fusion 10.1.
What you need
The latest version of the CloudReady ChromeOS image, v83, does not work with VirtualBox due to “graphics incompatibilities.” You’ll need to find and download the older version listed below, as Neverware doesn’t offer this file. As for VirtualBox, the latest version works just fine.
Before installing VirtualBox
VirtualBox doesn’t work when specific features are installed in Windows 10. If an error appears when trying to load the ChromeOS image, do the following:
Step 1: Type “turn” in the search field on the taskbar, and select Turn Windows Features On or Off in the results.
Step 2: A pop-up window appears on the screen. The following features should be disabled (though double-check what you’re losing access to before doing so):
- Application Guard — Isolates enterprise-defined untrusted sites.
- Credential Guard — Virtualization-based security that only grants privileged system software access to secrets.
- Device Guard — Enables Hyper-V components.
- <any> * Guard
- Containers — System-level virtualization for running multiple isolated applications.
- Hyper-V — Runs 64-bit virtual machines on the host OS.
- Virtual Machine Platform — Component for running a virtual machine.
- Windows Hypervisor Platform — Adds an extended user-mode API for third-party virtualization stacks and applications.
- Windows Sandbox — A virtual, disposable environment.
- Windows Subsystem for Linux (WSL) — A compatibility layer for running Linux binary executables.
Note: The features listed above relate to virtualization and are not included in Windows 10 Home. Re-enable these features if you don’t plan to use VirtualBox outside this ChromeOS test drive.
Step 3: Restart Windows 10.
If the ChromeOS image still fails to load, try the following:
Step 1: Right-click on the Start button, and select Windows PowerShell (Admin) on the Power User Menu.
Step 2: Type: bcdedit /set hypervisorlaunchtype off
Step 3: Shut down the PC, and then restart — do not simply click “Restart.”
Run ChromeOS in VirtualBox

Step 1: With VirtualBox open, Click File in the top-left corner, followed by Import Appliance on the drop-down menu.
Step 2: Next to the File field, click the Folder icon located on the far right, locate the CloudReady_Free_x64_Virtualbox.ova file on your PC, and then click the Open button.

Step 3: The OVA file appears in the file field. Click Next to continue.
Step 4: Leave all the default appliance settings alone, and click the Import button to continue. A pop-up appears as VirtualBox creates the ChromeOS virtual machine.

Step 5: On the main VirtualBox Manager panel, select the CloudReady_Free_x86 virtual machine, and then click the green Start button.

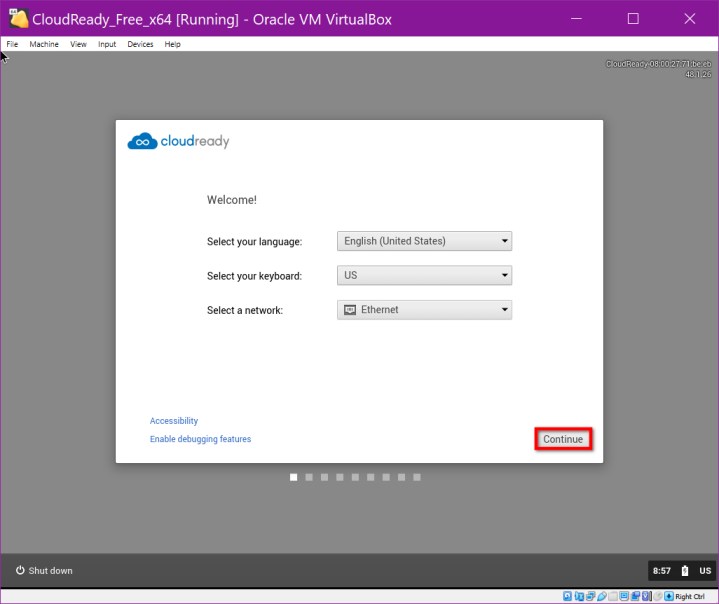
Step 6: The CloudReady logo appears for a moment until the install panel loads. Select a language, the keyboard layout, and the network connection, and then click Continue when ready.
Step 7: The Adobe Flash EULA terms appear. Click the Not Now button.
Step 8: Enter your Google Account email or phone, and click the Next button.
Step 9: Enter your Google Account password, and click the Next button.
Note: You can also select Browse as Guest, although you’ll see more of ChromeOS using a Google account.
Step 10: Verify two-step authentication if needed.
Welcome to ChromeOS
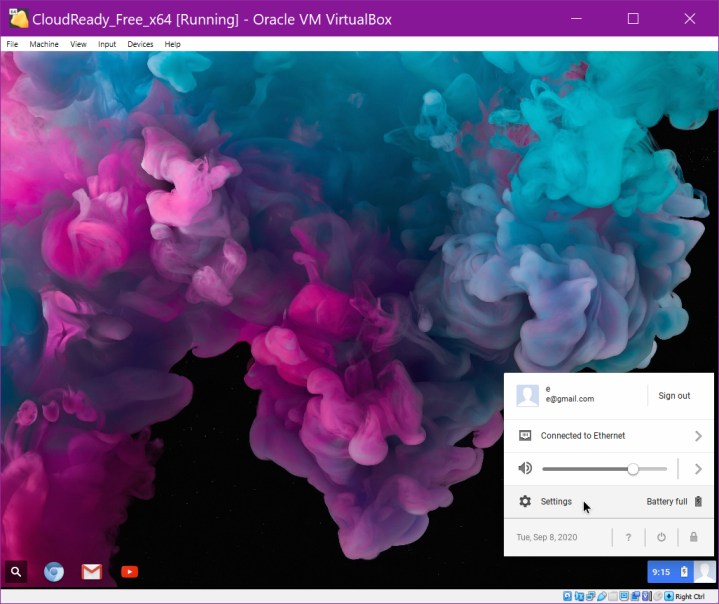
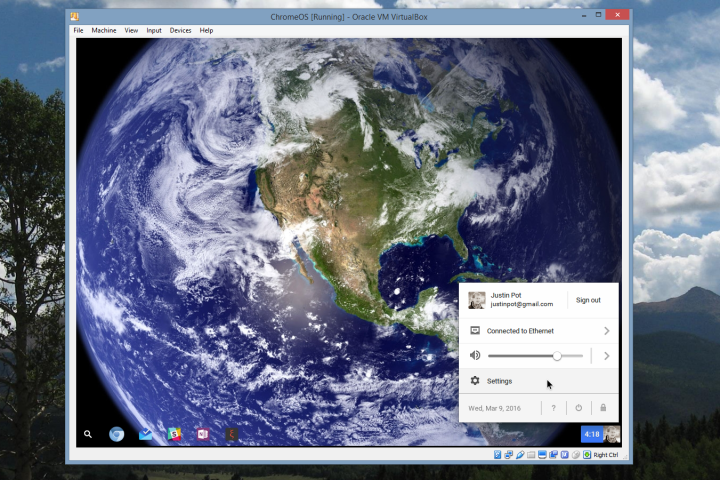
With ChromeOS loaded, you can get a general idea of what to expect. This build doesn’t reflect the latest version, as the entire interface looks different. A few web-based apps associated with your account may appear at the bottom, but that’s about it. This build doesn’t ship with wallpaper, so we downloaded one using the Chrome browser.
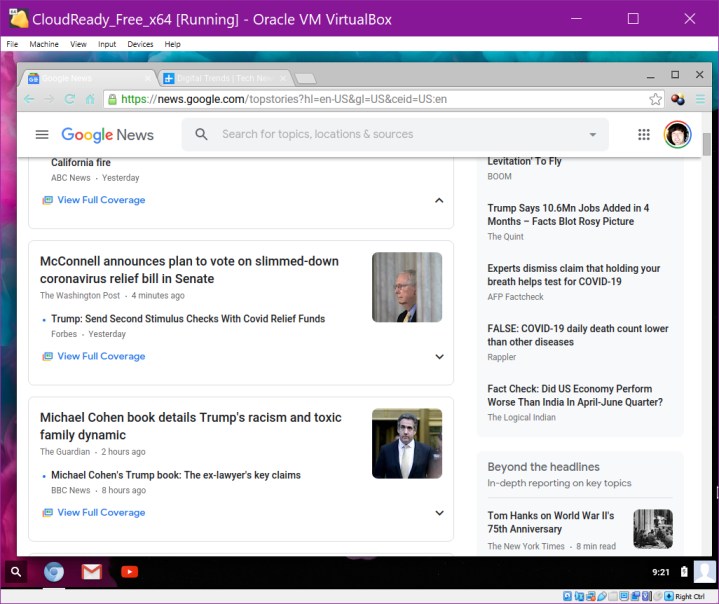
In newer builds, apps are tucked away in a “tray” that’s accessible by clicking the Launcher icon. In this older build, click the Magnifying Glass in the bottom-left corner, and an old-school pop-up window appears with all your web-based apps. Since this build does not support (or include) Google Play, Android apps cannot be downloaded and installed.

Click on your icon located next to the system clock, followed by Settings to change the wallpaper, mouse speed, default download location, Google Cloud Print, and more.
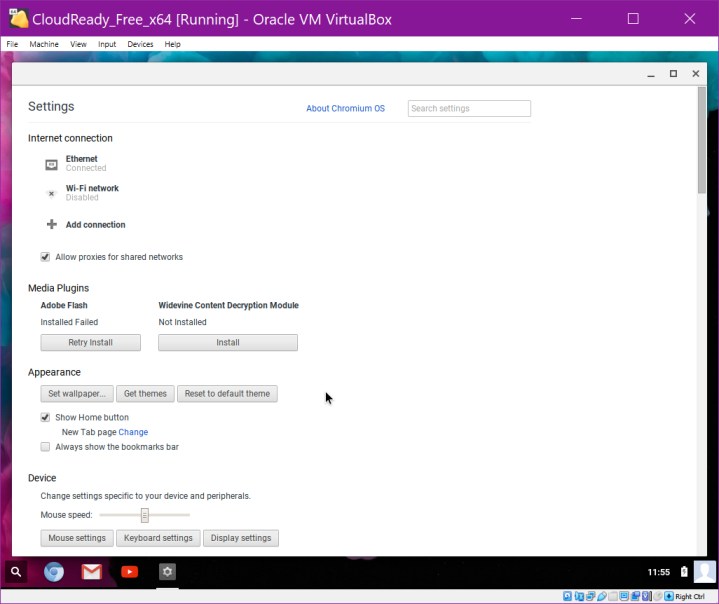
You may want to adjust the output resolution to be compatible with your PC desktop, and while you might think this is impossible, there are two ways to do this. Your first option is to switch between three modes — Fullscreen, Seamless, or Scaled. A second option is to select a percentage to scale up the ChromeOS desktop from 125% to 300%.

On the virtual machine’s menu bar, click View (as shown above), then select one of the three modes. Or you can click Virtual Screen 1 and choose a specific percentage.
Try before you buy
You’ll only get an idea of the real thing from running ChromeOS in a virtual machine using the build linked above. Currently, CloudReady doesn’t support VirtualBox, and it doesn’t run in VMware Workstation player 15.5. The current version only works in VMware ESXi 6.5, Workstation 14.1.1, and Fusion 10.1.
If the above link leaves you wanting more, it might be worth sampling ChromeOS on Chromebooks in-person at Best Buy or another electronic retailer. After all, it’ll get you further than trying to experiment with ChromeOS in VirtualBox on your own.
Editors' Recommendations
- 9 best 2-in-1 laptops in 2024: tested and reviewed
- The most common Chromebook problems and how to fix them
- Google just made a big change to how Chromebooks apps work
- Chrome OS to soon run everywhere, including on PCs and Macs
- Windows vs. MacOS vs. Chrome OS