For many Mac users, notifications are useful and welcomed. They allow you not to miss anything that may or may not be important, but there are times when you wish that the notifications would just leave you alone. Fortunately, turning them off is pretty simple.
This is your step-by-step instructions for turning off notifications. There is more than one way to do this, and we show them all to you. Just remember to turn them back on after your alone time is complete.
How to turn on Do Not Disturb manually
Using Do Not Disturb is the easiest way to turn off Mac notifications. It will keep you from seeing or hearing notifications (although you can view them by opening the Notification Center). There are a few ways to enable this feature.
Step 1: The easiest way to enable Do Not Disturb is to hold the Option key (labeled as Alt on some Macs) and click the Notification Center icon. It’s the far-right icon in the menu bar that looks like three lines stacked on top of each other.

Step 2: The Notification Center icon will turn from black to gray. This means Do Not Disturb has been turned on. It will remain on until midnight or until you turn it off.
Step 3: Alternatively, there’s another way to turn on Do Not Disturb. Swipe left from the right edge of the trackpad — this will bring across the Notification Center.
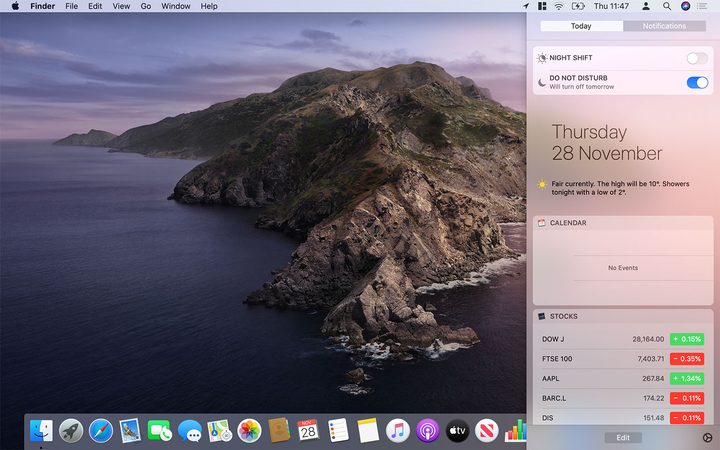
Step 4: Swipe downward, and two options will be revealed at the top of the Notification Center: Night Shift and Do Not Disturb.
Step 5: Click the dial next to Do Not Disturb to turn it on. As with the previous method, this will enable it until midnight or until you decide to switch it off.
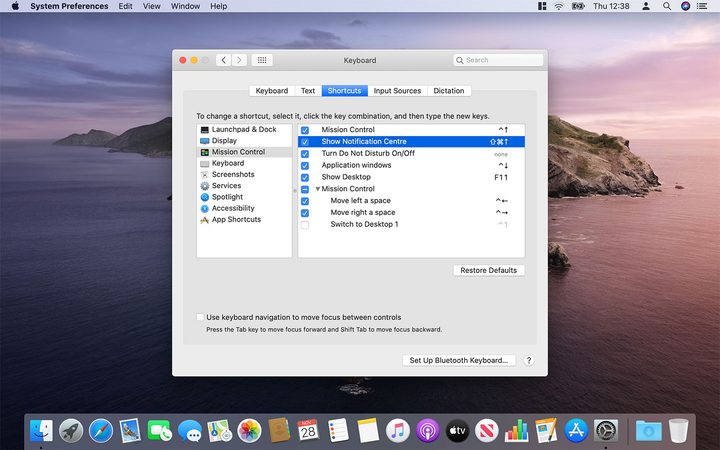
Step 6: Finally, if neither of the two above methods take your fancy, you can create a custom keyboard shortcut. Open System Preferences and click Keyboard, then click the Shortcuts tab. In the left-hand column, click Mission Control, then tick the checkbox next to Show Notification Center and enter your preferred shortcut. Close System Preferences when you’re finished.
How to schedule Do Not Disturb automatically
If you tend to be busy during the same time period on most days and don’t want to be bothered by notifications, you can schedule Do Not Disturb to turn on automatically.
Step 1: Click the Apple logo in the top-left corner of your screen, then click System Preferences. Alternatively, click the System Preferences icon in the Dock; it looks like a set of gray cogs.
Step 2: From here, click Notifications.
Step 3: In the Notifications section, click Do Not Disturb at the top of the left-hand sidebar.
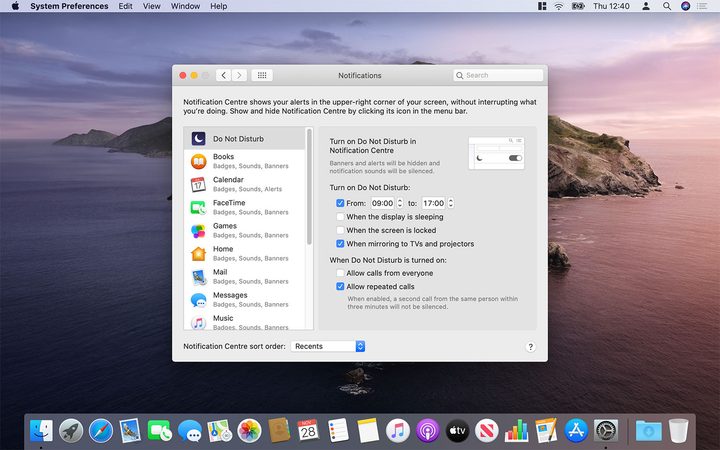
Step 4: There are several options here. You can have Do Not Disturb turn on at set times (for example, during your working hours if you use your Mac for your job) or when the display is sleeping and/or locked. You can also enable it when your Mac’s display is mirrored to TVs and projectors, so you won’t be interrupted during a movie or presentation.
Step 5: If you want to allow people to call you while Do Not Disturb is enabled, click the checkbox next to Allow Calls From Everyone. You can also choose to only allow through repeated calls, just in case someone is trying to contact you with something urgent.
How to turn off notifications for a certain app
Although Do Not Disturb is useful, it mutes notifications from every app on your Mac. You’ll want to use another method if you only want to stop certain apps from disturbing you.
Step 1: Like before, click on System Preferences and select Notifications.
Step 2: On the left side of the window, find the app whose notifications you want to stop.
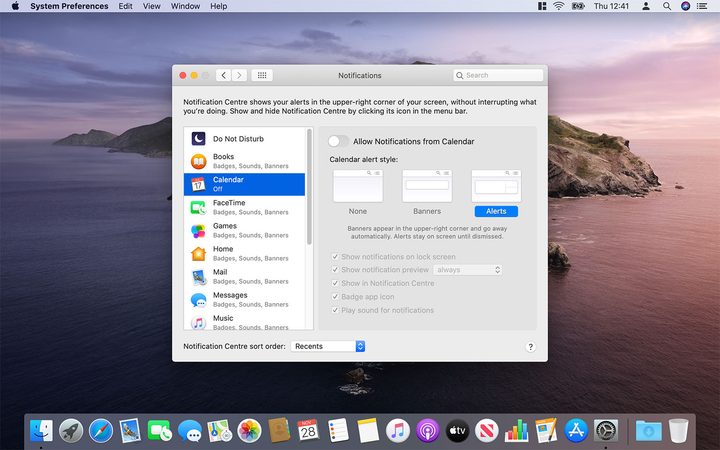
Step 3: You should see a toggle option that says Allow Notifications From [App Name]. Click on it; The toggle should switch and turn gray. It’s that simple— you’ve now blocked that app’s alerts.
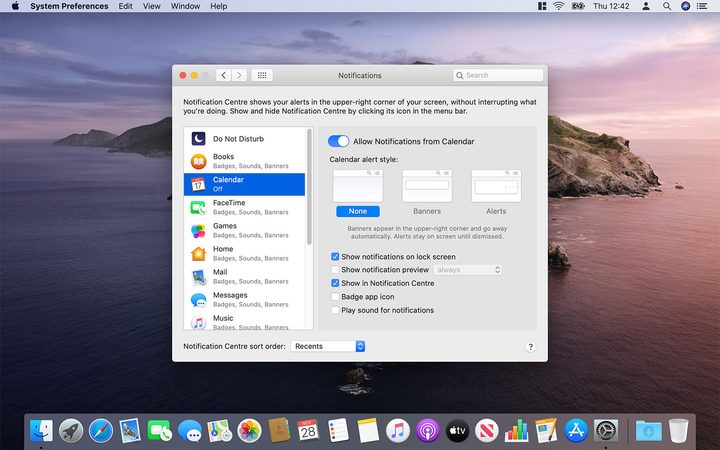
Step 4: If you don’t wish to block notifications entirely, but you need to limit pop-ups from just appearing on your screen, you can confine alerts to the Notification Center. In your settings, under [App Name] Alert Style, select None. After that, you can uncheck the checkboxes for Show Notification Preview, Badge App Icon, and Play Sound for Notifications.
Now you can look for alerts specifically in the Notification Center when it’s convenient, instead of seeing them light up across your screen while you’re working.
Take a look at our guide on how to download MacOS Big Sur for more Mac-navigating assistance.