When you want to see multiple tabs on one macOS screen without everything getting jumbled, turn to the Split View feature. Split screens allow you to have two or more sections, each displaying a different app. These sections allow you to work more efficiently and see more information without having a second screen.
In newer versions of macOS, there’s a very easy split-screen mode called Split View that anyone with an updated Mac can use. In this guide, we’ll teach you how to use Split View on a Mac to make the most of your system.
While connecting multiple external monitors is always a possibility for larger projects, here’s how to divide your screen on a smaller level whenever you need it.

Get started with Split View
Step 1: Begin by opening two or more windows that you want to be paired in a split-screen layout: browser windows, apps, documents — whatever you want. Pick your first window, and look in its upper-left corner to find three colored dots: red, yellow, and green. These control the window.
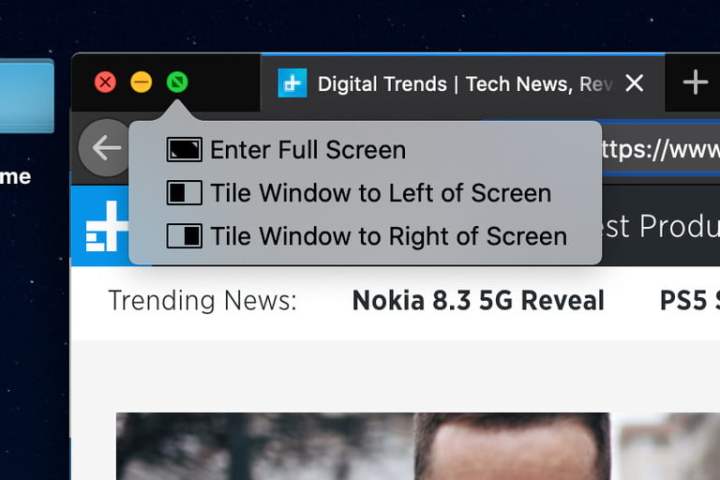
Step 2: If you hover the cursor over the Green dot, it presents two small “expand” arrows. Hold down on this Green dot, and a list of options appears: Enter full screen, Tile window to left of screen, and Tile window to right of screen. Select either the second or third option, and the window will fill that portion of your display.
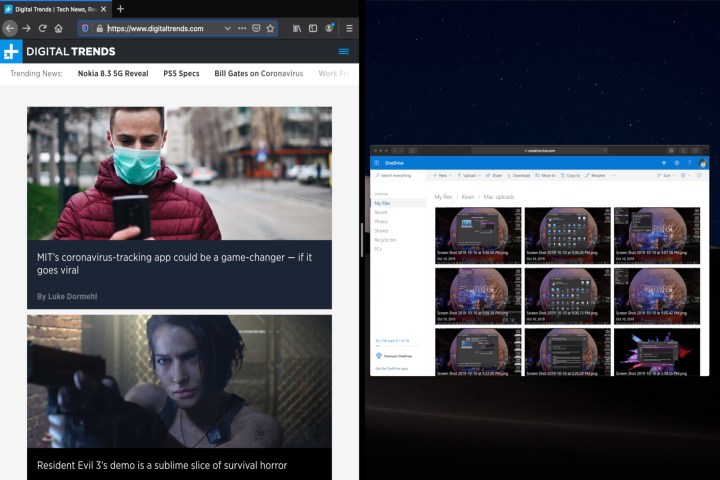
Step 3: One half of your Split View is done. You’ll see the first app on one half of the screen, with thumbnails of any other open windows on the other side. Select the other window that you want to use in Split View mode, and it will expand to fill the void, completing the Split View experience. You can tap either window to switch your primary focus as needed.
Adjusting Split View
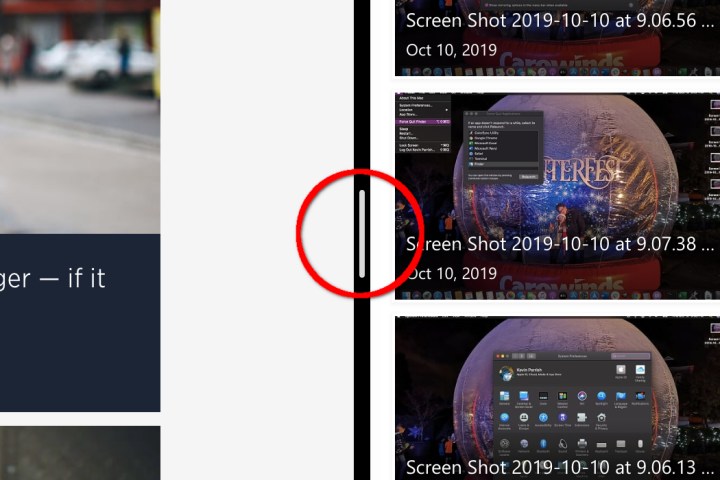
Split View doesn’t necessarily need to divide your screen equally. You can click and hold on the Black divider line and slide it left or right to adjust each half of the screen. This is particularly useful if you’re trying to view a large webpage with an odd design or need extra space for a big spreadsheet. Just note that some apps — like Apple’s Photos, for example — have minimum widths, so you may not be able to adjust the bar much or even at all.
If you realize you prefer the windows on different sides, simply click and hold an app’s Title bar and drag it over to the opposite side. The windows will automatically switch places.
Not sure where your menus have gone? Split View automatically hides the menu bar (and Dock). Just move your pointer to the top of the screen, and it reappears while your pointer remains, giving you access to each app’s menus while you’re using Split View.
Finally, if the windows are too small, you can adjust your resolution.
When you’re ready to leave Split View mode, click on the Green dot on either window or press Esc. This will return both windows to their original state and allow you to resume what you were doing before entering Split View.
Split View options
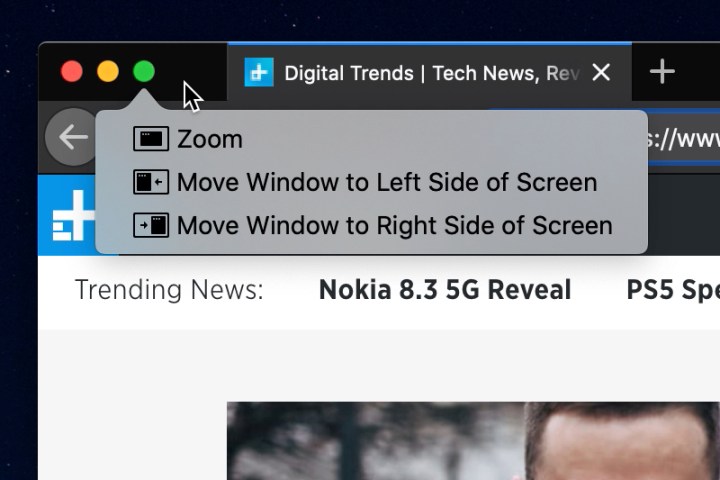
If you hold Option (or Alt) and click the Green button in a window’s top-left corner, you get three new options: Zoom, Move window to left side of screen, and Move window to right side of screen.
Whereas Enter full screen hides the Dock and menu bar, Zoom keeps these in place. The difference between tiling a window and moving it is similar — tiling hides the Dock and menu bar, while moving does not. Moving also doesn’t enter Split View — there’s no moveable black bar when you just move a window to either side of the screen. You don’t need to pair a second app, either.
Window snapping
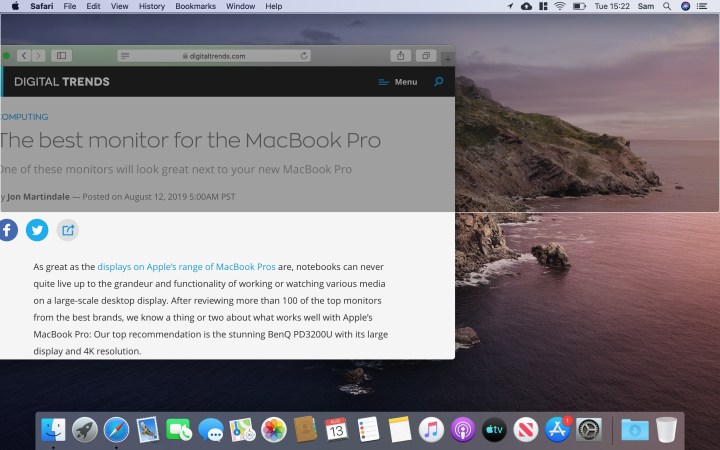
Mac users waited many long years, but macOS now has native window snapping, just like Windows 10 and later. Click and drag a window to one of the four sides or four corners of your display, and a translucent box will appear in front of it. This indicates the shape the window will occupy. Release the mouse button, and it’ll automatically snap to this position.
MacOS Catalina (and newer) gives you different options:
Drag a window into a corner, and it’ll take up 25% of your screen.
Drag it to the top portion of either the left or right side of the screen, and it’ll fill the top half of the display. Do the same for the bottom portion of the left or right side, and it’ll fill the bottom half of your screen.
Drag the window to the left or right of the screen without going near the corner of your display, and it’ll fill the left or right half.
Drag it to the bottom of the screen to make it fill the middle third.
Drag it to the top of the screen to make the app full-screen. Note that if you then drag a little farther up, you’ll enter Mission Control, so you have to be careful with this.
Given there are so many choices, it may take a bit of practice to find the various sweet spots. But adding this functionality to macOS is a definite boost for Mac users, who have been deprived of this useful function for far too long.
Note that window snapping is not the same as Split View — apps won’t enter full screen when you drag them into place, and there’s no black bar to adjust their size.
A quick word about Mission Control
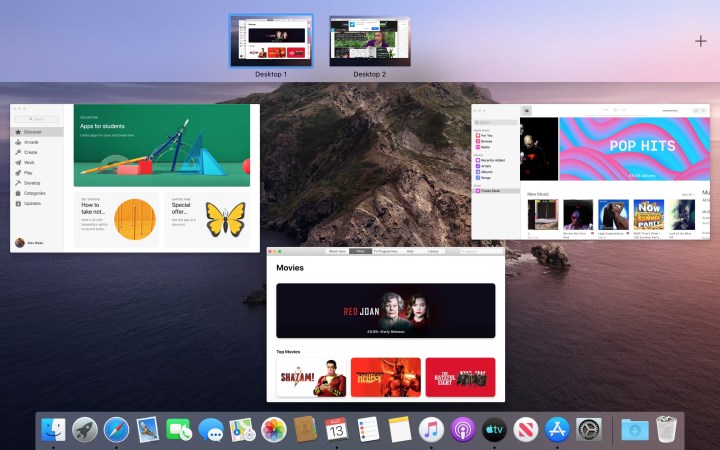
Do you have several windows open at once and want something more comprehensive to view them all? Mission Control can help.
This mode displays all your open windows in a ribbon-like view that lets you quickly jump from one to another. Mission Control also lets you create multiple virtual desktops (or “spaces”), each with its own apps and windows open. These are also displayed on the ribbon, allowing you to easily move from one desktop to another.
You can access Mission Control in many ways, but one of the easiest is to simply drag a window up to the top edge of your screen, which should automatically enter Mission Control mode. Alternatively, Apple keyboards typically include a Mission Control button (F3 or it has an icon that looks like three rectangles) or, if you have a trackpad, you can swipe upward with either three or four fingers (depending on your trackpad settings).
You can enter Mission Control while in Split View, too, which is an easy way of switching windows as necessary. Mission Control also helps you switch to Split View when you have two full-screen apps open. Just activate Mission Control, and then drag your app window on top of another window or app icon. This should immediately activate Split View.
Editors' Recommendations
- How to create a Smart Folder on a Mac
- How to change the login picture on a Mac
- How to change your MAC address on Windows and Mac
- How to create a Memoji on a Mac
- How to change your Yahoo password on desktop and mobile


