

The Terminal is a powerful macOS tool that lets you get under your computer’s hood and tweak the way it works in all manner of ways, from simple visual changes to updating your Mac and keeping it secure. Considering what it can do, it’s a very helpful app to have at your disposal.
Yet many Mac users either don’t know how to use the Terminal or don’t even know it exists. And granted, it’s not for everyone — its extensive powers mean that things can go wrong if you don’t know what you’re doing.
But that’s where our guide comes in. We’ve put together our best tips on how to use the Terminal and get the most out of it. We’ve also included some of our favorite Terminal commands, all of which can improve your Mac experience. Let’s get started.
How to open the terminal
This is probably the most important part of this guide since many people don’t know that the Terminal even exists. To open the Terminal, all you need to do is open the Finder app, select Applications in the lefthand sidebar, and then open the Utilities folder at the bottom and find the Terminal app. Alternatively, you can open the Spotlight search box by pressing Command + Space, typing “Terminal,” then selecting the top result or pressing Return.
Terminal is an interface through which you issue text commands to your Mac. Once you type a command, Terminal will respond in one of three ways: recognize and accept those commands, not recognize them, or prompt you for further input. It’s that simple.
The commands below will help familiarize you with how the Terminal works and what you can use it for in your everyday life.
Prevent your Mac from sleeping

This command accomplishes one very simple problem: keeping your computer awake for a period of time. Just open the Terminal and type in “caffeinate,” and your Mac won’t go to sleep until you close that Terminal window. You can also set a timer by typing “caffeinate -u -t” and then how long, in seconds, you want to prevent your Mac from sleeping.
For example, typing “caffeine -u -t 120” would keep your Mac awake for 120 seconds (or two minutes).
Change screenshot formats
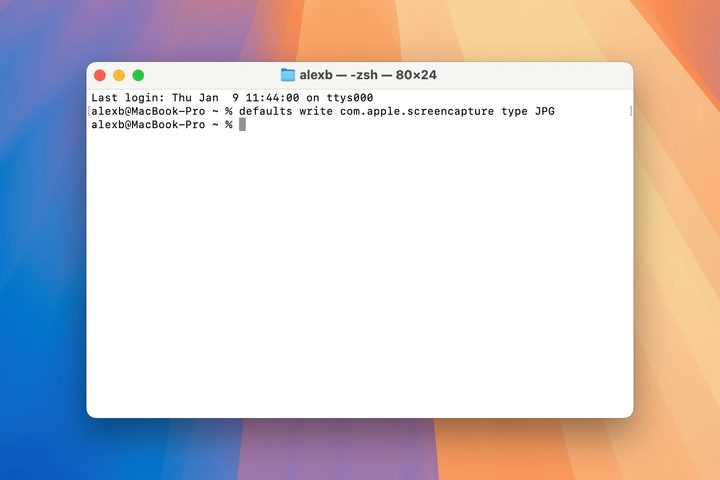
The macOS operating system makes it really easy to capture screenshots of your whole screen (Command + Shift + 3) or just part of your screen (Command + Shift + 4). However, it always saves those screenshots to your desktop as PNG files. That’s not always a bad thing, but sometimes you might want to save a screenshot as a different file type, such as JPG.
Fortunately, there’s a Terminal command that can solve that problem: just type: defaults write com.apple.screencapture type JPG
This command allows you to change the filetype your screenshots will be saved as — in this example, we’ve used JPG. You can change it back at any time by typing the above command and replacing JPG with PNG, making the full command: defaults write com.apple.screencapture type PNG
Show detailed file paths
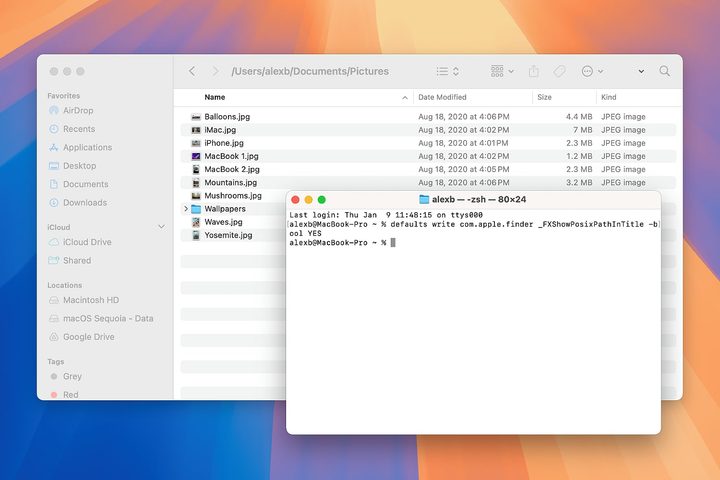
By default, when you open a folder in macOS, the top of the window will show the name of the folder but not where it is. For instance, open up your Pictures folder, and the top of the finder window will just say Pictures, not users/yourname/pictures. This can be a little irritating, especially when you’re moving folders around or digging through folders trying to find a particular file.
To show detailed file paths, open Terminal and type “defaults write com.apple.finder _FXShowPosixPathInTitle -bool YES” — then, press Return.
This terminal command shows the full path of a folder in the Finder window of that folder. If nothing else, it’s a helpful way to get an idea of how your files are arranged and keep your Mac nice and organized. Undoing this change is just as easy as typing out the above command again and replacing YES with NO.
Show hidden files
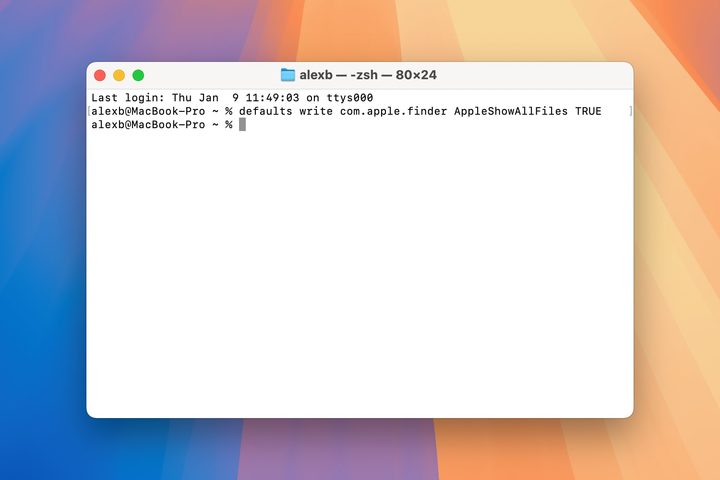
Sometimes, you just need to dig into the guts of macOS to fix some problem or another, and that will require accessing files that your Mac would prefer you left alone. By default, most sensitive files and folders are hidden from view, including from Spotlight and Siri searches. With the right terminal command, you can peel back the curtain and peer into the darkest reaches of your Mac.
To do so, type the following command into Terminal: defaults write com.apple.finder AppleShowAllFiles TRUE
The above command reveals all of your hidden system files, so make sure you know what you’re doing before you start messing around with them. If you’d prefer those files go back to being hidden, just re-enter the above command but swap TRUE with FALSE.
Update macOS

If, for one reason or another, you can’t update your Mac using the System Settings app, you can use the Terminal. In a new Terminal window, type the following: softwareupdate -i -a. This will download and install any updates to your operating system that are available. Note that this does not update individual apps.
If you instead want to see what macOS updates are available before installing them, type “softwareupdate -l” (that’s a lowercase L, not an uppercase i). This will display any macOS updates with an asterisk to the left of each update’s name. To install an update, type “softwareupdate -i [name]” — [name] is replaced by the exact name of the update, as listed in Terminal. If there are spaces in the update name, wrap the entire phrase in single quotation marks. For example, you could type: ‘softwareupdate -i macOS Sequoia 15.0.1’ — the update will begin when you press Return.
Change Dock spacing
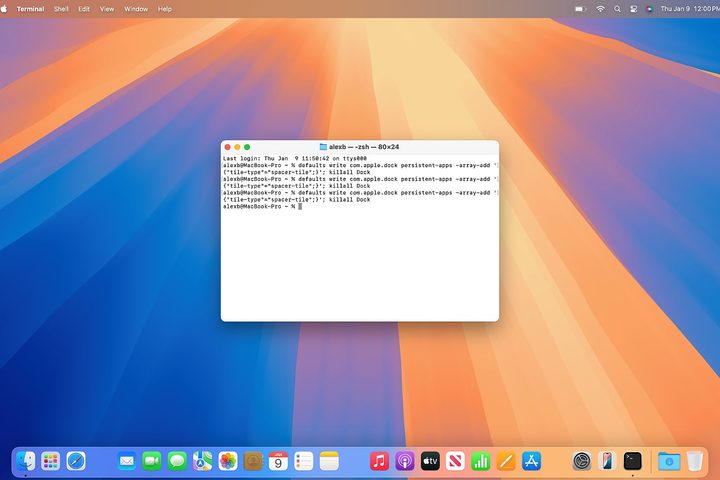
You can better organize your Mac’s Dock by adding spacers in between your apps. To do this, open Terminal and type the following:
defaults write com.apple.dock persistent-apps -array-add ‘{“tile-type”=”spacer-tile”;}’; killall Dock
Once you press Return, your Dock will restart, and a spacer will be added to it when it reappears. Type the command again to add another spacer (do this as many times as you like). Feel free to move the spacers around the Dock to group app icons together. To remove a spacer from your Dock, right-click it and select Remove from Dock.


