
No one likes email, but none of us can live without it. If you’ve found yourself struggling to manage incoming emails, I’ve found these three tips to be immensely useful.
Whether you want to automatically move messages, perform several actions with a single click, or make emails that need attention stand out among the rest, these Microsoft Outlook tips have you covered.
Use rules to organize incoming emails
To organize emails as they arrive, you can set up rules in Outlook. So, you can move an email to a folder, flag one to follow up, mark a message as read, and more. The best part is that it’s all done automatically.
Step 1: Go to the Home tab, select the Rules drop-down arrow, and pick Create rule.
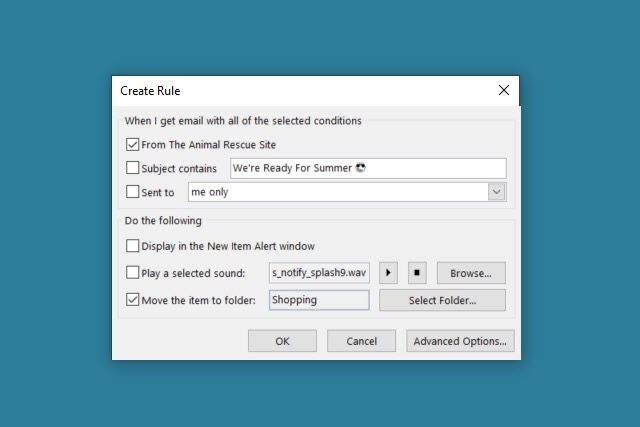
Step 2: In the box that opens, you have a few quick options you can choose from for the selected email.
For the condition, you can pick from the sender, the subject line, or sent to a specific email address. For the action, you can pick from displaying the alert window, playing a certain sound, or moving to a folder.
Step 3: If what you see in the box fits what you’d like to do, simply check the boxes for the conditions and actions you want and choose OK.
Use an advanced rule
As an alternative, you can choose from a larger variety of conditions and actions if you like.
Step 1: Select Advanced options in the Create Rule box.
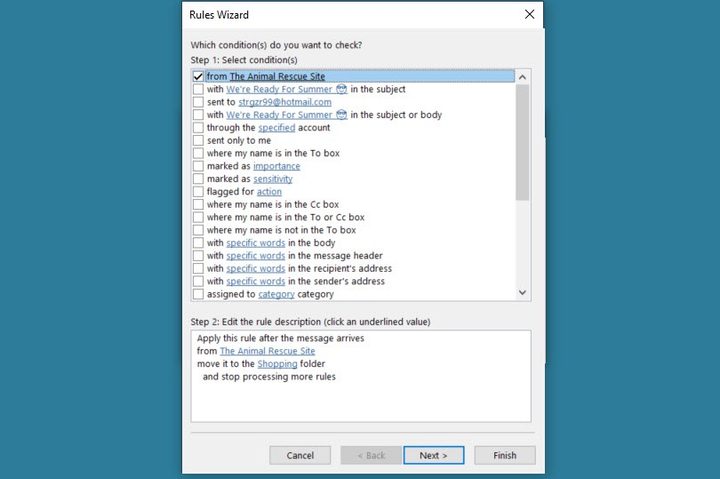
Step 2: You can then pick from over 30 conditions like if the email is marked important, has an attachment, or is an automatic reply.
Check the box(es) for the conditions you want to use and then select the blue linked text to complete the variables. Choose Next.
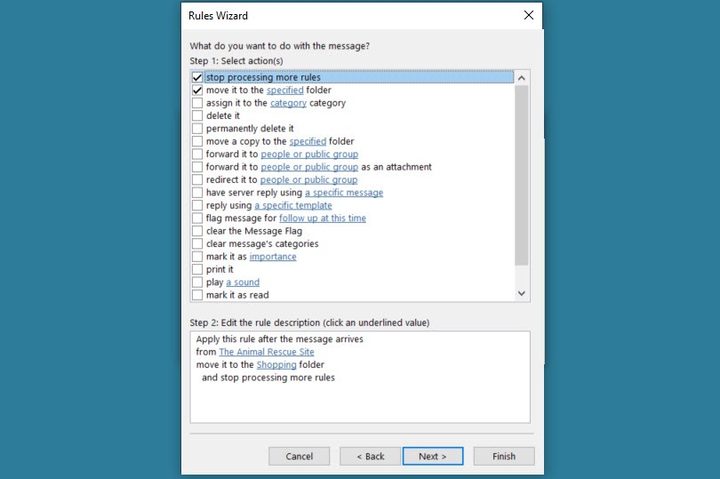
Step 3: You’ll then see about 20 actions you can take. Do the same by checking the box(es) for action(s) you want to use and selecting the blue text to fill in the necessary details. Choose Next.
Step 4: If there are any exceptions to the rule you want to add, you can do that next. Check those boxes, complete the details for the blue text, and choose Next.
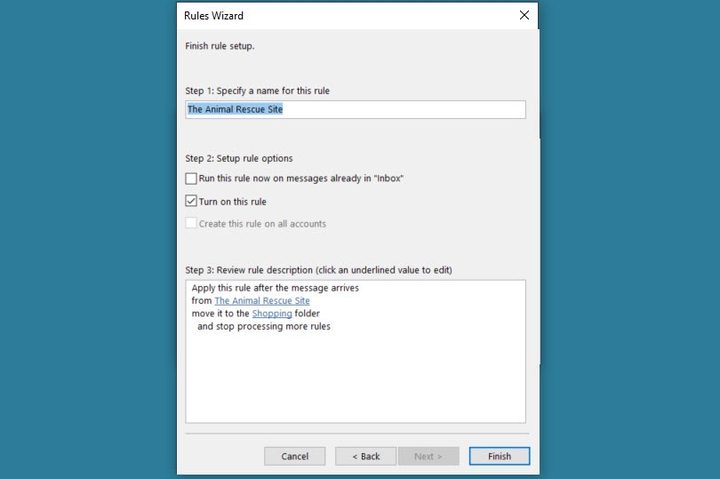
Step 5: Finally, give your rule a name, mark whether or not you want to run the rule immediately, and choose Finish.
Once you have your rule set up, you can sit back and let Outlook organize those incoming emails for you. By taking just a few minutes to create a rule, you can save time in the long run.
To view, edit, or remove a rule later, go to Home > Rules > Manage rules & alerts.
Set up Quick Steps for repetitive tasks
Outlook offers a feature called Quick Steps which can speed up tasks you do over and over. Similar to rules, Quick Steps let you choose one or more actions you want to take on an email. But instead of performing those actions automatically, you handle them yourself with just the click of a button. Plus, you can perform many actions at the same time.
Go to the Home tab and check out the Quick steps box in that section of the ribbon. You’ll see several actions such as Move to, Reply & delete, and Done.
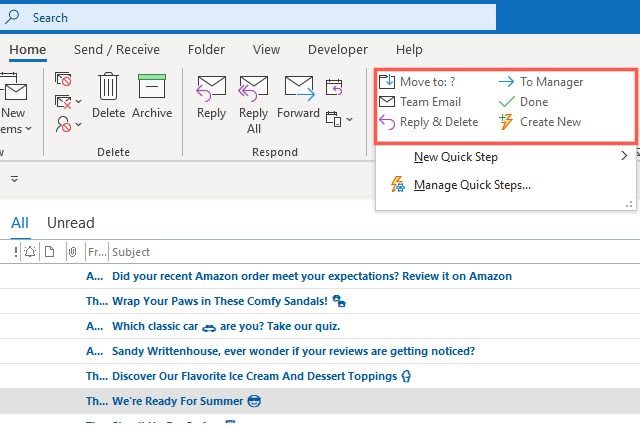
You can use one of the preset Quick Steps by selecting it and completing the details needed. For example, you can pick Move to, choose the folder, and optionally mark the email as read. Select Save.

Then to use the Quick Step on an email in your inbox, select the message and pick the Move to Quick Step.
Create your own Quick Step
If you’d like to create your own Quick Step, it takes only a minute.
Step 1: Choose Create New in the Quick Steps section of the ribbon.
Step 2: Then, name the Quick Step and use the drop-down box to select the action you’d like. To perform more than one, pick Add action and select the next one.
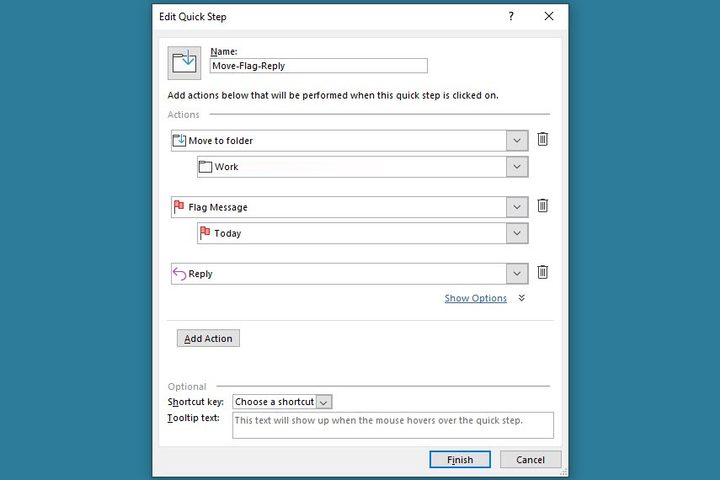
Step 3: Once you have all the actions you want, choose Finish.
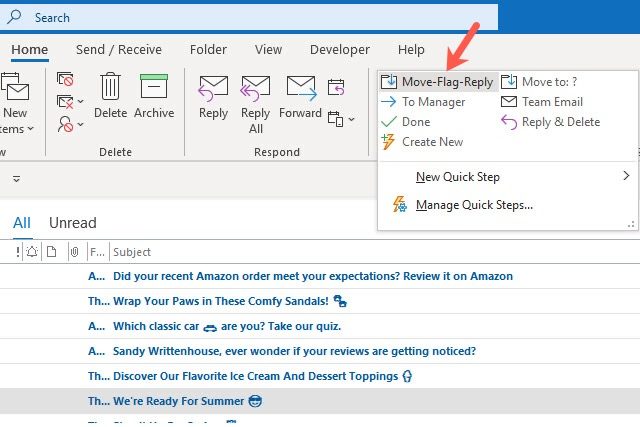
To use the Quick Step when an email arrives in your inbox, select the message and click its name in the Quick Steps box. You can also right-click the email, move to Quick steps, and pick the name from the pop-out menu.
If you want to perform several actions on an email at one time, Quick Steps is a true time-saver.
To view, edit, or remove a Quick Step later, go to Home > Quick steps > Manage quick steps.
Make emails pop with conditional formatting
One more handy inbox management tool in Outlook is conditional formatting. With it, you can make certain emails that arrive stand out with a specific font style, size, or color. This is a great way to call your attention to the messages that need it most.
Step 1: Go to the View tab and select View settings on the left side of the ribbon.
Step 2: Pick Conditional formatting in the pop-up window.
Step 3: You’ll see some default conditional formatting rules already set up for you like unread messages and overdue emails. To create your own, select Add.
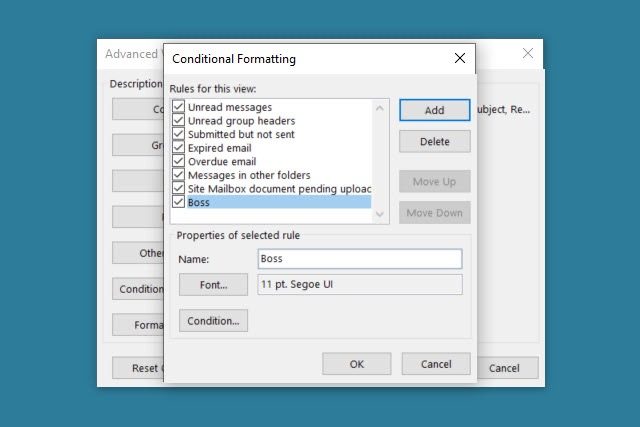
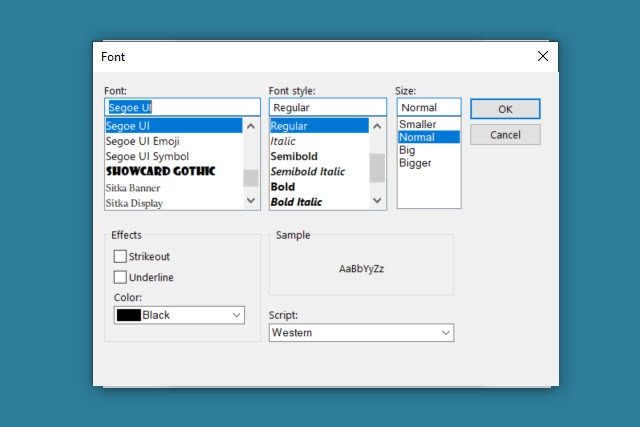
Step 4: At the bottom of the box, give your conditional formatting rule a name. Then, pick the Font button to select the style, size, and color in the subsequent pop-up box and choose OK.
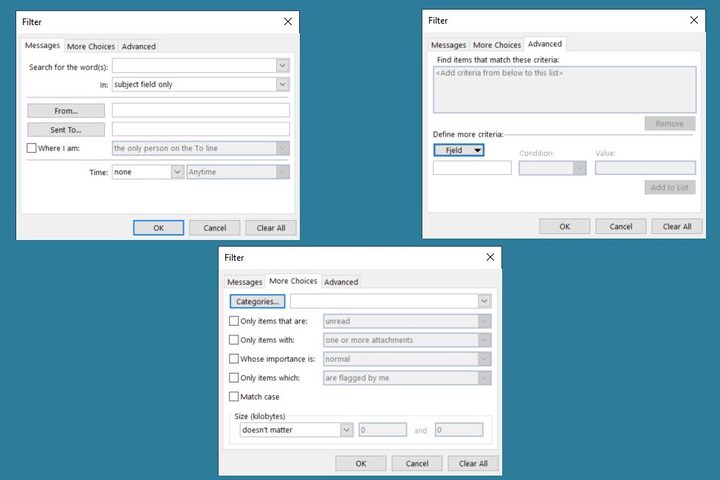
Step 5: Next, pick the Condition button. You’ll see three tabs in the next pop-up box to set up your conditions.
- Messages: Enter keywords, choose a From or Sent to email address, or pick a timeframe.
- More Choices: Select a category, choose items that are read or unread, have or don’t have attachments, are marked with a priority, or another option.
- Advanced: Set up custom criteria and choose the fields for the conditions.
Step 6: When you finish, select OK to save and close the subsequent pop-up boxes.
Now, you’ll see those emails with the conditions you picked and the font you selected pop, making them super easy to spot in your flurry of messages.
To view, edit, or remove a conditional formatting rule later, go to View > View settings > Conditional formatting.
If you’re looking for a new way to manage your emails, Outlook offers these features to help you keep your inbox under control. It might take a few minutes to set them up, but it’ll be worth the time you save later.
For more, take a look at how to set up an out-of-office reply in Outlook.


