Sending an email at the wrong time can hurt your chances of getting a response. Nobody wants their carefully written email buried under a pile of Monday morning messages. Schedule it for the right moment, and your email lands at the top of the inbox when it matters most.
Fortunately, Outlook makes it easy to schedule emails, whether you are on Android, iOS, Mac, Windows, or the web. The good news is that Microsoft has recently streamlined the process, so the steps are now almost identical across all platforms.
No more hunting through different menus depending on which device you are on. Once you learn how, you will never send an email at the wrong time again.
Difficulty
Duration
What You Need
-
Microsoft Outlook application
-
Microsoft Outlook account
Schedule an Outlook email on Windows, Mac, and web
The steps to scheduling an email on Windows, Mac, and web are exactly the same. So no matter which operating system you use or whether you use the web client, here’s how you can schedule an email in Outlook.
Step 1: Launch the Outlook app or open it in your web browser and click the compose button in the top-left corner to start a new email.
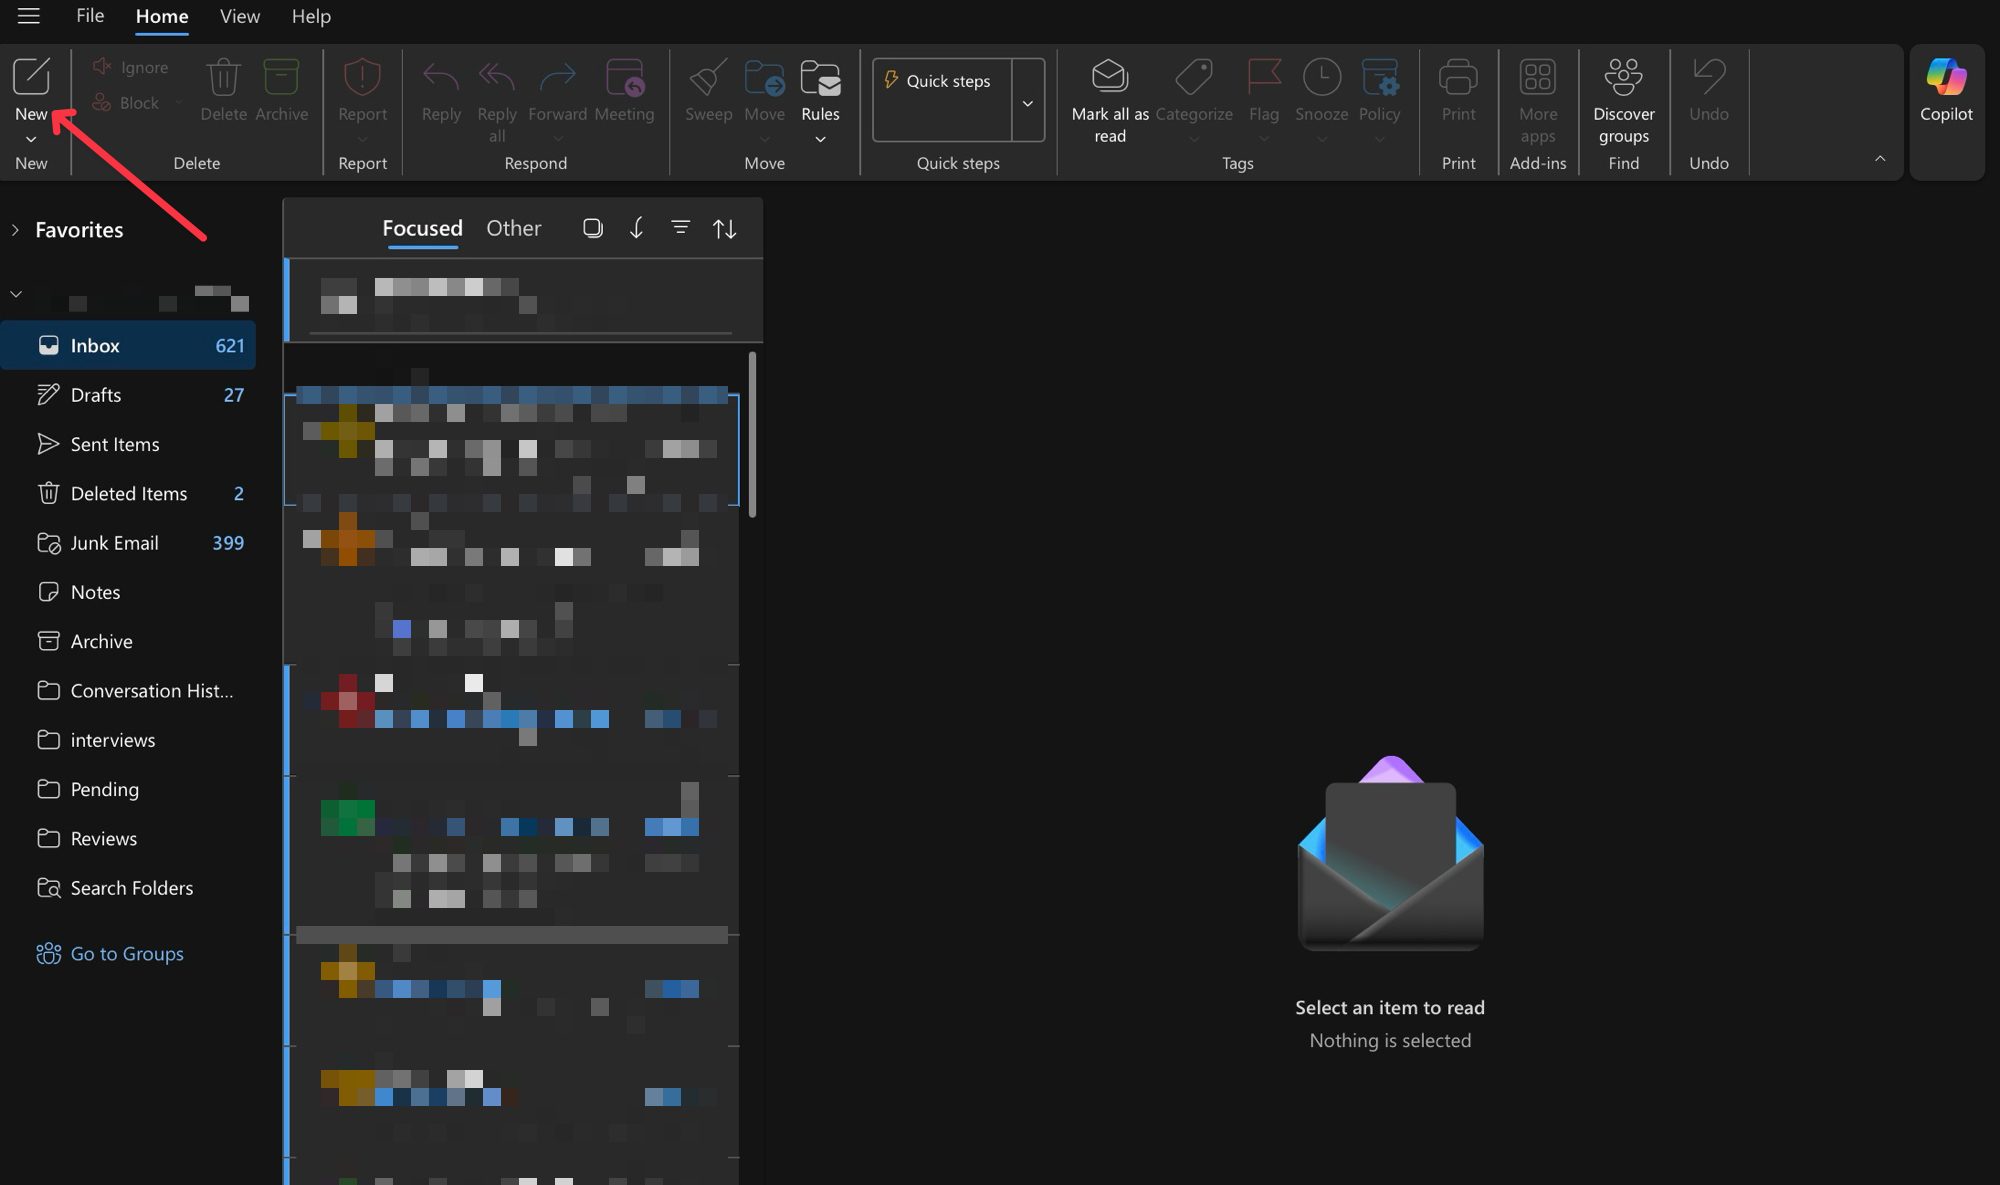
Step 2: Enter the recipient email address, subject, and write your email in the body. You will notice that a new “Schedule Send” button will appear on the top-right. Click on it to start scheduling the email.

Step 3: Set the time and date in the right sidebar that opens, and hit the send button to send the email on your set schedule.
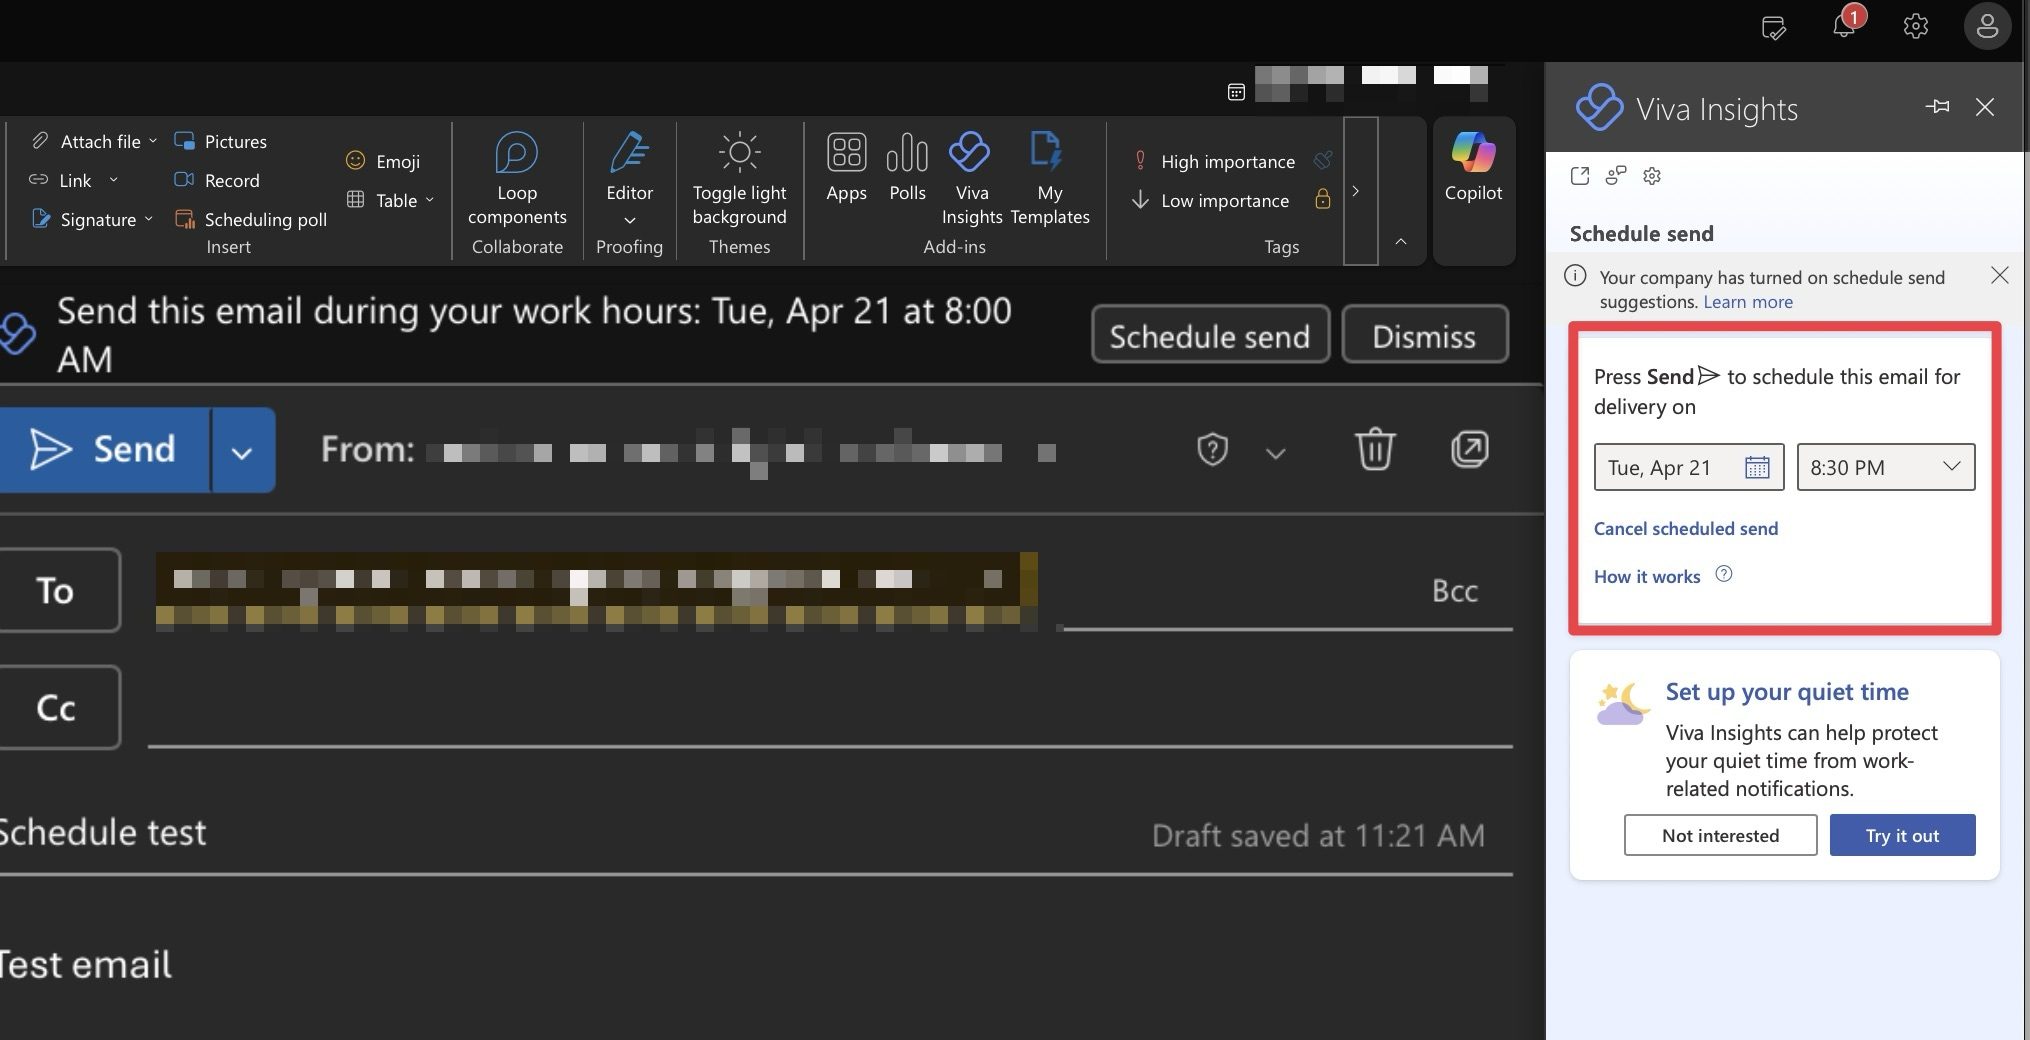
Step 4: If the scheduling option doesn’t automatically appear, click the drop-down arrow next to the Send button, and you will see the “Schedule Send” option.
Step 5: If you are using the arrow dropdown menu, the schedule feature might open in a pop-up window. Use it to schedule and send the email.

Previously, the steps were not only complicated but also varied across platforms. I like that Microsoft has updated Outlook to work consistently across platforms.
Schedule an Outlook email on Android and iPhone
Like on desktop, the steps for scheduling emails in Outlook are the same on both Android and iOS. However, the app might look a little different, so I have added the screenshots for both platforms to make it easy for you to follow.
Step 1: Launch the Outlook app on your phone and tap the compose button in the bottom-right corner.
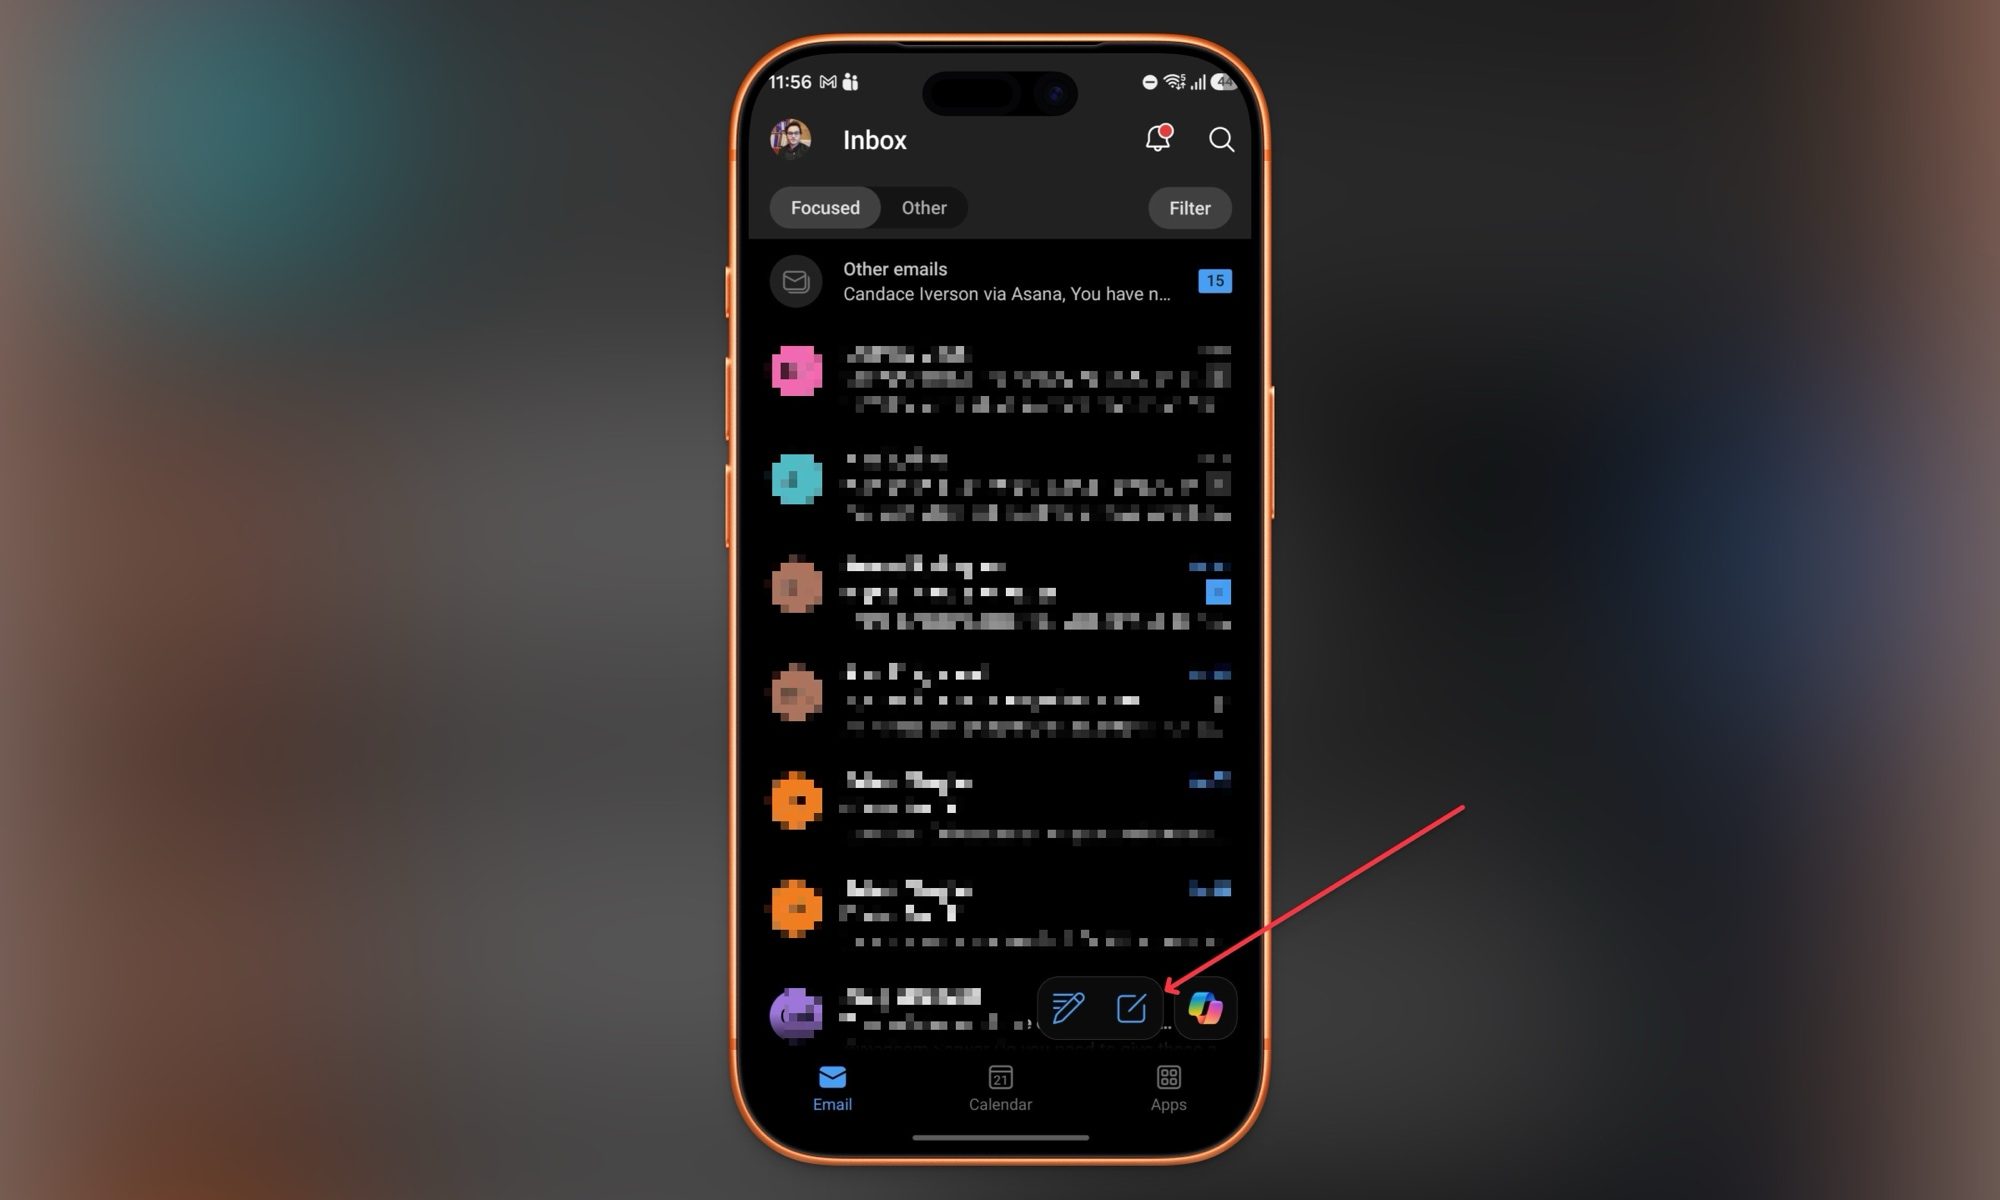
Step 2: Fill in your email details and hit the three-dot menu button at the bottom.
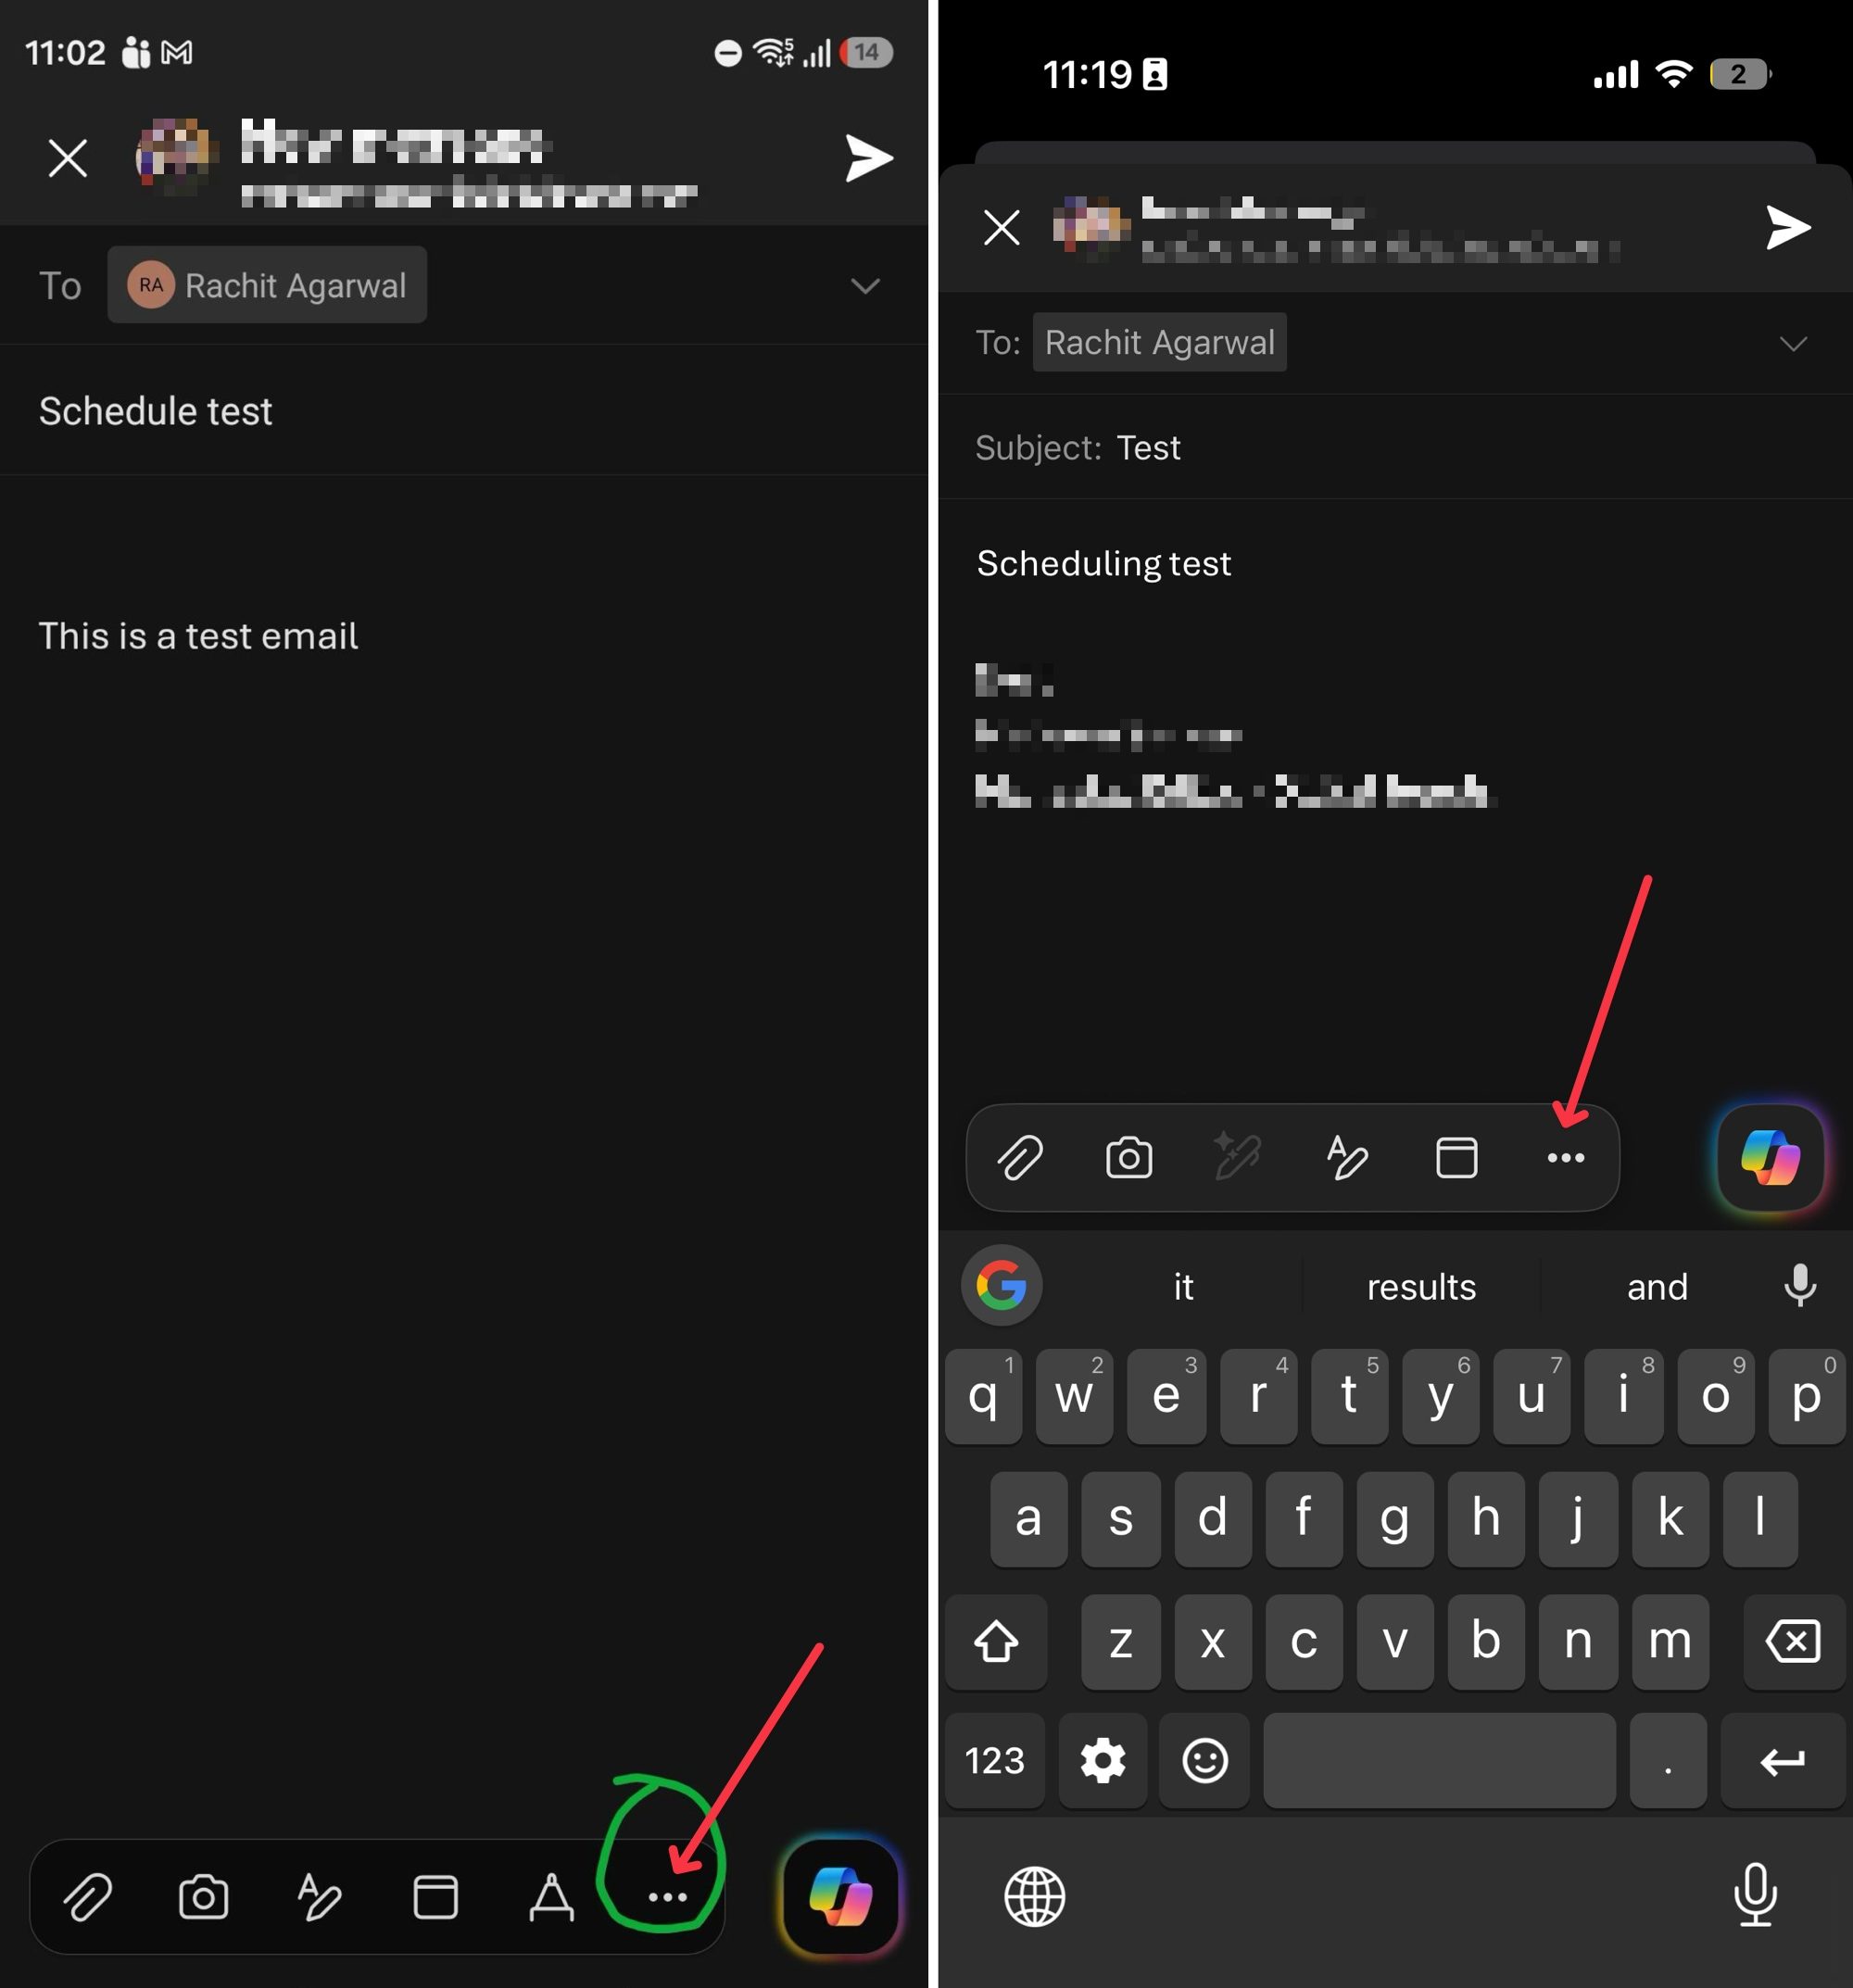
Step 3: Now, tap the “Schedule Send” button to schedule the email.
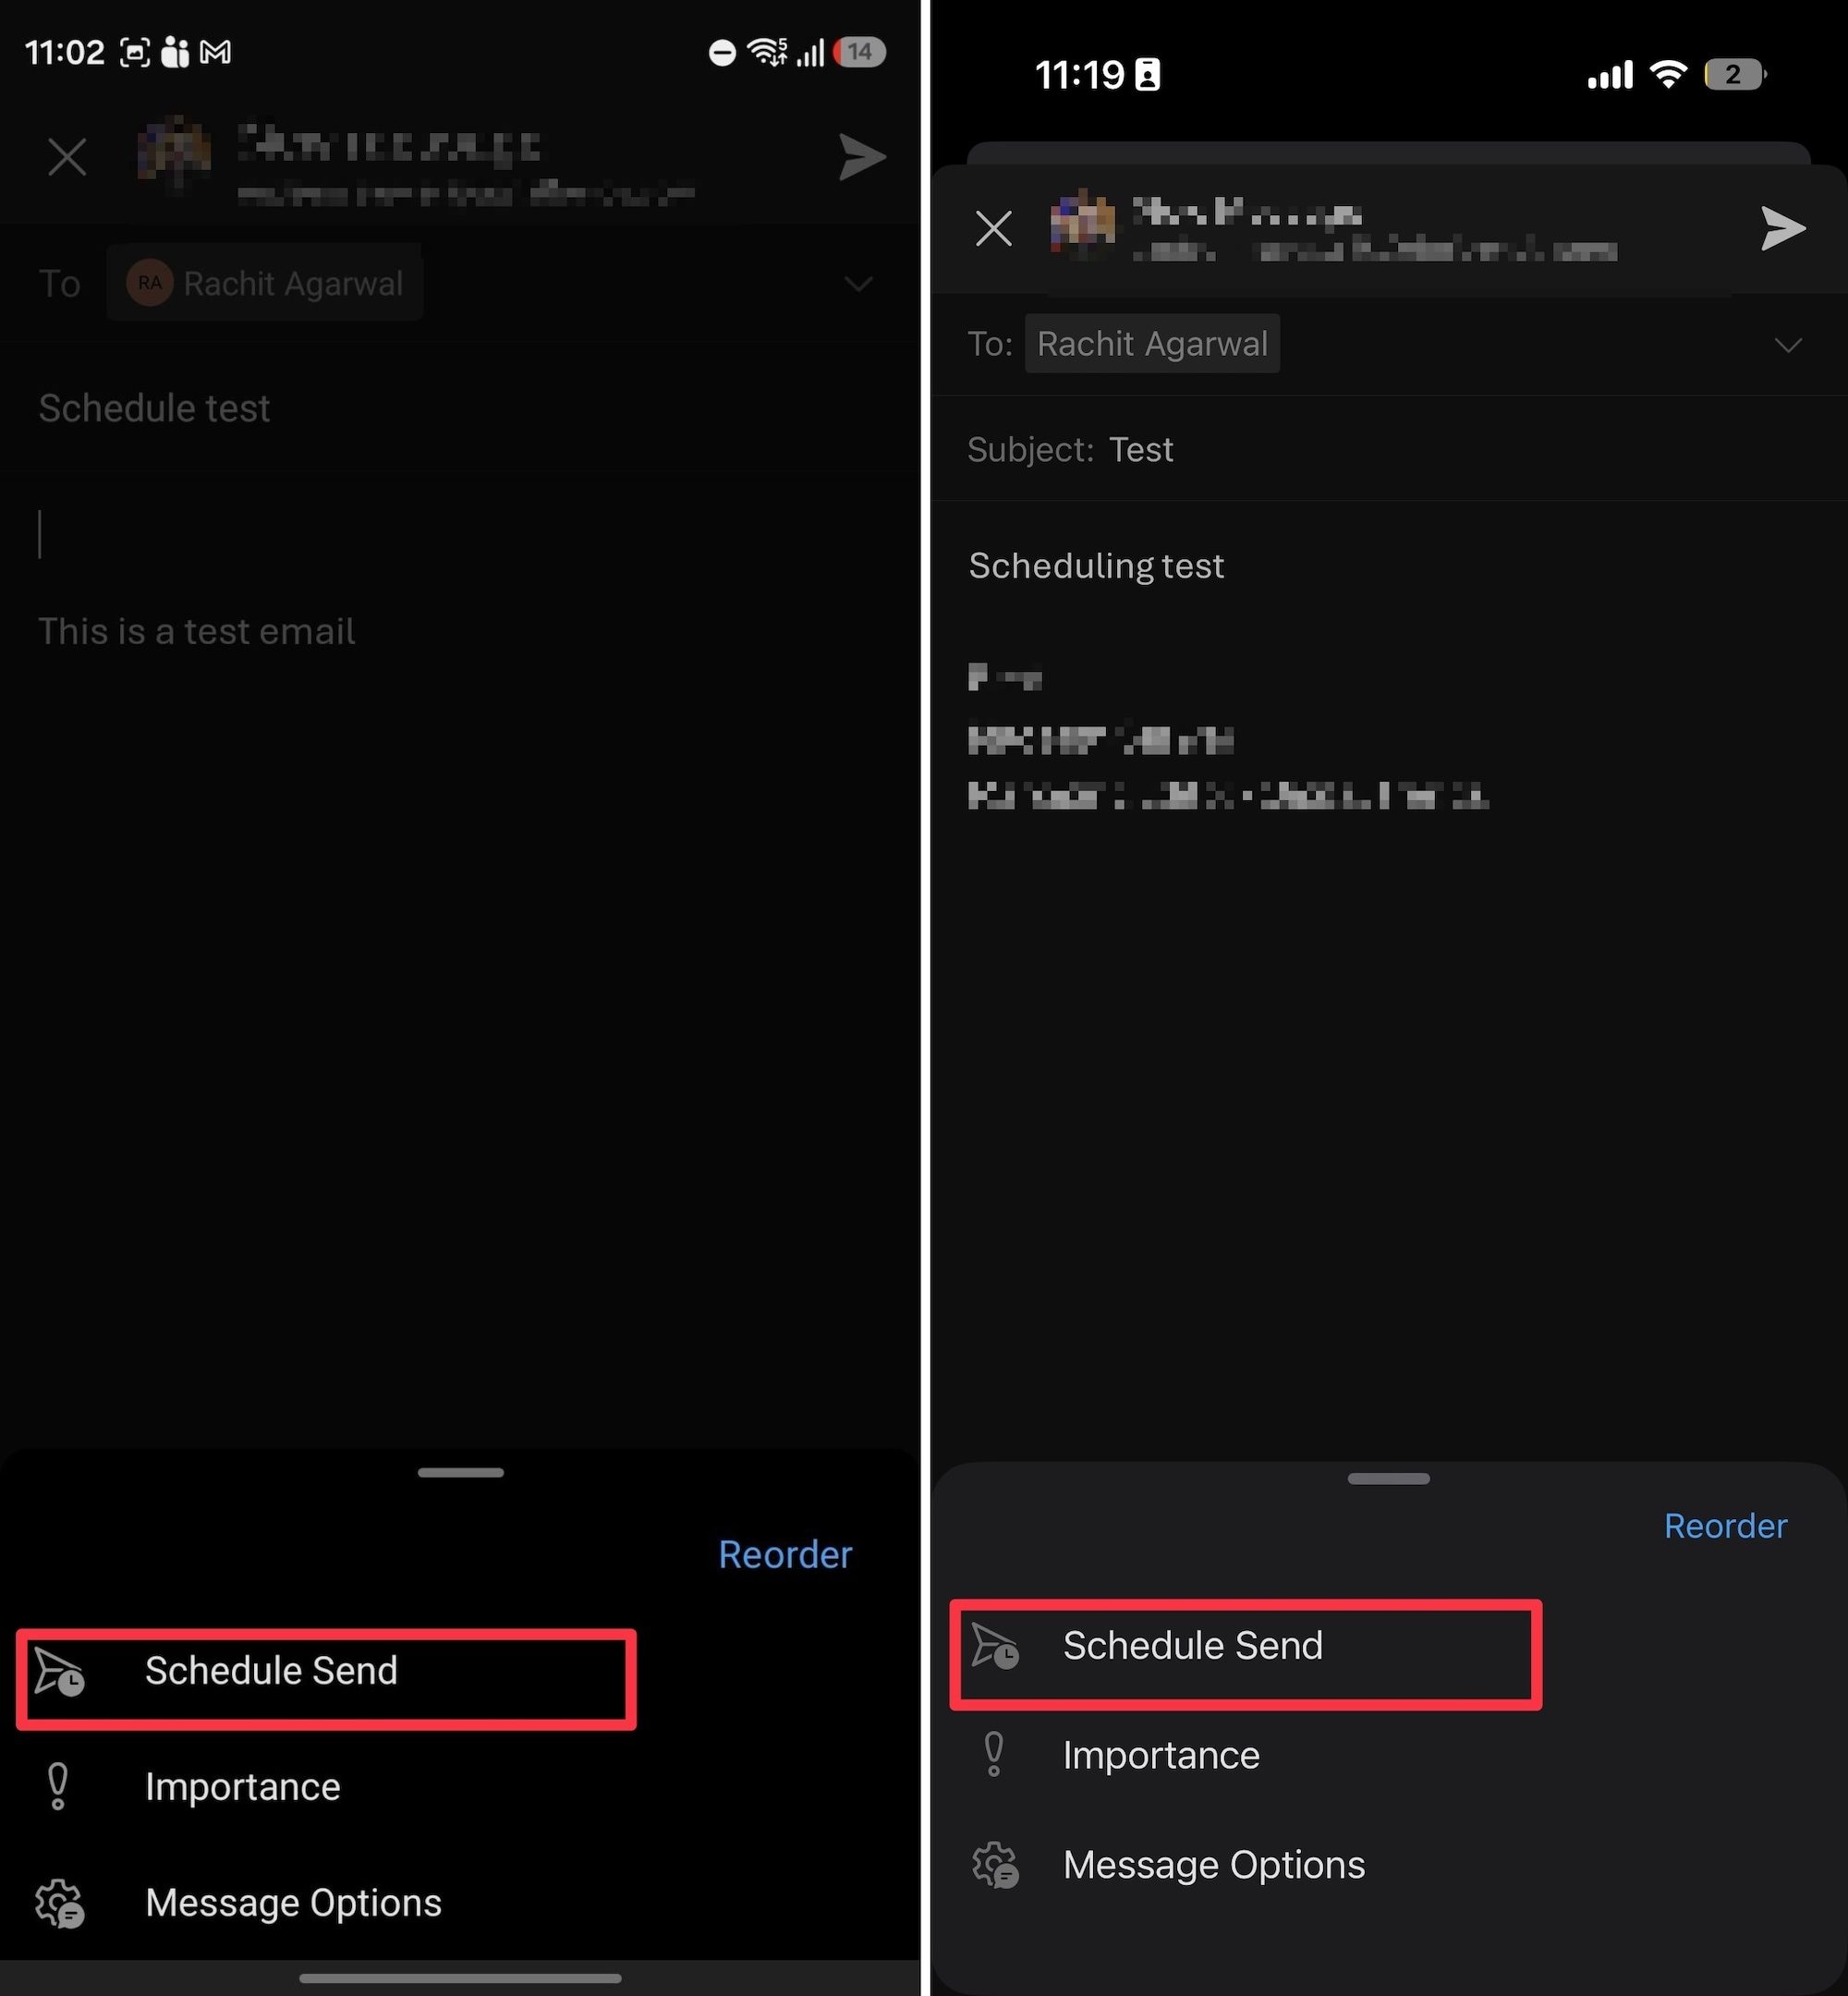
Step 4: Finally, tap to select from the suggested time or hit the “Choose a Time” button to enter a custom schedule.

That’s it. When you hit the send button, the email will be sent at your desired time.
Why don’t I see the schedule email option in Outlook?
If you are using Outlook as a third-party email client for your Gmail or other non-Microsoft accounts, and you don’t see an email scheduling option. you are not alone.
The new Outlook app doesn’t support the schedule sending feature for IMAP or POP account types and only works with Microsoft accounts.
You might still be able to schedule emails from Outlook for non-Microsoft accounts if you are using the classic Outlook app.
How to switch back to classic Outlook on Windows and Mac
If you are on the new Outlook and rely on Gmail, switching back to classic Outlook is worth considering until Microsoft adds broader support for this feature.
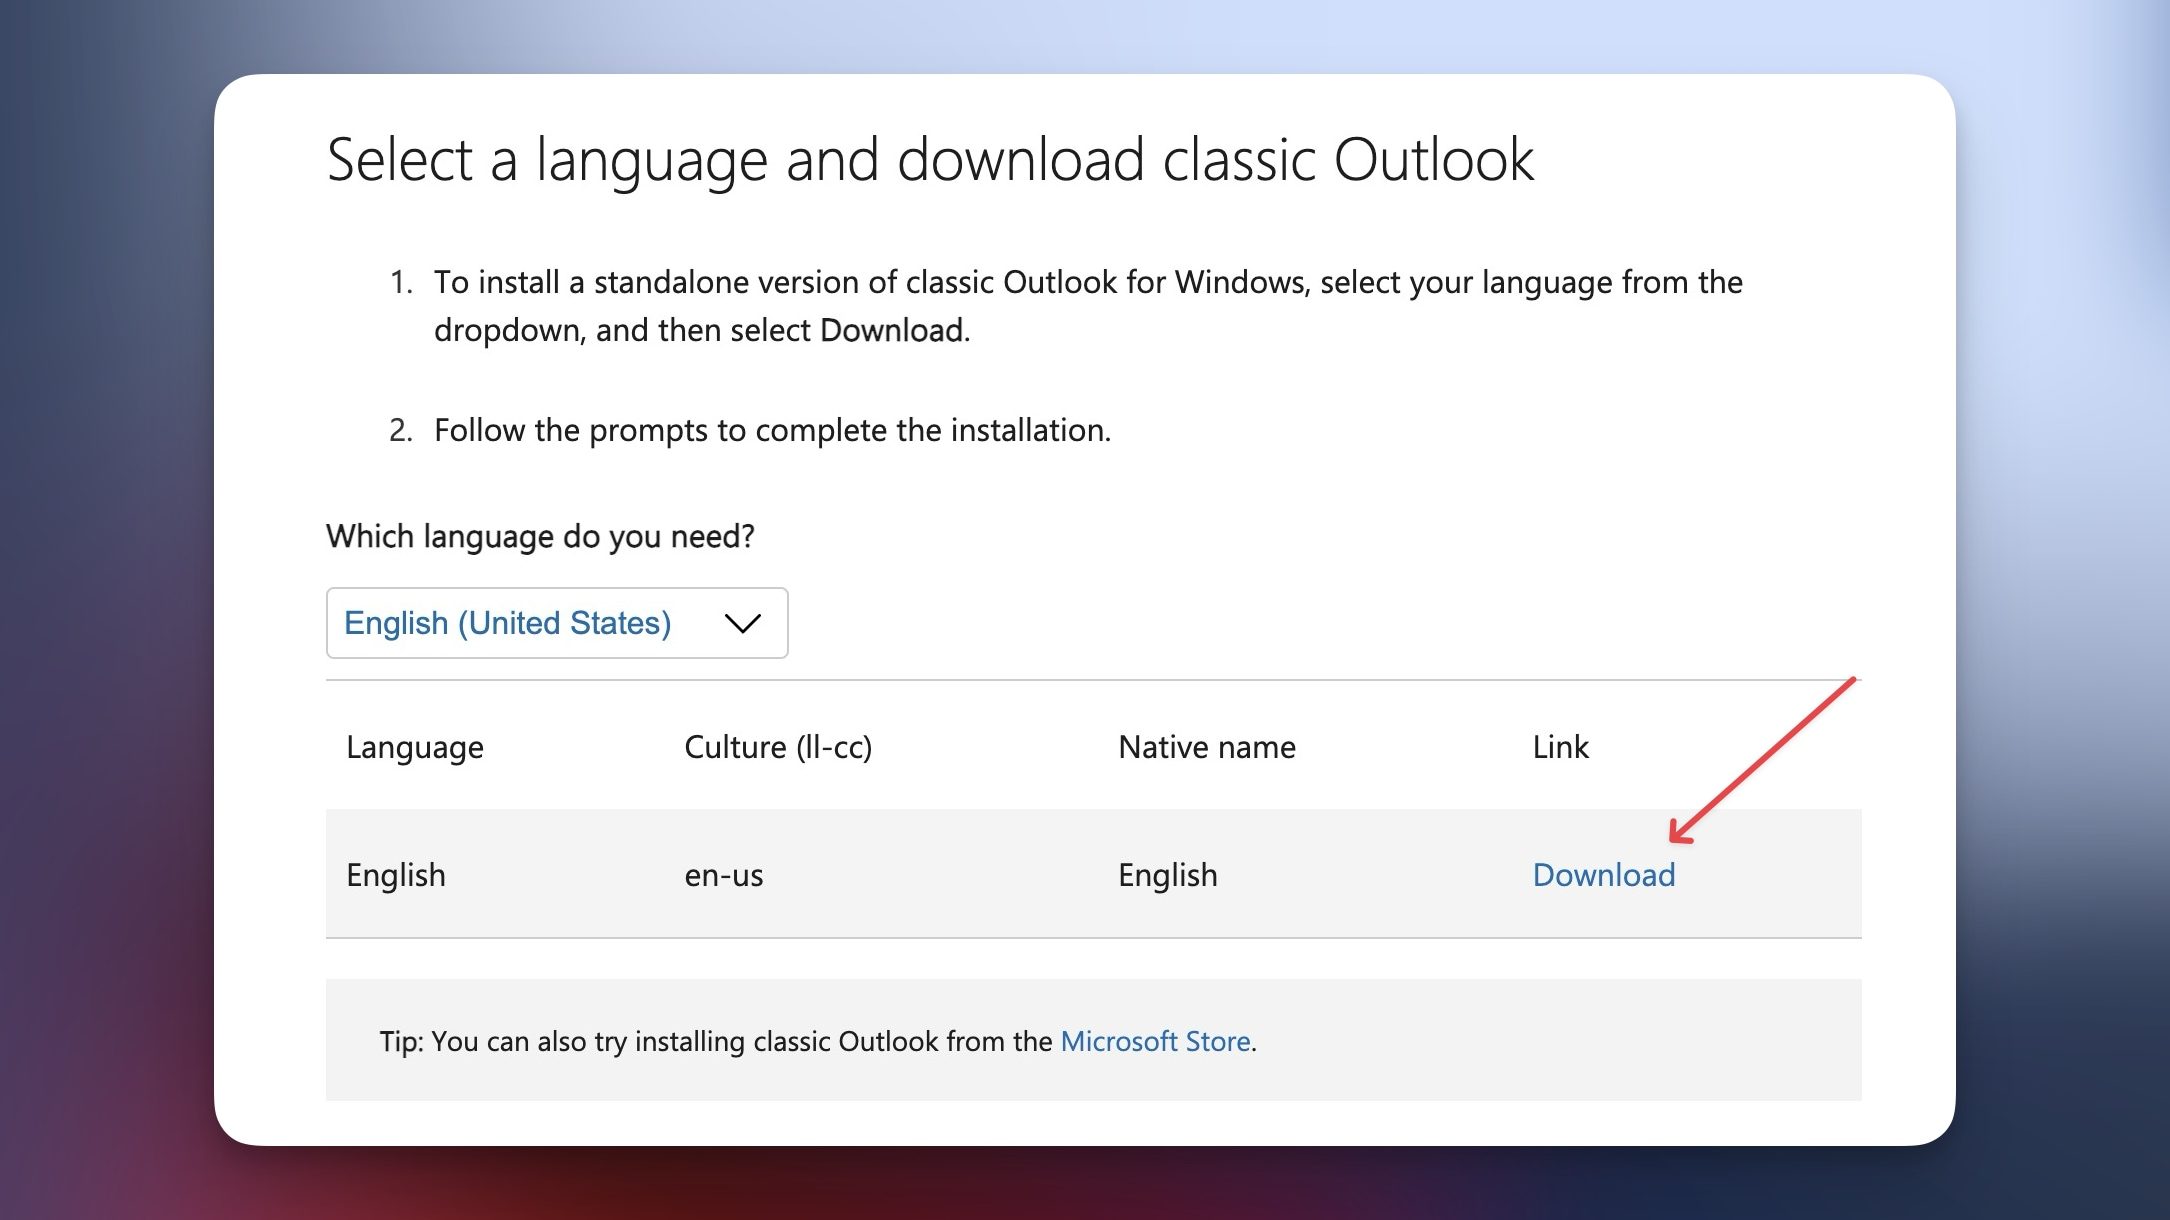
Step 1: To install or reinstall classic Outlook on your Windows PC, head over to the classic Outlook download page and click the Download button. Once downloaded, install it like any other Windows program.
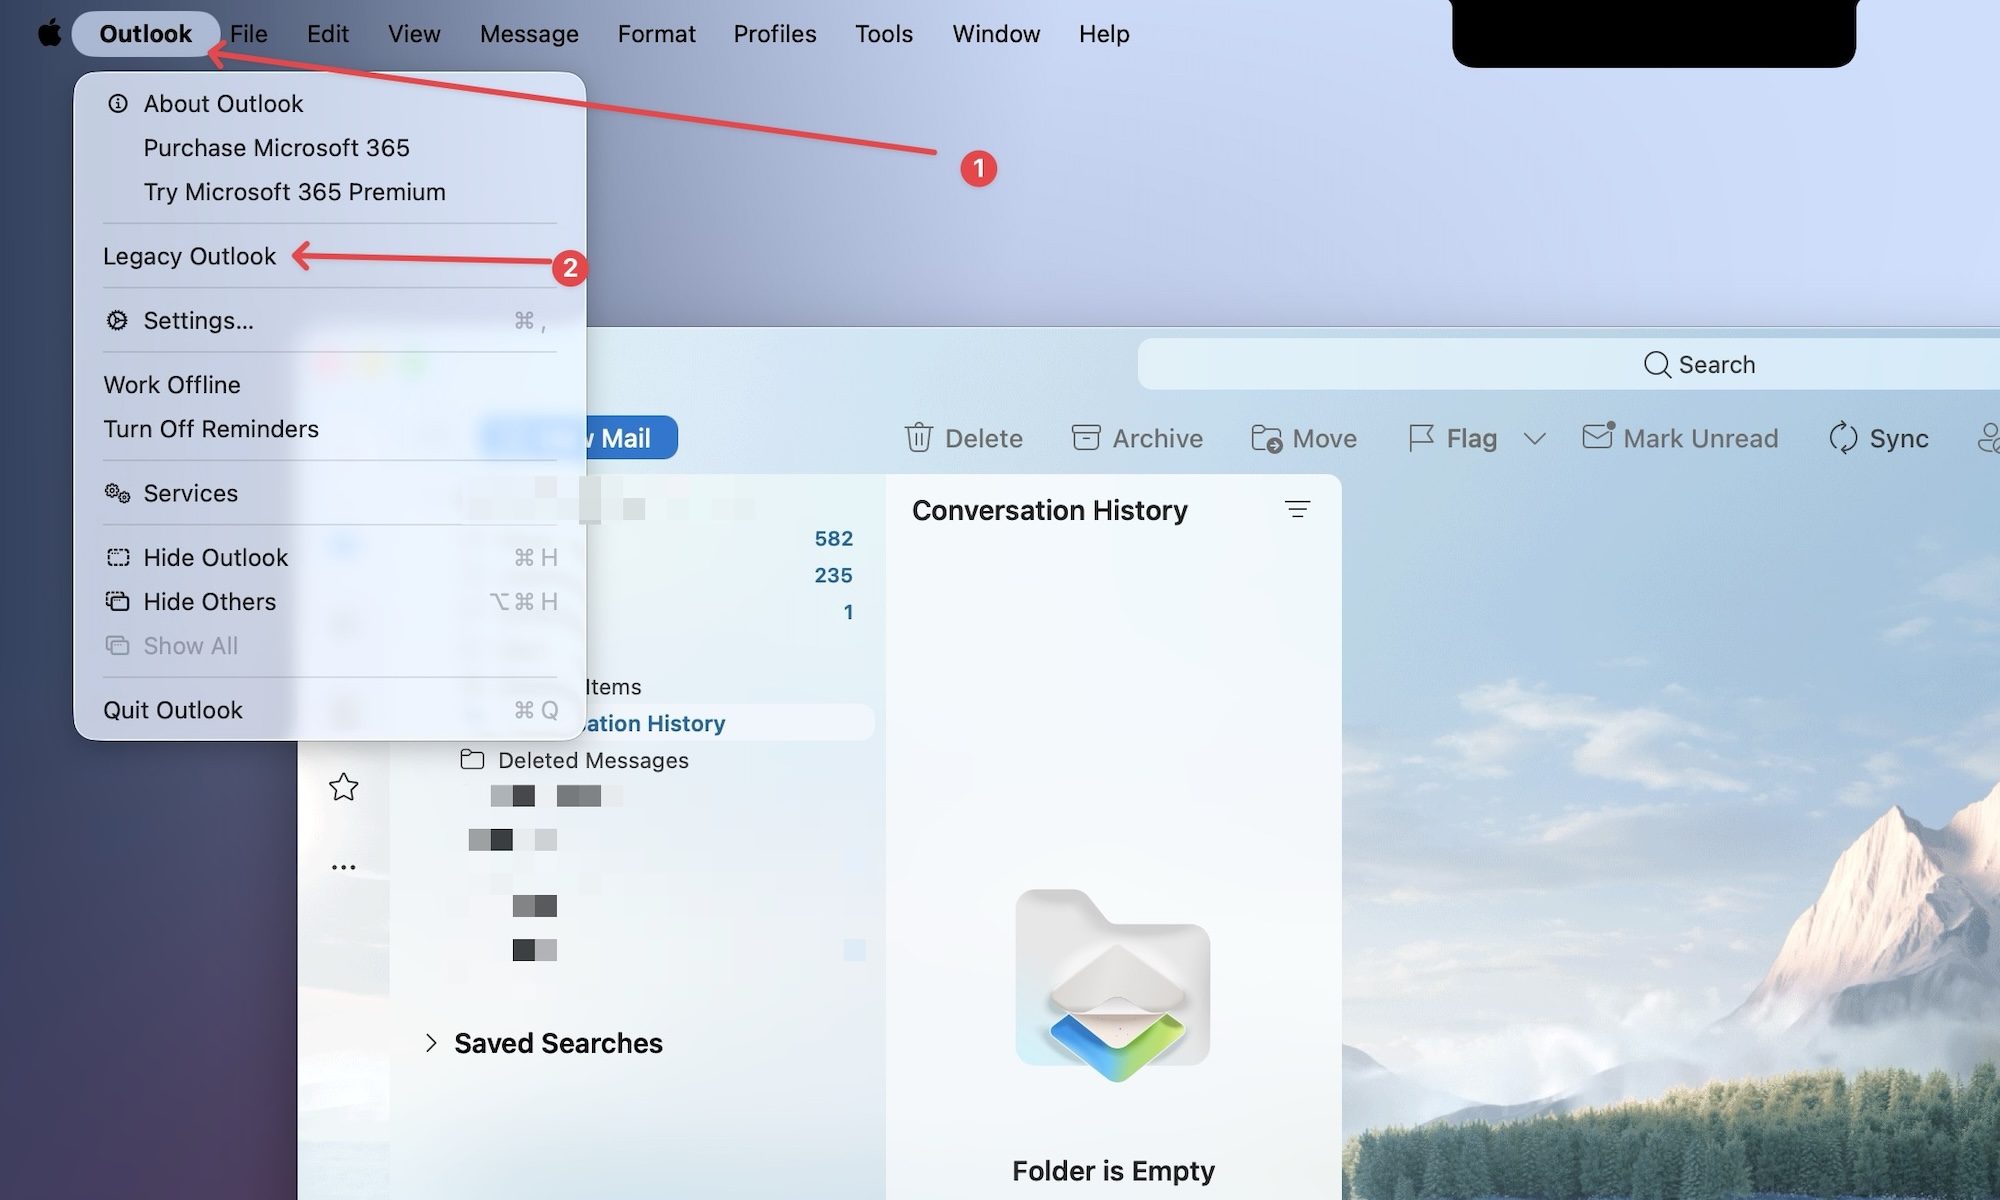
Step 2: On Macs, you don’t need to reinstall classic Outlook. Simply launch the Outlook app on your Mac, click on the Outlook menu in the Menu Bar, and select the Legacy Outlook option.
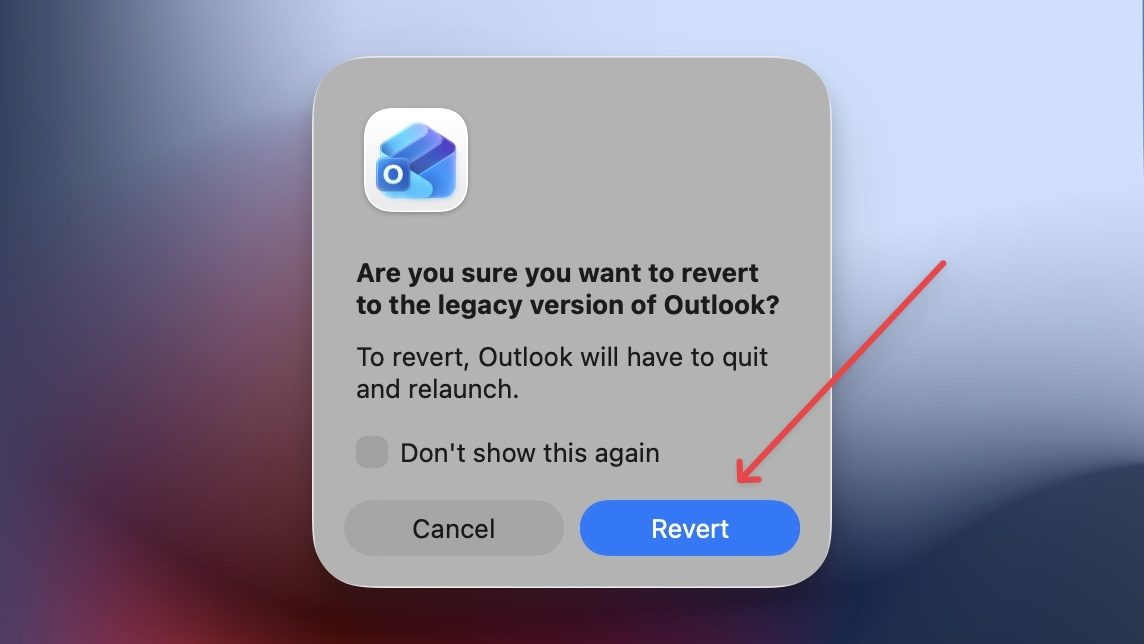
Step 3: Click on the Revert option in the confirmation pop-up, and your Outlook will revert to the legacy version.
Schedule an email using using the Classic Outlook app
Step 1: Open the Classic Outlook app and click New email or reply to an existing message.
Step 2: Compose your email, add the recipient, and enter the subject line as normal.
Step 3: Go to the “Options” tab in the message window and select “Delay delivery” in the ribbon.

Step 4: In the “Properties” box that opens, go down to the “Delivery options” section. Check the box for “Do not deliver before” and choose the date and time to send the email.

Step 5: Click the close button to exit Properties. Finally, click the Send button to send the message later.
Can I change the status of a scheduled email?
If you change your mind and need to send a scheduled email right away, it’s easy to undo. Head to your Drafts folder in Outlook, where all your scheduled emails are stored.

Open the email, and you will see a Cancel Send button in the top-right corner. Click it, and the email will go back to draft mode. From there, you can either send it immediately or reschedule it for a different time.
Schedule email in Outlook like a pro!
Email scheduling is a habit you should build in your daily work life. Whether you are sending emails outside office hours or to someone in a different time zone, scheduling emails ensures your email lands in someone’s inbox at the right time and is not buried under a pile of messages.
That should send you on your way (pun intended)! If you’ve sent an email by mistake, you can always recall an email in Outlook and try again. And if you’re struggling with spam emails, we can help you put a stop to it. Happy emailing!