Microsoft Outlook has a powerful calendar that offers a lot of features and functionaltiy to anyone looking to beter organise their home and work life. But if you want to keep other people updated with your comings and goings, then sharing your calendar in Outlook is a great way to do that.
Here's how to do it, whether you're using the Outlook web version or the local application.
How to share your Outlook Calendar on Windows
If you use Microsoft Outlook for Windows, then it's quite easy to share a calendar. Here are the steps.
Step 1: Open Outlook. Click on the Calendar icon in the upper-left. Click Share calendar from the menu. You'll be presented with a list of calendars that can be shared – not every calendar you have configured in Outlook will be available.
Click on the calendar you want to share.

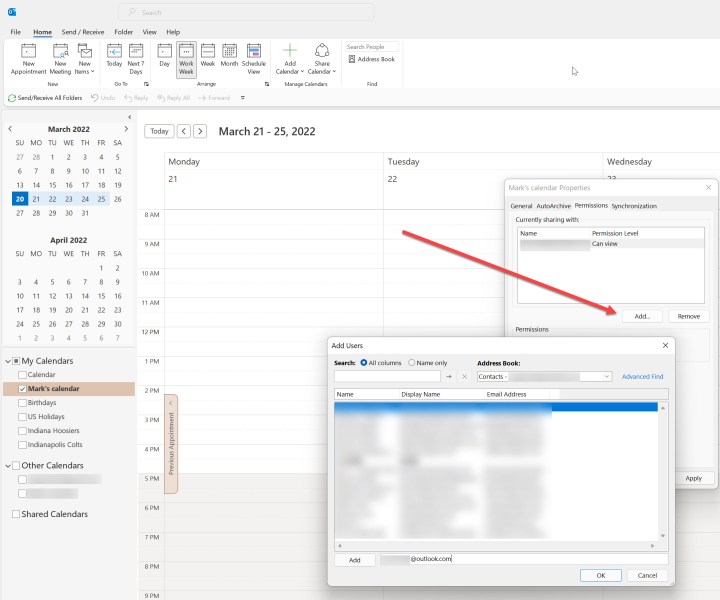
Step 2: You'll be presented with the Permissions section of the calendar Properties dialog box. Click the Add... button.
In the dialog that opens, you'll have access to your contact list to easily select a user to share with, or you can type an email address into the Add box. Select or add as many users as you'd like. Click on a contact and then the Add button to add a user from your contacts. This will add the user(s) with the default view permissions.
When you're done, click the OK button.
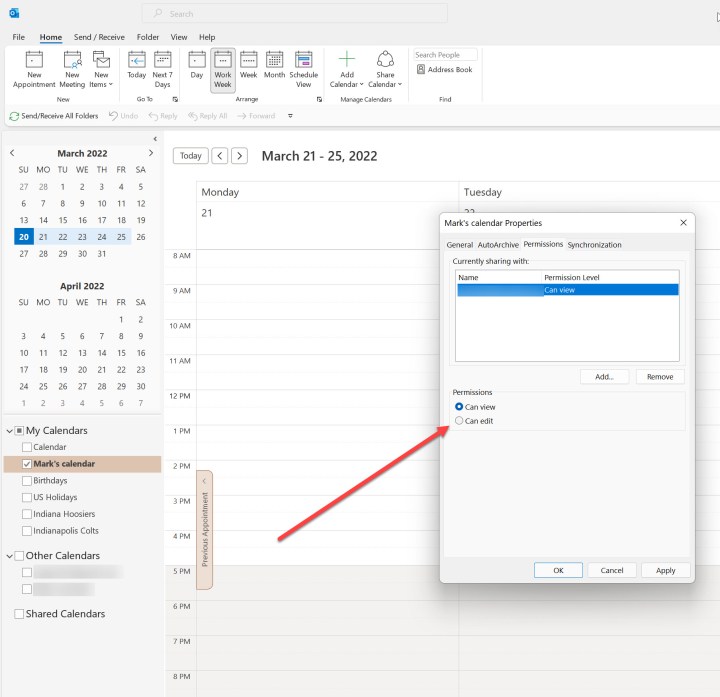
Step 3: In your list of users, you'll see the permissions options. Here, we see Can view and Can edit. Select each user and then choose your desired level of permissions for each.
When you're done, click the Apply button and then the OK button. This will send an email to each user, who can then accept or reject the calendar sharing invite.
How to share your Outlook calendar on the website
You can also use the Outlook web site to share your Outlook calendar. Here's how.
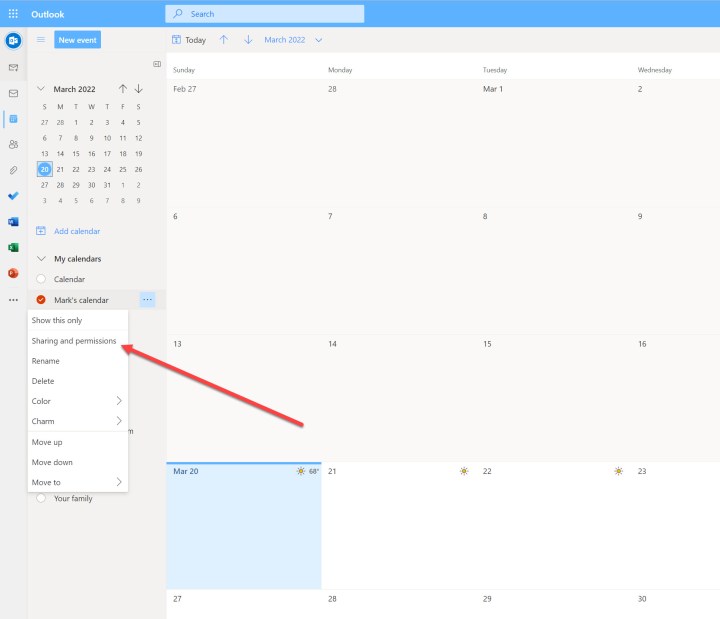
Step 1: Go to your Outlook account on the web, located at Outlook.live.com. If you've not already signed in, do so.
Select the Calendar icon on the left. Select the calendar you wish to share and right-click on it. If it can be shared, you'll have a Sharing and permissions option. Select it.
Step 2: In the dialog that pops up, type an email address into the box. As you start typing, options might populate that you can select. Either complete the email address or select from the list.
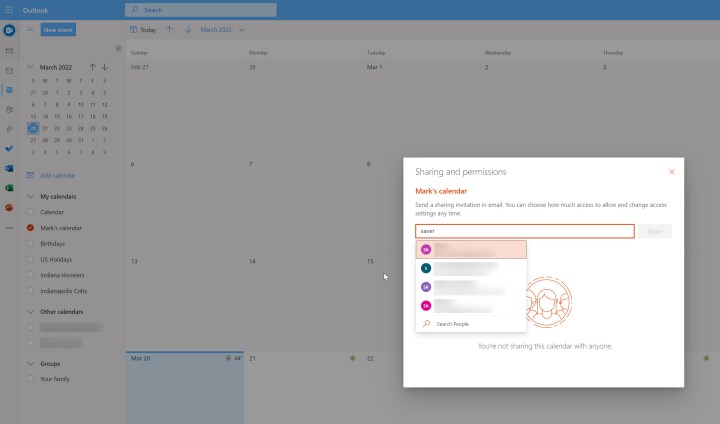
Step 3: When you've added the user, you'll have the option to set permissions. The options are Can view all details or Can edit. Select accordingly, and then click Share.
The user will populate and then you can add another user. Continue adding users until you've added everyone.

How to share your Outlook calendar on Android
You can share your Outlook calendar within the Android app, too. Select the Calendar icon in the top-left of the app, then select the gear icon. Select Add People and add the people you want to share the calendar with. Then adjust their permissions, and confirm you want to share it.
You can adjust who you share the calendar with later by repeating these steps and adjusting the list of people accordingly.
How to share your Outlook calendar on iPhone
You can share your Outlook calendar within the iPhone app, too. Select the Calendar icon, then select the gear icon. Select Add People and add the people you want to share the calendar with. Then adjust their permissions, and confirm that you want to go ahead with the sharing.
You can adjust who you share the calendar with later by repeating these steps and adjusting the list of people accordingly.