
Getting a brand-new MacBook Pro can be an exciting thing, but before you dive right in, there are a few settings that you should change first. These can help tweak your Mac to perfection, making it work the way you want it to instead of forcing you to adapt to its will.
Whether that means changing how Dark Mode works, customizing the way Siri sounds, or adjusting how you use your MacBook Pro’s pre-loaded gestures, there’s a host of customization available to you in MacOS. Let’s take a look at the most important settings you can change when you get a new MacBook Pro.
How to turn off auto brightness
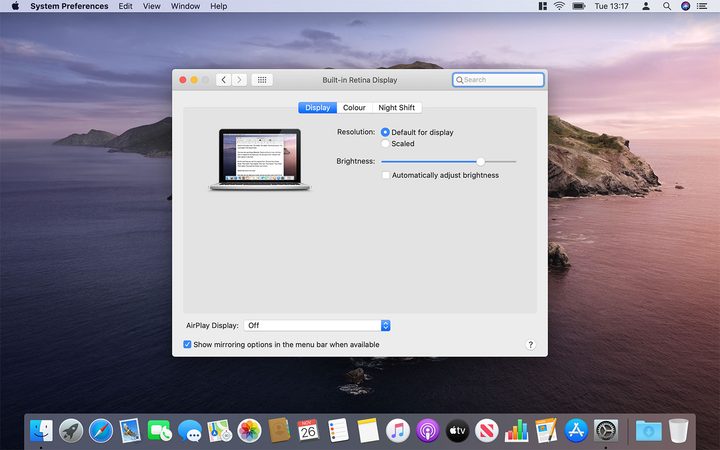
Your MacBook Pro has an in-built ambient light sensor fitted into the bezel of the screen. This detects the amount of light where you are and adjusts the display brightness accordingly. If you’re working in a dark room, it’ll lower the brightness to avoid searing your eyes, for example.
This works well, but there may be times when you want the brightness to remain the same no matter where you are. That’s particularly true if you’re editing photos and need a consistent brightness level for accuracy. Here’s how to disable auto brightness.
Step 1: Open System Preferences. This can be done by clicking the Apple logo in the top-left corner, then System Preferences, or by clicking the icon in the Dock. It looks like a gray set of cogs.
Step 2: In System Preferences, click Displays.
Step 3: Under the Brightness slider, untick the box reading Automatically adjust brightness.
Step 4: If your Mac supports True Tone, you can disable this too. This automatically adjusts your display’s colors to make them look consistent in different ambient lighting conditions. If you want to turn it off, untick the box labelled True Tone underneath the Automatically adjust brightness checkbox. (If you don’t see this option then your Mac doesn’t support True Tone.)
How to adjust Dark Mode
Dark Mode in MacOS makes your Mac’s display a lot easier on the eyes, especially when you’re using it at night. Although it was introduced in MacOS Mojave, in MacOS Catalina onwards you can allow your Mac to automatically enable Dark Mode based on the time of day.
Step 1: Open System Preferences from the Apple logo in the top-left corner or from your Dock.
Step 2: Click General.
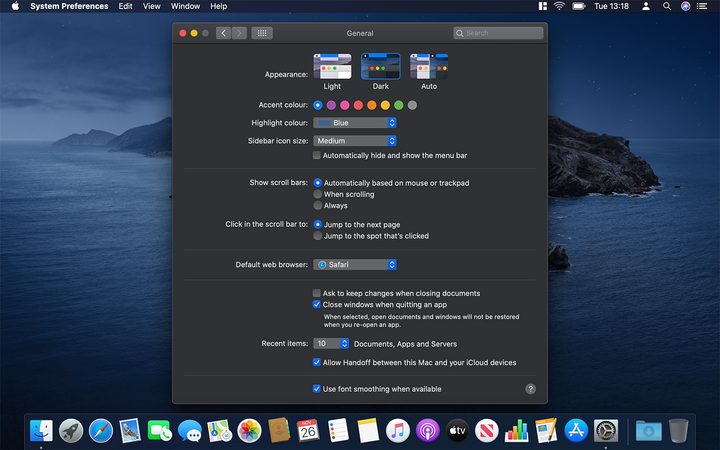
Step 3: At the top of the General menu are three options under the Appearance heading: Light, Dark and Auto. Clicking one of these will change the MacOS color scheme, including its wallpaper, menu bar, window colors, and more.
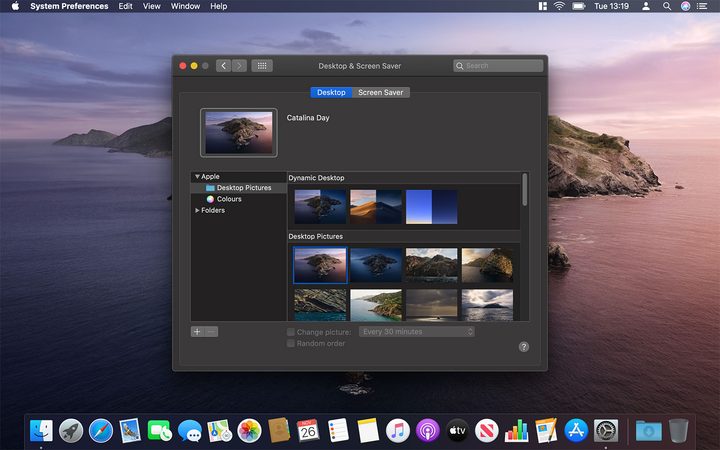
Step 4: Even though Dark Mode automatically changes your wallpaper, you can still set it manually and keep the Dark or Light color scheme elsewhere. To do this, go to the System Preferences home page and click Desktop & Screen Saver, then choose a wallpaper.
How to change notification settings
Sometimes, notifications on your Mac can be a real distraction. Thankfully, MacOS gives you a lot of control over them on a system-wide or app-by-app basis.
Step 1: Open System Preferences in the usual way.
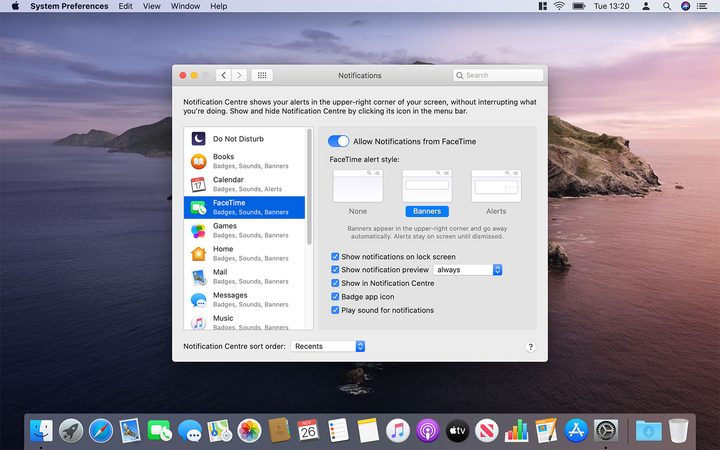
Step 2: Click Notifications.
Step 3: In the left-hand column, choose an app whose settings you want to change.
Step 4: Here, you can choose to disable notifications entirely by clicking the Allow Notifications from [app name] dial.
Step 5: App and system notifications often appear as a banner in the top-right corner of your screen. The Banner style just displays notification info; the Alert style, on the other hand, gives you action options. For instance, a notification from Reminders in the Alert style will let you mark it as completed or snooze it. You can also disable banners while allowing notifications elsewhere (such as on your lock screen).
Step 6: Further adjustments can be made using the checkboxes at the bottom of the window. Here, you can show or hide notifications on the lock screen, decide whether to show notification previews and when, and whether to show notifications in the Notification Center. You can also hide the red circle on an app icon showing how many notifications that app has, and decide whether alerts should play a sound.
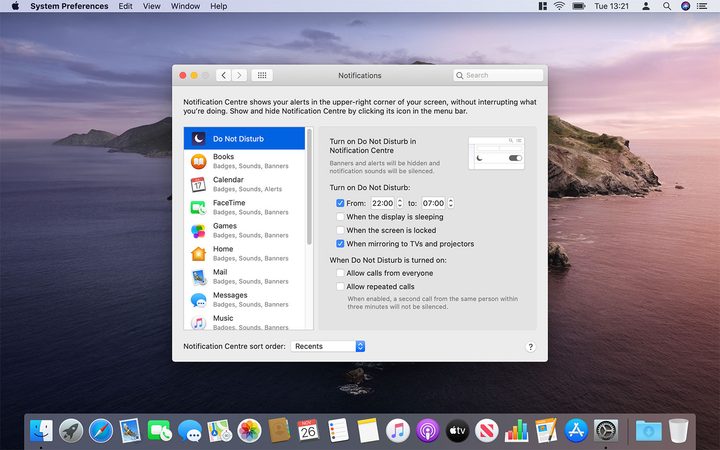
Step 7: Finally, you can turn on Do Not Disturb at the top of the left-hand column and adjust its settings. This will mute all notifications for the period you choose; you can choose to allow certain exceptions if you like.
How to turn off Siri on your Mac

These days, the Siri assistant is an important part of using an Apple device, so making sure it’s set up correctly for you is important. Here’s how to do it.
Step 1: Open System Preferences, then click Siri. To let Siri respond to your requests, tick Enable Ask Siri (if this is disabled, Siri will still make suggestions in apps and learns how you use your Mac, you just won’t be able to ask it questions).
Step 2: There are a number of settings that can be changed to your liking. You can set a new keyboard shortcut, change Siri’s language and voice, and decide if Siri gives you voice feedback. You can also show or hide Siri in the menu bar.
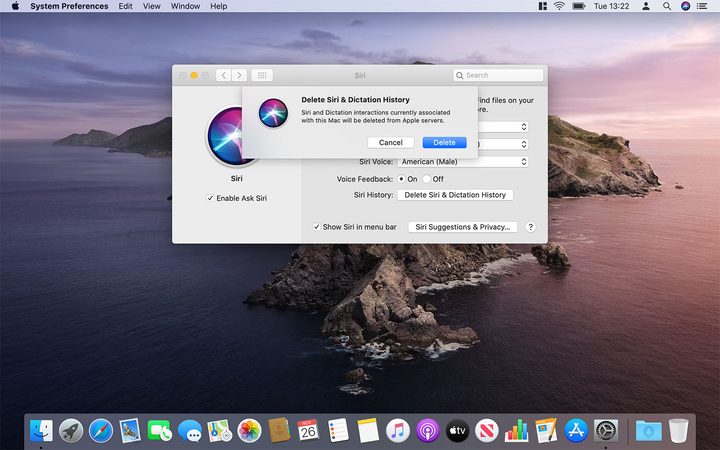
Step 3: If you want to clear out Siri’s recordings, just click Delete Siri & Dictation History to remove them from Apple’s servers. This includes transcripts of your requests and other data Siri uses (such as contact names, music you’ve asked it to play, etc). Although your Siri requests have a random identifier and are not associated with your Apple ID, you may still want to clear them out every now and then.
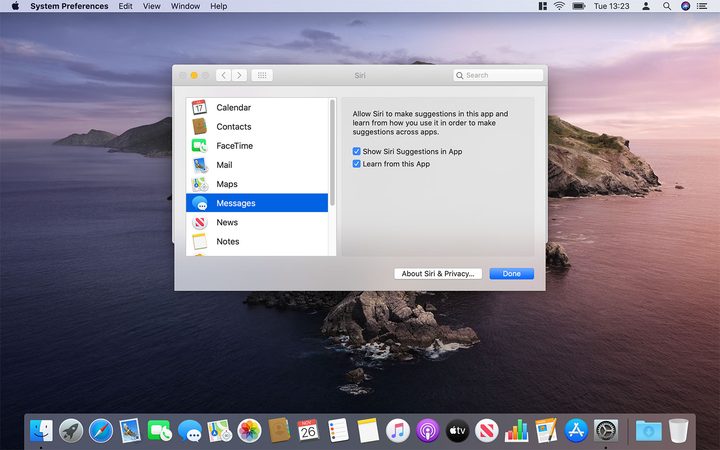
Step 4: You can choose whether individual apps can use Siri by clicking Siri Suggestions & Privacy. This determines whether these apps can use Siri’s machine learning nous to improve how they work, and whether you’ll get Siri Suggestions when using them.
How to change how the Dock works and looks
You don’t have to stick with the Dock’s default look and feel if it’s not to your liking. There are a number of settings you can change to personalize it.
Step 1: Open System Preferences, then click Dock.
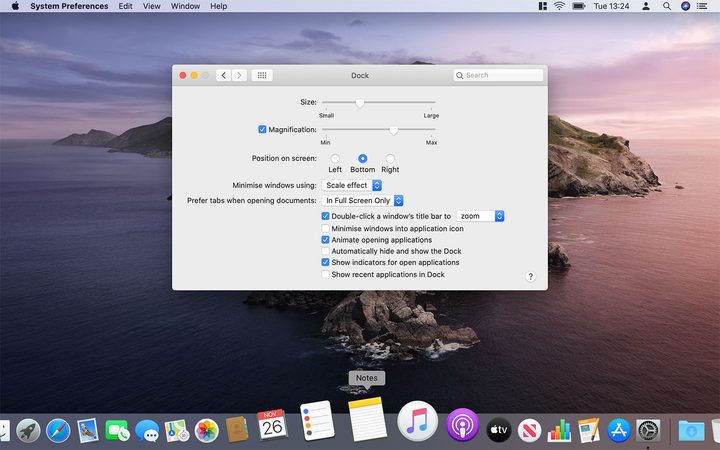
Step 2: Adjust the Dock size using the top slider. Ticking the Magnification checkbox means app icons will be enlarged when you mouse over them; you can change this magnification level using the slider.
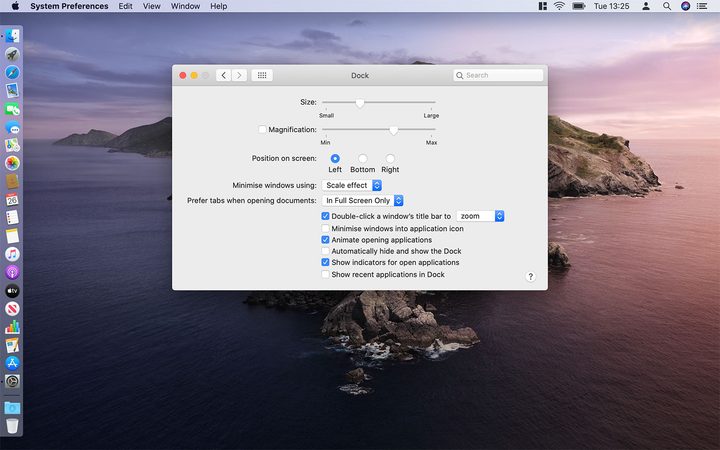
Step 3: By default, the Dock resides at the bottom of your screen. If you’d prefer it on the left or right, use the Position on screen section.
Step 4: There are a number of window-management options here too. You can change what happens when you double-click a window’s title bar, how windows should minimize to the Dock, and whether they should minimize into their app icon or as a separate window in the Dock.
Step 5: Finally, there are options to automatically hide the Dock and show it when you move your pointer to the bottom of the screen; to show or hide recent apps in the Dock; to indicate what apps are open with a dot under their Dock icon; and whether an app’s icon should ‘jump’ when you open it.
How to customize gestures on your Mac
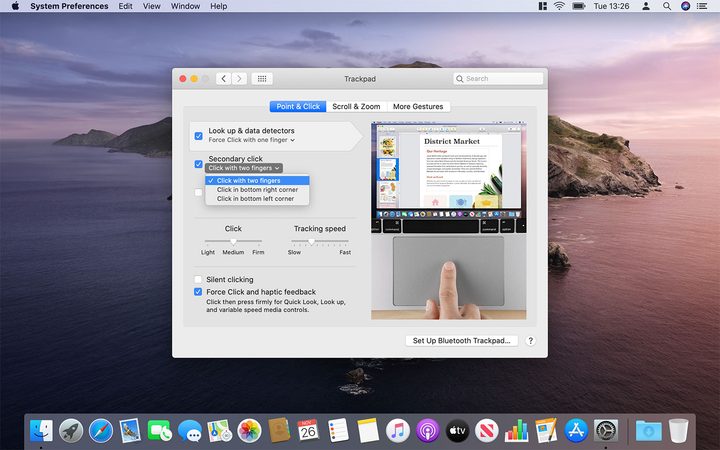
Macs are well known for their excellent gesture support, which enables you to quickly navigate your way around you Mac with a few swipes or taps. Here’s how to get even more out of your Mac’s gestures.
Step 1: Open System Preferences, then click Trackpad. Each gesture in this section has an accompanying video demonstrating how to use it.
Step 2: Here, you’ll see three tabs at the top of the System Preferences window: Point & Click, Scroll & Zoom, and More Gestures. Each section has a number of different gestures that can be customized, all with different options for how it they should be activated; pick the ones that feel most comfortable.
Step 3: Head to the Point & Click section. Here, you can adjust the trackpad sensitivity when you click, and how fast the pointer moves when you drag your finger. You can also enable silent clicking and, if your Mac supports it, Force Click and haptic feedback.
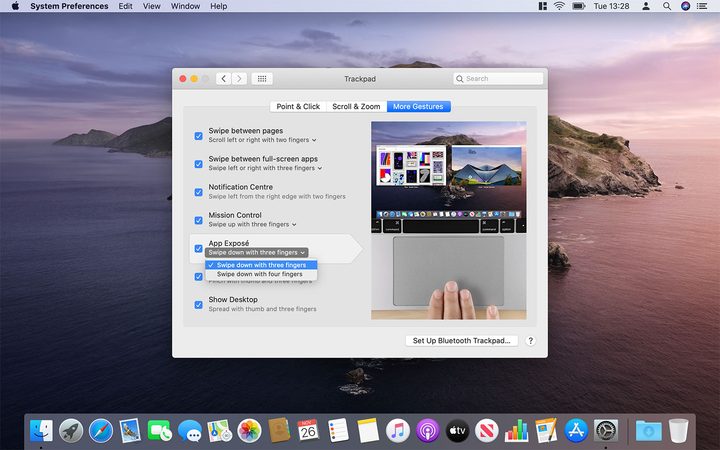
Step 4: By default, App Exposé is disabled on a Mac. This lets you quickly show all of an app’s open windows side-by-side in a top-down view, making it much easier to find a particular window. To enable it, go to the More Gestures tab and tick the App Exposé checkbox, then choose how to activate it.

Step 5: Sometimes, clicking and dragging a file all the way across your Mac’s screen can be tricky, especially if your MacBook doesn’t have one of the large post-2016 trackpads. Luckily, there’s a setting that can help. Open System Preferences and click Accessibility, then click Pointer Control in the left-hand column.
From here, click Trackpad Options, then tick the box next to Enable dragging and choose an option. Your choices are without drag lock, with drag lock and three finger drag; Apple explains what each one does on its website.


