I’ve built hundreds of PCs, but despite so much time with empty hardware boxes and a screwdriver, I still make boneheaded mistakes. Between rushing, ignoring critical steps in the build process, and simply not paying attention, I’ve ruined hundreds of dollars worth of hardware and wasted dozens of hours of time.
You don’t have to fall victim to the same mistakes I have. Here are some of the dumbest mistakes I’ve made when building PCs over the last few years and what you can do to avoid them.
Playing loose with compatibility
If you’ve built enough PCs, you think you know it all. You’ve seen enough cases and enough components to have a pretty good idea of what will fit where, and you don’t need to do the endless triple-checking of your build list to make sure everything will come together in the way you imagine it. That approach works pretty well for seasoned PC builders — until, well, it doesn’t.
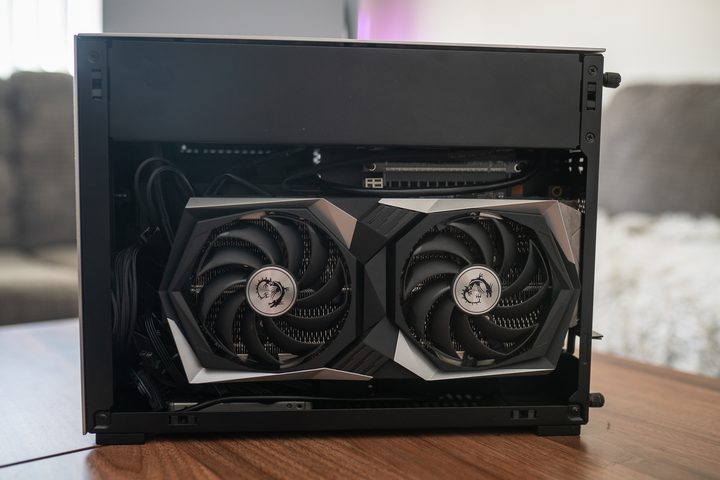
It’s happened to me several times. Not too long ago, I was putting together a console killer PC for an article I was working on inside the Lian Li A4-H20 PC case. I was using a dual-slot MSI RX 6600 XT Gaming X card for the build, which I assumed would fit. After all, this case supports up to a triple-slot card.
That wasn’t the case. The outer plastic shell of the cooler protruded out beyond the walls of the case, blocking me from putting the side panel back on. A quick check of the card’s thickness and the dimensions of the case would’ve solved this issue.
In another instance, I was putting together a build inside of the Hyte Y40 PC case. For this build, I was using a Corsair H115i CPU cooler, which is a 280mm all-in-one liquid cooler that I planned to install at the top of the case. I put everything together, including populating the other fan slots, and got ready to mount the CPU cooler.
Unfortunately, the Hyte Y40 doesn’t support a 280mm radiator at the top of the case. It supports up to a 360mm radiator, but it doesn’t have the extra width for a 280mm radiator. I was able to uninstall the fans on the side of the case and place the AIO there, but I could’ve saved 45 minutes and a headache by properly checking the spec sheet.
I was able to fix the problem in both situations, but I also have access to a backstock of old hardware to make up for any mistakes I make. Learn from me and double-check your compatibility even if you’ve done it a million times before.
Forcing the issue

I have a problem. I get too easily frustrated when building a PC, and I have a tendency to start forcing screws down when they clearly don’t want to budge. That’s a bad idea with any project involving screws, but it’s particularly damaging when you’re building a PC.
Thankfully, I don’t have any horror stories outside of stripped screws, but the problem could have easily been much worse. Although you need to put some pressure on certain screws in your case — particularly your fan screws and CPU cooler — pushing too hard can result in broken hardware or a PC that will slowly destroy itself.
Broken hardware comes up with motherboard screws. You need to securely mount your motherboard to your PC case, but you don’t need to tighten them with all your might. If you do, you might end up with a broken motherboard. I recall a time building inside the Be Quiet! Pure Base 900 where I almost did exactly that. The case doesn’t come with motherboard standoffs preinstalled, and I went to mount the motherboard with one missing. Thankfully, I caught the motherboard bending before I could do too much damage.
Elsewhere, forcing a screw down can cause a leak in your PC if you’re using a liquid cooler. Radiator screws are long and sometimes difficult to screw in due to a case’s design. This can force you to tighten the screw down at an angle, which could pierce your radiator and cause liquid to slowly seep out of your cooler.
You’ll have to put a bit of muscle in when building a PC, but it shouldn’t be anything unreasonable. If you feel like you’re forcing a screw down, that’s a sign that you need to take a step back and try a different approach before potentially ruining your hardware.
Forgetting BIOS updates
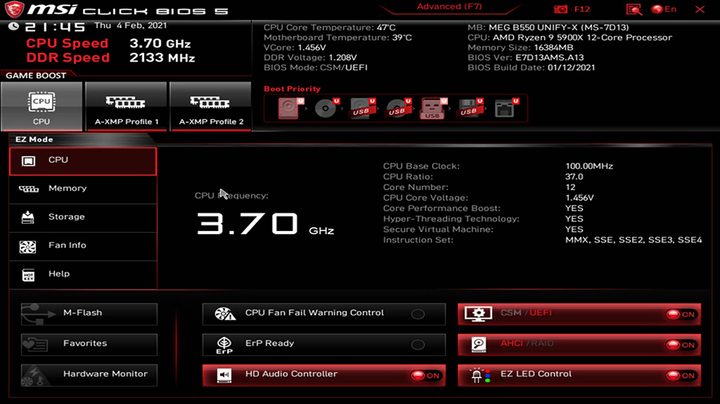
For decades, the traditional wisdom surrounding BIOS updates has been to only update if you specifically need to. BIOS updates are risky, and unless there’s a specific issue you’re fixing, there’s no reason to disturb the peace. Today, things are much different. Both Intel and AMD will release several generations of processors using the same motherboard design, and BIOS updates constantly add new features, support for more hardware, and updates that even improve performance.
In the past two years, I have installed a new AMD processor in an old AM4 motherboard five — yes, five — times without updating the BIOS beforehand. After realizing how royally I messed up, I then spent another hour, each time, disassembling the PC, installing an older AMD processor, flashing a new BIOS, and putting everything back together again.
I’ve only run into this problem when upgrading an older PC with a new supported processor, which is becoming increasingly common. There are other situations where this could pop up, however. New revisions to CPUs may need a specific BIOS version, and RAM kits may not be explicitly supported with whatever BIOS you pulled your motherboard out of the box with.
If you plan on making core hardware changes to your PC — mainly the CPU and RAM — it’s a good idea to update your motherboard’s BIOS beforehand. If nothing else, you’ll be able to rule out the BIOS if something isn’t working as expected, and you can be confident that you’re getting the best performance out of your hardware.
The CPU wiggle test

Let me tell you a story about how I ruined a $500 motherboard. I was installing the Ryzen 9 7950X inside a Gigabyte Aorus Master X670E motherboard. I lined up the golden triangle, carefully dropped the CPU into the socket, and clamped the bracket shut. After finishing up the rest of the build, mounting the cooler, and hooking up a display, I went to boot the PC for the first time. It didn’t work.
Hours of troubleshooting ensued before I finally decided to check the CPU. There were a few bent pins inside the CPU socket on the corner, and just like that, I had a dead $500 motherboard. I could’ve easily avoided the problem with the trusted wiggle test, too.
Whenever you install a new CPU, you should give it a little wiggle. This confirms that the CPU is aligned properly within the socket so that everything clamps together as it should when you close the mounting bracket. Newer CPUs have notches on them to line up the placement, in fact.
I didn’t do that. I must have misaligned the CPU slightly when I installed it, and in the process of closing the mounting bracket, I forced the CPU into place while bending some pins on the motherboard.
After installing your CPU, you want to ever so slightly nudge it on either side. Don’t apply pressure, but make sure it’s not moving inside the socket. The extra check can save you a lot of money and hassle if you find yourself in a similar situation.
Putting on the side panel before first boot
Call it superstition — that’s exactly what it is — but I’ve always had some kind of issue when booting up a new PC build after putting the side panel on. If you’re not familiar, there’s a bit of old PC-building folklore that your PC won’t boot if you put the side panel on after finishing the build. For me, confirmation bias has reared its ugly head on that old tale more times than I can count.
Of course, your side panel doesn’t change anything about if your PC will boot or not. Unless you have some serious thermal issue inside your case, the side panel won’t have any impact. But if there happens to be an issue where your PC won’t boot the first time, you have to take off the side panel again to get inside and fix the problem.
As long as I remember, I keep the side panel off on that first boot even if I know the PC is fine. It might be out of tradition, or it might be from the too many times I was burned by problems in the build. Regardless, leave the side panel off on that first boot just to make sure.