
One of the best things about exploring in Elden Ring is that you never know what you are about to stumble upon. You might wander across a hidden dungeon, get ambushed by a boss, or find a hidden NPC. There are so many things to discover that make exploration feel rewarding at every turn, but there’s one discovery you might find that will leave you completely stumped. At various locations in the Lands Between, you have probably found at least one Artist’s Shack, or perhaps one of the paintings in other obscure locations. At these specific locations are paintings of landscapes that you can collect, but you are not given any more information about why or what they’re for aside from the vague directions of trying to locate those spots.
These paintings are some of the most obscure puzzles in Elden Ring. Each of the seven paintings you can find depict a very specific spot somewhere out in the open world. If you manage to figure out where that place is and go there, you will get some very valuable rewards. By now, though, we all know just how incredibly vast the world of Elden Ring really is which can make pinpointing a single location feel impossible. If you’re feeling stumped by any or all of these painting puzzles, here’s where you need to go to solve them all in Elden Ring.
See more
- The best Dex weapons in Elden Ring
- The best Spirit Ashes in Elden Ring
- How to get every ending in Elden Ring
Homing Instinct painting location and solution
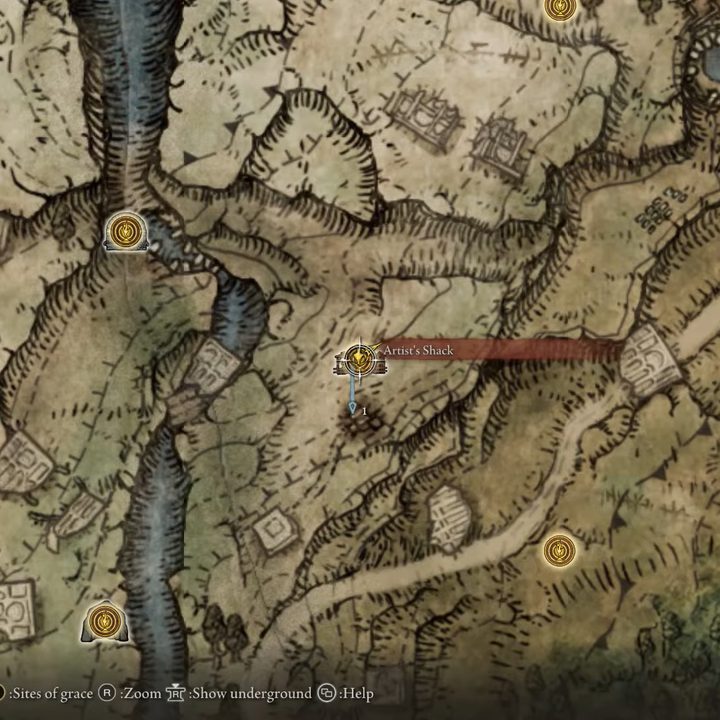
We’ll go in order of the paintings you should naturally come across as you progress through Elden Ring based on zone progression since, odds are, you missed most of them. The first one is located not too far off the main path in Limgrave in the first Artist’s Shack. To find it, go along the east side of the canyon north of Agheel lake. You’ll need to go a bit off the road to find the lonely shack with the painting inside. Interact with it to start the puzzle.
The location Homing Instinct is pointing to is way down to the southwest. Start by traveling to the Seaside Ruins Site of Grace and go a bit north towards the Cave of Knowledge. On the way, you will pass a graveyard you need to stop at. Find the big arch the painting showed and you’ll see the ghostly artist standing by the graves. Interact with it and you will get the Incantation Scarab Headpiece.
Prophecy painting location and solution
Your next painting is inside of Stormveil Castle, but only reachable after you beat the boss Margit, the Fell Omen. Before you get to Godrick the Grafted, you will hit the Lifteside Chamber Site of Grace. Go south into the big open courtyard with tons of enemies. On the right-hand side is a doorway leading into a chapel or library area with the painting standing out among the other furnishings. Collect it to begin the Prophecy puzzle.
The location you need to find is quite far off from here, all the way down south on the Weeping Peninsula. Fast travel over to the Church of Pilgrimage and go straight north to the cliffside. Near the very tip, you will spot the apparition chilling out in a chair overlooking the view. Interact with them and pick up your reward, which this time is the Warhawk Ashes.
Resurrection painting location and solution
Once you’ve gotten through, or around, Stormveil Castle and into Liurnia of the Lakes, we need to find the next Artist’s Shack. This one is along the eastern landmass, which you can travel to via the Liurnia Highway North Site of Grace. Ride along, going just a bit past the Carian Study Hall, and you will find the shack not too far from a Leyndell Knight. Head inside to get the Resurrection painting.
The spot you need to track down is also in Liurnia, specifically in Caria Manor. This location is way up on the northeast side of the zone in the Three Sisters area. The closest Site of Grace is the Behind Caria Manor location and also requires you to have gone through the manor and beaten the boss, Royal Knight Loretta, so make sure you have done or are prepared to do that. After the battle, go through the path to the east into a graveyard and find the ghost facing the direction of the Academy or Raya Lucaria. This one will give you the Juvenile Scholar Attire and a Larval Tear.
Redmane painting location and solution
Not only is this painting one of the hardest to find, but the solution is also likely to stump even the most observant explorers in Elden Ring, and even get you killed a couple of times if you’re not careful. The painting is in Caelid at the Sellia, Town of Sorcery. Go to the Sellia Under-Stair Site of Grace and go up the stairs, hang a right, and examine the rubble to the left, or east. This painting is tucked, somehow unharmed, under a still-standing stone archway. Sneak over to it and begin the Redmane puzzle.
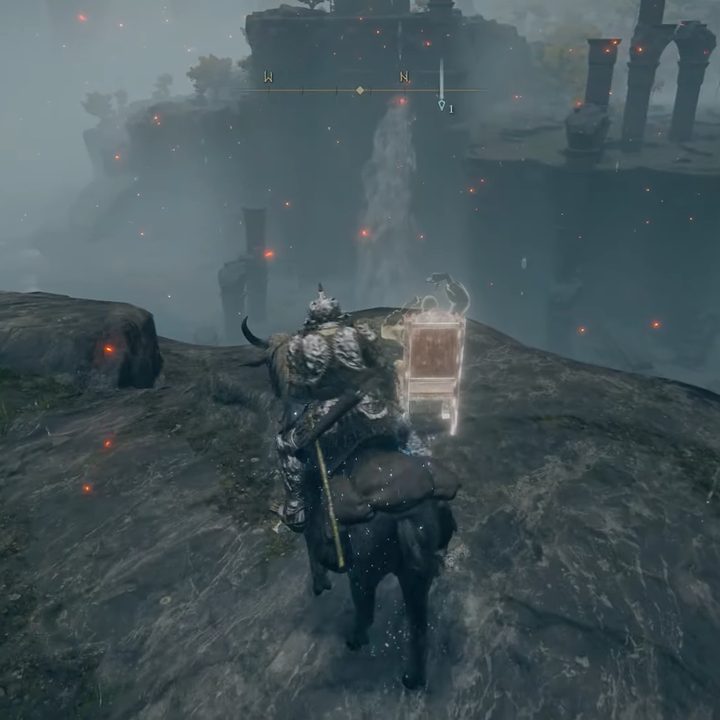
To reach the ghost of this painter, you will need to get your platforming shoes on. First off, go to the Dragonbarrow Fork Site of Grace, — a dangerous area to reach thanks to all the, you know, dragons. From this checkpoint, go east to the Minor Erdree to the north of Fort Faroth. Along the cliff near the tree are a bunch of giant broken pots. Follow along the cliff until you spot a root jutting out from the cliff. There’s a series of these you need to very carefully fall down, which is best done on foot for precision rather than on Torrent. If that isn’t bad enough, once you make it down to solid ground, there will be a giant waiting for you. Either take it out very carefully or sneak past it to the ghost of the painter hanging out at the edge of the cliff looking towards Redmane Castle in the distance. It will give you the Rain of Arrows Ash of War.
Flightless Bird painting location and solution
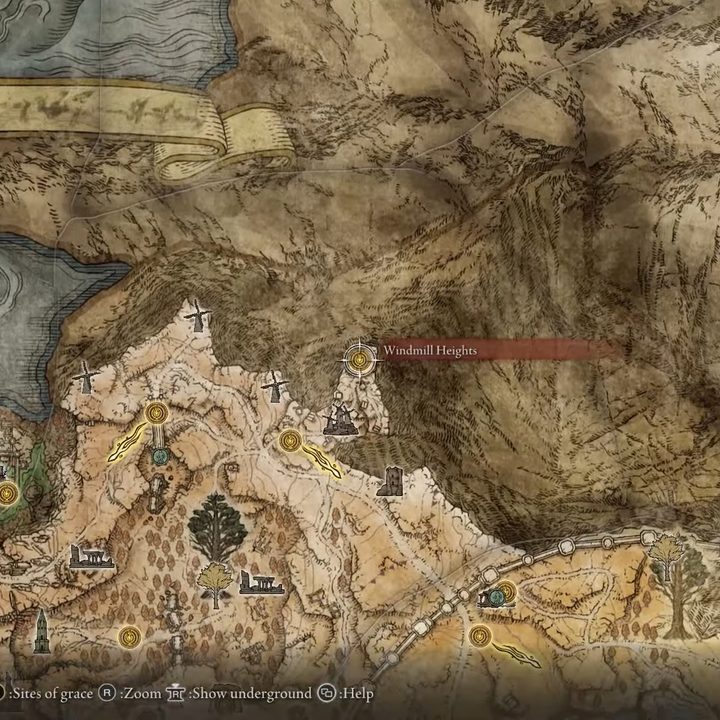
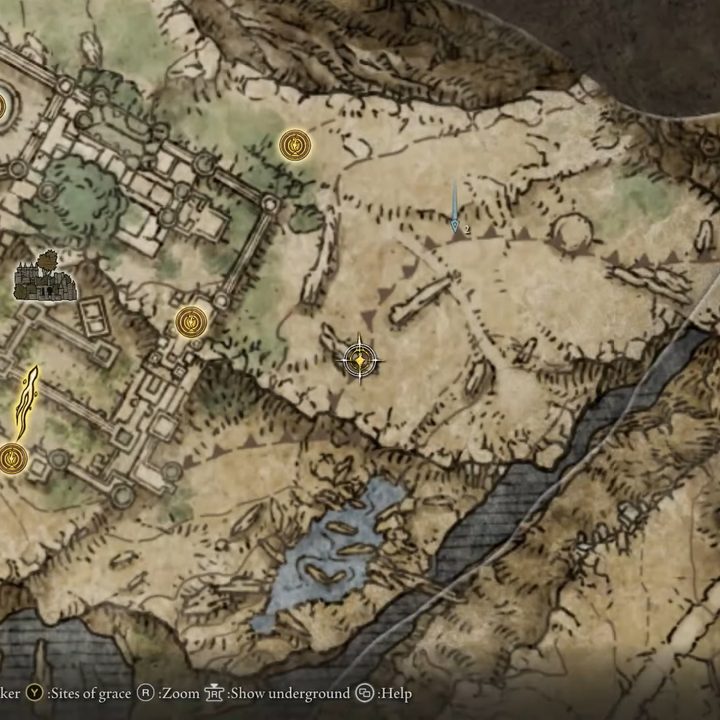
A much easier one after last time, the Flightless Bird painting is inside Leyndell, Royal Capital. Teleport over to the Fortified Manor First Floor Site of Grace and the painting is in the same room. This is an easily overlooked Site of Grace, so if you didn’t catch it the first time, you can find it by starting at the West Capital Rampart Site of Grace and taking the alley to the north. Once through, take a doorway on your left and down. Simply follow the path through and you will hit this Site of Grace and painting all at once.
This painting will take you out of the capital and to the Windmill Heights Site of Grace, which is at the far north end of Windmill Village, itself north of Leyndell, Royal Capital. If this is your first time visiting this somewhat off-the-beaten-path area, a Godskin Apostle will spawn right where the Site of Grace is, so you will have that to contend with. Once defeated, walk through the oddly peaceful, though quite unsettling, town to the south cliffside behind the houses. The ghost will have set up his chair here, and interacting with it will give you the Fire’s Deadly Sin Incantation.
Champion’s Song painting location and solution
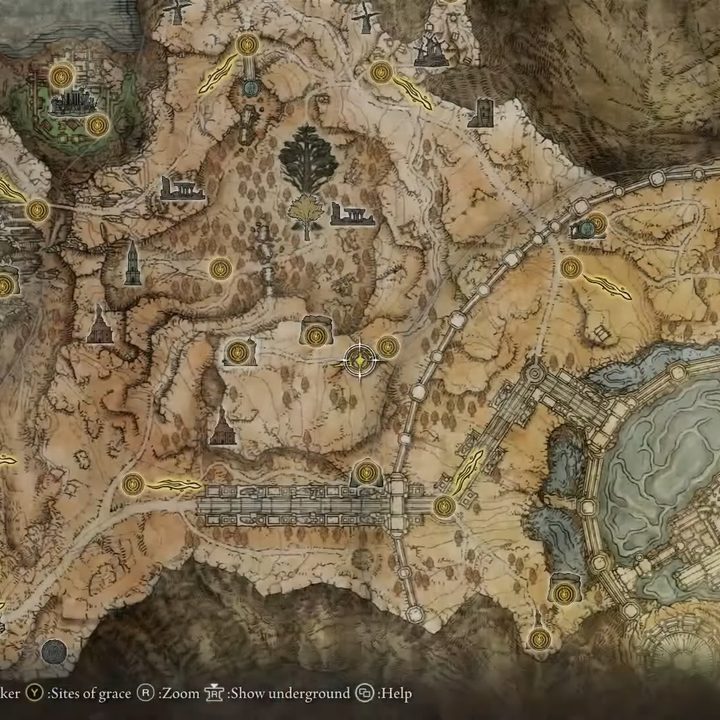
After rising up to the Altus Plateau, you will need to reach the tricky optional mini-dungeon called The Shaded Castle. You will need to take the long way to reach this area, down through the valley and under the bridge since there’s no way down if you stick to the higher routes of the area. Once you make it, hit The Shaded Castle Ramparts Site of Grace on the southeast side of the castle first, and then begin going northeast. You will find a collapsing wall and a path downward along a fallen pillar to the poisoned courtyard, but don’t go down. Instead, to the east, you will see a wooden walkway leading to some stairs. Take them up and they will guide you right to this magnificent Champion’s Song painting.
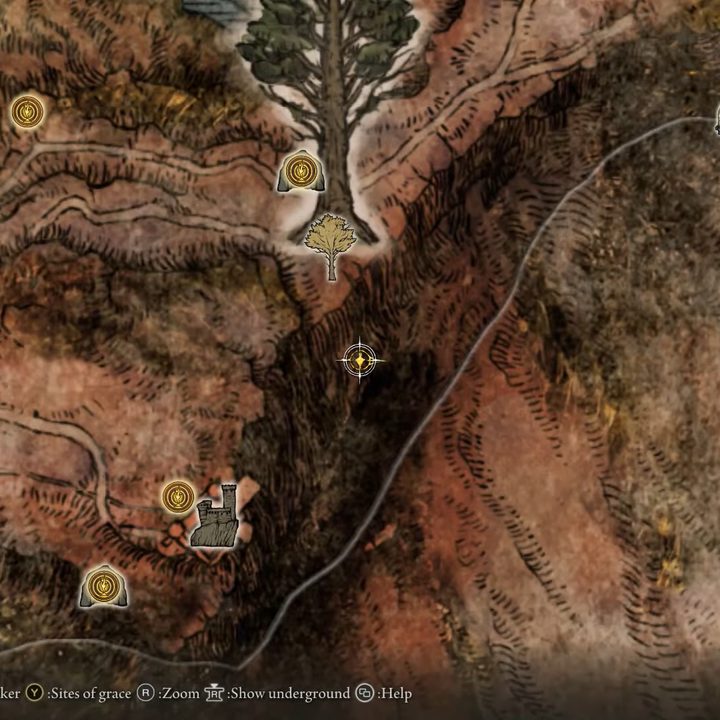
This spectral painter is still in the Altus Plateau. Travel to the Rampartside Path Site of Grace and begin traveling east until you hit a lightning storm striking the ground. From this point, climb up the cliff to where you either fought or will soon fight Ancient Dragon Lansseax just beside the Sainted Hero’s Grave location. On the northwest point of the cliff, you can finally find the late painter and receive the Harp Bow from it.
Sorcerer painting location and solution
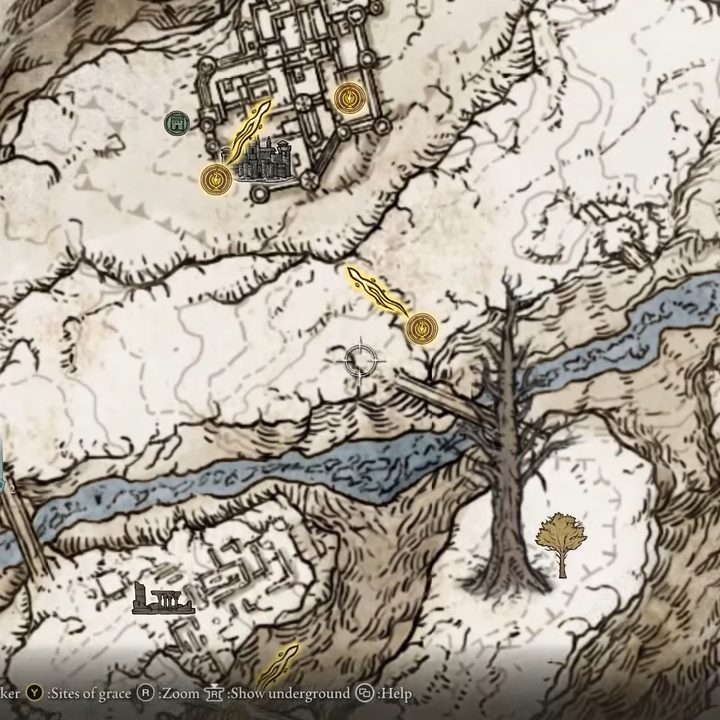
The final painting puzzle in Elden Ring is locked off until you can enter the Mountaintops of the Giants. Once you’ve entered this snowy zone, explore forwards until you get to the Castle Sol Main Gate Site of Grace. From here, enter the castle and take the first left between the defenses, either fighting the two giant lions or running past them for dear life, and take the next right up some stairs. Look for the room a little further on to the left that’s full of slug enemies. Head inside and climb the ladder up and onto the roof, follow the path around. Move fast here to avoid the teleporting enemies and massive ballista taking shots at you with exploding bolts. You will eventually hit another ladder after crossing a bridge that will take you back down and into a safe room with the Sorcerer painting inside.
This painter is out on a bridge south of Castle Sol. Head to the Freezing Lake Site of Grace and go north, up the cliff to the upper level, and ride west until you see the massive stone bridge crossing the gorge over the frozen river near the Shack of the Lofty location on the map. Ride past the first bridge you hit, though, and take the second one right at the edge of the cliff. Ride about halfway across and take a break with the painter enjoying the chilly view of the winter wonderland. Interact with your final ghost and obtain the Greathood helmet.


