
Your healing flask is your most precious item in Elden Ring. From the start of your journey all the way to the end, this one jug of juice will always be equipped (unless you’re doing some crazy challenge run or something). It isn’t your only source of healing in the game but is certainly intended to be the one you rely on when in a pinch. When you begin the game, your little flask is in a somewhat sorry state. It can only hold a few charges and heals a decent amount, but has way more potential if you can figure out how to upgrade it.
From the first Site of Grace you rest at, you will see the option to upgrade your flask in two different ways: By making each sip heal more, or by increasing the number of sips you can hold before running dry. Both are great, but having more chances to heal is perhaps better since battles can be long, drawn-out affairs, especially against bosses, so having more opportunities to heal can keep you in the game longer and potentially squeeze out a win. Getting more charges requires a special item called Golden Seeds, which you can only get in very special spots. Here’s where you can collect them all in Elden Ring.
See more
- What are Evergaols in Elden Ring?
- Fastest way to farm runes in Elden Ring
- How to duplicate Remembrances in Elden Ring
How Golden Seeds work
Golden Seeds are the materials you use to upgrade your healing flask to hold more charges. At first, you will only need one to upgrade it, but eventually, that number increases as you level it up. When you need more than one, you will have to remember to go into the menu at a Site of Grace to upgrade it later, or else you’ll just be sitting on the materials until you manually go in and upgrade your flask.
Golden Seeds almost always appear under glowing Erdtree Saplings that tend to stick out as small, golden trees, while a few can be picked up in some less obvious ways. So far, over 30 have been found, so there’s more than enough to give you plenty of charges. We will go through in the rough order you can find them zone by zone. Unfortunately, there is no way to track which ones you have found or not, so if you want them all and can’t remember which you’ve already gotten, you may end up backtracking.
Limgrave Golden Seeds
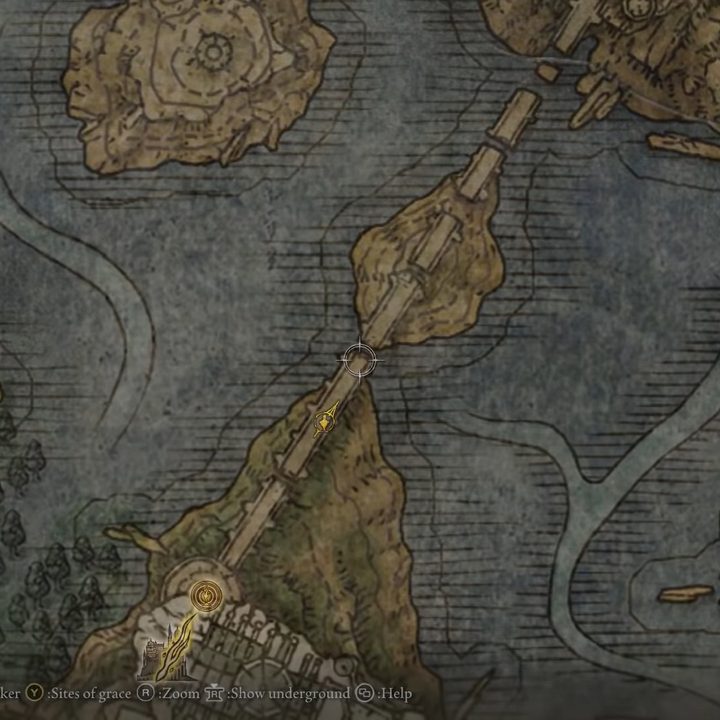
The first Golden Seed you will probably find naturally. The glowing tree is right off the road next to Stormgate Canyon, on the way to the entrance to Stormvail Castle. If you’re on the main path, just keep an eye on the east side as you go next to a small shack.
Moving over to the east side of the map, through Mistwood, you will eventually reach a little keep called Fort Haight. If you attempt to fight your way to the front gate, you will see a small clearing with the glowing sapling right in the center.
On the southern section of the map, across the bridge in the Weeping Peninsula, rest at the Castle Morne Site of Grace near the center of the map. Approaching the castle itself, this tree is overlooking the field leading up to it, with a giant archer guarding it.
One Golden Seed is waiting inside Stormvail Castle itself. Once you make it to the final boss or have bested him already, the path leading to his arena from the lift curves around before a staircase with two soldiers and a giant. Opposite them is the next seed.
An additional seed is given to you by Roderika. Without spoiling too much, as long as you talk to her enough when you meet her so she appears at the Roundtable Hold, you can talk to her again there to get a free seed just like that.
The last one in Limgrave is the toughest. This seed is a reward for beating an optional boss called the Ulcerated Tree Spirit in the Fringfolk Hero’s Grave. This optional dungeon is just a short drop to the northeast from the tutorial area but is extremely high level. Overcome this boss and the seed is yours.
Liurnia of the Lake Golden Seeds
For better or worse, there are fewer Golden Seeds to track down in the second major area of the game.
First up we need to go to the Academy Gate Town, which is almost right in the middle of this zone. It will mark itself on your map as you trudge your way through the swamp, and once you reach the Site of Grace of the same name, you will be able to see the golden sapling growing among the sinking buildings.
The main dungeon of Liurnia of the Lakes is the Academy of Raya Lucaria, which has one Golden Seed to snag while inside. After beating the boss halfway through the dungeon and unlocking the Debate Hall Site of Grace, you will go back outside. Go straight across and to the right to pass under a large bridge into a more overgrown area. A few weak zombies will be resting near the glowing tree.
The next stop is just outside an optional fort called Caria Manor, way up north. When you approach this area, just progress through until you hit the Upper Level Site of Grace and you will spot it on the ground just beside the cliff.
Now even further north, you will need to get wet traveling up the river until you hit The Ravine Site of Grace. Once the ravine opens up a bit, you can find the Erdtree sapling near some big stone egg … things.
Even though this dungeon is called the Stormveil Castle Depths, it is technically in the Liurnia of the Lake area. You will need to travel to the deepest point in Stormveil castle by making a treacherous drop to the dungeon below where another Ulcerated Tree Spirit needs to be slain.
Caelid Golden Seeds
Off to the east from Limgrave rather than north is the red-tinted Caelid region, which has precious few Golden Seeds living in the barren wasteland.
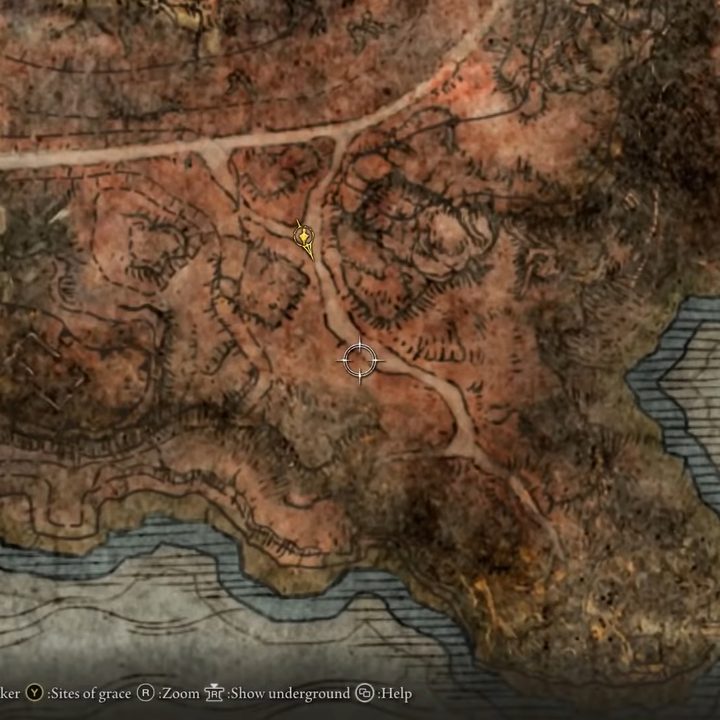
The first is down southwest toward Castle Redmane, but before you approach the bridge, the road will go right past this sapling. It isn’t as easy to spot in the bright environment, but since it is just a few feet off the path you shouldn’t miss it.
Now heading to the far north of this area, from the Farum Greatbridge Site of Grace, just follow the path north toward the Bestial Sanctum and the tree will once again be just off the path.
While up north, either from the last Site of Grace or from Lenne’s Rise, go straight south to find the War-Dead Catacombs. Navigate the dungeon and beat the Putrid Tree Spirit within to get another Golden Seed.
Almost right smack in the middle of Caelid is Sellia, Town of Sorcery. At the north end of the town, right next to the Sellia Backstreets Site of Grace, this tree is at the top of some stairs in a small circular plaza.
Siofria River Golden Seeds
We need to take a short detour to grab one Golden Seed from the underground Siofria River area. This one is a bit tricky to reach thanks to tons of tough enemies, but if you can get to the Hallowhorn Grounds and rest at the Worshippers’ Woods Site of Grace, you can make a run for this item. Head north along the path, and stick to the left side. Eventually, there will be a small bridge you can cross that will take you right to this little sapling and seed.
Atlus Plateau Golden Seeds
Once you enter the Atlus Plateau, go straight north until you hit the Erdtree-Gazing Hill, which is a fitting name for the place where you can easily snatch this Golden Seed.
From the entrance once again, follow the main path going northeast, veering north when it first splits and hitting the Atlus Highway Junction Site of Grace. Another small Erdtree is just a bit further up the road from here.
In the Hermit Village, go north to the Primeval Sorcerer Azur Grace and carefully make your way down the ravine where you can spot the tree glowing below.
Once you make it through this lava zone and out of Volcano Manor, take the Road of Iniquity Site of Grace and run as far northwest as the map allows. The tree will be out in the open.
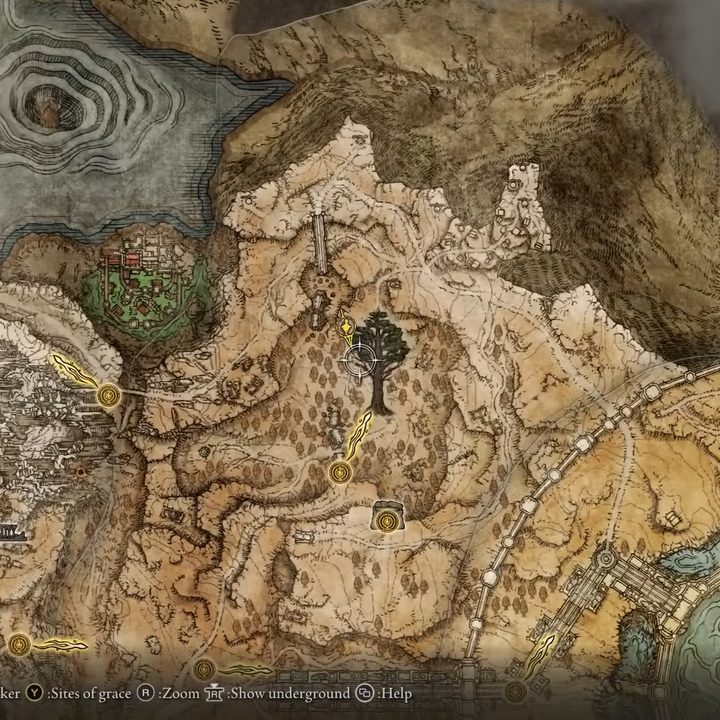
Now at the real Miner Erdtree, just west of the Woodfolk Ruins, this sapling didn’t fall too far from the tree. Just head north from the larger tree and locate the younger sibling.
From the previous seed, head directly east toward the Highway Lookout Tower. The next sapling is just across the road from said tower.
The next one is another that drops from a boss. Go straight south from the Outer Wall Phantom Tree Site of Grace, or northwest from the Minor Erdtree Church, and take down this enemy for a shiny new seed.
From that same Site of Grace, proceed forward through the building until you hit a courtyard. There will be a big golden tree with two Golden Seeds under it in the center you can’t miss.
Our last pair are in Lyndell, Royal Capital. First up, go to the northmost corner of the main section of the city by going north from Avenue Balcony. Drop down into the lower area and find yet another Ulcerated Tree Spirit. By this point, you should know what to do for this seed.
Last up you will need to reach the West Capital Rampart. This will be right near another boss we won’t spoil, but right in that area, you can find a small sapling growing in a stone courtyard kind of behind the spiral staircase.
Mountaintops of the Giants Golden Seeds
This is a smaller zone, so we only have a couple of seeds left to collect.
The first is right at the start. Once you hit the Forbidden Lands Site of Grace, go forward down the only path you can and you will go straight past this glowing tree.
From here, find the Giant’s Peak Catacombs, which is due east from the Giant-Conquering Hero’s Grave Site of Grace. You know the drill: go inside, beat the Ulcerated Tree Spirit, and take their seed.
From either the Foot of the Forge or Giant’s Gravepost, head east and north or south respectively to the end of the area. Right in the middle is this next Golden Seed.
Our next Seed is out in the open as well, this time between the Consecrated Snowfield and Consecrated Snowfield Catacombs Sites of Grace. It is almost directly west of the catacombs, near some ruins in the snow.
Our last stop is at Ordina, Liturgical Town. There’s a river running around the outside of this town. Run along the western bank and you will spot the golden tree with this final seed waiting to be collected.


