
It might be the last thing you guess you need, but your nail designs in Forspoken will be a major factor in how your adventure goes. Frey’s nail design isn’t just for style here — they function as a very important accessory. You will want to constantly be assessing which nails best serve your current situation, but also synergize with your other pieces of gear, those being your cloak and necklace. You don’t want to break any of these nail designs, so check out our guide on where to find them all in Forspoken.
What nail designs do
Nail designs are the most abundant gear type in Forspoken, over cloaks and necklaces.. You will get them through a variety of tasks, such as defeating bosses and completing quests, as well as simply finding them in the world. Unlike the other types of gear, you can (and should) equip up to two types of nail designs at once to stack their effects.
All nail designs, what they do, and how to get them
| Name | What they do | How to get them |
|---|---|---|
| Bounce | Healing item effects boosted
All damage -5% |
Complete the Brome Guild in The Moulderings area of Avoalet |
| Slay | Support Magic deals more damage when Surge Magic is fully charged
Frey spell damage +5% |
Unlocked automatically during Chapter 3 of Forspoken |
| Lit | Attack magic deals more damage when Surge Magic is fully charged
All spell damage +2% |
Complete the Zakto Village in the Tanta’s Demesne area of Visoria |
| Clutch | Healing item effect boost when health is low
All spell damage +2% |
Complete the Reeve Village in The Blessed Plains area of Cipal |
| Jet | Support Magic recharges more quickly
Frey spell damage +5% |
Complete the Ruins of Sommay in the Golden Hills area of Avoalet |
| Blue Flash | Attack spells charge more quickly
All damage -5% |
Unlocked automatically during Chapter 3 of Forspoken |
| Beaucoup | Surge Magic recharge rate boosted based on the number of spells learned
All damage -5% |
Complete the Ruins of Alda in the Inner Visoria area of Visoria |
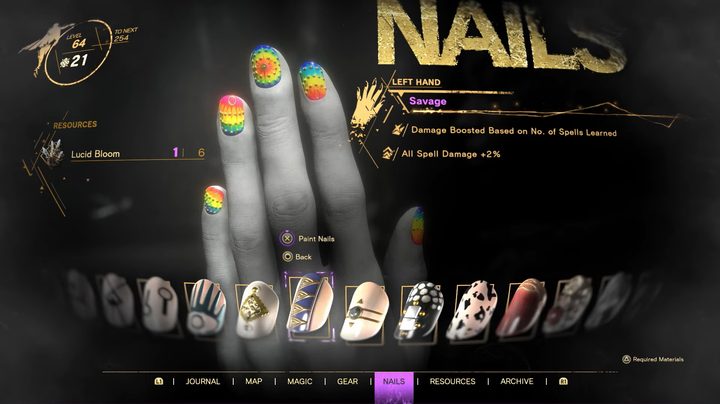
| Savage | Damage boosted based on the number of spells learned
All spell damage +2% |
Complete the Upril Village in the Visorian Isthmus area of Visoria |
| On Point | Top-level Attack Magic deals extra damage
Frey spell damage +5% |
Complete the Abandoned Merchant Convoy in The Sacred Peaks area of Cipal |
| Nightshade | Top-level Attack Magic can poison enemies
All damage -5% |
Complete the Ruins of Lepsi in the Fields of the Fallen area of Praenost |
| Ignite | Top-level Attack Magic can set enemies on fire
Sila spell damage +5% |
Complete the Ruins of Zelenina in The Path of Glory area of Praenost |
| III | Debuffs from Frey-specific spells last longer
Frey spell damage +5% |
Complete the Kloros Guild in the Middle Praenost area of Praenost |
| Passion | Damage boosted based on number of Sila-specific spells learned
Sila spell damage +5% |
Complete Fort Optima in the Mount Garrison area of Praenost |
| Frostbite | Top-Level Attack Magic can freeze enemies in place
Prav spell damage +5% |
Complete Fort Sestina in the Visorian Plateau area of Visoria |
| Heavy | Debuffs from Prav-specific spells last longer
Prav spell damage +5% |
Complete the Perle Village in the Samum Coast area of Avoalet |
| Honor | Damage boosted based on the number of Prav-specific spells learned
Prav spell damage +5% |
Defeat the Amphicynodon Abomination in the South Plateau area of Visoria |
| Dig Deep | Improved Surge Magic recharge rate
All damage -5% |
Complete Fort Wielki in The Guardians’ Way area of Praenost |
| Wired | Top-level Attack Magic can electrocute enemies
Olas spell damage +5% |
Complete the Biichu Village in The Blossomwoods area of Junoon |
| Wisdom | Damage boosted based on the number of Olas-specific spells learned
Olas spell damage +5% |
Complete Fort Laayak in the Physic Garden area of Junoon |
| Twisted | Debuffs from Sila-specific spells last longer
Sila spell damage +5% |
Complete the Ruins of Eskii in The Fountainfields area of Avoalet |
| Aftershock | Killer Blows generate a shockwave
All spell damage +2% |
Unlocked automatically during Chapter 5 of Forspoken |
| Tease | Debuffs from Olas-specific spells last longer
Olas spell damage +5% |
Complete the Ruins of Teharnaa in the Nearcoast Terrace area of Junoon |
| Hope | Damage boosted based on the number of Frey-specific spells learned
Frey spell damage +5% |
Complete Fort Chahiye in the Crosstide Coast area of Junoon |
| Escalate | Enables Killer Blows to be chained together
All spell damage +2% |
Complete the Ruins of Koshish in the Nowhere area of Junoon |
| Amped | More damage inflicted when more enemies are present
Frey spell damage +5% |
Complete the Ruins of Calme in The Untrodden Forest area of Avoalet |
| Flaunt | More damage inflicted when HP is high
All spell damage +2% |
Complete Fort Gabb in the Yonder Cape area of Visoria |
| Fatale | Enemies can be knocked to the ground more easily based on the number of spells learned
All spell damage +2% |
Defeat the Gigas Abomination in the Mount Garrison area of Praenost |
| Blessed | Improved critical hit rate
All spell damage +2% |
Complete the Chichek Village in The Water Garden area of Avoalet |
| Grit | More damage is inflicted when health is low
All spell damage +2% |
Complete the Plateau Hollow Cave in the Shepherd’s Meadow area of Visoria |
| Spectrum | Critical hit rate boosted based on the number of spells learned
All spell damage +2% |
Defeat the Deinosuchus Abomination in The Moulderings area of Avoalet |
| Trigger Happy | Support Magic recharges faster when Surge Magic is fully charged
All spell damage +2% |
PlayStation 5 Preorder Bonus |
| Overclock | Support Magic recharges faster when Surge Magic is fully charged
All spell damage +2% |
PC Preorder Bonus |
Best nail designs to wear
- Cipal: For an early game set, this buff to spell damage will help you get to grips with the game and power up faster.
- Lit: Not only does this set give you a flat buff to your attacks, but if you hold onto your Surge, you get even stronger.
- Fatale: This is a great scaling set since it gets easier to knock enemies down as you learn spells, plus it buffs all your spells from the start.
- Flaunt: As long as you can keep your HP up, which is easy when paired with the right cloaks and necklaces, you’ll be enjoying plenty of bonus damage.
How to change nail designs
Changing out your nail design is as simple as going into the Nails tab on your menu, selecting your currently equipped nails, and then cycling through all the ones you’ve unlocked and equipping whichever you choose.


