
How to start the Burning Shores DLC in Horizon Forbidden West

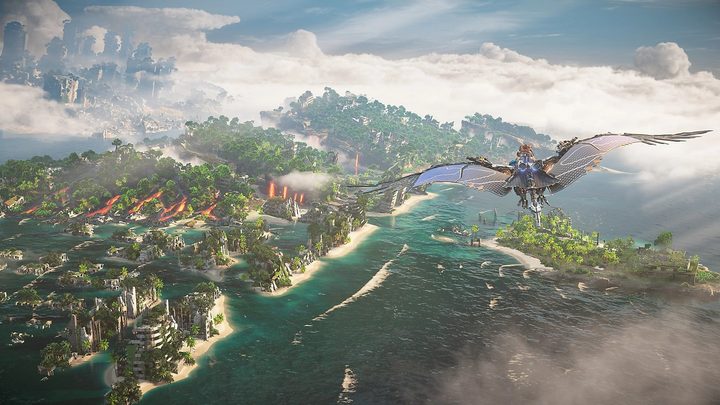
Aloy’s adventure wasn’t fully concluded at the end of Horizon Forbidden West, but you don’t have to wait for the third game to continue her journey. With the Burning Shores DLC, a brand new region is unlocked. This area is home to the Quen tribe and brings in a new character named Seyka to accompany Aloy on a new quest. Of course, there will also be tons of sidequests, new machines to hunt, and sights to see. If you’re interested in exploring this new and dangerous region, there are some requirements you should know about that could prevent you from jumping in as quickly as you think. Here’s everything you need to know about how to start the Burning Shores DLC in Horizon Forbidden West.

How to start the Burning Shores DLC

Aloy riding a machine in the sky over LA.
Image used with permission by copyright holder

The major requirement for accessing the new content (outside of purchasing it, of course) is that this takes place after the main campaign, unlike the DLC for the first game that could be accessed in the middle of the story. This means that you need to have gotten through all main story missions ending in “Singularity.” Your save must be at this point to access the DLC. If you finished the game and started a New Game + run, but haven’t gotten back up to that point, you won’t be able to start the DLC until you get there again. The final mission of the game has a recommended level of 35, while the first mission of Burning Shores is 38, so you may want to do some side activities beforehand if you are underleveled.

It is also important to note that this DLC is exclusive to the PlayStation 5 version of the game. If you own Horizon: Forbidden West on the PS4, you won’t be able to activate or play it on that console, unfortunately.

If you meet these requirements, upon starting up your save file with the DLC downloaded, Aloy will receive a call on her Focus from Sylens asking to meet him at Tilda’s mansion to begin the first quest of the DLC.

Editors' Recommendations

Jesse Lennox
Jesse Lennox loves writing, games, and complaining about not having time to write and play games. He knows the names of more…
Street Fighter 6: how to enroll with every master
The player confronts Ryu in Street Fighter 6 World Tour.

If you want to be the best, you need to learn from the best. Street Fighter 6 lets you put yourself into the action by creating your own custom character who learns the art of fighting from both the iconic world warriors and a host of newcomers while advancing through the World Tour mode. Each master you pledge yourself to will unlock their own unique moves to add to your list of possibilities when customizing your moveset. You might think meeting all the characters would happen naturally through the story, yet you can easily complete the entire mode without encountering most of the masters. Let us give you your first lesson by showing you how to enroll with every master in Street Fighter 6.
How to enroll with every master

Each of the main characters included at the launch of Street Fighter 6 is considered a master, which results in a total of 18 to find. Some you will come across naturally as you play World Tour mode, but most are either hidden or require you to complete certain optional objectives to find. Here's each master and how you can find them to learn their special moves.
Luke
You will automatically be enrolled with Luke when you begin World Tour mode in Street Fighter 6. You can find and train with him at any time in Metro City at the warehouse marked on your map.
Chin-Li
Chun-Lu is also impossible to miss as you go through the story. Once you get to Chapter 2-1, your objective will be to fund Chun-Li in the Chinatown area of the map. Once you find her there, you can go back to that spot to train with her at any time.
Marisa
Further on in the story, when you get to Chapter 3-3, your objective will now be able to travel using the World Map to get to Colosseo. Once you arrive, Marisa will be introduced automatically. Just speak with her again afterward to become her student.
Blanka
The big green beast Blanka can be missed, but only if you don't bother exploring. After you get to Chapter 6-1, Luke will unlock the Ranger's Hut location on the World Map. Not only will you be able to become Blanka's student, but you will also get the Blanka Chan outfit.
Dee Jay
Also available in Chapter 6-1, Dee Jay is found in Bather's Beach. After a battle (regardless of if you win or lose), you will be able to enroll with this master.
Lily
Lily is the first tricky master to enroll with. During Chapter 4-1, you need to complete a side mission called "The Spirit Guide" that you can pick up from an NPC in Chinatown named Ana. After completing the quest, Thunderfoot Settlement will be unlocked on the World Map. Go there, speak to a few NPCs, and Lily will arrive in a cutscene. Once it ends, speak to her to enroll as a student.
Cammy
Cammy also is locked behind a side mission that you can go on during Chapter 7-1. The one in question is called "Special Unit Del-?" in Metro City. Head down to the subway to grab the quest, complete it by clearing out the subway, and unlock access to the stadium area on the west side of the map. Once you take care of all the enemies downtown, you can go back to King Street via the World Map to find and battle Cammy.
Jamie
Jamie is slightly tricky to find. You need to be in Metro City during the night and go into the Chinatown alley. He will be in the middle of a fight, leading to his intro, after which you can climb up the nearby ladder and onto the roof to speak and train with him.
Ken
After a long break, Ken will be the next unmissable master. Once you get to Chapter 8-3, you will get the mission "The Elusive Former National Champ" that sends you to go find Ken at a construction site. After getting the appropriate headgear, you can head to the site and  be introduced to him.
E. Honda
Not long after you encounter Ken, E. Honda will show up in Chapter 8-4 during the "Big in Japan" mission. Simply head to the restaurant to meet up with the famous sumo star.
Ryu
Ryu can be found next by traveling to Genbu Temple. Just walk up and speak to him to begin training.
Kimberly
Also unmissable, Kimberly will be introduced during Chapter 8-7 during the "High Flying Man" mission. Once the mission is complete, she will be posted up on the roof above your hideout.
Guile
Once you've finished Chapter 8-7, you can go learn from Guile by putting on the SiRN lab coat and talking to an NPC at the construction site to get a mission to go to the Carrier Byron Taylor. Go there, fight a bit, and he will jump in to help you out.
Manon
Following Chapter 7-3, when the "Extra" sidequest unlocks in Metro City's Beat Square, you will be taken to Fete Foraine automatically. After Manon introduces herself, you can speak to her again to become a student.
Dhalsim
The yoga master himself can be found by doing the "Yoga Statue" quest available starting on Chapter 9. Talk to Anik in Bayside Park in Metro City. Complete the quest to unlock Dhalsimer Temple on the World Map, where you can enroll with Dhalsim.
Zangief
The sidequest for Zangief also spawns when you hit Chapter 9. This time, you need to go to the stadium to find the "Hither and Thither" mission from some wrestlers. Finish up the quest and the Barmaley Steelworks will be added to your map. Zip on over and meet the master grappler.
Juri
Not available until much later in Chapter 11-4, you're looking for the "A Hardboiled Adventure" sidequest in Nayshall from Govind in the Bazaar. You will need to wait until Chapter 12 before you can fully finish this quest, but once done, you can ask to study under Juri.
JP
The last master you will find can only be encountered once you've fully finished World Tour mode. Once everything is wrapped up, go to Old Nayshall at night and go to the Suval'hal Arena Entrance. JP will be there waiting by the stairs around back for someone to come asking to train.

Read more
How to get Autobuild and all schema locations in Zelda: Tears of the Kingdom
Link using autobuild to build a fanplane.

At first, you might be disappointed to see that Link has lost all his core abilities from Breath of the Wild when you first begin The Legend of Zelda: Tears of the Kingdom. While those moves were great, what replaces them is even better, and you will likely forget all about those old ones in a matter of hours. Ultrahand in particular is essentially limitless in what you can do with it. Building contraptions, most often vehicles, is easy and intuitive. Still, sometimes you know what you want to build and would rather skip the process of, you know, building it. For that, the game offers you Autobuild.

However, like so many things in Tears of the Kingdom, you have to seek it out in order to utilize it, and the game is perfectly fine with you never stumbling upon it. To save you time building those common contraptions, here's everything you need to know about Autobuild, plus where to find all the Schema Stones in Tears of the Kingdom.
What is Autobuild?

Read more
How to solve the Jonsau Shrine in Zelda: Tears of the Kingdom
zelda tears of the kingdom jonsau shrine

First introduced as smaller challenges in Breath of the Wild, Shrines not only return for The Legend of Zelda: Tears of the Kingdom, but now there are 152 of them to find and solve. Each shrine presents players with some sort of challenge, either combat-, puzzle-, or skill-based, that lets them claim a sweet Light of Blessing. Puzzle shrines, in particular, can be quite tricky, but there are also multiple ways to solve them if you're creative enough. The Jonsau Shrine will require brains and brawn to overcome, so let's explore how to conquer it in Tears of the Kingdom.
How to find the Jonsau Shrine

The Jonsau Shrine is hidden in the Lanaryu Wetlands region to the east of Lookout Landing. The exact coordinates are 1743, 0018, 0025.
How to complete the Jonsau Shrine

Read more