
Horizon Forbidden West: All War Totem locations

Aloy is no stranger to picking up all sorts of random junk in Horizon Forbidden West. Whether it’s sticks and rocks for crafting, or ancient relics from the world prior to the robotic uprising, you’ll be stopping every couple of steps to grab something in the massive open world. Collectibles are essentially mandatory for open-world games, and the Horizon series continues to hide a bunch of these secret trinkets across the map in the sequel, but with far more variety and types this time around.

Right alongside collectibles, Easter eggs are another common features developers like to tuck away in hidden corners of their open worlds. Sony’s first-party studios have lately been using Easter eggs as a way to give a friendly nod to their sibling studios, such as Ratchet and Clank: Rift Apart featuring Jak and Daxter and Sly Cooper through a secret weapon. Horizon Forbidden West is the latest major first-party release and has made a few references to another major franchise in the form of three collectible War Totem Easter egg items.

There will be very minor spoilers here for what each War Totem is, and obviously where to find them, but they have no bearing on the actual story or plot of Horizon Forbidden West itself. Also, unlike every other collectible in the game, War Totems are not marked on your map for you, but still unlock a unique reward for finding them all, which we will also share.

Further reading

First War Totem location

A map of a watery area.
Image used with permission by copyright holder

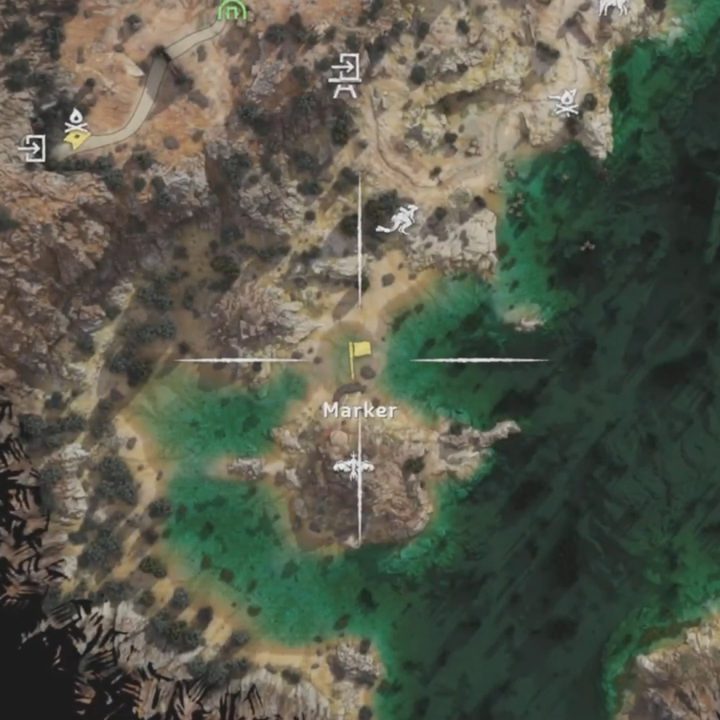
The first War Totem we will collect is called Totems of Brotherhood. This is the first one you will be able to find in Horizon Forbidden West and is in No Man’s Land. By heading to the southwest end of the Jagged Deep area, you will want to find the little land bridge leading to a small rocky protrusion. There will be a fallen machine here to mark the spot you’re looking for. Aloy will comment that she should take a closer look, and comment about the hammer stuck in its head. You can get a couple of different lines here referencing the hammer as being Mjolnir from Norse mythology but use your Focus to highlight a trail leading across the water. Follow it around the side of the little cliff to a small shrine with the Totems of Brotherhood inside.

These are clear depictions of the two dwarven brothers from God of War that help Kratos upgrade his weapons and gear.

Second War Totem location

A map of some snowy mountains.
Image used with permission by copyright holder

Next up we’re tracking down the Totem of War. You could probably guess who this totem will depict, but either way, here’s where you need to go to track it down.

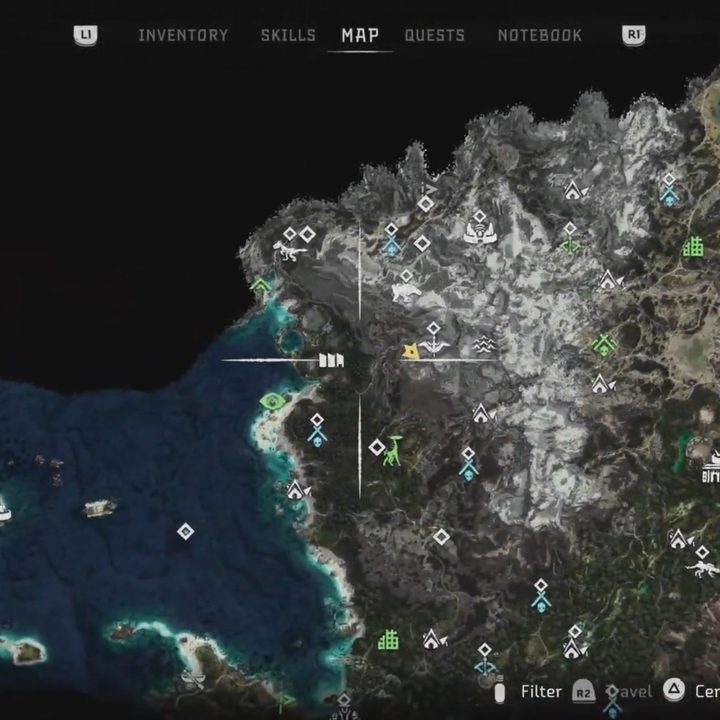
Starting from the Cliffwatch settlement, follow the road to the southeast of The Greenhouse location that winds up a steep path into the mountains. Take all the switchbacks up to a tree with a suspicious ax stuck in a tree trunk. Again, Aloy will mutter about it to tip you off. Power up your Focus to find the trail yet again and follow it up a nearby climbable cliff to the top. Continue forward, sneaking by some perched machines above, and around to a wooden cabin. The roof extends off to the left, sheltering the Totem of War.

Aloy rightly identifies it as “some kind of war God,” obviously Kratos from the ax and tattoos.

Third War Totem location

A map of a beach by the water.
Image used with permission by copyright holder

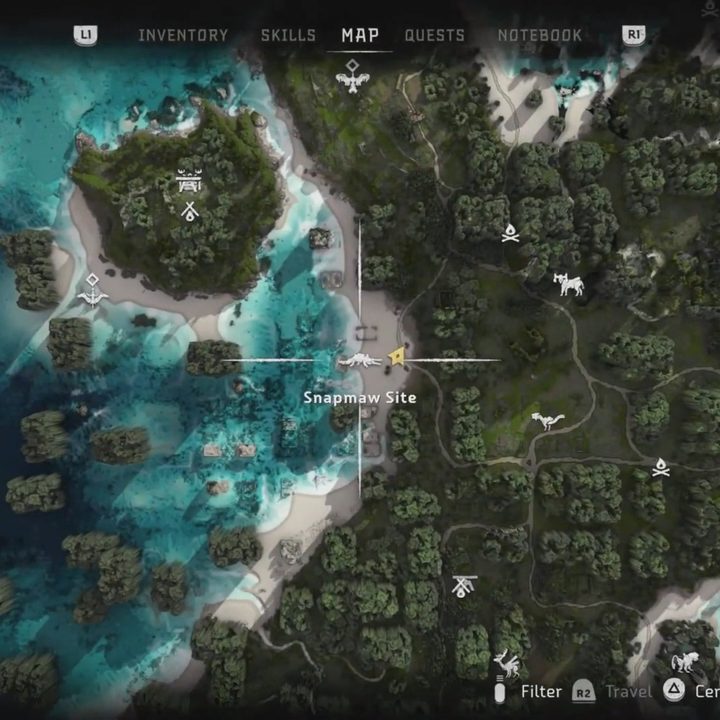
Our final War Totem is another obvious one, especially if you picked up the trend, and is called the Totem of Youth. You can’t reach this one until you hit the Isle of Spires. Once there, you will need to get to the far west coast, somewhat near the stomping grounds for Snapmaws. Once on the beach, look for a pair of palm trees, one large and the other short, with a bunch of arrows lodged in them. Curious, Aloy will want to take a closer look. Fire up your Focus one more time here to find some tracks leading deeper into the island. It’s a simple trek through the trees to a rusted-out bridge. Balancing on the railing is this final War Totem.

With Atreus rounding out your collection, you have gathered the entire crew from the massive God of War game, which is getting its own sequel sometime in the future.

War Totem reward

Aloy wearing god of war paint.
Image used with permission by copyright holder

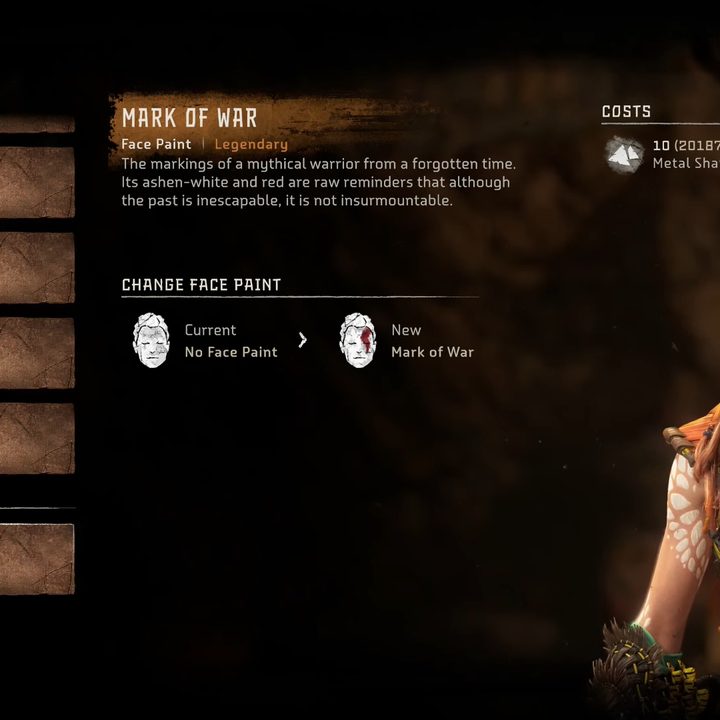
Aside from some cool little carvings of these beloved characters, you also unlock something for Aloy to use in Horizon Forbidden West after collecting the entire set. It’s not much, but you earn the Mark of War Face Paint, meant to recreate Kratos’ iconic look. Aloy’s face will be powdered white, with the striking red line crossing over her left eye just like the God of war himself.

Editors' Recommendations

Jesse Lennox
Jesse Lennox loves writing, games, and complaining about not having time to write and play games. He knows the names of more…
All Word of Power locations in Alan Wake 2
Alan Wake sitting at a desk with a typewriter.

Alan Wake 2 splits its campaign up between the titular writer from the original game and a new character, FBI agent Saga. While the two play mostly the same, each one does have some bespoke elements. Aside from smaller touches like each having their own weapons and inventory, they also have different sets of collectibles to search out. While Saga needs to track down and solve things like Nursery Rhymes and open Cult Stashes, Alan's hidden items, called Words of Power, are more in line with his profession. These are more concepts than actual, physical items to grab, and must be picked up in a unique way. Not only are they worth finding because they unlock a Trophy, but they also will help smooth out the difficulty curve since they serve as upgrades for Alan. Our words may not be as powerful as Alan's, but they can still guide you to every Word of Power location in Alan Wake 2.
How Words of Power work
Words of Power are environmental objects that only Alan can interact with. While exploring his section, you will be able to hunt down these spots on the map and find a spiral of words written somewhere. To "collect" one, you simply need to shine your light on it from the right angle -- your controller will vibrate to let you know you're getting close.

Words of Power are divided into seven types, each of which offers three different upgrade options in different areas. Here's each type and how they can improve Alan's skills.

Read more
All stash locations in Alan Wake 2 and how to open them
Alan drenched in green light in Alan Wake 2.

FBI agent Saga Anderson and her partner, Alex Casey, are called into Bright Falls to investigate a murder committed by a strange group calling themselves the Cult of the Trees. These dangerous cultists are your main enemy in Alan Wake 2, and they put up quite a fight despite mostly using basic tools as weapons. They seem mindless and primitive, but the fact that they have a series of Cultist Stashes hidden all around the world suggests otherwise. These treasure troves are very well hidden, and they're protected with a small puzzle to try and prevent those who may stumble upon one from grabbing all the goodies inside. You'll find yourself short on supplies essentially all the time in Alan Wake 2, so scooping up some extra ammo and batteries is always welcome. Here is where you can find all the Cultist Stashes in Alan Wake 2 and how to open them.
All Cultist Stash locations
There are a total of 21 Cultist Stashes to find and unlock in Alan Wake 2. Each zone has its own set to find, and they all have different puzzles you need to solve to open them. None are missable, but some can't be obtained until you make story progress or get specific tools.
Bright Falls Cult Stashes

The first Cult Stash you can find comes as soon as you reach the town of Bright Falls for the first time. Instead of going straight to your destination down the block, turn around and head toward the dead end. Behind the truck will be a big locked box. To open this one, all you need to do is play a little game of Simon Says. The keypad will flash three buttons in a sequence that you simply need to repeat to open the box and grab the loot.

Read more
All Marko’s Memories locations in Spider-Man 2
Spider-Man perched on a balcony.

The opening sequence of Spider-Man 2 is a massive, technical showpiece of an encounter with the iconic villain Sandman, aka Flint Marko. Despite Peter and Miles thwarting the villain's rampage in the opening hours, his impact on the map -- and the game at large -- is far from over. Even after being sent away to prison on The Raft, Sandman has left behind mysterious crystals that are causing trouble all across the city. These become one of the many side activities you can participate in between main missions for some extra rewards like City Tokens. While they are all optional, completing each of these Marko's Memories activities does uncover a narrative about the troubled man and someone close to him that is well worth exploring. Besides, you will need to clean them all up if you want to fully complete the game anyway, so let's detail where you can find each of Marko's Memories in Spider-Man 2.
Where to find Marko's Memories

There are 14 crystals scattered across the various boroughs of Spider-Man 2's New York, but just like with other collectibles like Prowler Stashes, you will have to wait for some to unlock as you make story progress. Additionally, the 14th and final memory won't be available until you've gotten all the others, and it leads to the quest's final objective. These will show up as an orange crystal on your map, but you can also spot them from all the sand they create around the area. When you approach one, you will need to fight a few waves of sand enemies before you can grab the crystal, crack it open, and hear the memory inside. Here's which borough you should be looking for them in, and how many there are in each.

Read more