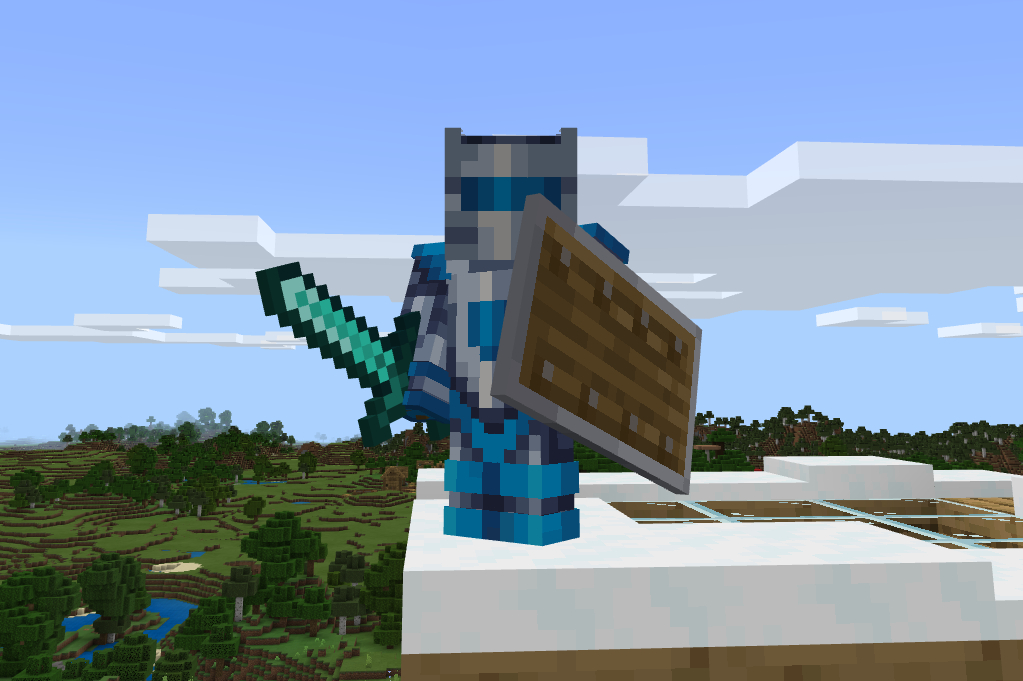
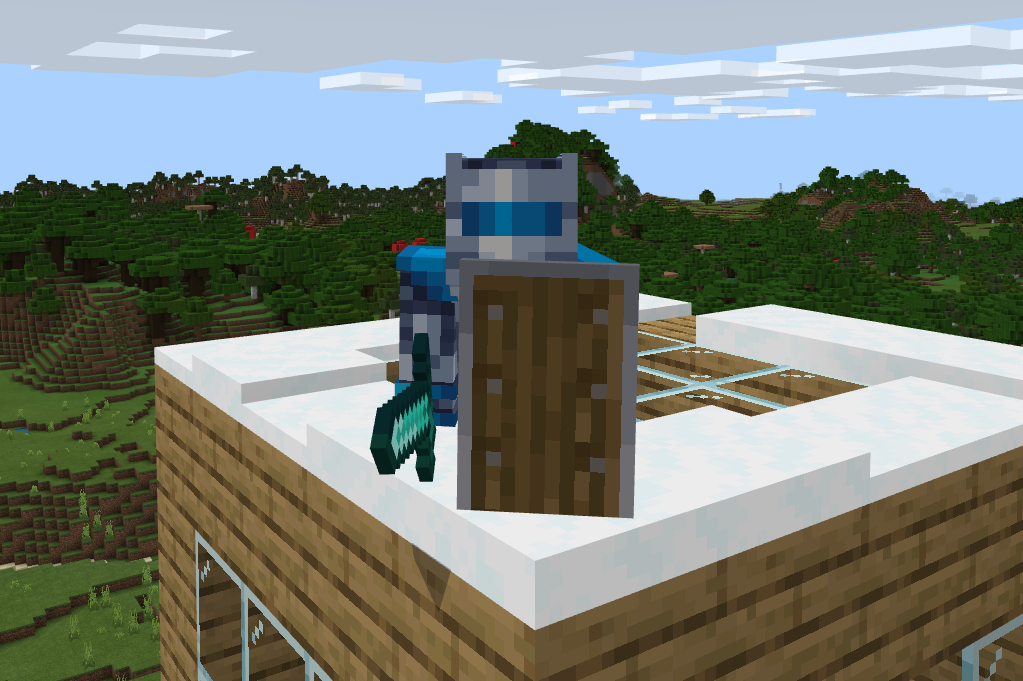
How to make a shield in Minecraft

You’re in a deep cave searching for ore and you stumble into a dungeon filled with skeletons. You only have a pickaxe in hand and no means of blocking their fatal blows. We show you how to make a shield in Minecraft so you can survive the attack and grab the loot.

Making a shield is extremely simple. The main ingredients are wood plank blocks and iron ingot. You’ll need both the Furnace and Crafting Table to make your shield. We also show you how to decorate and use your new shield.

Gather wood

Minecraft Trees
Image used with permission by copyright holder

Find yourself a tree and chop it down. Your lumberjack skills result in little blocks of wood logs (Survival Mode) scattered across the terrain that you need to gather. You can use anything to chop down trees — even your fist — except for a sword.

Note that you can use any combination of wood to create a shield — you’re not locked into using six blocks of the same wood plank type.

Gather iron ore

Minecraft Iron Ore
Image used with permission by copyright holder

You’ll need iron ore to craft iron ingot, one of the shield’s ingredients. You can’t miss these blocks: They have little yellow and tan flakes, as shown above. The ore is located at sea level or slightly lower in veins of up to 10 blocks. You’ll need a stone pickaxe at the very least to mine this ore.

You can also acquire iron ore dropped from fallen iron golems, which you can find near villages.

Make wood planks
Minecraft Make Wood Planks
Image used with permission by copyright holder

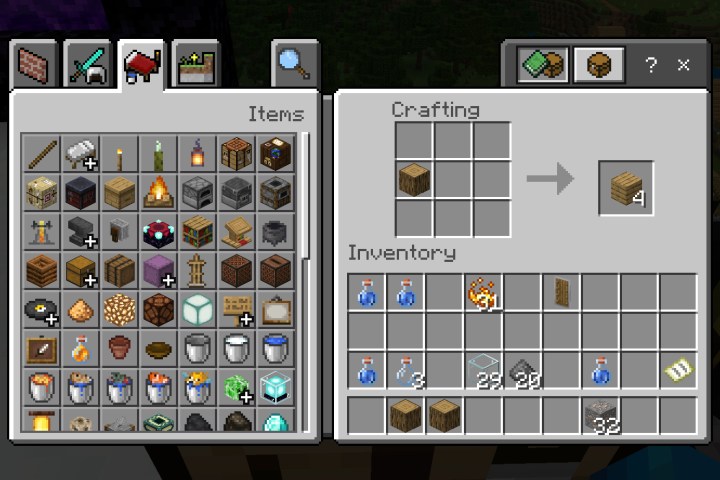
Now that you have wood, you need to create wood plank blocks. You’ll need six wood plank blocks to craft a shield.

Step 1: Open your Crafting Table.

Step 2: Place one wood block (log, normal. or stripped) into any square in the crafting grid.

Step 3: Drag the resulting four wood plank blocks down into your inventory.

Step 4: Repeat steps two and three for another four wood plank blocks.

Make iron ingot
Minecraft Make Iron Ingot
Image used with permission by copyright holder

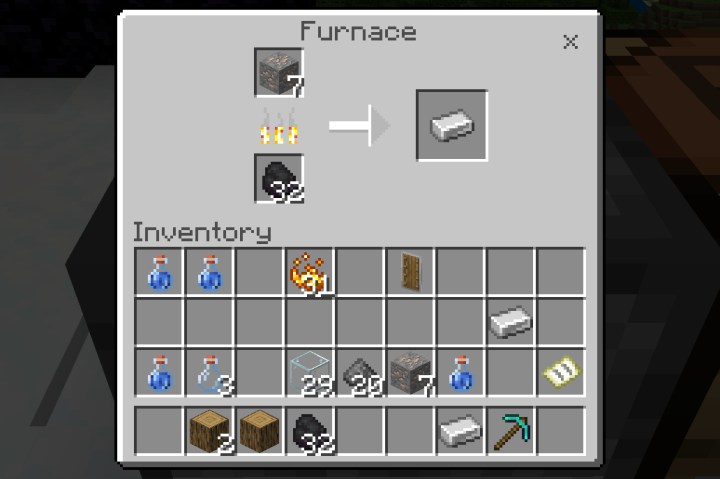
Here we show you how to make iron ingot from iron ore using a Furnace.

Step 1: Open your Furnace.

Step 2: Add fuel to the bottom square. This can be wood, coal, charcoal — whatever you have that burns.

Step 3: Place iron ore into the top square.

Step 4: Drag the resulting iron ingot down into your inventory.

Make your shield
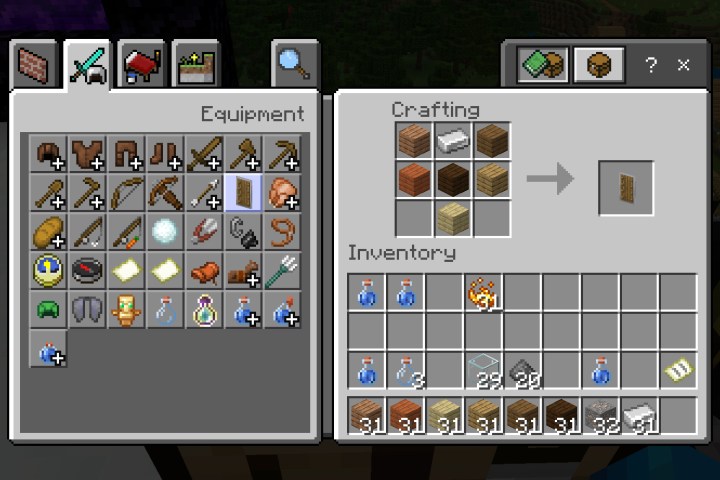
Minecraft Craft a Shield
Image used with permission by copyright holder

Step 1: Open your Crafting Table.

Step 2: Place six wood plank blocks into the crafting grid in the shape of a Y: The top two squares in the first column, the bottom two squares in the second column, and the top two squares in the third column.

Step 3: Place one iron ingot in the remaining top box in the second column. Refer to our screenshot above for the correct placement.

Step 4: Drag your new shield down into your inventory.

Decorate your shield (Java version only)
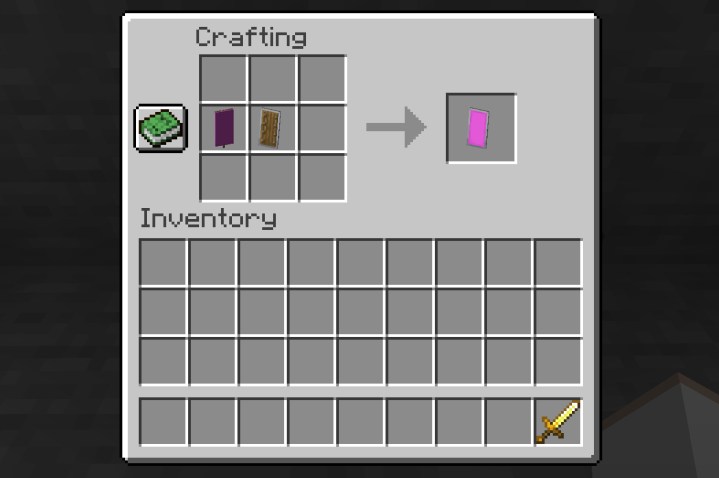
Minecraft Decorate Shield
Image used with permission by copyright holder

You can add a banner to your shield. For now, however, you can only do this in the Java Edition.

Step 1: Open your Crafting Table.

Step 2: Place your shield in the center square on the crafting grid.

Step 3: Place one banner into the square to the shield’s left.

Step 4: Drag the resulting decorated shield down into your inventory.

Equip and use the shield
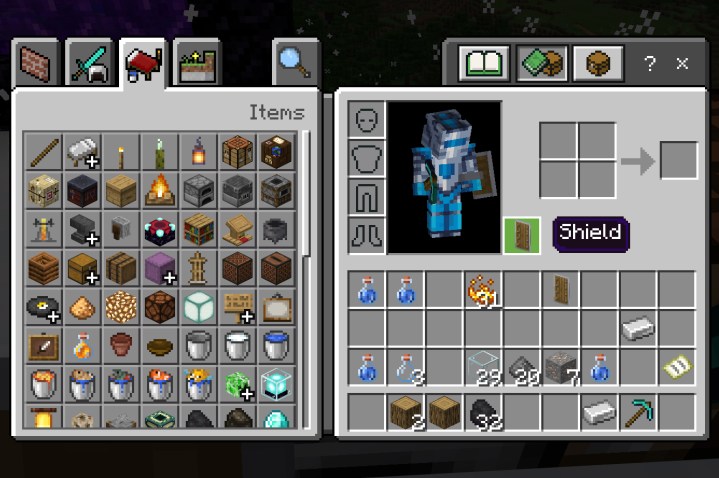
Minecraft Equip Shield
Image used with permission by copyright holder

Step 1: Open your inventory.

Step 2: Drag the shield from your inventory into the square located at the bottom right of your avatar, as shown above. This square has a shield symbol inside.

The shield is now located in your off hand. In the Java Edition version, you can right-click to use the shield and block attacks. In all other versions, the shield goes up when you enter Sneak Mode (crouch). You can place a shield in the Hotbar and use it as a weapon in your main hand too.

Check out our other guides for Minecraft:

Editors' Recommendations

Kevin Parrish
Former Digital Trends Contributor
Kevin started taking PCs apart in the 90s when Quake was on the way and his PC lacked the required components. Since then…
All romanceable characters in Baldur’s Gate 3 and how to romance them
A player conversation in Baldur's Gate 3.

Romance options are by no means new in the CRPG genre. Even more traditional RPGs have added romance options for certain characters, but each game handles the process of actually entering into a romantic relationship differently. Baldur's Gate 3 is packed with interesting characters and companions that could catch your eye. Even if you're not new to CRPGs, it's always a challenge to understand what a certain character will like or dislike, as well as what actually counts as moving closer to a relationship with them. Thankfully, Baldur's Gate 3 developer Larian has made it so that there are no restrictions on who you can romance based on your chosen gender or race, so all that's left to do is study up on how to woo your dearly beloved.
All romance options and how to romance them
There are eight possible characters you can enter into a relationship in Baldur's Gate 3, including all available companions. Relationships are based on earning positive opinions from them and hinge on the actions you take in the world with them in your party. Even if what you're doing doesn't directly impact them, they will think differently based on what they see you do, so keep that in mind before you do something your love interest might think less of you for. Also, be sure to speak to them each time you go to camp to further their individual stories.

You can check the approval rating for all characters under the Detailed View section of your character sheet. Make sure it is high before you do the quest where you rescue the refugees.
Astarion

Read more
How to build an outpost in Starfield
Spaceship on planet in Starfield.

As advertised, Starfield is filled with over 1,000 planets to freely land on, explore, and plunder for resources. While you could simply go down and scan the surface for resources to mine manually, if you want to be an efficient miner, then you will want to set up an outpost to automate the process for you. Somewhat like the building system introduced in Fallout 4, outposts have a lot of systems going on. Getting started isn't too tough, but the amount of options and things you need to balance can get complicated if you plan on making this a lucrative venture for resources and Credits. The tutorial can get you started, but we'll get you the rest of the way there to managing a successful outpost in Starfield.
Find a vein
Your outpost isn't going to do much if you set it up in an area with no resources, so plotting out the best location to build is key. When you arrive at a planet of choice, you are given the option to scan it. This will reveal the main resources that planet has, plus change the view to show how those resources are distributed. Once you've found a planet with the resource(s) you're looking for, rotate the planet until you find a big concentration of it to land on.

But don't just drop your outpost beacon right where you land! Just because you set your ship to land on what looks like a mother lode of resources doesn't mean the specific spot you touch down will be right. Whip out your scanner and check the area, specifically for underground resources. When you find an area with a good amount of one or more resource veins, then its time to start building.
The basics

Read more
How to level up fast in Baldur’s Gate 3: best ways to farm XP
A wizard charges a spell to hit a minataur.

Leveling up is important in almost every RPG, but for a CRPG as deep and ruthless as Baldur's Gate 3 can be, being underleveled can make many aspects of the game essentially impossible. Each level provides you with valuable points within your skills, but also the opportunity to learn new abilities for in and out of combat. If you're too focused on simply trying to complete the main story, sooner or later you will hit a wall and need to level up before you can progress. Or, if you're more interested in making sure you can crush any battle and pass any skill check without needing to use Inspiration Points to reroll, then knowing the best way to earn XP will get you there. Here's how you can level up fast in Baldur's Gate 3.
Fight, fight, fight!

Let's get the most obvious source of XP out of the way first. Every enemy you slay will deposit a nice, little chunk of XP toward your next level, with the amounts varying depending on the level of your enemies. There are a ton of optional fights in Baldur's Gate 3, such as some you can just happen to come across in your travels, but also others that you can choose to avoid by talking your way out of a confrontation. With the latter option, you will want to consider whether or not you're OK with potentially killing the specific person or group you will be fighting. Killing certain characters can have unforeseen consequences later on, but on the other hand, so can letting them live.

Read more