
We’ve had dozens upon dozens of Marvel games across the generations. From titles focused on single heroes, such as the fantastic Marvel’s Spider-Man, to team efforts in series like Ultimate Alliance, there’s no shortage of choices to get your superhero fix. While anyone can easily find the big-name heroes in these titles, there are some hero teams that don’t usually get the spotlight, or even much attention at all, such as the Midnight Suns. That all changes with Marvel’s Midnight Suns, but it’s not just the unlikely heroes that will throw some people for a loop.
Unlike any superhero game before it, Marvel’s Midnight Suns is a tactical RPG from the creators of the XCOM series. While it isn’t quite as brutal as those games, it does share a similar gameplay loop of turn-based, strategic encounters instead of the usual action-focused affair. The inclusion of cards only further differentiates it from any other superhero game, but that doesn’t mean you should avoid it. Marvel’s Midnight Suns will take some getting used to if you’re unfamiliar with tactics games, but these tips and tricks will make sure you always play your cards right.
See more
- Marvel’s Midnight Suns’ deck-building is better than you think
- Everything we know about Spider-Man 2
- The best Marvel games of all time
Spend time in the Abbey
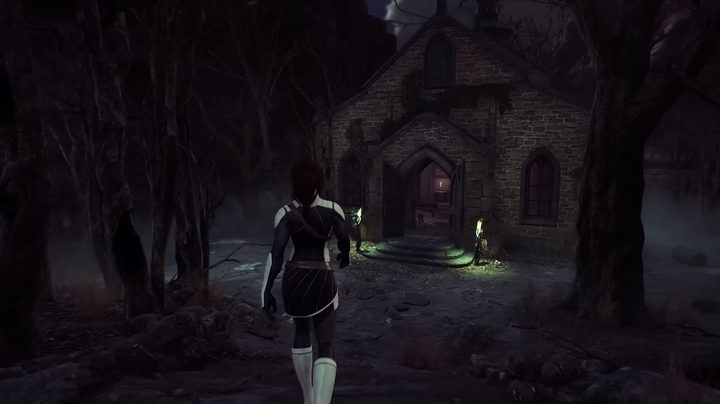
After completing the tutorial you will be dumped into the hub area called the Abbey. This is your base of operations, and where half the game essentially will take place. As eager as you might be to get right back into the action, you will always want to fully explore and utilize your time in the Abbey.
There are a ton of things you can do in the Abbey that will help you during combat. This includes collecting herbs for Magik to increase the card quality you get after meetings, acquiring tonics and essence for upgrading abilities, sparring with other heroes, creating new cards, building friendship levels, and so much more.
Aside from those more obvious and directed Abbey activities, there are also secrets to discover that unlock abilities you can use in the Abbey grounds to access new areas in a sort of Metroidvania-style progression. There are also a ton of hidden chests that reward you with bonuses and new cosmetics to dress up your favorite heroes in.
One last thing: always find and pet Ebony and Charlie. It won’t have any immediate benefits, but trust us, it will be worth it if you do it every day.
Focus on three friends

Every hero on your team in Marvel’s Midnight Suns has a friendship level that you will want to increase to unlock new abilities and passive buffs. This is done between missions while in the Abbey by hanging out, talking, giving gifts, and other activities done with said heroes. However, there are a limited number of opportunities to raise friendship levels in a single playthrough, and not enough to max out your entire roster’s friendship levels.
While you shouldn’t just ignore the rest of the heroes — even lower levels of friendship still give bonuses — you likely won’t be able to max out more than three on a single run. Once you know who your favorites are, focus on them and then spread the rest of your time out between the others.
Difficulty is fluid

Marvel’s Midnight Suns doesn’t make you stick to a single difficulty level. While you start off on the medium setting, you will unlock harder ones as you play and complete missions. You can think of difficulty levels more as mission modifiers, which grant you better rewards, such as XP and Gloss, for increasing things like enemy HP and damage. As you get more confident, push yourself to try on harder levels to get more rewards.
Alternatively, if you find yourself beating your head against the wall, go ahead and lower it. You won’t get quite as much for doing it, but it’s better than not completing the mission at all.
Maximize your turns

A default turn in Marvel’s Midnight Suns gives you three card plays, two redraws, and one move. Before you spend any of these, plan out the best way to maximize your turn to get the most actions possible. For example, cards that have the Quick effect will refund you a card play if it is used to KO an enemy, which is perfect for grunts that go down in a single hit. Then there are cards that are simply Free, which are weak, but obviously don’t cost anything.
You have as much time as you want to perfectly plot your attack, so carefully read through your current hand to make the most of what you have. You might just be able to win an entire encounter on a single turn if you play perfectly.
Always use the environment
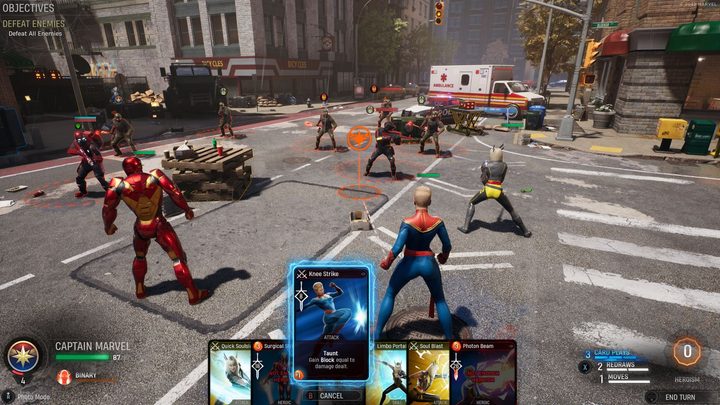
Speaking of playing perfectly, the environment is just as useful as your cards. Environmental attacks cost heroism, not card plays, and offer another easy way to deal damage and thin out any adds in a fight. You can tell what objects in an arena can be used to attack based on their glow. Different objects can also create special effects on enemies, like generators causing stun.
Prepare for missions and read your opponents
Every mission in Marvel’s Midnight Suns begins with a brief loadout on what your objective is, such as taking out enemies or defending objectives. Use this to form your team to best suit the objective, not just always bringing in your favorites.
Once on the field, while you’re planning out your turn, highlight all the enemies first. This will tell you all their passive and status abilities so you know which you should prioritize taking out first. You should also pay close attention to the icons above their heads that tell you which of your heroes they intend to attack next. Even if you can’t wipe the enemy team, you should be able to keep yours safe by KOing, or at least interrupting, the ones posing the most threat.


