Pokémon games have always been beginner friendly. Their RPG mechanics are, on the surface, quite simple and easy to understand. All a player really needs to understand to make it through most of the games, including Pokémon Legends: Arceus, is which Pokémon types are weak or strong against another. That, plus some grinding, could easily carry a normal player through the game without hitting much of a wall in terms of difficulty. However, going into the more difficult challenges of the games, or for those just wanting to create the most powerful Pokémon possible, there have always been extra ways to maximize how strong your team of monsters are.
In past games, the main “hidden” stat players focused on boosting were called IVs and EVs, but Pokémon Legends: Arceus scraps those in favor of a new system called Effort Levels. They didn’t just rename these stats for no reason, though, and no matter how familiar you are with stat-boosting in older games, you will still have a bit to learn with this new system, such as how grit and grit items play into things. If you’re beefing up your team to take on Pokémon Legends: Arceus’ most difficult challenges, read up on this guide covering everything about Effort Levels and grit.
See more
- What are alpha Pokémon in Pokémon Legends: Arceus?
- How to trade with friends in Pokémon Legends: Arceus
- Pokémon Legends: Arceus: How to expand your satchel space
What are Effort Levels?

Before getting too deep into the weeds, we need to understand what Effort Levels even are, and more importantly for veteran trainers out there, how they’re different from IVs and EVs. IVs, or Individual Values, are tied to each of a Pokémon’s stats, such as health, attack, defense, and so on. These are unique to each Pokémon, though they can be manipulated by breeding to create inherently better Pokémon. In Pokémon Legends: Arceus, IVs functionally don’t exist anymore.
EVs, or Effort Values, were stats that increased for your Pokémon based on battling other wild Pokémon. Effort Levels work the same way, but you don’t increase them by fighting wild Pokémon anymore. By raising Effort Levels, your Pokémon will earn more points in that particular stat — HP, attack, defense, and so on — every time they level up. Each stat can increase between 3 and 5 extra points per level, with the only exception being HP, which ranges from 6 to 8.
Like IVs, a Pokémon’s base Effort Levels are random to start. However, unlike the IV and EV systems in the past, you don’t have to breed and transfer Effort Levels before you can max them out. Any Pokémon, with enough work, can raise their Effort Levels to the maximum level. Effort Levels can go from 0 to 10 at the highest level.
How to check Effort Levels
IVs and EVs historically have either been obfuscated from the player, or otherwise hidden to various degrees. This was to prevent casual players from feeling overwhelmed with all this extra info that, again, wasn’t necessary for simply beating the game. Pokémon Legends: Arceus doesn’t put Effort Levels right in your face, but they are at least easily accessible and very clear once you know where to look.
To check a Pokémon’s Effort Levels, there are a few ways to do it. If the Pokémon is in your party, simply pop open their summary and hit the R button to tab over to the hexagon symbol. This will show you that Pokémon’s stats in a hexagon chart. Beside each stat’s name will be a number inside of a circle. That number represents that Pokémon’s Effort Level for that stat.
For any Pokémon in the pasture, you can check them the same way. Just highlight the Pokémon you want to check, and all their stats will appear on a list on the right side of your screen.
How do you increase Effort Levels?
So, if Effort Levels no longer work like EVs, which increased from fighting different wild Pokémon, then how do you increase Effort Levels? The entire system for raising Effort Levels is far more streamlined and straightforward than the often esoteric and overly complex EV system of old. The only way you can increase Effort Levels is to use specific consumable items known as grit items. These include Grit Dust, Grit Gravel, Grit Pebbles, and Grit Rocks.
Each grit item has a slightly different function and rarity, but you will need them all to hit max Effort Level for each Pokémon. As noted, a Pokémon’s Effort Level can go from 0 all the way up to 10, and to increase those levels, a specific grit item needs to be used.
Grit Dust is used to level up a Pokémon’s Effort Levels between 0 and 3, Grit Gravel to go from 3 up to 6, Grit Pebbles take you from 6 to 9, and you need a Grit Rock to make that final leap between 9 and 10. Each grit item will only increase a Pokémon’s Effort Level one level, so if you are at level 0, you will need 3 Grit Dust to get to level 3, for example. Going from 0 to 10 on a single Pokémon will cost 3 Grit Dust, 3 Grit Gravel, 3 Grit Pebbles, and 1 Grit Rock, multiplied by six for all six stats.
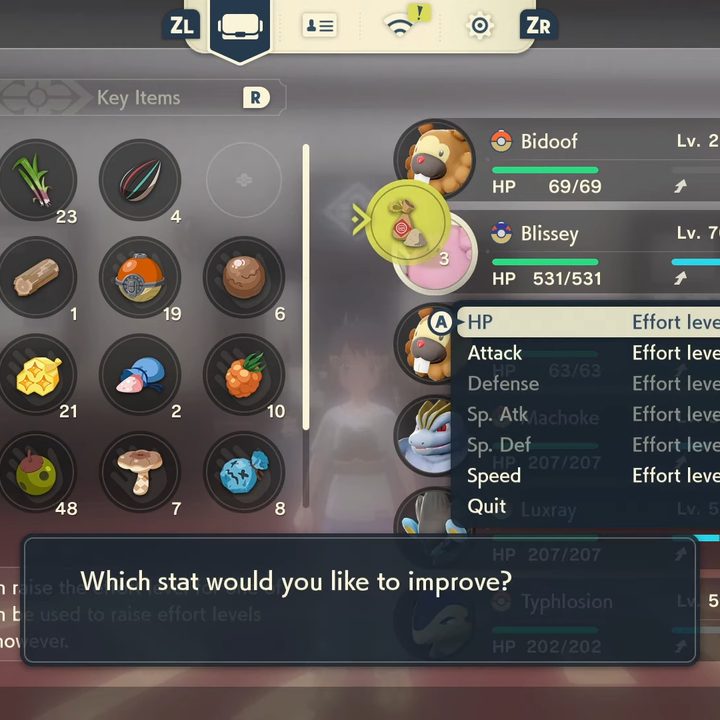
Once you have the grit items necessary, to actually use them simply open up your satchel and locate the items in the Everyday Items tab. Select the item, and you will be prompted to pick which Pokémon you want to apply it to, so long as they are currently in your party. Once you pick the lucky monster, you can then pick from a list of all the stats which one you want to apply it to, so long as that stat isn’t above the level of the item.
How to get grit items
Since grit items are the only way to increase your team’s Effort Levels in Pokémon Legends: Arceus, you’re going to be needing a lot of them if you want to max out your roster’s stats. Thankfully there are a number of ways to obtain grit items, and a couple of farming techniques you can use to make the process a little easier — and maybe faster depending on how long you’ve already been playing. Unfortunately, you cannot purchase grit items anywhere in the game for any type of currency or points.
Random drops
Grit items can be a random drop from any and all Pokémon you encounter out in the wild. The higher level the Pokémon you beat, the better odds of getting a grit item drop. As far as what type they drop, it all seems to be random at this point. The best odds of getting a random grit item drop come from Alpha Pokémon, but this is not a recommended way to grind out these items. If you want to earn them from battle, just go fight as many high-level Pokémon in as quick succession as you can. Even if you get low-level grit items, like a bunch of Grit Dust, it can still be useful. We’ll cover that at the end.
Release your Pokémon
The most consistent and easy way to get grit items will come at a high cost, unless you’ve been stocking up on catching dozens of Pokémon during your journey. Every time you release a Pokémon from your pasture, they will always leave behind one of the grit items for you. Since you can release batches of Pokémon at once, you can quickly farm a bunch of these items if you’ve got a surplus of extra Pokémon.
Somewhat like with getting grit items from battle, the higher the level of Pokémon you release, the better the grit item you will get. Any Pokémon released that is between levels 1 and 19 will leave you either a Grit Dust or Grit Gravel; 20 to 49, either a Grit Gravel or Grit Pebble; and level 50 and higher, either a Grit Pebble or Grit Rock. However, if you’re crazy enough to release a captured Alpha Pokémon, you will either get a Grit Pebble or Grit Rock regardless of their level.
Trade in your extra grit

We mentioned that getting a ton of Grit Dust can be useful even after you no longer have any use for it, and this is thanks to Zisu. She will exchange any lower-tier grit item for higher ones, though at a 10-to-1 exchange rate. So, if you’ve got 10 or more Grit Dust gathering, well, dust, you can swap those out for 1 Grit Gravel. The rate is pretty terrible, but considering you’re either relying on random drops or releasing high-level Pokémon to get these items at all, it may end up being necessary to max out your core team’s Effort Levels.