
The best Warzone Armaguerra 43 loadout

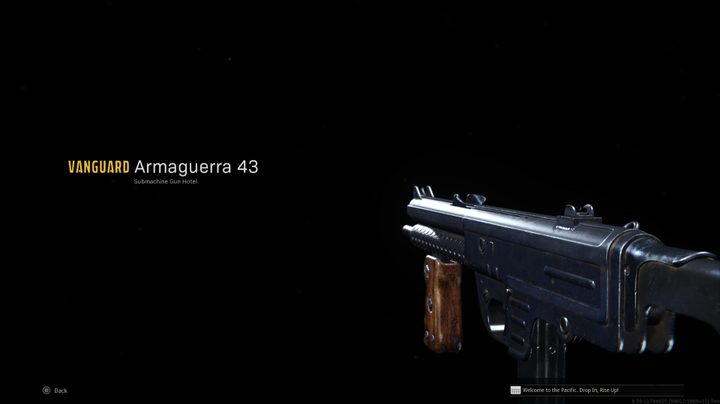
When it comes to the meta in Call of Duty: Warzone, the best weapons are far more diversified than they used to be, as clearly indicated by the close-range SMGs. There is a slew of viable options, though many players have gravitated toward the Armaguerra 43, which launched in 2022. This SMG has a lot going for it, with large magazine sizes, a competitive time to kill (TTK), and an overall great feel. While it’s important to deck out your assault rifles for long-range, it’s equally as crucial to make sure your SMGs perform well up-close, including the Armaguerra.

But what’s the best build? With so many attachments and slots and an ever-shifting meta, it can be overwhelming to know how exactly to build your weapons. Here, we’ll go through the best Armaguerra 43 loadout in Call of Duty: Warzone.

Recommended reading:

Recommended Videos

Armaguerra 43 overview

The Armaguerra 43 in Warzone.
Image used with permission by copyright holder

The Armaguerra 43 has many benefits and quirks, which we’ll dive into here. For starters, it doesn’t have the best TTKs in the game up close, but according to TrueGameData, it’s in line with many of the best SMGs, only it kills slightly slower (we’re talking a tenth of a second slower). The thing is, this weapon outclasses many of the best SMGs at midrange, making it great for engagements at around 18 meters or so. Because of this, you’ll want to prioritize taking shots beyond the typical close-quarters distances to ensure you’re coming out ahead.

Even still, the Armaguerra 43 can still hold its own up close, especially if you land headshots, which isn’t too difficult to do, considering how easy it is to control. Beyond that, the Arma features a fast rate of fire of 940 RPM, making it more forgiving than many other SMGs in Warzone.

But how should you build this weapon?

The best Armaguerra 43 loadout

The Armaguerra 43 in Warzone.
Image used with permission by copyright holder

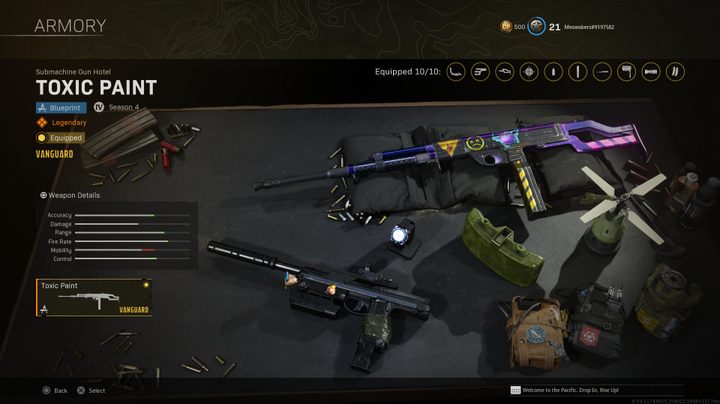
Recommended loadout:

Muzzle Recoil Booster
Barrel
Botti 570mm Precisione
Optic Slate Reflector
Stock Imerito SA Folding
Underbarrel Mark VI Skeletal
Magazine 9mm 60 Round Mags
Ammunition Subsonic
Rear Grip Taped Grip
Perk Steady
Perk 2 Quick

There are actually a few variations of Armaguerra 43 builds that could work, but for our recommendation, we’ll stick to a close-quarters loadout that can still function at midrange.

Start with the Recoil Booster Muzzle for an increased fire rate, giving the weapon a better TTK. As its name suggests, this will increase your recoil, but when used up close, this is a non-issue. After that, equip the Botti 570mm Precisione Barrel, giving you better vertical recoil control and improved bullet velocity, which helps when taking shots at midrange.

You’ll want to use an Optic, and for that, we recommend the Slate Reflector since it gives you a clean picture without hurting your aim down sights (ADS) time. Follow that up with the Imerito SA Folding Stock for better sprint-to-fire times and movement speed (perfect for those up-close fights).

As for the Underbarrel, we recommend the Mark VI Skeletal, giving you faster ADS times and better movement speed. You’ll also want to use the 9mm 60 Round Mags, which gives you more ammo with fewer penalties. It does slightly hurt your ADS time and movement speed, but the other attachments will make up for that.

Next, use the Subsonic Ammunition, keeping you from appearing on the minimap when firing. Since you won’t be using a suppressor with this build, Subsonic is crucial. After that, make sure you utilize the Taped Grip for improved sprint-to-fire speed, movement speed, and overall sprint speed.

For your first weapon Perk, we advise using Steady, which boosts your ADS movement speed and ADS firing movement speed. This will lead you to more victories up close. Finally, equip the Quick Perk 2 for a boost to sprint speed. As you can see, this build will ensure you move around as quickly as possible.

Perk 1 Quick Fix
Perk 2 Tempered
Perk 3 Amped

This is more of an aggressive build, so with that in mind, we recommend using Quick Fix for Perk slot 1. Remember, this Perk immediately triggers health regeneration when you secure an elimination and when you apply an armor plate. After that, we like to use Tempered with this build, which allows you to reach max armor with only two plates instead of three. For Perk 3, it’s best to use Amped for faster weapon swap speed.

Lethal Equipment Throwing Knife
Tactical Equipment Stim

When it comes to Equipment, there are a couple of avenues you can take, but if you’re on a smaller map like Rebirth Island or Fortune’s Keep, we recommend Throwing Knives so you can quickly finish off downed enemies without wasting ammo. For Caldera, you can go with Molotovs. We also advise using Stims for Tactical Equipment, which immediately triggers health regeneration and gives you a speed boost.

Joseph Yaden
Former Digital Trends Contributor
Joseph Yaden is a freelance journalist who covers Nintendo, shooters, and horror games. He mostly covers game guides for…
Black Ops 6 might be the biggest Call of Duty release ever
Soldiers near a train in Black Ops 6.

Call of Duty: Black Ops 6 is on track to be the most successful Call of Duty release in the franchise's history thanks to a record-breaking launch, according to Activision and Microsoft.

The companies revealed that Black Ops 6 had the biggest three-day opening for the series by many metrics. It had the most players, most hours played, and the most total matches, according to a post on X (formerly Twitter). The game also got a shout-out during Microsoft's quarterly earnings call on Wednesday.

Read more
The best Wildcards in Call of Duty: Black Ops 6
Kill Order gameplay in Call of Duty: Black Ops 6.

The concept of a Wildcard might sound like a risky endeavor in Call of Duty: Black Ops 6, but this part of your loadout isn't random at all. We haven't seen this system since Cold War, and even those who remember it from that game will need to learn all the new cards there are in Black Ops 6. You can only equip a single Wildcard on your loadout, but they are powerful enough to completely redefine your playstyle. So far, there are only six to unlock while grinding through the levels with your friends, but picking just one is still a tough choice, especially if you want to use a permanent unlock on one after hitting Prestige. We've ranked all the Wildcards in Black Ops 6 so you can always have the winning hand.
All Black Ops 6 Wildcards, ranked

There is a level of personal preference in which Wildcard you will find better than others, but in most cases, the ones we've ranked as the best will help every player gain an edge in online matches. Here's our ranking of each Wildcard from best to worst, along with what level you unlock them at.
Perk Greed - Level 54
The last Wildcard you unlock is easily the most powerful. Perk Greed lets you unlock a fourth Perk to your loadout instead of being limited to three, which can borderline break the game if you choose the right set of Perks. It is also the most versatile of the Wildcards since it gives you the most options to play with instead of a specific bonus you may not find useful. It can also more easily unlock the special bonus buff you get for equipping three Perks from the same category.
Gunfighter - Level 33
Right in the middle of the unlock list, Gunfighter is one Wildcard you could easily make a case for over Perk Greed in some situations. This one increases your attachment points for your primary weapon by three. If you're rocking a top-tier weapon already, this Wildcard can let you tweak its stats even higher. We rank it second because it only applies to one weapon and thus is a bit more limiting.
Overkill - Level 24
For such an early Wildcard, Overkill is quite a powerful choice. This card lets you equip any weapon (except melee weapons) in your Primary and Secondary slots instead of the ones typically reserved for each. That means you can build a loadout with two Primary weapons and be far more versatile on the battlefield. Instead of having to trade off range, damage, rate of fire, mobility, or any other aspect of your game, you can cover almost all your bases by picking two Primary weapons that cover each other's weaknesses.
Prepper - Level 45
Field upgrades are powerful, don't get us wrong, but having two instead of one isn't always that much of a game-changer. It's a bit less useful than Gunfighter only because field upgrades are more situational and require more attention to use to their full potential. If that's you, then this is a great choice.
Danger Close - Level 38
Who doesn't want another grenade, Molotov, or combat axe? Is getting a second Lethal worth the Wildcard slot, though? Not in our opinion. Most of the time, Lethals are used in desperation or as a way to deny enemy movement for a time, and even then, they are risky because of how vulnerable you are while using them.
Tactical Expert - Level 15
The first Wildcard you get is better than nothing, but only just. It's exactly like Danger Close, only you can hold two Tacticals instead of Lethals. This is, by nature, a little worse since Tacticals don't have the ability to kill an enemy (unless you get super lucky and you directly hit an enemy with one who is on low HP). You can get some use out of them, but you're better off upgrading as soon as you have another option.

Read more
The best Perk-A-Colas in Call of Duty: Black Ops 6
A screenshot from Call of Duty: Black Ops 6's zombies mode.

There's nothing more refreshing than taking a nice big swig of a Perk-A-Cola during an intense Zombies match with your pals in Call of Duty: Black Ops 6. Besides tasting great (we assume), these colas empower you with buffs that will keep you alive until the later rounds. These bonuses are just as important as the Pack-A-Punch, but come in a wider range of flavors. It is possible to stack them all, but that gets expensive very fast so you need to be thrifty about choosing which ones are most valuable early on. These colas come in eight different types that may or may not be worth your Essence to chug. If you want to know which ones are the best in Black Ops 6, check out our ranking.
Best Perk-A-Colas in Black Ops 6

We're ranking these Perk-A-Colas based on their base bonuses, not any additional effects you can get if you Augment them, from best to worst.
Jugger-Nog
You can never go wrong with the classic Jugger-Nog. Increasing your health by 100 is useful for the entire duration of a Zombies mode, but especially in the early rounds. Going down is at best a major setback and at worst a cascade into defeat. This extra health allows you to get out of a bad situation that would otherwise end your run.
Quick Revive
This Perk has two components, with the less useful one being the ability to revive teammates 50% faster. Ideally, that shouldn't be needed but is nice. However, what makes it rank so high is the 50% shorter delay on health regen. Your health will come back over time in Zombies but at a dreadful pace. Starting to heal faster means less time running and kiting zombies around and more time in the action helping the team.
Speed Cola
The best early guns for Zombies mode have a large magazine, fast reload, or both. Running out of ammo at the wrong time and not being able to get more rounds in the chamber fast enough has ended many a run, but Speed Cola is the solution. It will speed up your reloads and armor plating by 30%. That's not a massive number, but fast enough to make the difference.
Stamin-Up
These zombies aren't the shambling types. They will chase you down like sprinters, and some of the monstrous ones can outpace you even at full tilt. Stamin-Up sounds like it would let you run for longer, but actually just lets you run faster since you have no limit on sprint in Black Ops 6. Positioning is everything in Zombies so being able to get where you need to be faster is never a bad thing, especially if it's a downed teammate bleeding out.
Deadshot Daiquiri
Every zombie has a weak spot, which is most often the head. Deadshot Daiquiri makes a critical hit hurt even more than normal, plus increases your auto-aim on those weak points when you aim down sights (ADS). That second part shouldn't factor much if you've got good aim, which is why this is only a decent Perk-A-Cola.
PhD Flopper
Not being able to hurt yourself is situationally useful, and the ability to cause an explosion by diving is a risky move. Yes, it's cool, but you don't want to be lying prone surrounded by zombies. This is a cool gimmick, but save yourself the Essence and skip it.
Elemental Pop
When Elemental Pop works, it's great. The problem with it is that you can't rely on it. It gives a small chance on every shot you take to add a random ammo mod effect, which is cool but impractical. If you have spare Essence on you, sure, it won't hurt you to have, but it isn't something that will turn the tide for you or your team.
Melee Macchiato
Finally, Melee Macchiato bottoms out the list. It is fine in the early game when the hordes are small and you're better off meleeing enemies since it will smack enemies away with each hit, but quickly drops off in usefulness. When the zombies get too strong and too numerous, you will need a lot more than a strong punch to deal with them and end up forgetting you even have it.

Read more