Guided Access is one of those obscure accessibility controls buried deep within iOS and iPadOS that you likely didn’t even know existed. However, it can make a big difference in how you — or selected others — use and control access to your Apple device. We explain how to enable and use this feature on the iPhone, iPod Touch, and iPad.
Guided Access acts to limit your Apple device to using just one active app. It grants access to all controls and features available to that specific app, but it doesn’t let users access any other app installed on the device. Guided Access isn’t limited to specific apps. For example, if you restrict an iPhone to just YouTube Kids and hand that device over to a child, your device won’t be in total disarray when you take it back. Guided Access doesn’t even grant access to the home screen.
Overall, Guided Access serves to protect your privacy, prevent accidental changes by a third party who may be using your device, or keep you focused on the task at hand. The timer function is especially convenient for limiting usage to specific tasks. It’s ideal for parents, educational settings, businesses, restaurants, museums, and so on.
How to enable Guided Access
We start by enabling the feature using iOS 15. These instructions work equally well with all Apple mobile devices.
Step 1: Open the Settings app.
Step 2: Scroll down and choose Accessibility.

Step 3: Scroll down and choose Guided Access near the bottom.

Step 4: Select the toggle next to Guided Access to enable this feature (if it’s not already).

Step 5: Choose Passcode settings and then select Set Guided Access passcode. Enter a passcode twice. The passcode is the key to protecting your phone because the user must know what it is to exit the designated app. Alternately, you can enable Face ID or Touch ID as a way to end a Guided Access session.

Step 6: Go back to the previous screen and select the toggle next to Accessibility shortcut. This allows you to triple-click the Home or Side button and enter Guided Access mode at any time from within your chosen app.

How to use Guided Access
Do the following steps when you’re ready to concentrate on a single app.
Alternately, you can use Siri to start a Guided Access session by launching an app and telling Siri to “turn on Guided Access.” Siri will not do anything until you have an app open.
Step 1: Open the app that you want to focus on.
Step 2: Triple-click the Side button (iPhone X or newer) or the Home button (iPhone SE or any older Apple device with a Home button).
Step 3: Tap Guided Access.

Step 4: Use your finger to circle parts of the screen you don’t want responding to touch input. This is convenient when watching a video or reading so you cannot tap out of your task. You can move or resize the defined areas or tap the X to remove them.

Step 5: Select the Start button in the upper-right.

How to choose additional Guided Access options
After you open an app and activate Guided Access, you can easily move in and out of the mode with a triple-click of either the Home or the Side button. To see additional options, you must first click out of Guided Access. Then you will see an Options button in the bottom-left corner. This lets you control access to several features.
Step 1: Choose Options.

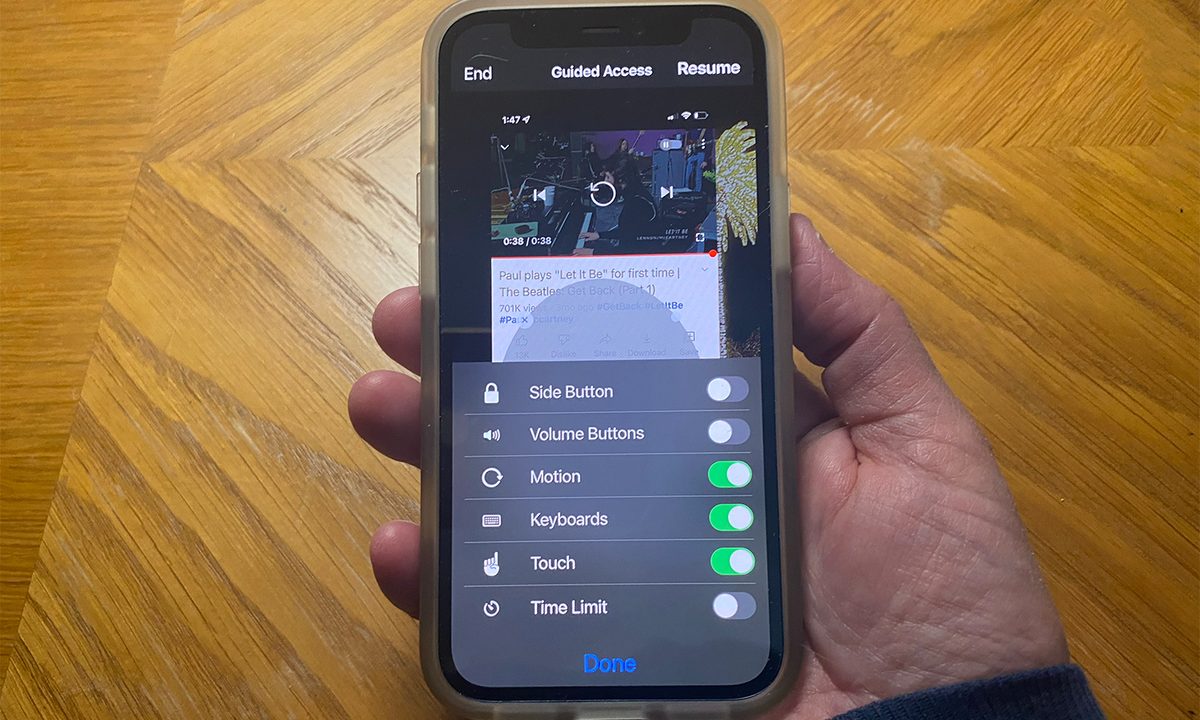
Step 2: A pop-up menu appears at the bottom displaying six toggles: Side Button, Volume Buttons, Motion, Keyboards, Touch, and Time Limit. Choose the toggle to enable or disable each and then select Done.

Step 3: Resume to continue your Guided Access session.

How to exit Guided Access
There are two major ways to terminate a Guided Access session.
Once Guided Access is enabled, anyone trying to leave the locked app will receive a message telling them to triple-click the Home or Side button to exit. If they don’t know the passcode, they won’t be able to exit Guided Access.
If you ever get stuck in Guided Access mode, just hard-reboot the device to clear it out. To completely disable Guided Access, go back into Settings and tap the Toggle to disable this feature.
Step 1: Triple-click the Side or Home button, enter the passcode, and tap End.

Step 2: Triple-click the Side or Home button and allow Touch ID or Face ID to end the session.