Regularly backing up your mobile devices is a tedious but necessary chore. With an iPad that you don’t use as your primary computing device, it’s easy to forget that it still contains a rich store of information about your personal life — emails, notes, pictures, messages, health information, device settings, music, and apps with private data that you would be very sorry to lose should your iPad get lost, destroyed, or fall into the wrong hands.
Regular backups ensure that you can restore all of your critical information if you have to. If you ever decide to replace your current iPad with a new model, backups make it easy to transfer information to your new device without a time-consuming setup. You can back up your iPad directly to your MacOS laptop or desktop, as well as to your PC, using iTunes. You can also back up to iCloud directly from your iPad. One method is not inherently superior to the other — it all depends on your preferences. We’ll show you how to back up an iPad both ways.

Back up an iPad with iTunes or Mac
If you’re using a Mac running MacOS Catalina or newer, then you’ll find that iTunes has been split into separate apps. The instructions are mostly the same, but you’ll start by selecting your device from Finder once connected. If you’re using a PC, then iTunes is still the software of choice. Backing up your iPad with iTunes or Mac Finder lets you make a full local backup that resides on your computer. Local storage depends on how much free space your hard drive has available. While encryption is turned off by default for local backups, you can make an encrypted backup of your iPad via iTunes or Finder to store on your computer. An iPad backup doesn’t include iTunes or App Store content; iBooks PDFs; synced iTunes content, like MP3s, CDs, videos, books, or photos; or data currently stored in iCloud, like iCloud photos, text, multimedia messages, iMessages, Apple Pay info and settings, Apple Mail data, or Activity, Health, and Keychain data. Those last three require an encrypted backup.
Backing up your iPad on your Mac is accomplished in a single iTunes or Finder summary window. If you’re using this method, launch the app and connect your iPad to your computer via the USB cord that came with your iPad. You may be asked to punch in the iPad passcode or “Trust This Computer” — just follow the on-screen instructions.
When everything is connected, select the iPad icon from the top left side of the iTunes or Finder window. If you have Health and Activity data stored on your iPad, check the Encrypt Local Backup box, and create a new password that will be stored in your Keychain. If you’re not saving this kind of private data, you can choose to make an unencrypted backup. Then, click the Back Up Now button. Wait until the progress bar finishes traveling across the top of the window. Then, click the Done button at the bottom right and the Eject button located next to the iPad icon. That’s it.

Back up an iPad with iCloud
You can back up your iPad with iCloud via a Wi-Fi connection. The process is simple, but you’ll want to make sure you have enough space in your iCloud account to accommodate your backup and that you are signed in to your iCloud account before getting started. All Apple device owners get 5GB free in iCloud, but if your backup takes up more space than you have available, you’ll need to purchase additional iCloud space.
An iCloud backup encompasses all data and device settings; HomeKit configurations; home screen and app organization; purchase history (but not the content) of music, movies, TV shows, apps, and books; ringtones; and your visual voicemail password. It does not include anything that is already stored in iCloud, such as Contacts, Calendars, Notes, iCloud Photos, shared photos, iMessages, Voice Memos, text and multimedia messages, Health data, data stored in other cloud services (Gmail, Exchange, and Apple Mail), Apple Pay information and settings, and Face ID and Touch ID settings. Backups via iCloud are always encrypted.
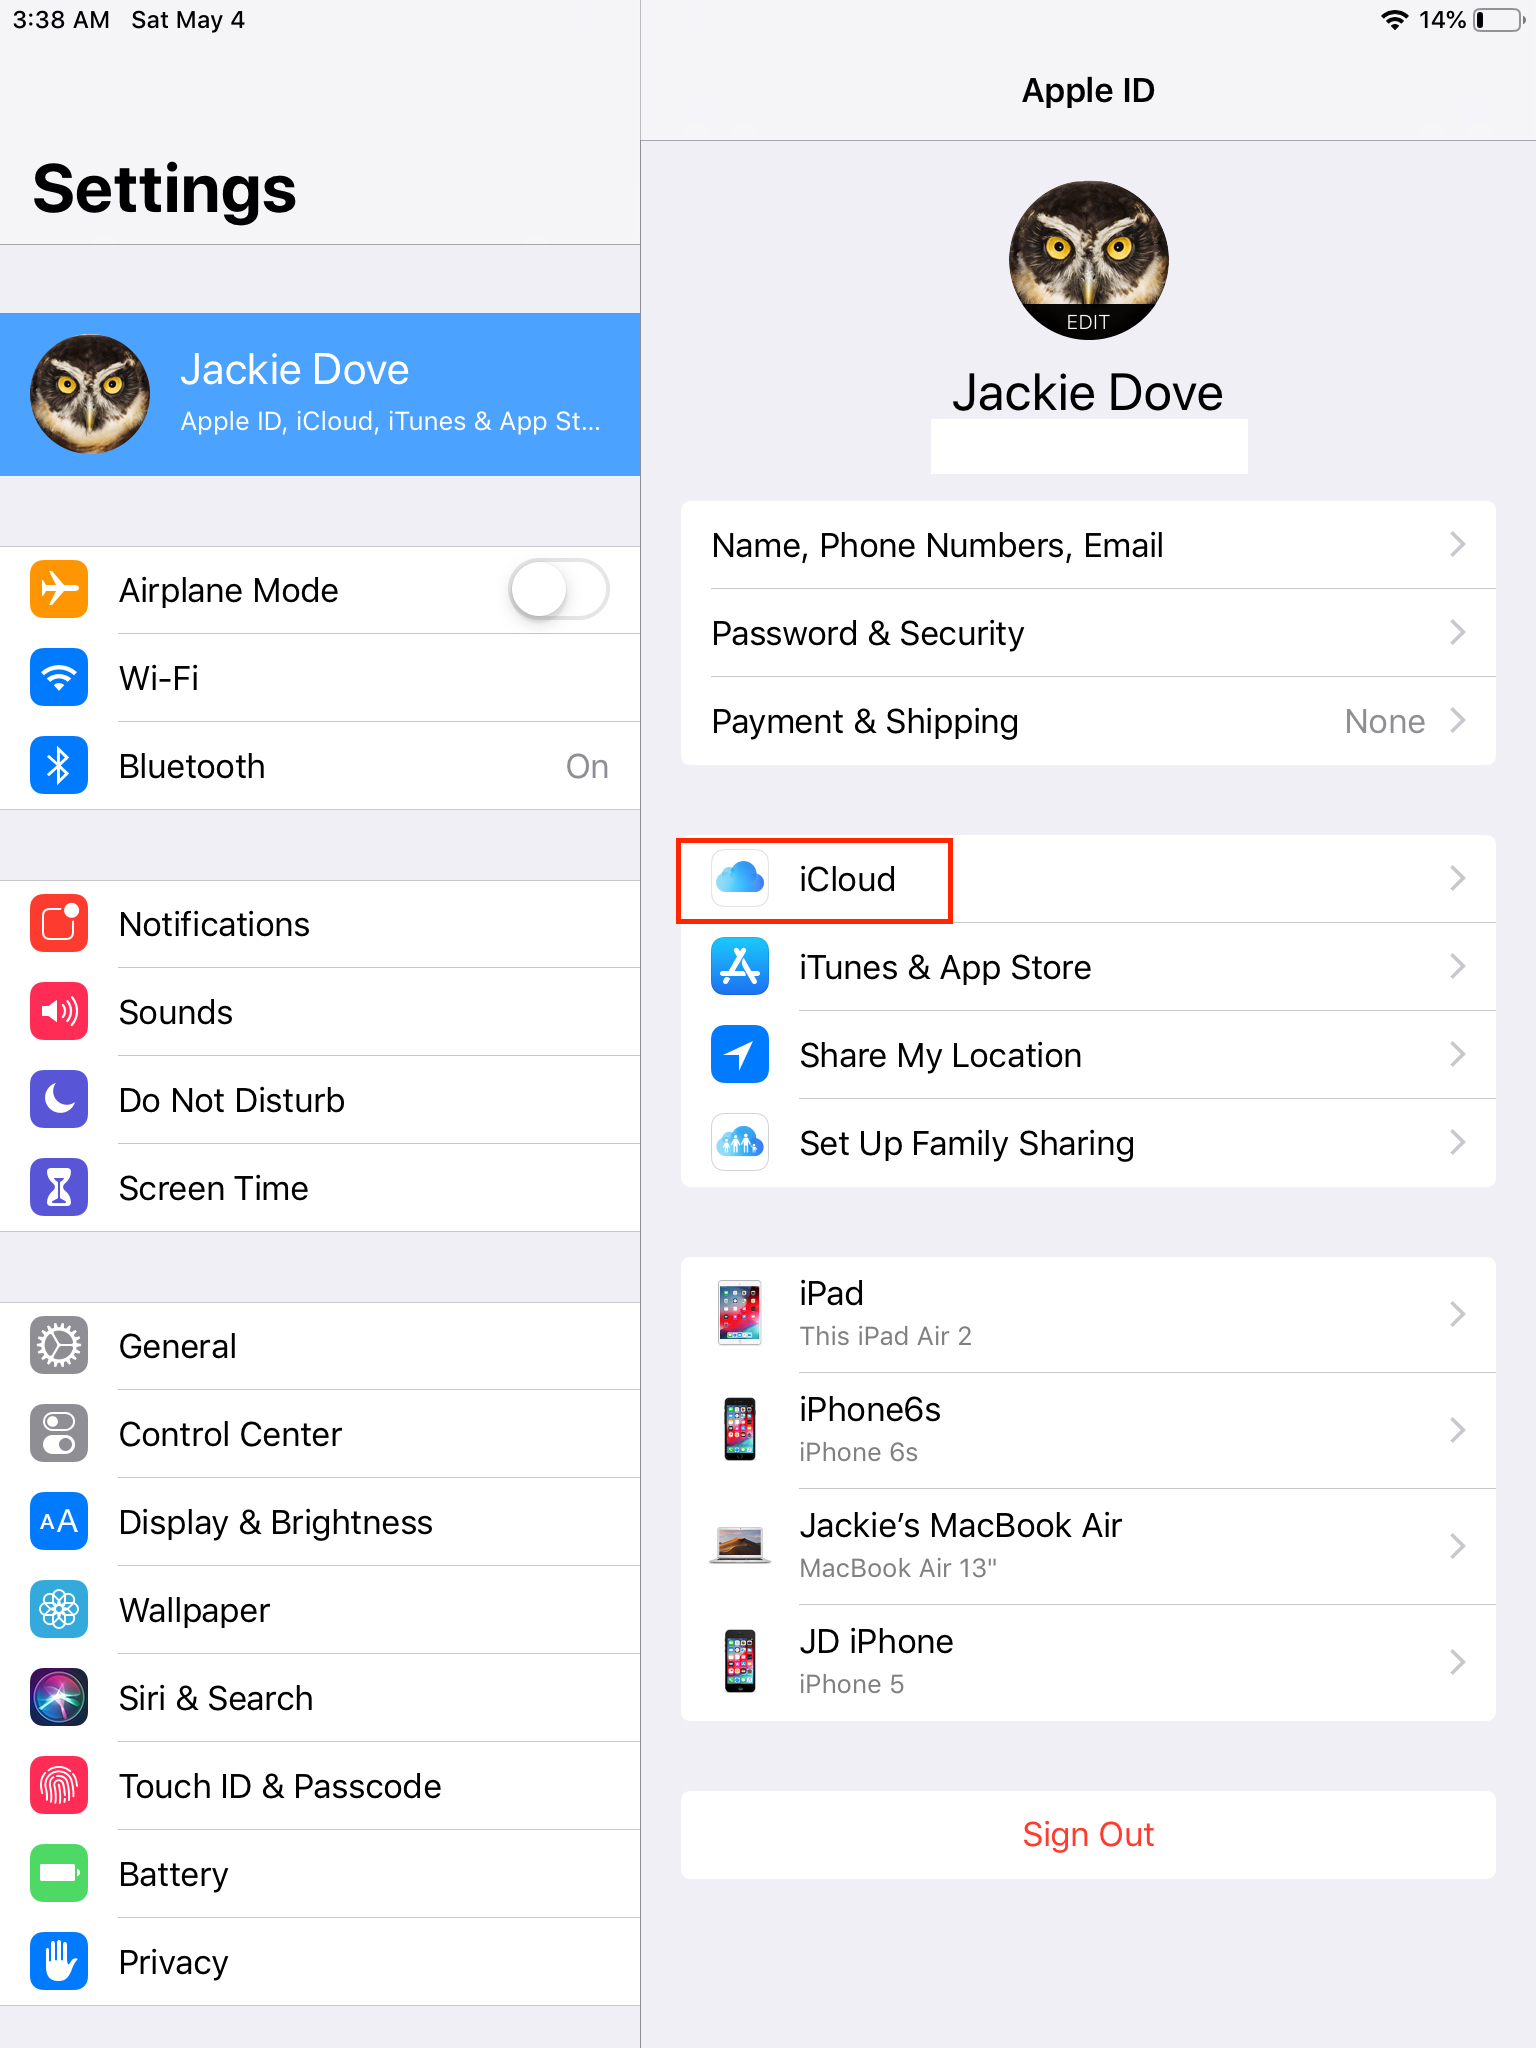
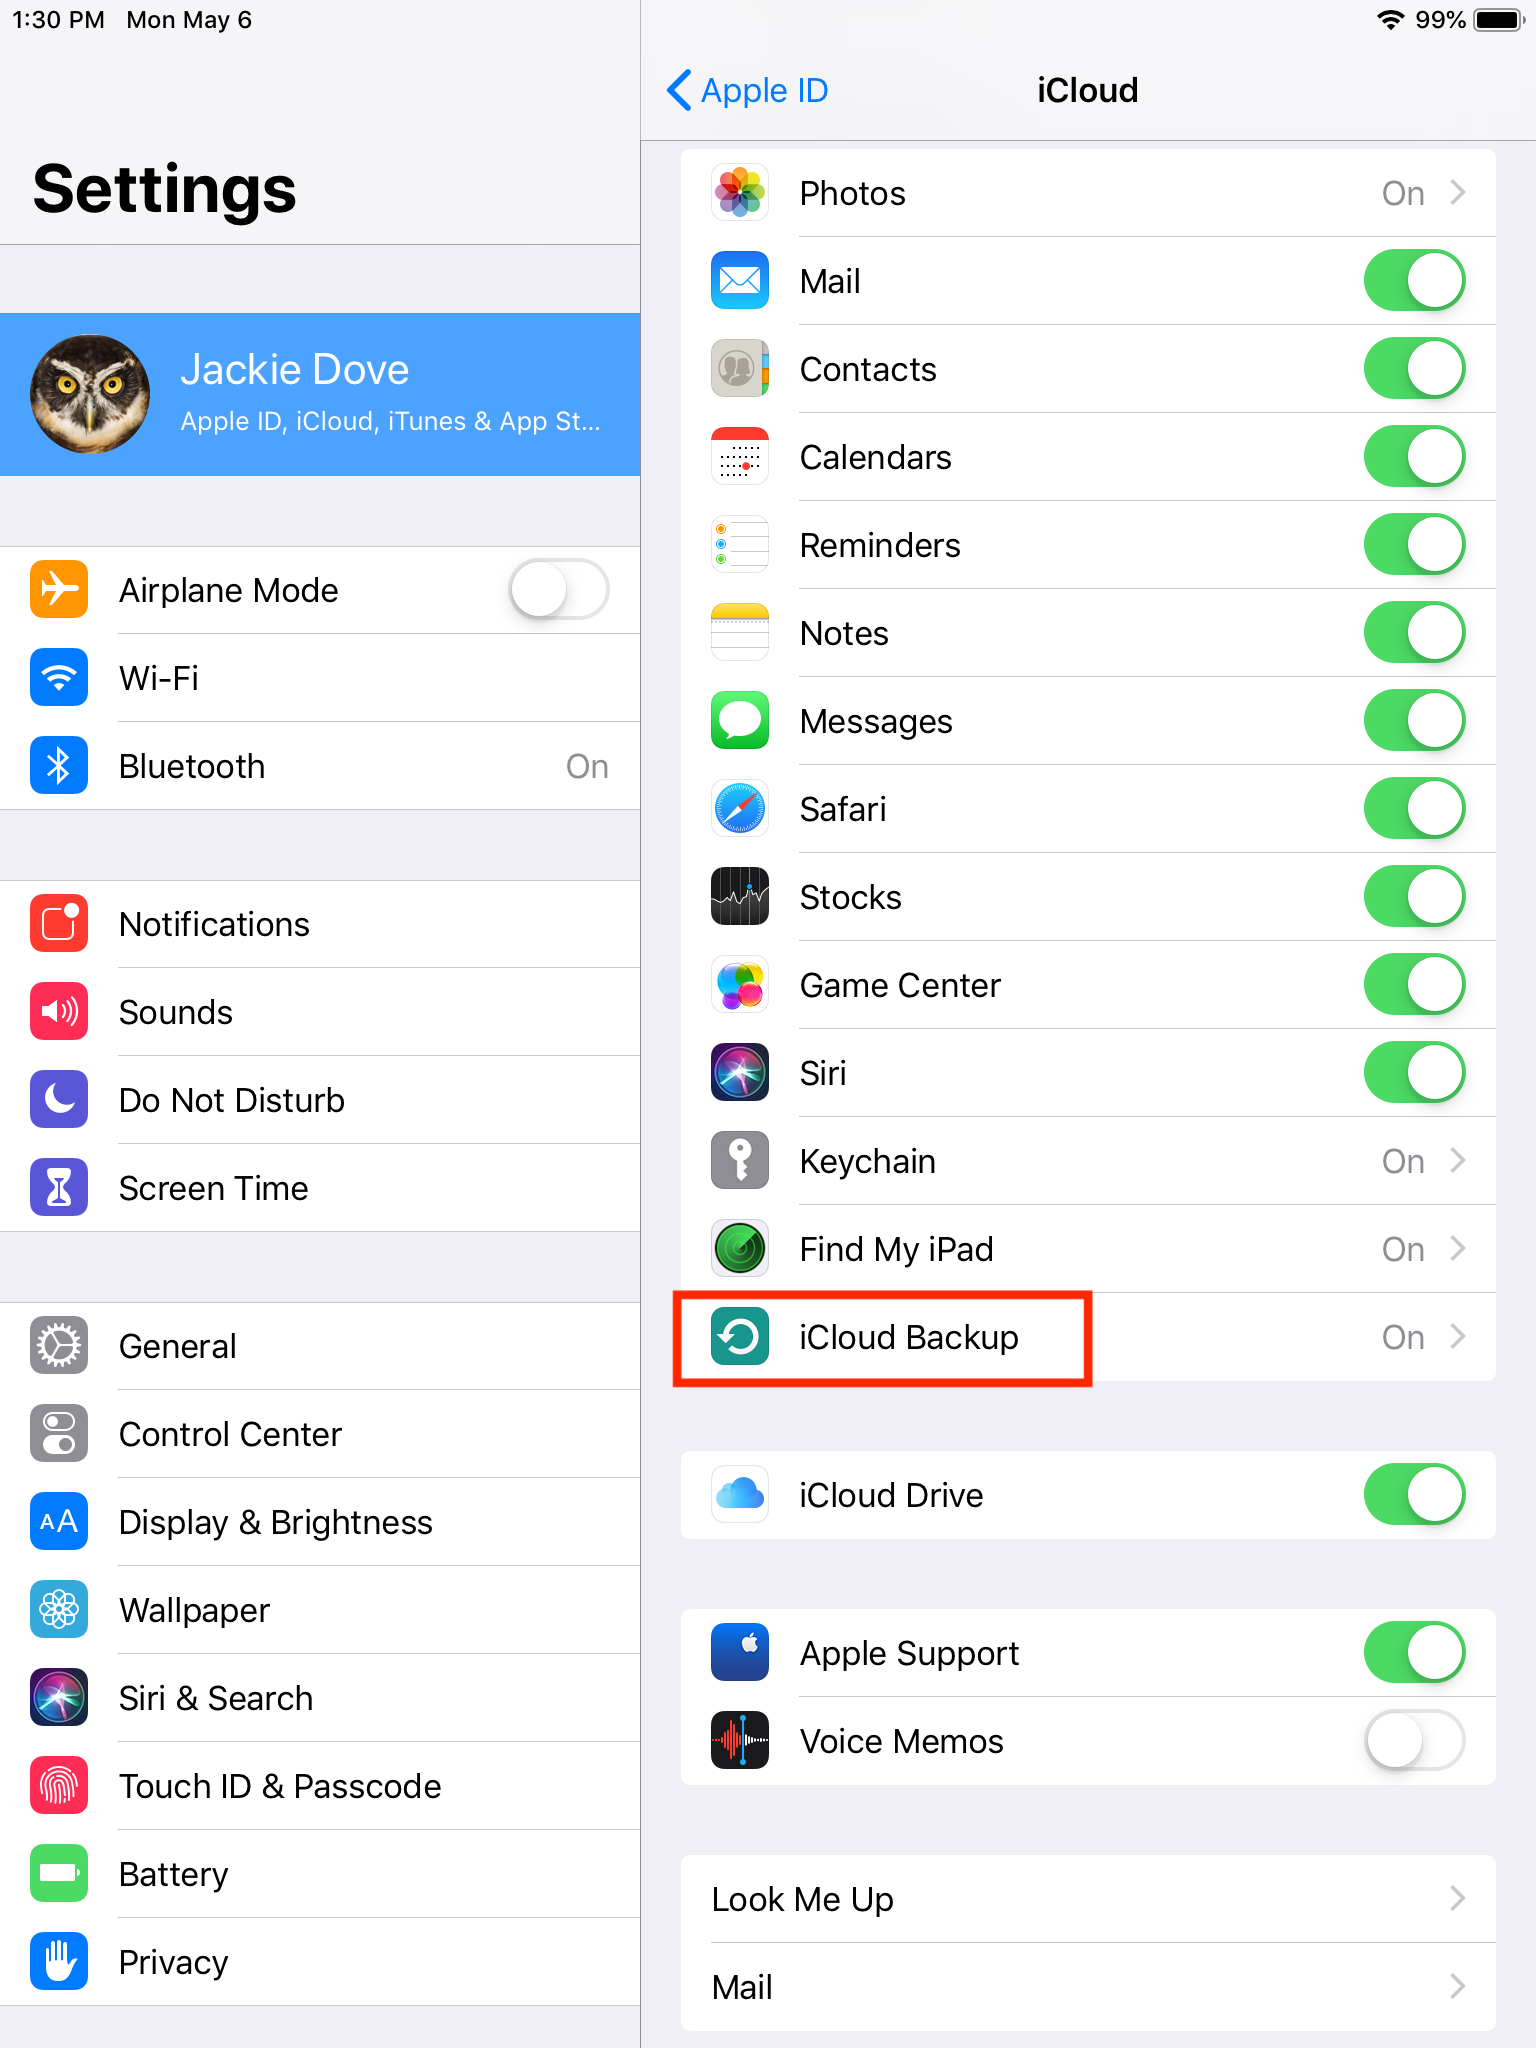
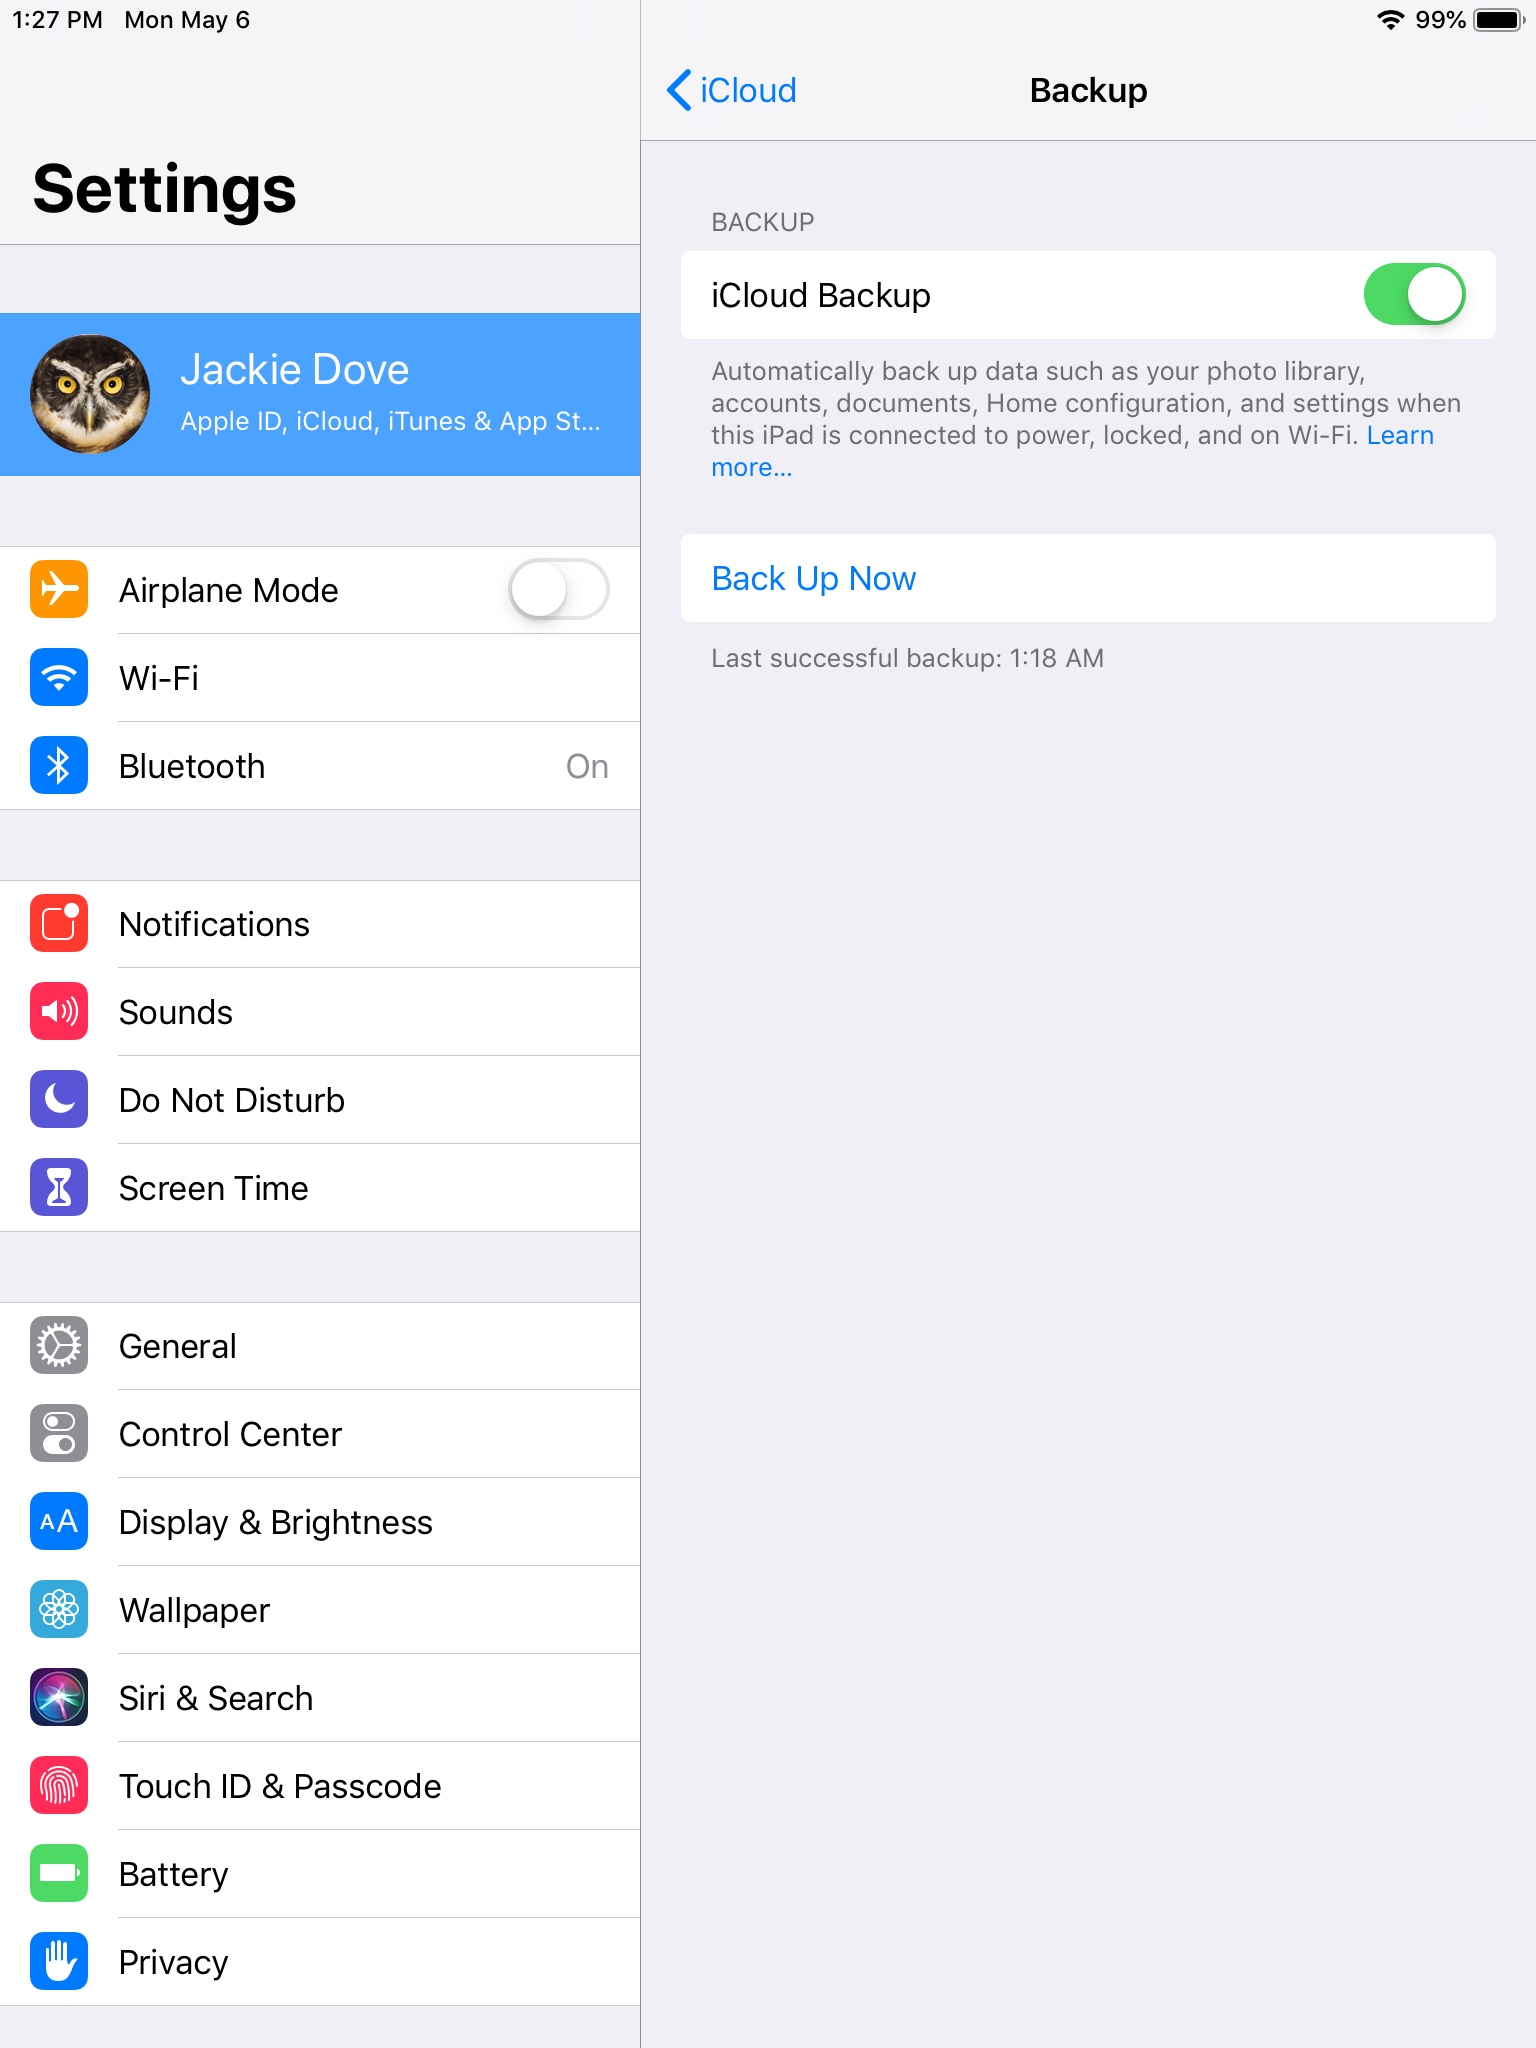
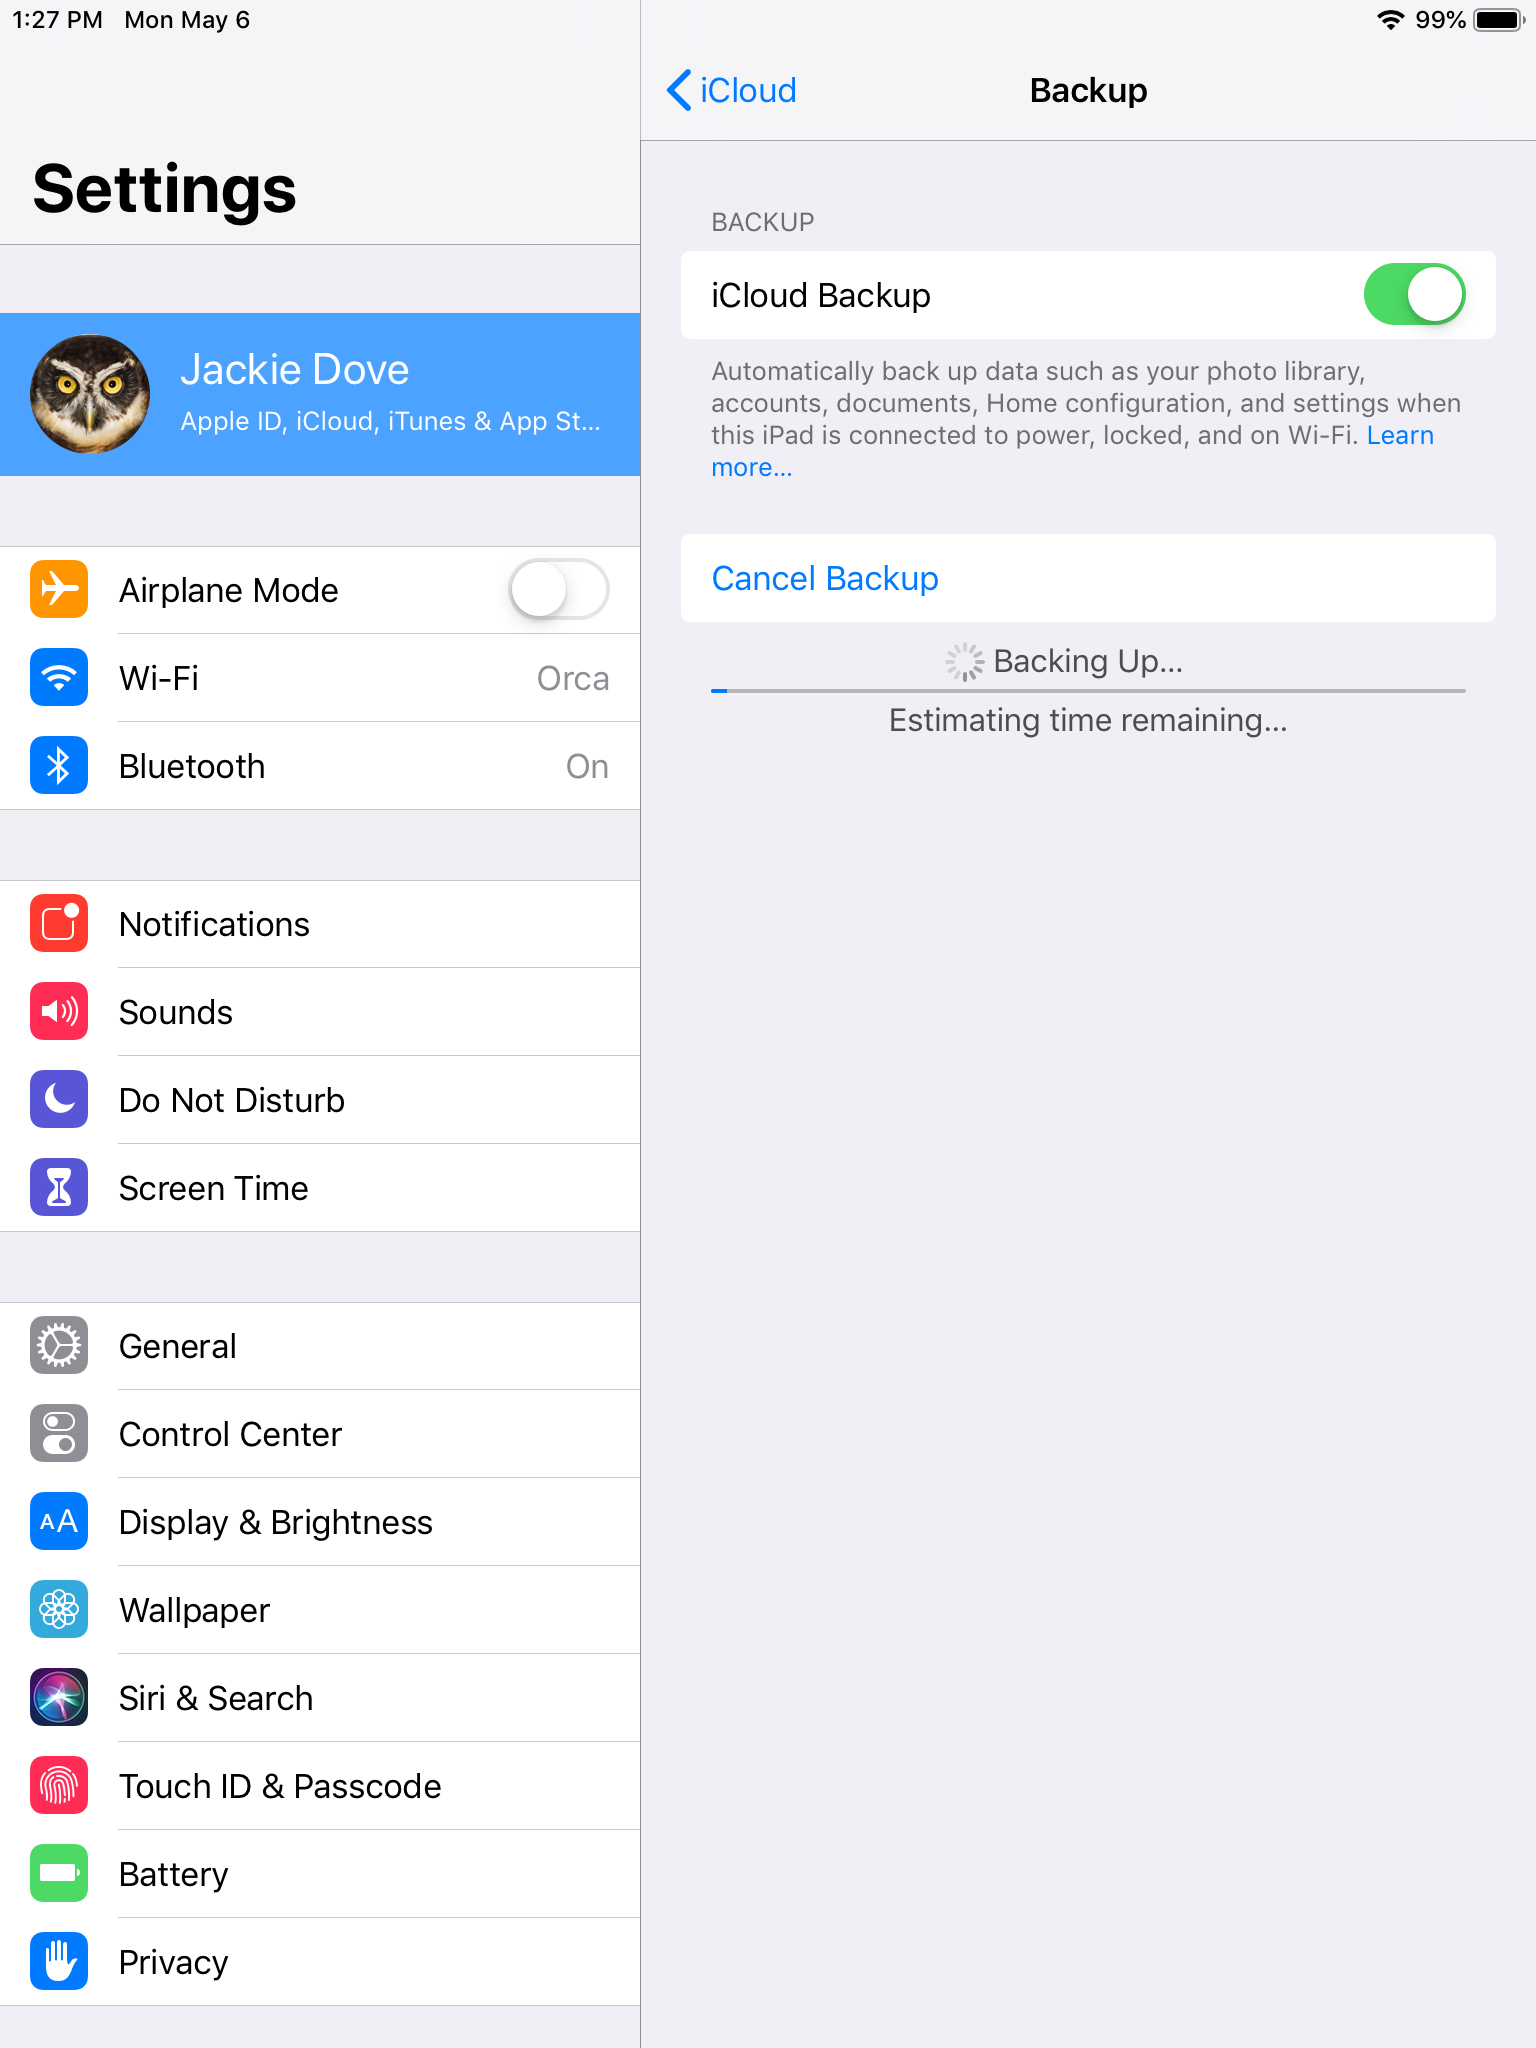
On your iPad, make sure that you are connected to your secure network. Then, go to Settings > Your Apple ID > iCloud and tap iCloud Backup. Enable iCloud Backup by toggling the button to green and tapping OK. At that point, you’ll get an alert telling you that your iPad will no longer back up to your computer automatically when you connect your device. A pop-up alert may also appear telling you that the backup is enabled. Then, tap the Back Up Now command. A progress bar appears under the command — wait until it is completed. A notation then appears, telling you the time of the most recent backup. With iCloud backup enabled, iCloud will back up your iPad every 24 hours.
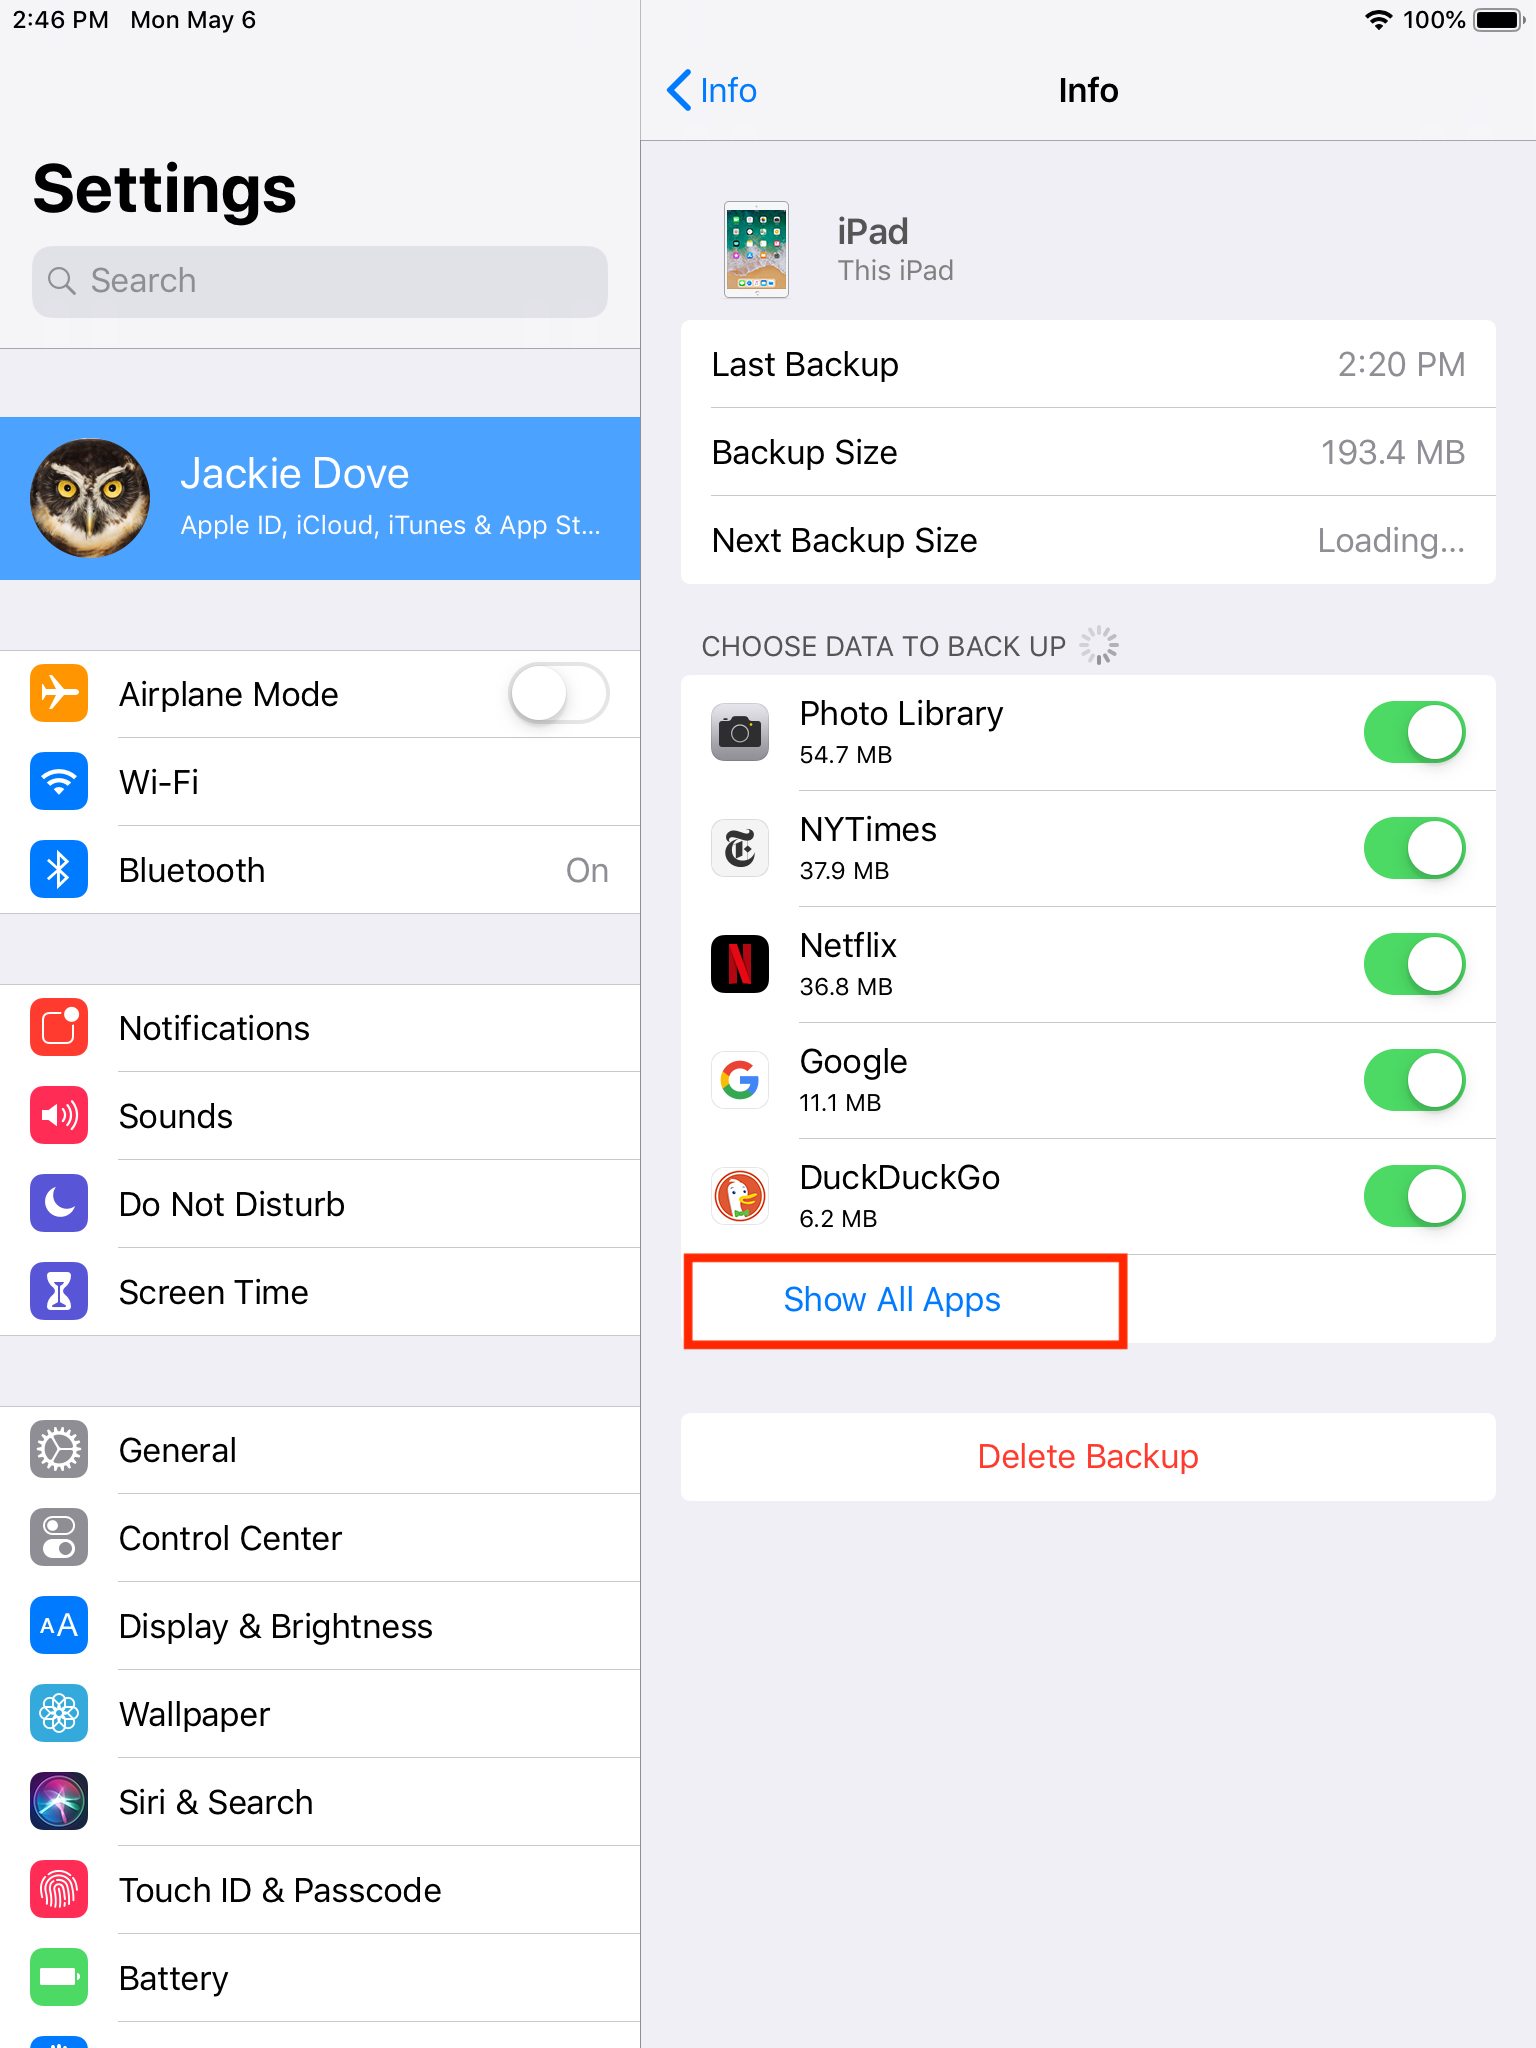
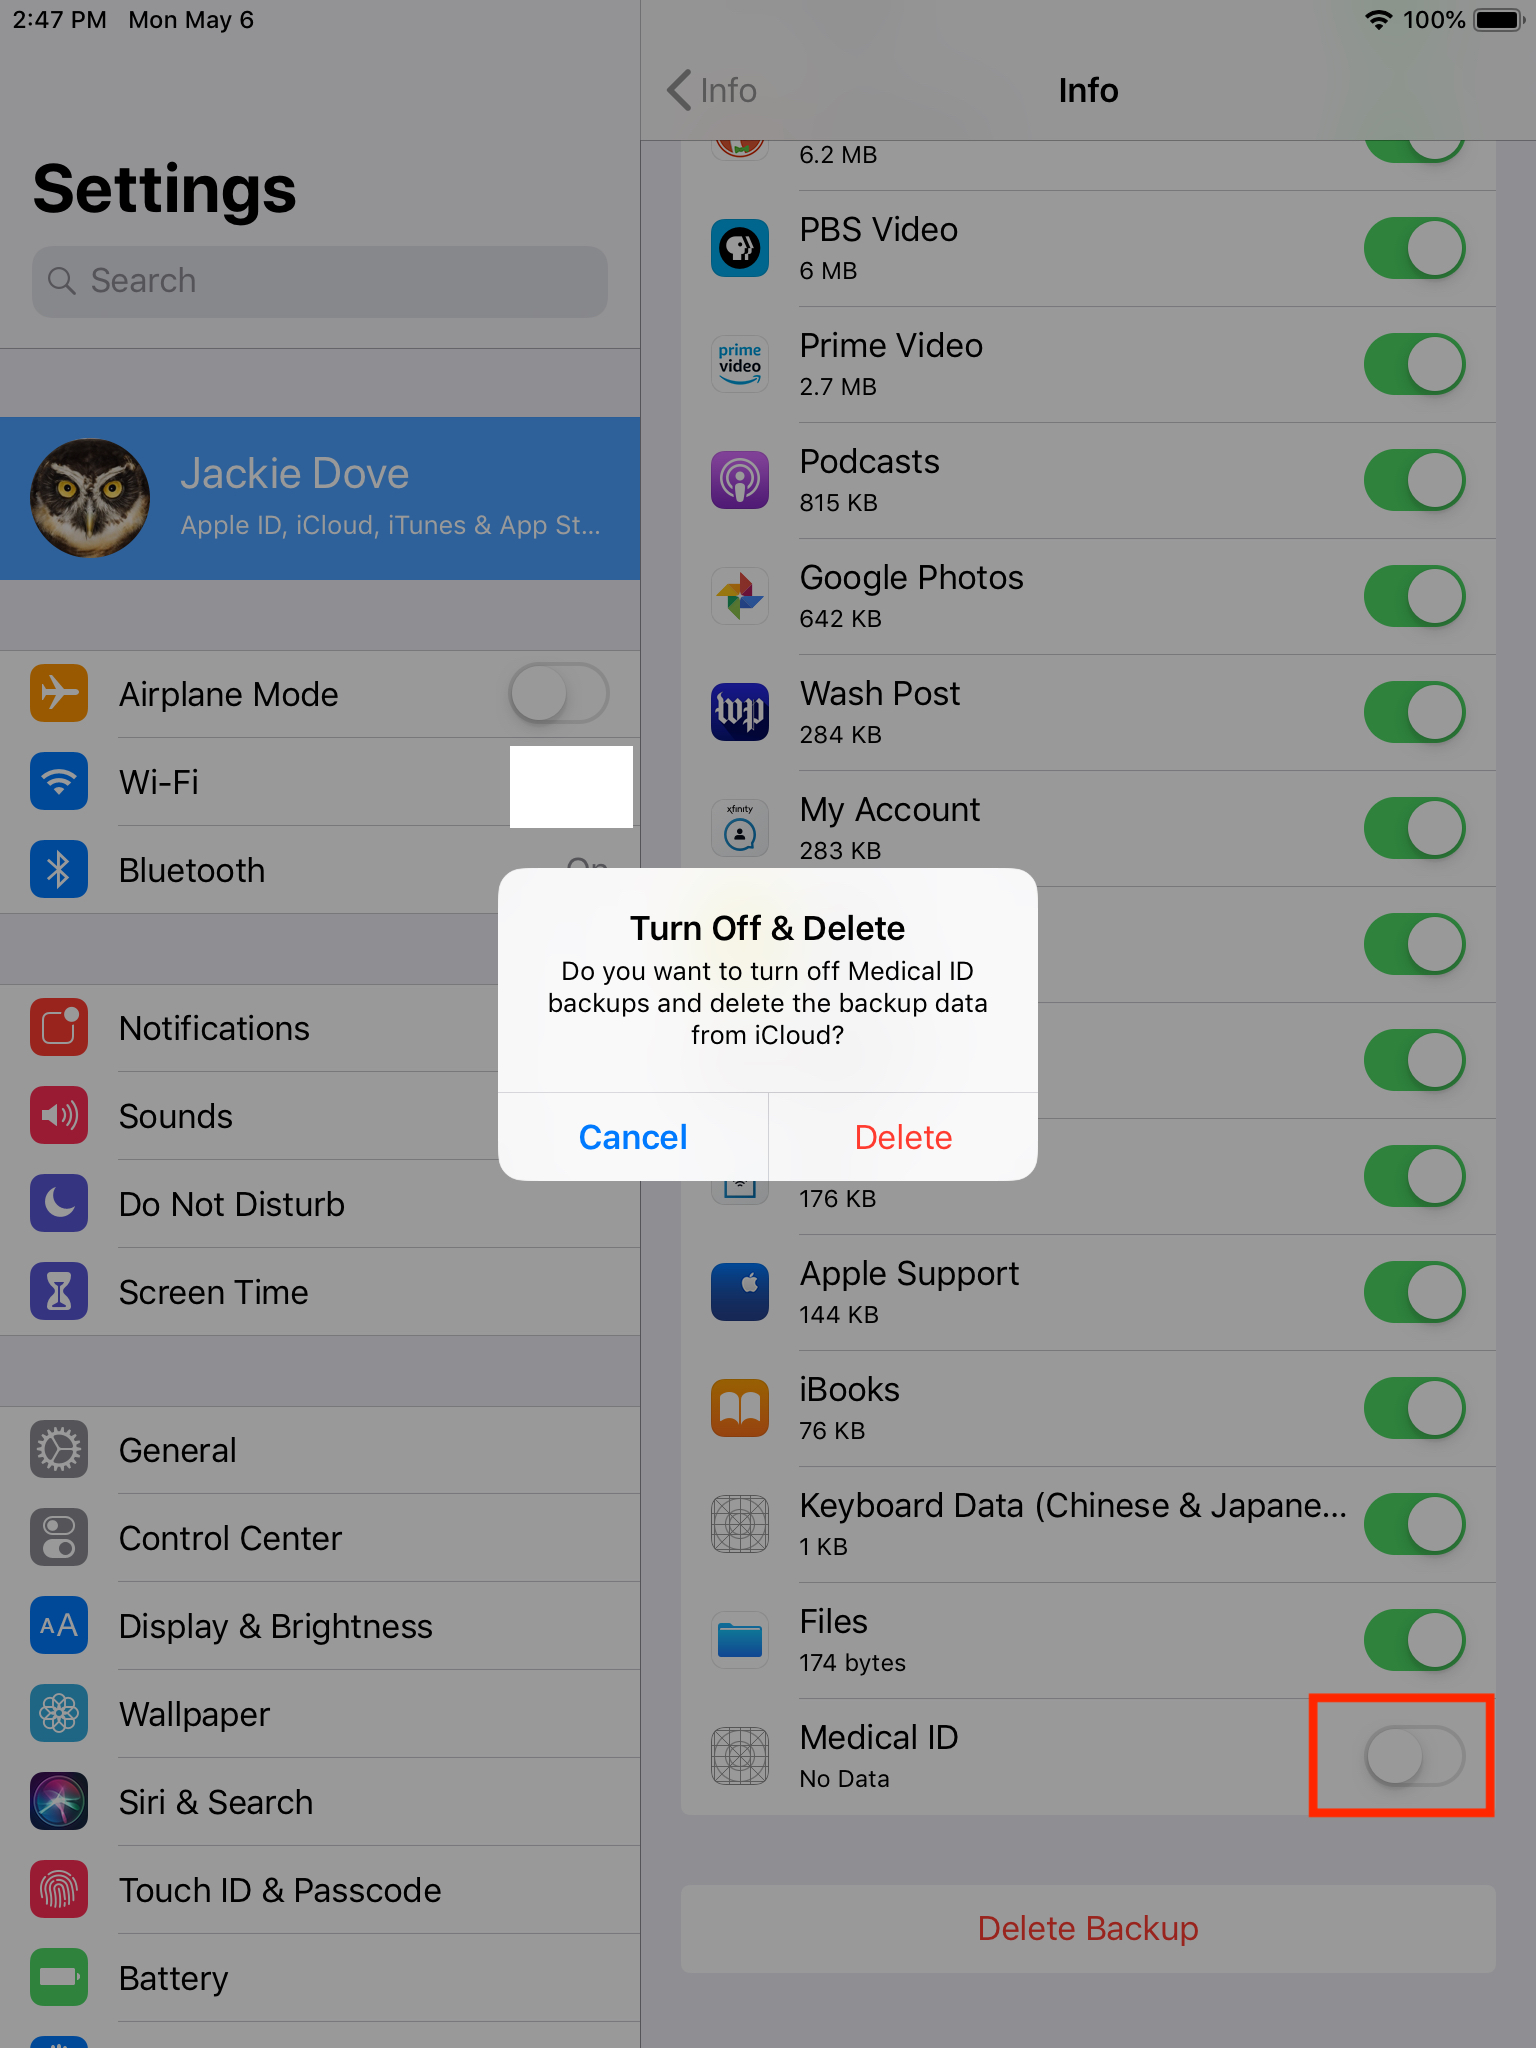
You can even manage your backups by prioritizing which data is most important to you. That can save you space if you’re not willing to add to your free iCloud account. Just tap on the Manage Storage command and choose your iPad. Tap the Show All Apps option to see the full roster of your iPad apps. Then, toggle some switches off.

If you back up via iCloud, you never have to manually mess with backups again, as you can set backups to take place automatically. To do this, leave the iCloud Backup enabled in your iPad settings. Then, plug your iPad into a power source, connect to a secure Wi-Fi network, and keep your device screen locked. It will upload only the changes you made to your iPad during that interval.
One more thing: You don’t have to choose one backup method over the other — you can do both, though not at the same time. This allows you to back up and retrieve your data anytime from anywhere and also lets you store your complete backup on your computer at home for easy access and a backup in the cloud just in case.
Editors' Recommendations
- Are you having iPhone alarm problems? A fix is coming soon
- No, we weren’t expecting this with the revamped iPad Pro
- Apple is about to do the unthinkable to its iPads
- We finally know when Apple will announce its 2024 iPads
- An Apple insider just revealed how iOS 18’s AI features will work