
If you’ve ever lost speed on a long traverse or had to unstrap your bindings on a flat cat track, you know how important it is to have a freshly waxed snowboard. Keeping your board regularly waxed allows you to go faster downhill, glide smoother along traverses, and exert more control in tight trees. It also keeps your base in good shape, extending the life of your snowboard.
Tune shops, however, are expensive and time-consuming. If you want to wax your board on a consistent basis, the easiest and most cost-effective way is to learn to do it yourself. Fortunately, that’s a lot easier than it looks. To learn how to wax a snowboard properly, all you need is a few pieces of equipment, a brief tutorial, and a little practice — you’ll be working like a pro in no time. Here’s the best way to wax a snowboard yourself.
Things to consider
What type of wax is best?
Before you get started, you want to consider what type of wax to use. If it’s the middle of an exceptionally cold winter, or you live in a dry climate where the temperature gauge rarely hits two digits, you’ll want to invest in a good cold-weather wax. Conversely, if it’s late-March and you’ve already stocked up on spring riding shorts, you’ll want a warm weather wax that’s specifically formulated for spring conditions. Anything in the middle and an all-weather wax is your best bet.
How often should you wax your snowboard?
The next thing to think about is how often to wax your snowboard, which largely depends on how often you ride. Opinions range but most people agree you should wax your board every three to 10 times you ride. Specific riding style also plays a factor. If you’re an aggressive snowboarder who hits a lot of manmade features that wear on the wax — or if you stomp a lot of landings that put pressure on your base — you’re going to need to do it more often. If you’re a fairly casual rider who doesn’t work the board as intensely, you likely won’t need to do it as often.
How fast you want to go is another factor — in essence, how important is speed to you? If you like to play in the snow and aren’t concerned with race-style performance, you don’t need to wax your board religiously. If you want to charge like hell and be the first one to the lift line every time, you need to wax practically every session — or at least more frequently than your peers.
The last thing to consider is the type of board you use. Riders whose board has a sintered base need to wax more frequently whereas extruded bases tend to be able to go a bit longer. Although the porousness of a sintered base absorbs tons of wax and ultimately rides faster than extruded bases, it becomes slower than its extruded counterparts when wax is low.
Really, the best gauge you have to tell when it’s time to wax your board is simply how it feels. If you notice it’s starting to slow down, it’s time to give it a wax.
How to wax your snowboard
1. Put your snowboard in the vises.
What you'll need
- Vises (2)
- Base Cleaner
- Snowboard Wax
- Waxing Iron
- Scraper
- Scuff Pad
- Polish Cloth
Clamp your vises onto the bench, table, or counter you plan on working from, screwing them down securely before placing your snowboard on it with bindings facing down. If you don’t have vises, simply remove the bindings and put the board face down on the floor.
Note: If you use the vises and keep your bindings on, be sure the straps are tucked carefully out of the way and the screws aren’t exposed to the iron. The heat can permanently warp or damage screws, rendering the bindings ineffective and even dangerous to ride.
2. Clean the base
Using a base cleaner, thoroughly wipe the board down from nose to tail. The idea is to completely remove all traces of former waxings, along with dirt, grime, and grit. This allows the new layer of wax to be thoroughly absorbed.
3. Prepare your iron
Plug in your iron and place it on the lowest possible setting. This assures that you’ll be able to melt the wax without it smoking or getting too hot for the base to handle. In a perfect world, it’s best to use a snowboard-specific iron since it distributes heat consistently while allowing you to apply the wax more evenly to its squared-off edges. However, there’s nothing saying you can’t use a regular clothing iron either. Just keep in mind that if you do, you’ll never be able to use it for clothes again — unless you want them covered in snowboarding wax, of course.
4. Drip the wax
Once the iron warms, turn it upside down and then ever-so-gently place a piece of wax on the metal. As it starts to melt, little droplets will begin dripping onto the board. Start at one end and carefully drip a line around the edges on both sides. Once the edges are spotted with dots of wax, begin zig-zagging back and forth across the base, splattering wax as you go.
5. Spread the wax
Once the base of the board is covered with the dripped wax, gently press the iron down on top of them. As you apply heat, the droplets will begin melting again and become smooth enough to spread around. Work your way across the base, moving the iron in circular motions to spread a thin, even layer of wax. Pay extra attention to the edges of the board which tend to get dryer and wear down wax faster than the center of the board. Most importantly, make sure you move quickly and never hold the iron in one place. Allowing it to linger burns your board or warps the base permanently.
6. Let it dry
Leave your board for at least 30 to 40 minutes. The longer you leave it the better and some people even let it sit overnight to absorb every last drop of wax. At a bare minimum, it needs 10 minutes to fully dry.
7. Scrape the board
Once the wax completely dries and has cooled, it’s time to scrape the board. Begin at the nose and pull a scraper lengthwise to the tail, keeping a firm, steady 45-degree angle. As you do this, you’ll see white bits of wax peel up and slough off. Do this repeatedly until all excess wax has been wiped from the board. You can’t really over-scrape your board, either — the bottom is highly absorbent, so really get in there and scrape away.
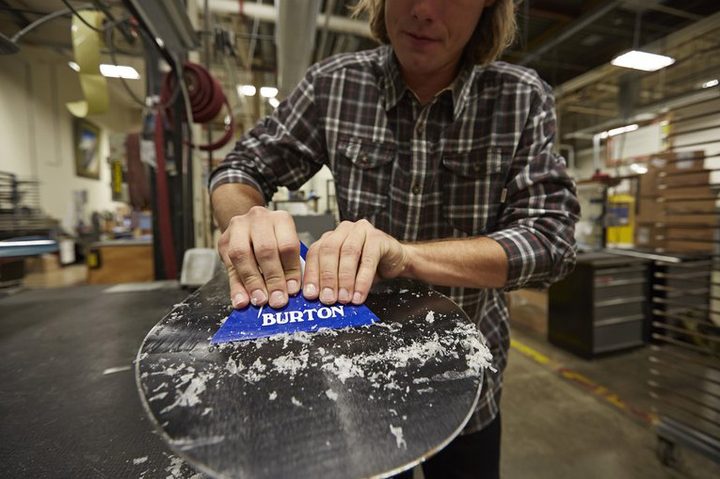
Caution: Always use plastic scrapers. Metal versions are meant for applying a board’s actual base material and can damage your board if used for scraping wax.
8. Scrape your edges
Your scraper should feature a small notch on one side so, once you’ve fully scraped the base, drag the notch along the edges to remove any wax from the metal sides. This part is extremely important — caked wax on your edges makes them much less responsive and harder to hold.
9. Brush and polish
When your board and edges have been fully scraped, use a scuff brush on your board from tip to tail, taking long, broad strokes. If you don’t have an official snowboard brush, you can use a horsehair bristle brush or a light Scotch Brite scouring pad. Brush the base until little bits of white flakes stop appearing. When you’re done, wipe the excess dust off with a soft cloth and give it a quick polish.
Best gear for the job:
Swix Waxing Table
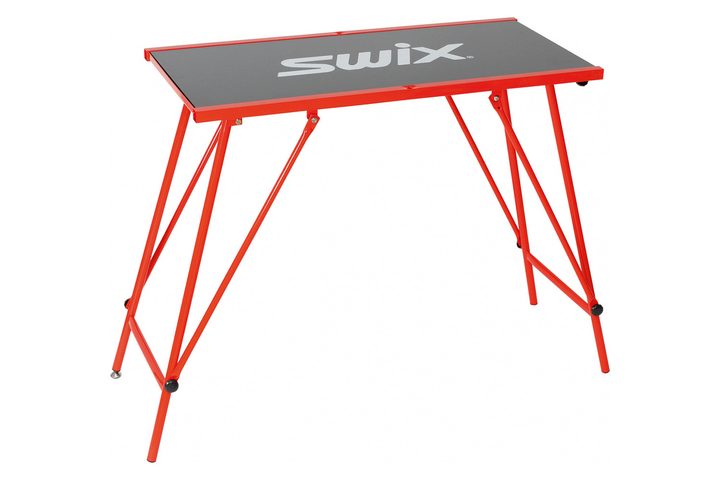
Whether you’ve set up a full-time tuning station in your garage or want a portable table to bring up to the cabin, Swix’s 96- by 45-centimeter waxing table features easily foldable legs and weighs just 25 pounds. It’s also sturdy enough to firmly hold your board as you scrape it, yet not so big and clunky that it’s a hassle to carry.
Burton Tuning Vises
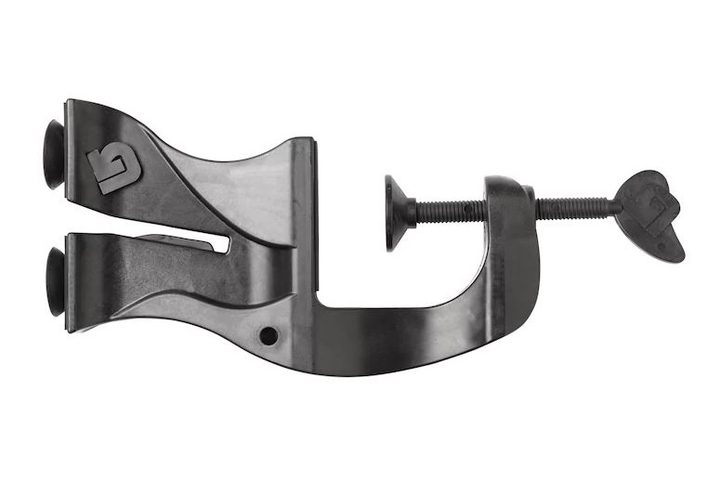
These awesomely useful snowboard-specific vises lock your deck into place with a firm suction grip and hold it steady in a horizontal position for waxing. On top of that, they can be turned vertically for edging and tuning. Their compact size makes them easy to throw in a gear bag or take for a weekend ski trip. As a bonus, each one features a bottle opener on the bottom so you can crack a cold one while you work.
Toko Soft Wax Box

Having loose wax and tangled iron cords cluttering your gear bag is a nuisance — which is exactly why this soft wax bag from Toko is so great. This fully padded, insulated wax bag is custom-designed for tuning gear with a bottom compartment fit for an iron and a roomy upper storage unit with two plexi bins for wax. It also features two large zip-up sleeves on each side for scrapers, brushes, and other tools.
OneBallJay BioGreen Citrus Base Cleaner
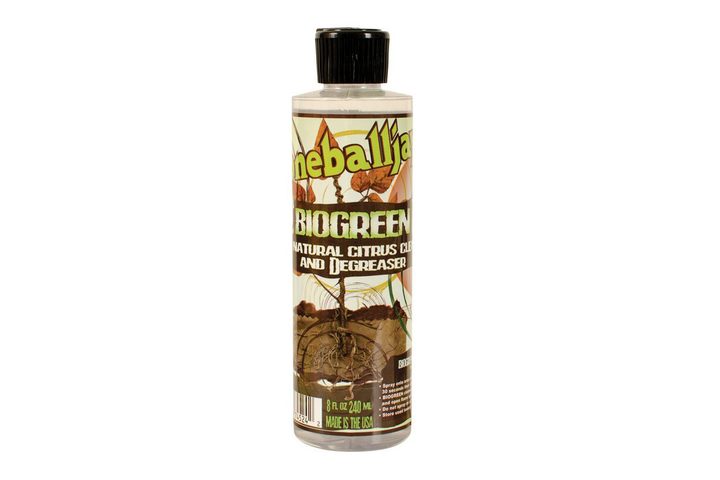
If you spend lots of time grinding rails or dragging your board through a lot of muck, OneBallJay’s BioGreen base cleaner helps you wipe last session’s grime off your base to get it ready for a fresh coat of wax. Using a citrus-based, fully biodegradable blend, the formula effectively removes old wax, dirt, and other grit to get your board moving fast again.
Dakine Nylon-Cork Brush
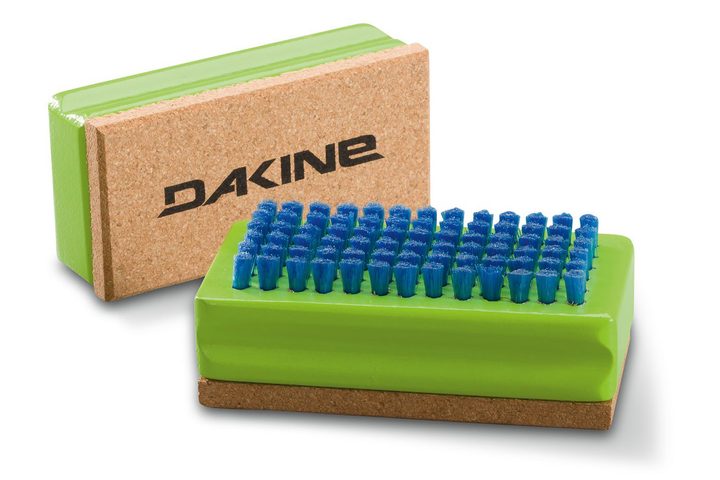
Dakine’s nylon-cork brush is a superb 2-in-1 that offers soft, nylon bristles on one side and sturdier cork material on the other. The bristle side works to brush your base clean pre-wax or smooth it out afterward while its cork side is used to buff new coats of wax. The ergonomic design places the soft nylon on the underside so that when you’re using the cork, it doesn’t irritate your palm.
Swix Plexi Scraper 4-millimeter
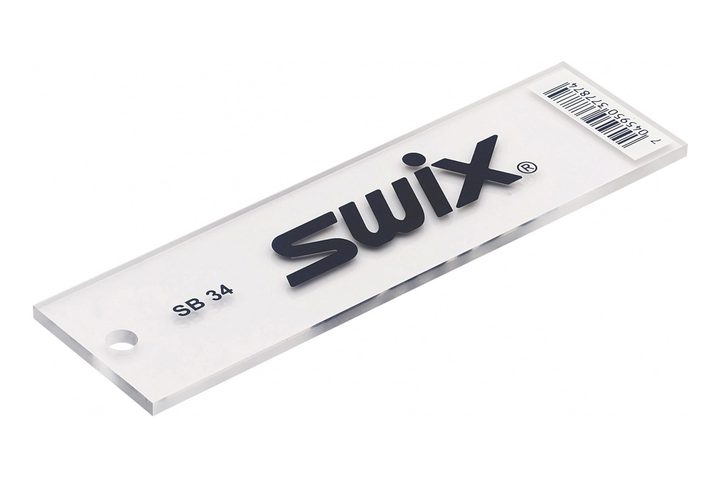
This simple plexi wax scraper from Swix features a thick, 4-millimeter blade that’s specially designed for snowboards. The scraper’s material is strong and durable with a sharp edge that lasts hundreds of scrapes, allowing you to get every last bit of wax off of your board.
Lib Tech All Temp Banana Wax
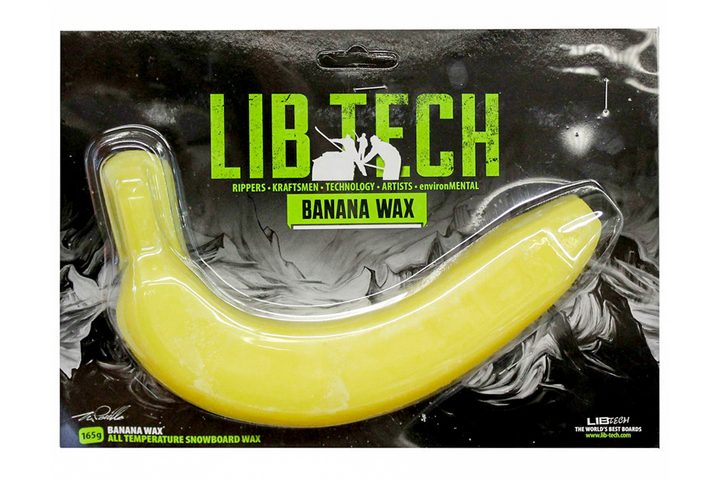
Meant to be as fast as a slippery banana, Lib Tech’s all-temperature wax is the perfect formula if you live in a climate where temperatures fluctuate — even within a few weeks — going from frigid and cold to warm and sunny. The wax, which is made by One Ball Jay exclusively for Mervin, can also be used as a rub-on wax.
For warm weather wax, try Demon’s United Orange Crush and for colder weather, check out Swix’s Buy at Amazon .
Dakine Super Tune Tuning Kit
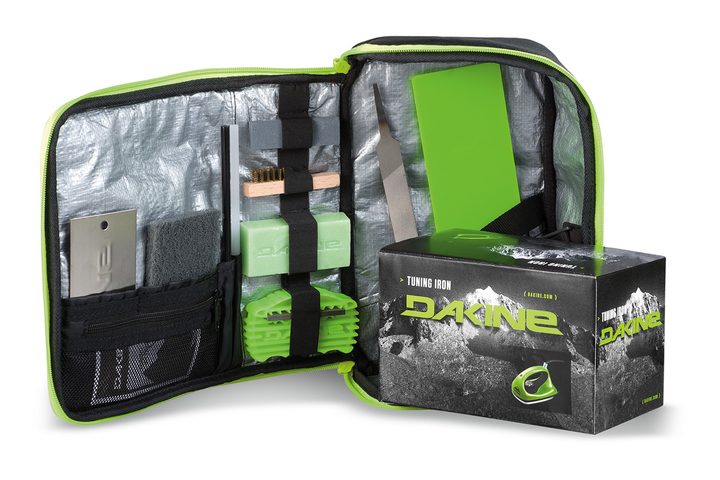
Made for riders who move around a lot and want their tuning gear in one convenient, portable pack, this kit includes a stainless steel 110-volt adjustable tuning iron, an all-temp wax octane bar, p-tex, a scraper, file, edge tool, stone, and even instructions in case you forget everything you learned from our guide. This all comes in a sleek and compact zippered case with multiple pockets custom fit for each tool.

This miracle product is meant for the top of your board, not the bottom, however, it works the same kind of snow-gliding magic, creating a slick, anti-stick surface on your board where snow tends to pile up. To use it, just spray the wax on top of your board, allowing it to shed snow off the front and sides thus preventing big heaps of snow from piling on and slowing you down.


