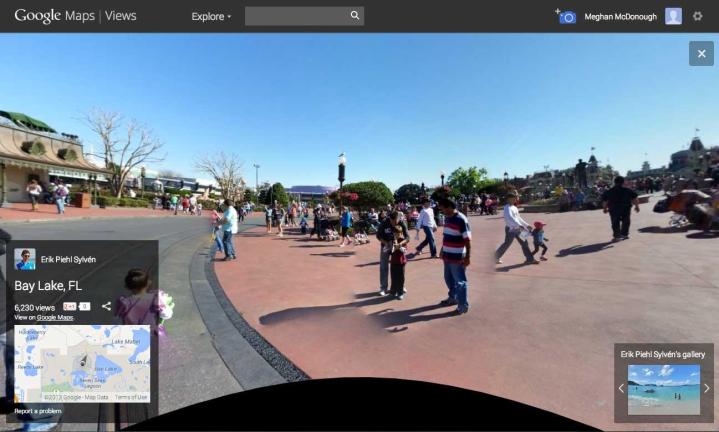
The 360-degree panoramas on Google Maps are definitely fun to explore, but they’ve been mostly created by Google up until now. Lucky owners of devices running Android 4.2 Jelly Bean are now able to use the nifty photo sphere capability of their camera app to add images to Google Maps with Views, a new photo-sharing hub for sharing the 360-degree panoramas.
We recently covered how Google Maps depends on the kindness of strangers to make edits and additions via Map Maker, but the new, plainly-named Views allows users to upload 360-degree panorama shots of various locations to add to Google’s new Maps. Of course, the catch is that user-added photo spheres make Google’s product better, but the company doesn’t compensate anyone who adds a photo sphere to a location.
Google wants anyone to be able to contribute photo spheres, even if they don’t have a device running Android 4.2. Below, we’ll walk you through how to take and upload a photo sphere using either your Android 4.2 device or your DSLR.
Using an Android 4.2 device
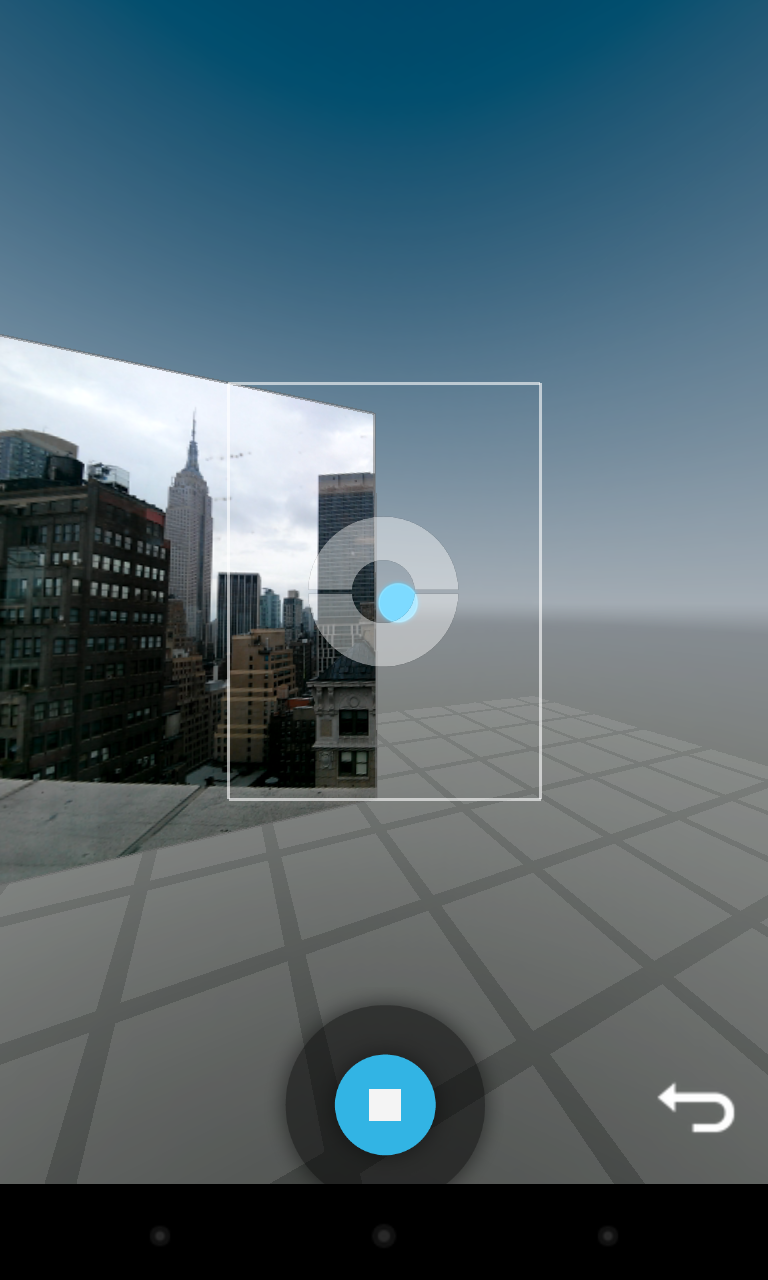 Shooting a photo sphere in your Android 4.2 phone or tablet is simple. In your device’s Camera app, look for the little camera icon in the bottom left-hand corner. Touch this, and it’ll open a menu for video, panorama, or what looks like an inverted panorama symbol on a globe. Tap the latter one; that’s the photo sphere button. Holding your device vertically and close to your face level, capture the scene by positioning your camera so that the blue dot lines up with the center of the doughnut. Stand in the same spot as you rotate and continue matching up the blue dot to the center of the doughnut. You don’t have to hit all the dots, but the more you do, the more accurate the photo sphere will be.
Google says you need to complete at least five rotations, tilting your camera up or down, to create a full photo sphere. Once you’re done capturing, just press the stop button at the bottom of the screen.
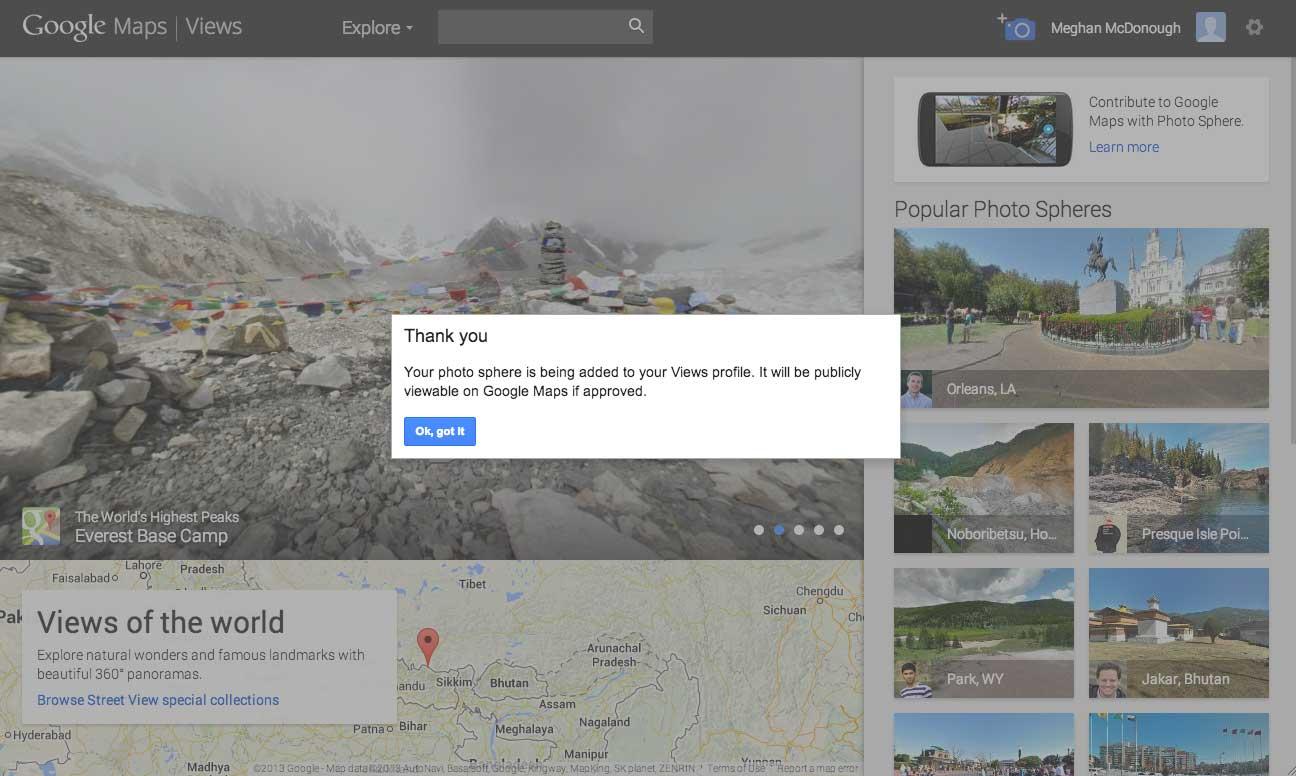
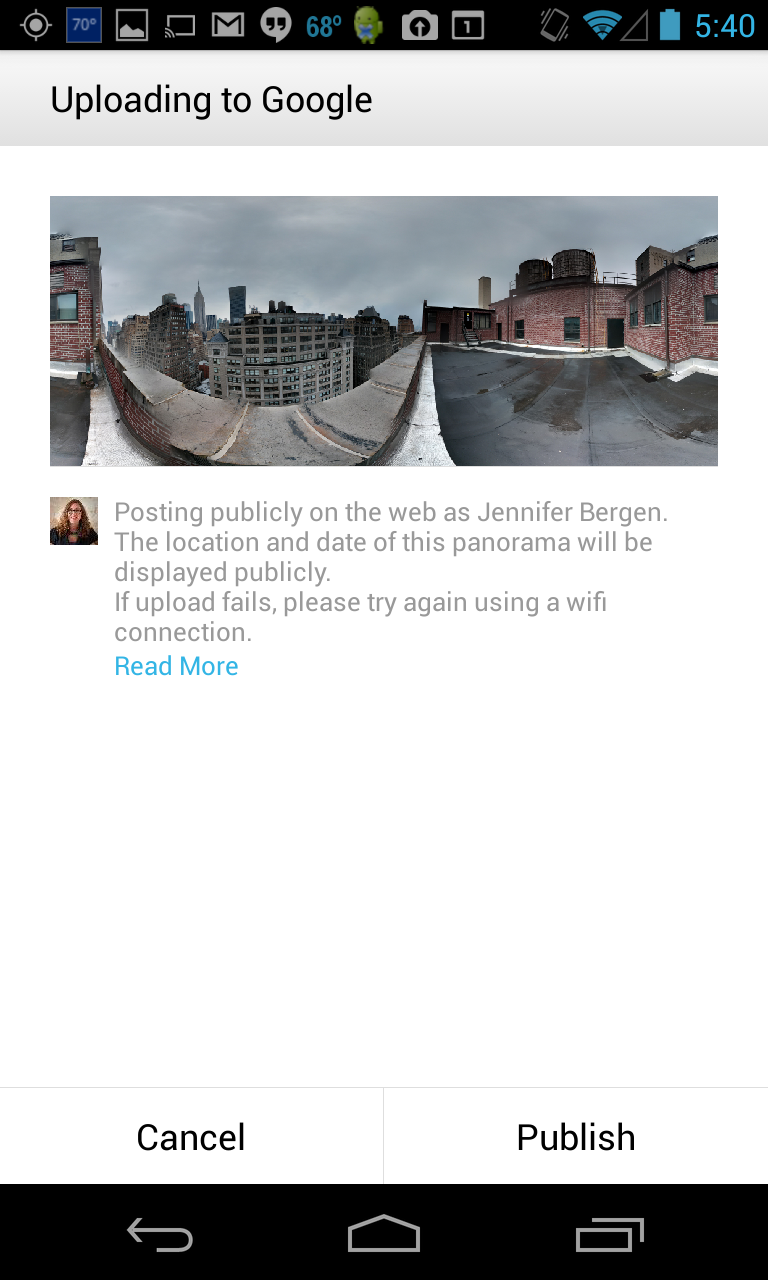 To share your photo sphere, simply press the Share icon and select Google Maps. You’ll see a warning that you will be sharing publicly on the Web. The location and date of the photo sphere will be displayed publicly. If you’re comfortable sharing, press “Publish.” A message will pop up telling you that your Photo Sphere will be public on Google Maps as soon as it’s been reviewed. That’s it! All you have to do is wait.
Using a DSLR
According to Google’s Android developer site, only 5.6 percent of Android users are currently running Android 4.2, the only version that currently includes photo spheres. Thankfully, if you’re not on the current version of Android or you’re (gasp!) not using an Android phone, there is another way. DSLR users are also able to take spheres or panoramas and add them to Views. As you might expect, there are a few more steps involved than there is with your phone, but it’s nothing too crazy. Plus, there’s the added bonus of greater control over the images you take, such as shutter speed, aperture, and focal length.
When using a DSLR to shoot a panorama, it’s helpful to use a small aperture, manual focus, and a tripod for keeping your shots level. Lastly, shooting in portrait orientation helps to make sure you don’t cut off a tall object. It’s important to note that whichever method you use, you’ll need a Google+ account to add your images.
Grab your camera and head to the location you wish to shoot. We found it easier to stand in the middle of a location and shoot around one point, but be mindful of traffic if you’re in the street. Choose a starting point and start shooting, making sure to let an object, such as a light pole, from one shot overlap into the next shot. This will make stitching the photos together later much easier.
If your camera includes GPS, use it. Otherwise, make a note of where you took the images so you can put the View in the correct spot on Google Maps.
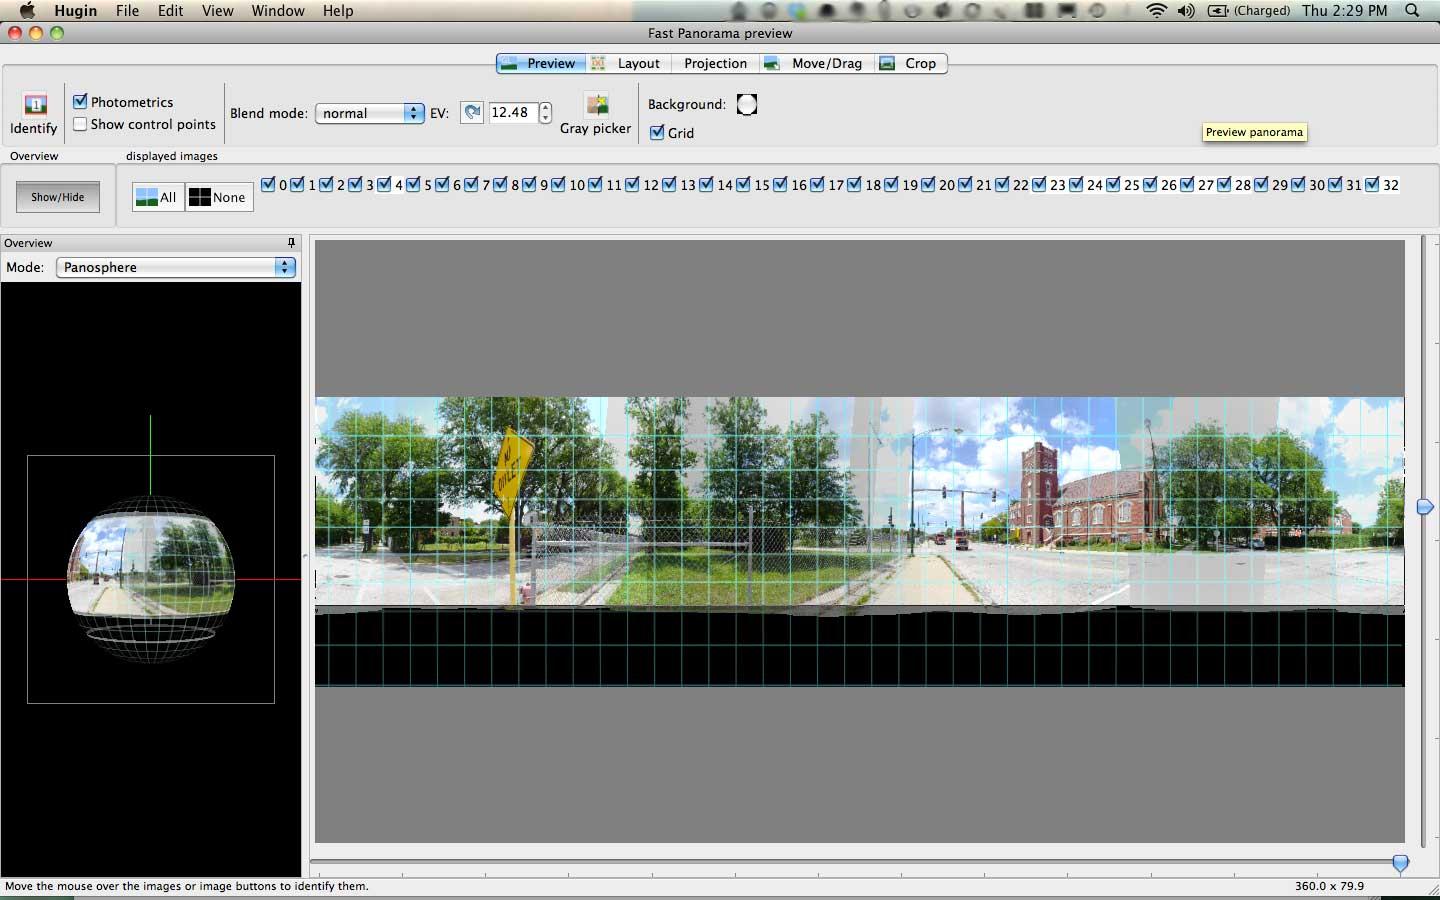
Next, you’ll need to piece together all the images you took into a panorama shot. Thanks to technology, this is not nearly as tedious as you might think. We used the free program Hugin, which works for Mac and PC, to stitch our images together. The app automatically tries to determine where the image should line up, but then gives you fine-tuning control to make any corrections. If you’ve got a lot of images to line up, the process takes several minutes, then several more to create a TIFF file version of the panorama. This is a good time to grab a cup of coffee. Or lunch.
The panorama version of your images can then be uploaded to Google’s photo sphere creator. Whether you use Hugin or another panorama app, you’ll have to upload the image to this site before adding it on Google Maps. We had a fair amount of frustration attempting to upload our panorama to this photo sphere creator. It took us several tries and numerous unresponsive server errors until we discovered that the photo sphere creator only accepts files saved as JPG. Hugin’s default panorama image is a TIFF file, so you’ll need to change it to a JPG using a photo editor.
The photo sphere creator will ask you to define the north direction in your image and then ask you to place the location on the map using Street View to make it exact and correct. It will then show you a preview of your photo sphere and give you a link to download it. Unfortunately, you have to download the photo sphere to your computer before you upload it again to Google+.
From here, make sure that your Google+ account is set to upload full size images, then upload the file to your account. While we wish this was the last step, it’s not. Now you have to add it to Google View by going to https://www.google.com/maps/views/. Click on the camera next to your name and then select the photo sphere you wish to upload to Google Views and, ultimately, Google Maps. Remember that it will be publicly viewable, so you probably don’t want to test this out in your backyard.
Google will add the image to your personal Views folder and will add it to the public map if it is approved. There’s no telling how long it will take for your View to be approved for public consumption, but Google’s sparse documentation for acceptable Views states that the sphere must be a complete 360-degree photo view, must not contain illustrations, renderings, prominent or superimposed advertising, and must not be someone else’s image – even if you credit them.
While this process was fairly tedious – to the point that it made us more than a little frustrated – the end result is very cool. Still, we think waiting for your smart device to get an update to Android 4.2 – or, better yet, 4.3 – might be worth the wait if you plan on creating a bunch of photo spheres.
It’s doable with a DSLR, and the end result is good, but it’s more hassle than we think it’s worth. Especially since you have to wait for Google to approve the image for public consumption after you’ve gone through the whole creation process. However, if you just want to create photo spheres to share on Google+, you can skip the Google waiting period, but the creation of the image remains the same.
Editors' Recommendations
- How to change margins in Google Docs
- How to delete a file from Google Drive on desktop and mobile
- How to do hanging indent on Google Docs
- How to delete Google Chrome on Windows and Mac
- How to create folders and move files in Google Drive