Treyarch’s second downloadable content pack for Call of Duty: Black Ops 2 is here and we’ve been playing all week to bring you this little rundown of what’s new, what to expect, and how to survive. The Uprising DLC adds four new multiplayer maps and one new Zombies map to the mix. There aren’t any extra bonuses like the Revolution DLC’s Peacekeeper SMG or the new Turned mode in Zombies, but Treyarch still manages to serve hardened fans with some cool extras that bring added flavor to what’s new.
Let’s take a look at what we’ve got…
The Maps
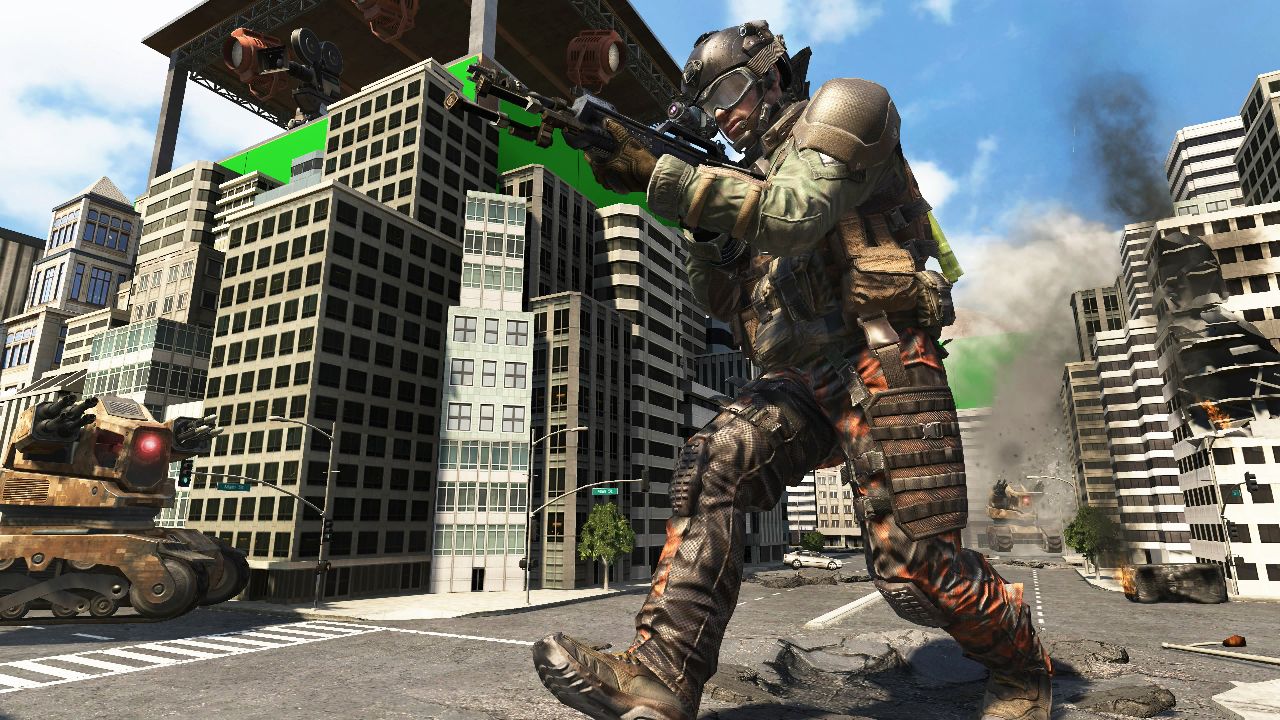
Uprising‘s four new maps span locations that bring something new and different to Call of Duty‘s multiplayer in one way or another. “Magma’s” familiar crumbling city setting is the result of an erupting volcano rather than waging warfare, bringing in lava as a street hazard to be avoided. “Encore” pits players against one another in an outdoor concert space. In all cases, new layouts demand fresh tactical approaches. As with any other Call of Duty map pack, surviving is a matter of learning the lay of the land and using it to your advantage.
As with the previous map pack, a special playlist using “Core” match rules has been set up that constantly cycles through the four newcomers. Those who prefer instead to play in Hardcore mode aren’t completely out of luck, as the Uprising foursome is also integrated into general playlists. You’ll simply have to wait for one to come up in the natural course of gaming and then hope that everyone votes for it. Being that these are brand new maps, votes seem to be falling in that direction for now.
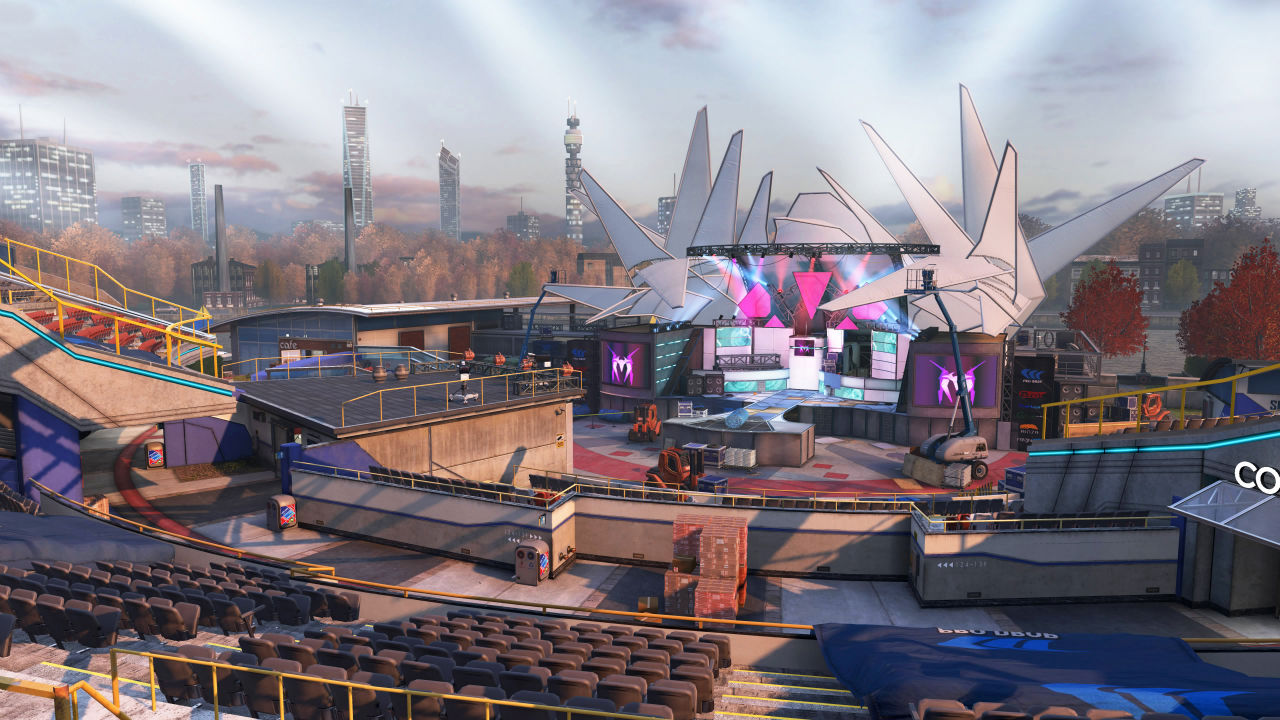 Encore brings Call of Duty multiplayer to an unoccupied outdoor concert space with a central, wide-open kill zone, and paths at the outer edge of its roughly circular shape. The central part of the map is occupied by the stage, a general admission section that is crowded with equipment, and a half-circle ring of seats. A tunnel under the stage provides quick access to the outer ring on one side and a more dangerous, open-air path through the stands offers similar access on the other. Set your killstreaks to favor air support, and you can do some serious damage to the other team. If you are working with a team, one person with a stealth loadout acting as a spotter, can control much of the action.
The central portion of the map goes absolutely crazy in objective-based matches, and you may want to have a loadout that can help stop deaths by grenade, including a trophy system and a flak jacket. Snipers have a distinct advantage here, with roosts available for just about any angle. An abundance of flanking routes ensure that no sniper can ever get too comfortable, and players who generally feel more comfortable fighting at close range might prefer to stick with a strategy of running the outer ring and hopefully catching some of those waiting snipers unaware.
 Magma‘s volcano-ravaged city center is split down the middle by a winding street that is crowded with rubble and abandoned vehicles. It’s a dangerous route to use for crossing between the north and south ends, with the map’s central location vulnerable to fire from multiple protected positions at both ends. The damaged street offers a low road to take as well, skirting along the map’s largest lava flow, but that route provides only slightly more cover and is vulnerable to ambushes. Snipers and distance-loving players will want to keep an eye on the central part of the map, especially during objective-based matches. In domination, a turret in the right location can be nearly unstoppable.
The west side of the map offers north-south access with more cover, thanks to a couple of buildings and a crumbling tunnel filled with more abandoned vehicles. This tunnel is a popular one for firefights, situated as it is right between the two spawns. Watch for snipers here as well, especially when you’re facing an entrenched enemy on the north side of the map. The east side of the map, with a Magma Superliner train terminal, crashed train, and outdoor waiting area creating opportunities to move from cover to cover as you push back against constant enemy spawns. It is an easy map to get around quickly, so UAVs are going to have a big impact here. Make sure your team has one in the air often, and keep an eye out enemy UAVs to shoot down.
“Magma” definitely offers more for those players who excel at medium- and long-range combat, though lava is a constant threat to all. It works similarly to the way it does in the Zombies “Tranzit” map. Wander too close to lava-covered rocks and you’ll take damage. That damage piles up quickly – much moreso than it does in Zombies – so be sure to get clear as quickly as you can.
 Studio is a unique entry in the Uprising lineup due to the fact that it isn’t really a new map at all. The layout is an exact reproduction of the “Firing Range” map from Treyarch’s 2011 effort, Call of Duty: Black Ops. It’s only the look of the environment that has changed dramatically. “Studio” is set on the back lot of a movie studio, one that seems to do a brisk business in blockbuster filmmaking. You’ll see a Western-style saloon shootout setting, an alien invasion of a fake city, an animatronic T-Rex escaping from a zoo enclosure, and a miniaturized city block that would likely serve as a literal stomping ground for a Godzilla-like monster flick.
For those who haven’t played Firing Range, a few tips. Firefights generally tend to flare up around the Wild West saloon and its nearby outdoor shooting gallery at one end of the map, and around the Jurassic Park-like T-Rex at the other. The central part of “Studio” is wide open, with multiple overwatch locations looking down on it. Stick to the fringes, work with your team, and lay waste to this Hollywood backlot.
Mid and close range weapons will do well here, but snipers will have to pick there locations carefully. There are a few areas that offer a good field of view, but most leave you vulnerable to attack from another weapon. The action moves quickly as well, so if you are playing a game mode like Domination, don’t sweat losing a flag – you can get it back quickly enough.
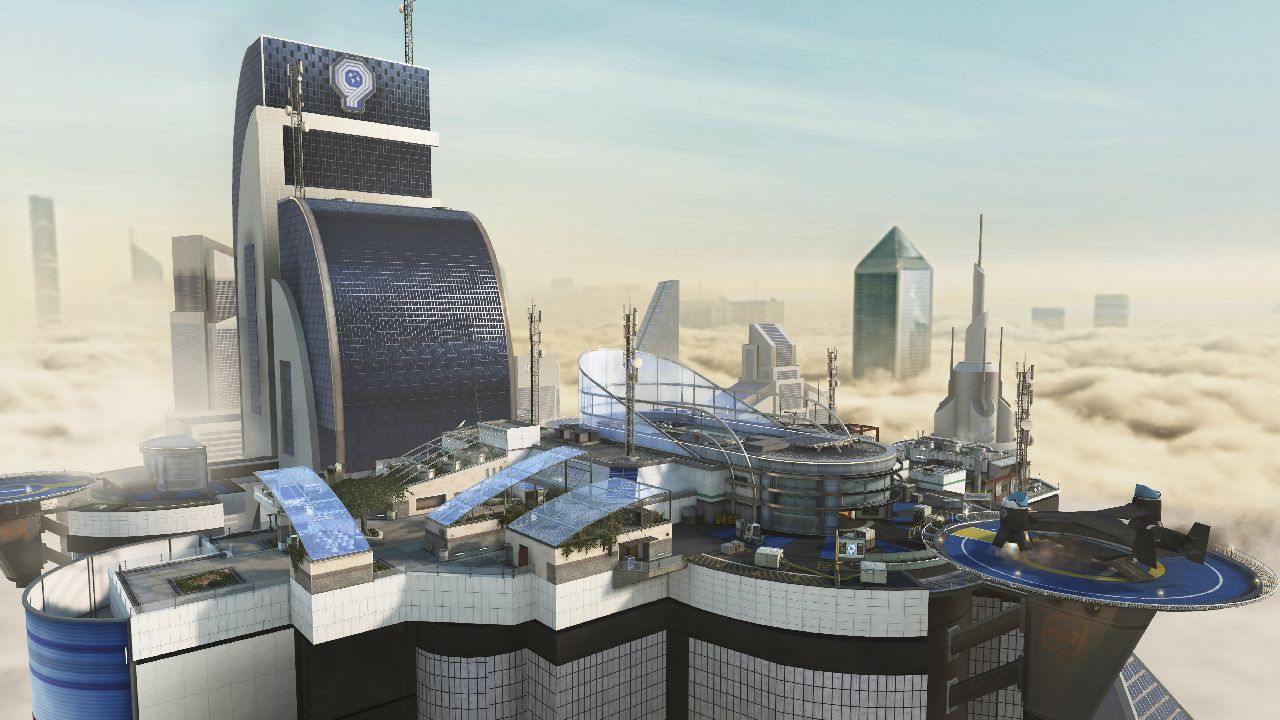 Vertigo is unusual for a Call of Duty map, and harkens back to the Modern Warfare 2 map “Highrise,” with its many ways to instantly kill yourself with step in the wrong direction. While most multiplayer maps tend to funnel the action around and toward a central location, Vertigo works instead to push much of the action to its fringes. The central portion of this futuristic skyscraper rooftop is actually a small, circular interior location that serves better as a quick access route from one side of the map to the other than it does as a location for sustained action. There simply isn’t enough space, or cover, for a serious firefight.
Fortunately, the routes circling this roughly oval-shaped map snake in a variety of directions, with multiple chokepoints and secret routes that require death-defying jumps and careful ledge-walking to navigate. There’s really a little something for every type of player on Vertigo. The helipad and the area around it is the ideal sniper killzone. The various support buildings and service corridors that are scattered about provide great cover and tight corners for shotguns and SMGs to take advantage of. “Vertigo” might not be a perfectly balanced map, but it is easily Uprising‘s most well-rounded multiplayer offering, and all game modes have something to offer.
Laying traps can make the difference, and once you identify the more unusual ingress points – like the window you jump in to where “B” would be in domination, a countermeasure like a Guardian is both effective, and kinda funny.
Zombies
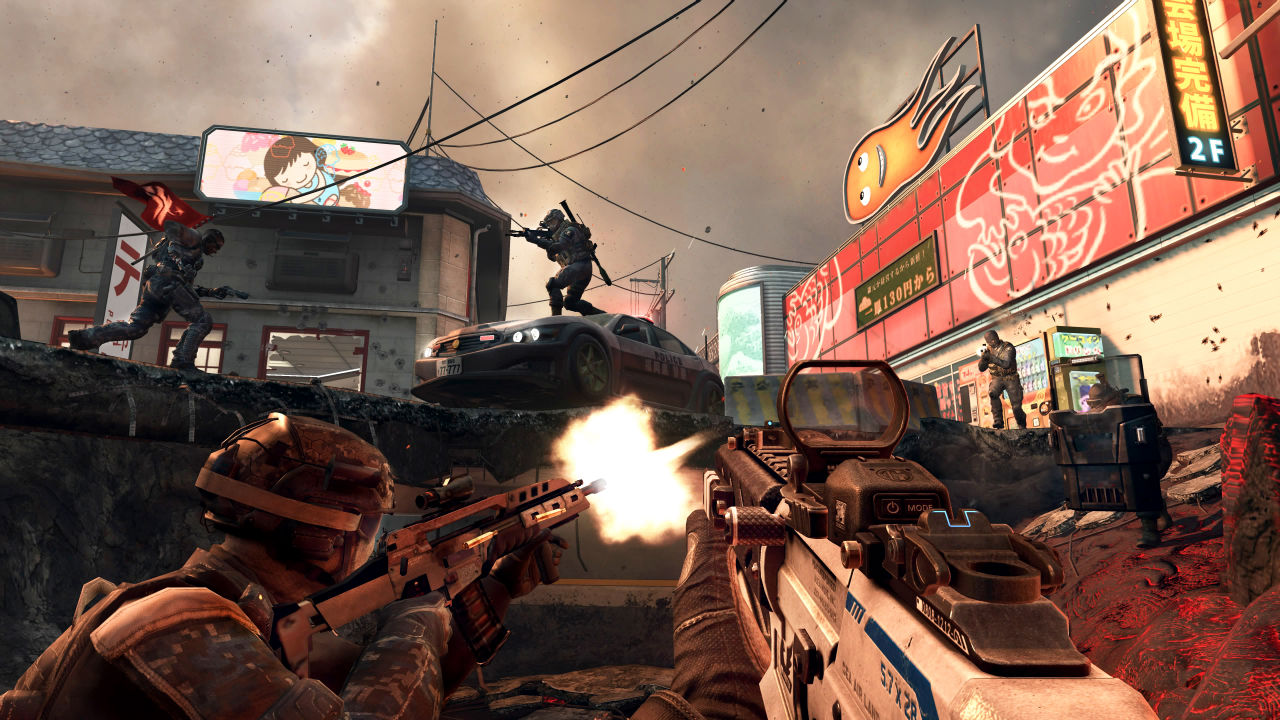
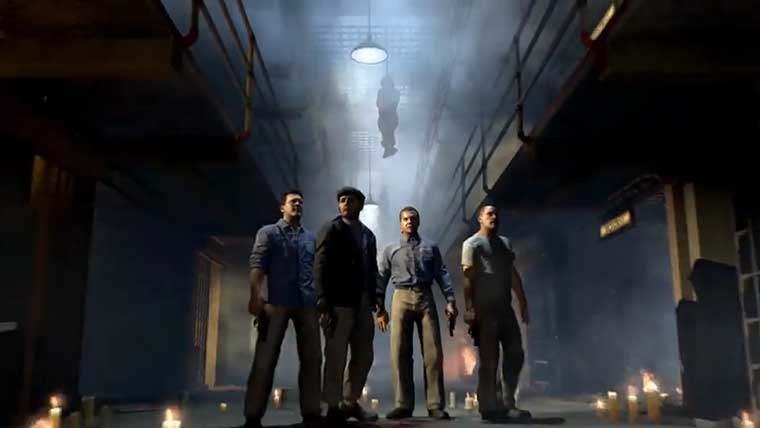
The new Zombies map added in Uprising is set on San Francisco’s Alcatraz Island, site of the famed federal prison that held some of our country’s most notorious criminals until it was closed in 1963. You’ve actually got two play options with this map: a smaller slice that can be played exclusively in the competitive Grief mode and the larger map, and associated story-driven survival mode, called “Mob of the Dead.” Grief is straightforward enough, though it’s worth noting that it is so far the only Zombies map in Black Ops 2 to bring back the previous game’s PhD Flopper Perk-a-Cola machine.
“Mob of the Dead” leaves behind the starring foursome that was at the center of the “Tranzit” and “Die Rise,” replacing them with a quartet of mobsters who are brought to life by noted Hollywood personalities – Ray Liotta, Joe Pantoliano, Chazz Palmintieri, and Michael Madsen – much like the Call of the Dead map did in Black Ops. The story sets up a prison escape for this bunch, and assembling the map’s plane – one of a handful of buildables available – is key to reaching the Golden Gate Bridge-situated Pack-a-Punch machine for upgrading weapons.
We’re getting ahead of ourselves though. When a “Mob of the Dead” match starts, players are immediately introduced to one of the new features to be found on this map: the afterlife. A new addition to the HUD lets players know when they have an extra life stored away. That life is spent the first time you go down, with you respawning as a ghostly figure that is able to shoot zombies with lightning and jump to more than twice the height of a living character. Players stuck in the afterlife can also walk through certain sections of wall – marked in the living world by blue symbols – as a necessary step in solving the map’s multitude of puzzles. If you see a box in need of power behind a seemingly impassable gate or door, it might be accessible as a ghost.
A few things to note about being in the afterlife. For starters, your lightning won’t actually harm zombies. Instead, it charges up power meters, opening certain doors and switching on Perk machines, and it instantaneously teleports any zombie it strikes to another part of the map. This can be a great defensive tactic for clearing out a mob so that team members can be revived. You can’t revive anyone other than yourself while you’re in the afterlife, though any other living team member can still revive you as well.
You’re always running around on a timer as a ghost. You can tell that your time is running short when the sound of a faint heartbeat becomes quicker and more pronounced. Rumble controllers will also shake in time with the heartbeat, with increasing intensity as your time as a ghost runs thin. Whenever you’re in the afterlife, the location of your flesh-and-blood body is always visible – even through walls – as a blue symbol (the same one that marks walls you can walk through as a ghost).
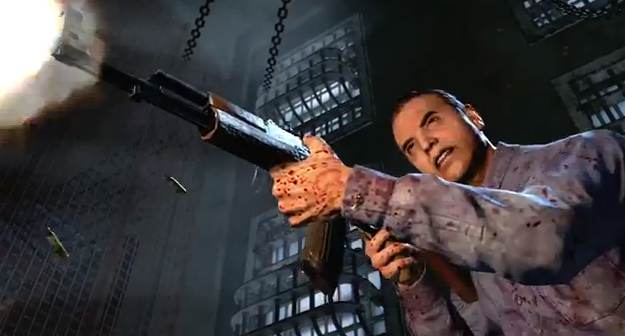
“Mob of the Dead” features a new boss zombie, Brutus. This hulking fellow’s arrival is always signaled by musical cue, and usually by the shouts of terror that start to come through your headset. There’s nothing really special about this guy: he runs faster than your average zombie and he hits a bit harder, but he’s mostly just another bullet sponge. The quickest way to bring down Brutus is with headshots; knock off the helmet, then knock off the head.
The only twist with the boss is that he’ll sometimes spawn in after players spend an extended period of time at the Mystery Box. When he does, he’ll immediately run to the box and smash it in with his oversized police baton, at which point one player must spend 2,000 points to unlock it before the box can be used again. Once the box is smashed, Brutus acts the way he normally would, chasing players around until he’s snuffed out.
Assembling the plane to reach the Pack-a-Punch machine is an elaborate process that could take up an entire guide on its own, but it’s not terribly difficult once you get the layout of the map down and find a group of like-minded players to cooperate with. Assembling the plane requires bringing its five different parts to the rooftop launch, an area that is accessible from the infirmary only after a ghost player walks through walls to reach the roof and feed power to the locked door there. The first step in this process involves recovering the Warden’s key, which dangles above one of the map’s two main cell blocks; as with the roof, getting the key requires the use of afterlife.
“Mob of the Dead” also adds a number of new weapons to the mix. The AK-47 and the Death Machine gatling gun(!) can both now be obtained from the Mystery Box. The Blundergat wonder weapon is also a box weapon from the start; it’s four-barreled sawed-off shotgun that can be upgraded to fire zombie-attracting, exploding acid rounds after three buildable parts have been obtained and assembled. Players will also find a few new wall weapons: the uzi is found in a couple of different locations and the Tommy Gun can be found out on the docks.
Finally, there’s the Hell’s Retriever tomahawk, a boomerang weapon for your tactical grenade slot that was shown off in one of Uprising‘s pre-release trailers. Getting this thing is a bit of a process. Three locations on the “Mob of the Dead” map feature the image of a dog’s head drawn on a wall. There’s one in the infirmary, one in the cell block just down the stairs from the infirmary, and one out on the docks near the Tommy Gun.
Kill a zombie in close proximity to one of the head drawings, and a fiery hellhound head will emerge from the wall and suck the undead corpse into its mouth. Feed enough zombies to a single head and that head will disappear. To get the Hell’s Retriever, you must complete this process with all three of the heads. After that, head down to the laundry room and through the door there that leads to the tunnels. You’ll notice that a hole has opened up in one of that corridor’s walls. The Hell’s Retriever is just inside it, impossible to miss.
This tomahawk is especially cool because it recharges after a few seconds, effectively giving you an endless supply of ammo even when your bullet wells run dry. The Retriever is extremely useful against zombie trains. Simply build up a healthy conga line of undead behind you, spin around to face them in a long, narrow space, and let loose with the Retriever.
Editors' Recommendations
- Is Call of Duty: Modern Warfare 3 cross-platform?
- Call of Duty: Warzone Mobile is out to eliminate mobile gaming’s stigma
- Call of Duty: Warzone is finally coming to mobile in March
- Call of Duty: Modern Warfare 3 Zombies: how to complete Bad Signal
- The best weapons in Call of Duty: Modern Warfare 3