
How to solve every Merlin Trial in Hogwarts Legacy

Hogwarts Legacy is the best Harry Potter game to ever land on consoles and PC, and the title’s open-world setting is one to be reckoned with. You’ll spend hours exploring the fantastical universe, completing an array of inspired side quests and puzzles, all while evolving your character. The Merlin Trials is a particular set of challenges you’ll want to take on, as you’ll earn additional inventory slots when you beat one. And if you’ve ever played an open-world RPG, you’ll know just how vital these extra digital cubbies can be.

Merlin Trials are unlocked after completing the “Trials of Merlin” main quest. After this, you’ll be able to find all Merlin Trials, but you’ll also need to make sure you have Mallowsweet Leaves on hand. You won’t be able to begin a trial without one. 

You’ll face an assortment of different challenges, and we’ve put together this guide to let you know what Merlin-inspired quests await, and how to solve each and every one of them. 

How to beat all Merlin Trials

A glowing green figure of Merlin.
Digital Trends

There are nine basic trial types you will encounter. They will all be changed up in some way, but still require the same solution. Bear in mind that some trials do require your character to know specific spells, so if you don’t have those unlocked yet, the trials won’t be able to be solved. If you’re ever unsure of what to interact with during the trials, use Revelio to light up interactable objects.

Roll the ball (Depulso required)

This trial type asks you to use the Depulso spell to knock a big sphere to a designated pit in the ground. Simply keep nudging them until you roll them into the slot. Some trials may require you to burn debris off the hole first, so keep that in mind.

Stack the balls (Accio required)

This is another ball-moving puzzle, but this time the balls are small and you need to lift and place them into slots on different platforms.

Blast the balls

One of the most simple trials, this one just asks you to shoot a bunch of targets around the area with any attack spell. The only tricky part can be finding them all.

Blast the slabs

Almost identical to the prior trial, but this time you just need to blast the green stone slabs.

Light the torches (Confringo required)

This type of trail asks you to ignite three torches before any of them go out. As soon as you light the first torch, it will begin sinking into the ground and extinguish the flame once it is fully submerged. Some torches are on higher platforms than others, so it is usually best to start with those to give yourself the most time.

Escort the moths (Lumio required)

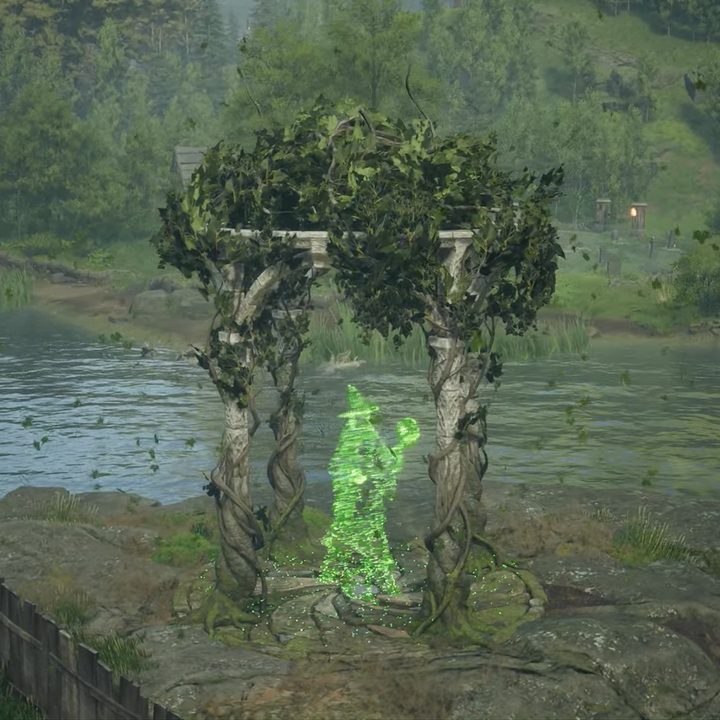
Using your Lumio spell, you need to lead three clusters of moths to a glowing statue. Once you bring all three groups of moths to the statues, you’re done.

Fix the statues (Reparo required)

A simple trail, this one tasks you with finding the three broken statues and fixing them up with your Reparo spell.

Match the symbols (Flipendo required)

A set of three columns, each with two sections, will be in the area. Each face of the sections bears a symbol you need to rotate through using Flipendo to match the symbols on each column.

Platforming

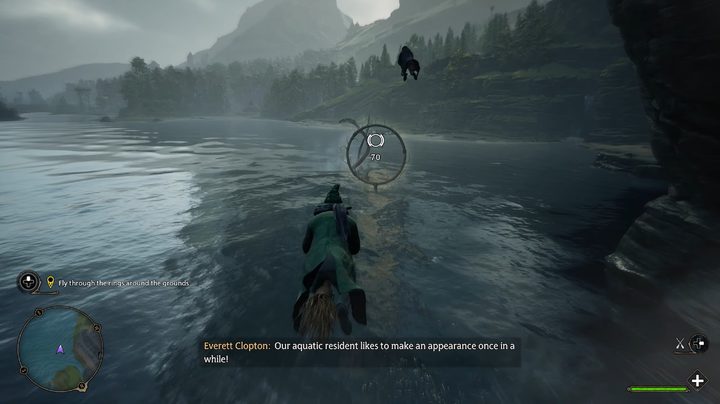
The last trial type is a simple test of your platforming skills. You just need to navigate an obstacle course of stone platforms all the way to the end without falling. During some trials, we’ve found that you can actually get on your broom and fly over platforms to activate them. While we’re not sure if that’s a bug that might get patched out down the line, it currently makes these challenges much easier.

How to find Mallowsweet Leaves

A wizard flying on a broom over a lake.
Warner Bros. Games

You won’t be able to begin a Merlin Trial without having Mallowsweet Leaves on hand. Fortunately, there’s a few different ways you’ll be able to collect these magical plants. 

First and foremost, when you complete the Trials of Merlin story mission, Nora Treadwell will reward you with five Mallowsweet. Beyond this single gifting, you’ll also be able to purchase them from vendors in The Highlands. Do keep in mind that Highlands shopkeepers typically keep low quantities of Mallowsweet, so if you buy up all their stock, they won’t carry more for another 2.5 days.

A more savvy alternative is to just learn how to grow Mallowsweet yourself. You can do so by venturing to The Magic Neep in Hogsmeade and completing a Herbology course, at which point you’ll then be able to grow Mallowsweet and other plants in both Greenhouses and the Room of Requirement.

Editors' Recommendations

Jesse Lennox
Jesse Lennox loves writing, games, and complaining about not having time to write and play games. He knows the names of more…
The best vocations in Dragon’s Dogma 2
Dragon's Dogma 2 key art featuring a knight with a fiery hole in their chest.

Your Vocation defines your role in combat in Dragon's Dogma 2. Everything from your skills to what weapons and armor you can use is tied to this class. You will pick from just a handful at the beginning of the game, but can easily change Vocations later on, as well as unlock more than twice as many new options than what you start with. It can take a while to really get a feel for a Vocation and how it performs in combat, as well as to look through all of its skills and augments, before knowing if it's worth sticking with to level up. Personal preference will play a part to some degree, but these Vocations have the most potential to make you the strongest Arisen in history.
The best vocations in Dragon's Dogma 2

You can pick from 4 Vocations at the start of Dragon's Dogma 2, but will end up with a total of 10 by the end of the game if you unlock them all. New Vocations are unlocked by completing quests, but they are almost unmissable. Four Vocations -- the Magick Archer, Mystic Spearhand, Trickster, and Warfarer -- can only be used by your character and not any Pawns.
Warfarer
There's very little downside to being a jack-of-all-trades in Dragon's Dogma 2, which is exactly what the Warfarer is. This is the only Vocation that can use any weapon in the game AND learn any skill from other Vocations. This is the only Vocation that really lets you build whatever class you want and gives you the ability to adapt to any situation you find yourself in. The main downside to this class is it has the lowest base stats, but that is a small price to pay for how versatile you can be.
Mystic Spearhand
Hybrid Vocations are all quite powerful, but we put the Mystic Spearhand at the top of the heap. This class turns you into a fighter that can take advantage of magic to output crazy damage. The two almost overpowered abilities you get here are the ability to slow enemies for a short time and to create a magical mimic that doubles all your actions. It is great for both crowd control and large single targets, but takes a while to unlock and lacks some range.
Warrior
If you're going to be a straight-up melee fighter, you might as well hit with the biggest weapon you can, right? The Warrior swings swords large enough to make Guts blush and is a full-on tank. You won't be doing anything fancy with this vocation beyond charging up and swinging as hard as possible. The obvious drawback is any flying or ranged enemy will counter you, so bring some Pawns in those classes to cover your bases.
Sorcerer
For those who fancy themselves a pure mage, stick to the Sorcerer over the actual Mage vocation. While the Mage is more focused on healing, it is the Sorcerer who gets the best offensive spells you will want to be casting. If you have a second Sorcerer with you, you can even sync up and decrease your casting time. If not, you will need some tanks to take aggro while you deal with some slightly long casting times and low total health.
Thief
As far as the starting Vocations go, the Thief is the one we find the most fun and viable for the entire game. This is a light and speedy build focused on critical hits and being able to climb and hang on to large beasts. Once on, you have a number of great skills to stagger and knock down an enemy so the rest of your squad to gang up on it. Just don't get hit because you're one of the squishier Vocations.

Read more
Elden Ring: How to find and use Rune Arcs
An Elden Ring player sits on their horse and looks out at a castle ahead.

Like everything else developed by FromSoftware, Elden Ring is painfully difficult. It'll take you hundreds of hours to discover everything it has to offer, and unless you're a grizzled veteran, you'll likely hit the "Game Over" screen thousands of times before your journey in the Lands Between comes to an end.

One way to help even the odds is by using Rune Arcs — a consumable item that lets you access Great Runes. You'll first need to unlock Great Runes to start properly using Rune Arcs, but once that's taken care of, you'll notice a big boost in your abilities.

Read more
All Demiguise Statue locations in Hogwarts Legacy
A demiguise statue glowing.

The Demiguise Statues are some of the most important collectibles in Hogwarts Legacy. Not only are they featured in one of the game's most popular side quests, but they're used to upgrade one of the best spells available to your witch or wizard. That means you'll want to go out of your way to find these objects – even if that means you'll need to slog around the map a few times.

However, you won't be able to find these unique objects as soon as you launch Hogwarts Legacy. That means you shouldn't start your search until you've unlocked them, otherwise, you'll search for hours and find nothing.

Read more