
Elden Ring: How to find and use Rune Arcs

To longtime FromSoftware fans, Elden Ring is just Dark Souls rebranded (and that’s a good thing). Developers recycled several fan-favorite weapons, like the Claymore, and mechanics, like upgrading your weapons at a grumpy old blacksmith. Some mechanics also got a “rebrand.” For example, Bonfires are now Sites of Grace, Souls are Runes, and White Sign Soapstones are now Furled Fingers. Rune Arcs are another example of a rebranded mechanic from the Souls series. So what are Rune Arcs in Elden Ring, how do you use them, what do they do, and where can you find them?

What are Rune Arcs in Elden Ring

The item menu in Elden Ring displays the description for Rune Arcs.
Image used with permission by copyright holder

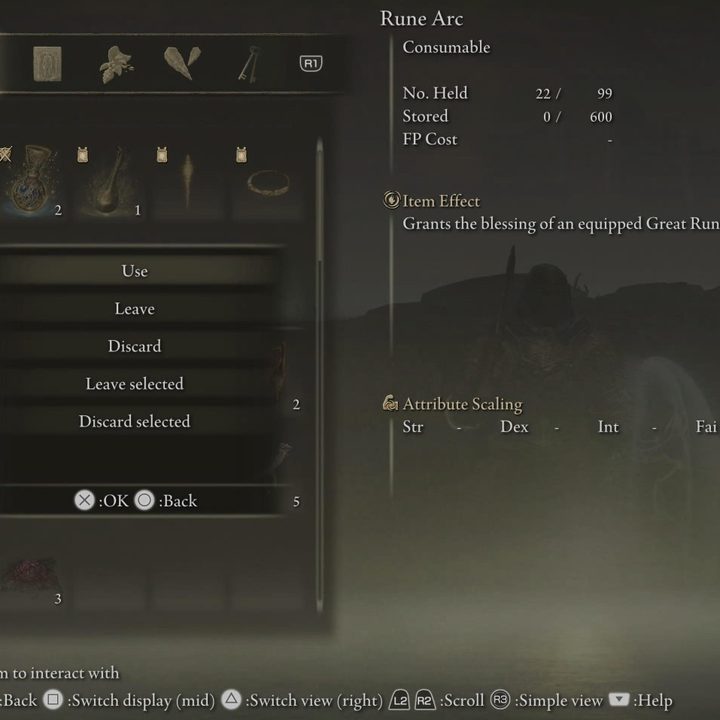
Even if you’ve just started playing Elden Ring, you’ve probably found a handful of these mysterious items and are confused as to what they do. Rune Arcs in Elden Ring allow you to utilize your equipped Great Rune. If you don’t have one equipped (or haven’t unlocked one yet), cracking a Rune Arc increases your HP slightly.

For you Dark Souls 3 fans, Rune Arcs are similar to Embers. They also work like Humanity from the first Dark Souls. For the remainder of this article, we’ll refer to cracking a Rune Arc as being “runed” and not having one cracked as being “unruned.”

An Elden Ring player sits on their horse as undead creatures attack them.
Image used with permission by copyright holder

In the image above, you can see what your HP, FP, and Stamina meters look like when you’re runed. When you crack a Rune Arc in Elden Ring, you’ll see the Great Rune icon glowing next to your HP. When unruned, that icon appears dull. You’ll lose your Great Rune ability if you die, requiring you to use another Rune Arc to get it back. In a game like Elden Ring, when death is a common occurrence, you shouldn’t burn through Rune Arcs until you’re sitting on a tall pile of them.

Here’s a quick Rune Arc tip to keep in mind: In Dark Souls 3, you could restore your HP by cracking an Ember, which was helpful during boss fights if you ran out of Estus. Unfortunately, that little trick doesn’t work in Elden Ring. You’ll get the max HP boost, but you won’t recover any HP.

How to use Rune Arcs in Elden Ring

To use Rune Arcs in Elden Ring, open up your inventory and find them among your flasks under the tools tab. Select and use a Rune Arc to gain the effect of your Great Rune. For example, we have Morgott’s Great Rune equipped, which boosts our overall HP when runed. Our unruned health (at 40 Vigor) is 1,450. When we crack a Rune Arc, our max HP increases to 1,812, about a 25% increase.

You can also add Rune Arcs to your equipment bar, or hotkey them to your pouch. Since they don’t offer any on-the-fly benefits, like a full heal, there’s no reason why you’ll ever need them at a moment’s notice.

We recommended using Rune Arcs right before boss fights, but only after you’ve tried a handful of times. You wouldn’t want to waste one when you’re still learning the boss’s moves. Otherwise, Rune Arcs can help you trudge through molten lava, like in the Gelmir Hero’s Grave near Volcano Manor.

Where to find Rune Arcs in Elden Ring

An Elden Ring player kills a host of fingers.
Image used with permission by copyright holder

You can find Rune Arcs through general exploration. They’ll be marked as blue-tinted item pickups, the ones indicating special items. You can also get Rune Arcs in Elden Ring by playing multiplayer. You’ll get a Rune Arc for helping another player defeat a boss in their world or fend off invaders. You can also get Rune Arcs for invading other worlds and killing the Host of Fingers.

The Twin Maiden Husks in Roundtable Hold have five for sale. However, they cost 4,000 runes each. Your runes are better spent elsewhere.

If you’re looking to grind Rune Arcs in Elden Ring by invading other worlds (but ran out of Festering Bloody Fingers), you have some options. You can complete White-Faced Varre’s questline to obtain the reusable Bloody Finger. Alternatively, head to Volcano Manor and complete the first invasion quest to get the Recusant Finger.

Editors' Recommendations

Mike Colucci
Michael Colucci is a lifelong video game fan based out of the greater Boston area. He's the one insistent on searching every…
Where to find Republic Chests in Fortnite
Republic Chest

Star Wars is once again taking over Fortnite with the brand-new Find the Force event, which brings a ton of new quests, items, and cosmetics to the popular battle royale. If you want to complete the full event reward track and earn all of the skins, one of the quests you'll need to knock out is opening a Republic Chest. Of course, you may want to seek these out each game anyways, as opening them will reward you with a new DC-15 Blaster, which is an immensely strong firearm that has infinite ammo and excellent range. Here's where to find Republic Chests.
Where to find Republic Chests and what's in them
Republic Chests can be found at three locations on the Chapter 4 Season 2 map. You'll find some located about halfway between The Citadel and Shattered Slabs, some to the west of Slappy Shores, and some by the road southwest of Frenzy Fields. Land at one of these spots and search the white tent-like buildings there for the chests.

Each Republic Chest contains one of the new DC-15 Blaster firearms alongside a selection of random support or healing items. You'll commonly see Medkits, Small Shield Potions, and Chug Splashes pop out, so you shouldn't have much trouble getting prepared for battle from the items you get from the Republic Chests.

Read more
All perks in Star Wars Jedi: Survivor
Cal Kestis with BD-1 droid on his shoulder.

Star Wars Jedi: Survivor has a wide variety of skills to learn alongside its five unique lightsaber stances, ensuring you have no shortage of ways to customize your playstyle. The addition of perks bumps up those options even further, granting you the ability to equip badges that improve certain aspects of protagonist Cal Kestis' kit, such as increasing XP earned or improving his ability to break the guard of his foes. Some are found by exploring, while others are purchased from a particular vendor and unlocked fairly early in the game. A handful of perks are unlocked only after beating the game and starting New Game Plus.

Each of these perks uses a certain number of perk slots when equipped, so you'll have to make some tough decisions about which ones you want to have active at any one time. Luckily, exploring the galaxy will net you some additional perk slots, so you'll be able to equip more as you get further in your adventure. Even with all of the perk slots unlocked, however, you'll still want to strongly consider which perks will benefit you best. We'll make that a bit easier on you by listing all of the perks you can find in Star Wars Jedi: Survivor, what boons they offer, and how many perk slots they'll take up.
Perks discovered by exploring
These perks are found by thoroughly exploring the world and completing objectives. You may have to overcome some pretty tough challenges to find them all.

Read more
All lightsaber stances in Star Wars Jedi: Survivor
Jedi Cal Kestis.

Star Wars Jedi: Survivor takes place five years after its predecessor, and Cal Kestis has definitely gained some new Jedi tricks during the time that has passed. While there are some returning features that you're likely to recognize and appreciate, there are also a wide variety of new mechanics, skills, and more to check out in this highly anticipated follow-up. Among those new additions are an expanded set of lightsaber stances that allow you to decide what kind of fighter you want Cal to be. Whether you want to strike fast at the cost of defense, take things slower with bolstered protection, or find the middle ground between the two, you have five options that can ensure you'll find what works for you.
How to change stances
You can have two stances equipped at one time, and switching between them can be done on the fly, allowing you to weave together different elements of your two chosen kits. However, you can only change stances at a meditation point, so you'll need to be sure that you've thought things through pretty well before heading out into dangerous areas. To help you with your decision-making, here are all of the stances in Jedi Survivor and how they work.
Single Blade Stance

This stance is unlocked from the beginning of the game.

Read more