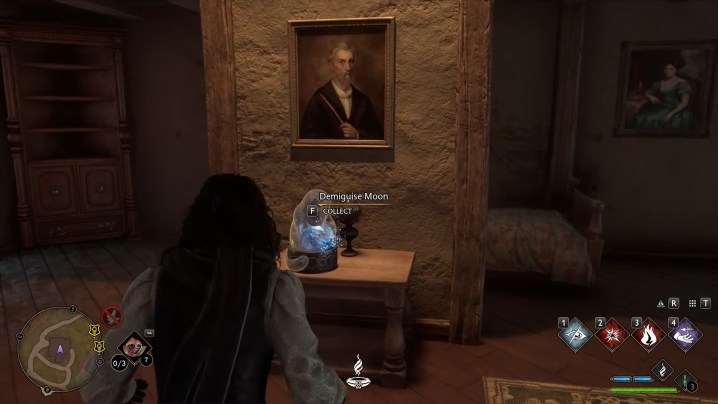
The Demiguise Statues are some of the most important collectibles in Hogwarts Legacy. Not only are they featured in one of the game’s most popular side quests, but they’re used to upgrade one of the best spells available to your witch or wizard. That means you’ll want to go out of your way to find these objects – even if that means you’ll need to slog around the map a few times.
However, you won’t be able to find these unique objects as soon as you launch Hogwarts Legacy. That means you shouldn’t start your search until you’ve unlocked them, otherwise, you’ll search for hours and find nothing.
Here’s a look at all Demiguise Statue locations in Hogwarts Legacy, along with why they’re so useful.
And if you’re on the hunt for anything else in Hogwarts Legacy, here are guides on all Daedalian Key locations, where to find mandrakes, and how to find Rococo the Niffler.
What Demiguise Statues do
Demiguise Statues won’t appear in the world until you unlock the Alohomora Skill from Gladwin Moon. You’ll be shown the first statue, which will then spawn the rest in the world. Once you collect nine of them, you will get to Alohomora level 2, and at 13, you unlock level 3. If you’re hunting them all down, there are a total of 30 to find (not counting the initial three you get when first learning Alohomora). Keep in mind that these statues only appear at night.
All Demiguise Statue locations

Here’s every Demiguise Statue location:
Hogwarts
- Inside Professor Fig’s classroom in the Astronomy Wing.
- From the Transfiguration Classroom, go through the doors to your left and down the stairs to the right. Enter the door and down another staircase to reach the statue of a dragon. Turn right and lockpick the door to reach the statue.
- In the Defence Against the Dark Arts tower, go down the stairs to ground level and unlock the door (requires level 2 Alohomora). The statue is on the desk.
- From the Great Hall, go to the right of the Hufflepuff table and unlock the level 1 door.
- In the Library, go into the Restricted section and go down stairs and jump to the floor below. The statue is next to an eye chest.
- Now starting at the Potions Class, go through the double doors and down the stairs to your left. Unlock the level 1 door and go down the hall to a second door to unlock.
- Reach the Divinations Classroom and head inside. The statue is on the professor’s desk.
- Turn around from the Beasts Classroom and unlock the level 2 door that leads into the Grounds Keepers building. Head downstairs to find it.
- At the Hogwarts North Exit, turn around and find the level 1 door near the staircase to find this statue.
- The last Hogwarts statue is in the Clock Tower Courtyard. Go through the door behind the gate and pass over the bridge to a set of double doors. Once through, go left and unlock the level 1 door to the bathroom. The statue is in a secret room in the broken stall.
Hogsmeade
- On the windowsill of the Tombs and Scrolls store.
- Inside the house with the level 2 lock south of Ollivanders on the second floor.
- On top of some crates in the backroom of Hog’s Head
- Inside the house north of Pippin’s Potions with a level 2 door lock. Go inside and to the second floor to find it.
- Behind the level 1 locked door on the second floor of Three Broomsticks
- Go to the house beside Three Broomsticks with a level 1 lock and grab the statue on the second floor.
- Inside Dervish and Banges, the statue is right on the counter.
- Directly across the street from Brood and Peck, unlock the level 1 door and look above the fireplace.
- Go to the small house behind the Honeydukes, unlock the level 1 door, and grab it off the small table in the entryway.
Highlands
- Go to the Pitt-upon-ford and follow the path south until you come to a house. Go inside and up to the top floor to find the statue.
- From the Upper Hogsfield Floo Flame, go north to a house with a wagon wheel next to the front door and a level 1 locked door. The statue is right inside.
- Fast travel to Arenshire and find the nearest house with a level 1 lock. The statue is on the second floor.
- In Lower Hogsfield, enter the domed house with a level 1 lock and look behind the door after you enter to spot the statue.
- Zip over to Brocburrow and go to the center of town and face north. Enter the house to your right with a level 1 lock and look immediately to your left upon entering.
- Over in Keenbridge, take the path to the west to a house with a pumpkin patch outside. Pick the level 1 lock and grab the statue right inside.
- At Feldcroft, go into the house to the east and check the windowsill on the left.
- Now in Irondale, find Althea Twiddle’s house, go inside, and look behind the counter for this hidden statue.
- From the Marunweem Floo Flame, go north and enter the first house on your left. Unlock the door and again check behind the counter.
- Teleport to the Bainburgh Floo Flame, turn around, and look to your left. Go toward this house with the level 1 locked door and nab this statue right inside.
- Finally, in Cragcroft, go to the massive tree in the middle of town. Turn to the northwest and go inside Bella Navarrow’s shop. On the top floor is your last Demiguise Statue.
Editors' Recommendations
- All Teddy Bear locations in Fallout 76
- What is dragonsplague in Dragon’s Dogma 2 and how is it cured?
- How to solve every Merlin Trial in Hogwarts Legacy
- Final Fantasy 7 Rebirth: all piano sheet music locations and rewards
- All Legendary Schematics in Palworld and where to find them


