
Where to find mandrakes in Hogwarts Legacy

Fans of the Harry Potter film and books will be familiar with the mandrakes in Hogwarts Legacy. These are one magical plant you certainly don’t want to encounter without proper ear protection, but that’s not something you need to worry about all that much in the game. Instead, actually finding a source of these screaming plants is the real task. While there are a couple of ways to get your hands on them, none are explicitly pointed out to you. If you’re ready for a quick lesson in herbology, here’s where you can find mandrakes in Hogwarts Legacy.

And if you’re on the hunt for anything else in Hogwarts Legacy, here are guides on all Demiguise Statue locations, all Daedalian Key locations, and how to find Rococo the Niffler.

Where to get mandrakes

A woman selling mandrakes.
Image used with permission by copyright holder

Mandrakes can be obtained in three main ways:

Where to buy mandrakes

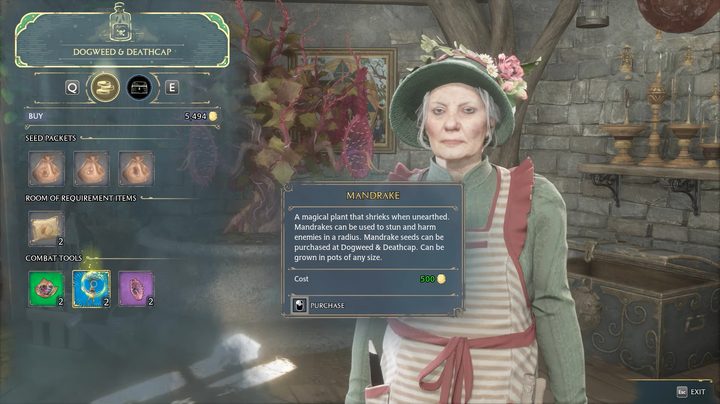
The easiest method to get mandrakes, provided you’ve got the funds, is to simply purchase them. While most vendors are hit-and-miss when it comes to stocking up on them, the one reliable source you can always go to for your mandrakes fix is Dogweed and Deathcap located in Hogsmeade. You can buy them for 500 Galleons each.

How to grow mandrakes

If you want to show off your green thumb, grow your own mandrakes by planting mandrakes seeds on a potting table in the herbology classroom. Seeds, once again, can be purchased from Dogweed and Deathcap.

Where to find mandrakes

If you’re pressed for time and cash, you can go scavenging for mandrake in the wild. These plants grow in the Forbidden Forest, though are not a very common resource to find, so you may end up wandering around quite a bit to locate them.

What mandrakes are used for

A man in armor next to a mandrake plant.
Image used with permission by copyright holder

Mandrakes are useful for multiple purposes in Hogwarts Legacy, the most important being that you need them to begin Professor Garlick’s assignments to learn important spells like Wingardium Leviosa and Flipendo. You can also pull them out in a battle to stun, deafen, and even harm enemies in range.

Editors' Recommendations

Jesse Lennox
Jesse Lennox loves writing, games, and complaining about not having time to write and play games. He knows the names of more…
Street Fighter 6: how to enroll with every master
The player confronts Ryu in Street Fighter 6 World Tour.

If you want to be the best, you need to learn from the best. Street Fighter 6 lets you put yourself into the action by creating your own custom character who learns the art of fighting from both the iconic world warriors and a host of newcomers while advancing through the World Tour mode. Each master you pledge yourself to will unlock their own unique moves to add to your list of possibilities when customizing your moveset. You might think meeting all the characters would happen naturally through the story, yet you can easily complete the entire mode without encountering most of the masters. Let us give you your first lesson by showing you how to enroll with every master in Street Fighter 6.
How to enroll with every master

Each of the main characters included at the launch of Street Fighter 6 is considered a master, which results in a total of 18 to find. Some you will come across naturally as you play World Tour mode, but most are either hidden or require you to complete certain optional objectives to find. Here's each master and how you can find them to learn their special moves.
Luke
You will automatically be enrolled with Luke when you begin World Tour mode in Street Fighter 6. You can find and train with him at any time in Metro City at the warehouse marked on your map.
Chin-Li
Chun-Lu is also impossible to miss as you go through the story. Once you get to Chapter 2-1, your objective will be to fund Chun-Li in the Chinatown area of the map. Once you find her there, you can go back to that spot to train with her at any time.
Marisa
Further on in the story, when you get to Chapter 3-3, your objective will now be able to travel using the World Map to get to Colosseo. Once you arrive, Marisa will be introduced automatically. Just speak with her again afterward to become her student.
Blanka
The big green beast Blanka can be missed, but only if you don't bother exploring. After you get to Chapter 6-1, Luke will unlock the Ranger's Hut location on the World Map. Not only will you be able to become Blanka's student, but you will also get the Blanka Chan outfit.
Dee Jay
Also available in Chapter 6-1, Dee Jay is found in Bather's Beach. After a battle (regardless of if you win or lose), you will be able to enroll with this master.
Lily
Lily is the first tricky master to enroll with. During Chapter 4-1, you need to complete a side mission called "The Spirit Guide" that you can pick up from an NPC in Chinatown named Ana. After completing the quest, Thunderfoot Settlement will be unlocked on the World Map. Go there, speak to a few NPCs, and Lily will arrive in a cutscene. Once it ends, speak to her to enroll as a student.
Cammy
Cammy also is locked behind a side mission that you can go on during Chapter 7-1. The one in question is called "Special Unit Del-?" in Metro City. Head down to the subway to grab the quest, complete it by clearing out the subway, and unlock access to the stadium area on the west side of the map. Once you take care of all the enemies downtown, you can go back to King Street via the World Map to find and battle Cammy.
Jamie
Jamie is slightly tricky to find. You need to be in Metro City during the night and go into the Chinatown alley. He will be in the middle of a fight, leading to his intro, after which you can climb up the nearby ladder and onto the roof to speak and train with him.
Ken
After a long break, Ken will be the next unmissable master. Once you get to Chapter 8-3, you will get the mission "The Elusive Former National Champ" that sends you to go find Ken at a construction site. After getting the appropriate headgear, you can head to the site and  be introduced to him.
E. Honda
Not long after you encounter Ken, E. Honda will show up in Chapter 8-4 during the "Big in Japan" mission. Simply head to the restaurant to meet up with the famous sumo star.
Ryu
Ryu can be found next by traveling to Genbu Temple. Just walk up and speak to him to begin training.
Kimberly
Also unmissable, Kimberly will be introduced during Chapter 8-7 during the "High Flying Man" mission. Once the mission is complete, she will be posted up on the roof above your hideout.
Guile
Once you've finished Chapter 8-7, you can go learn from Guile by putting on the SiRN lab coat and talking to an NPC at the construction site to get a mission to go to the Carrier Byron Taylor. Go there, fight a bit, and he will jump in to help you out.
Manon
Following Chapter 7-3, when the "Extra" sidequest unlocks in Metro City's Beat Square, you will be taken to Fete Foraine automatically. After Manon introduces herself, you can speak to her again to become a student.
Dhalsim
The yoga master himself can be found by doing the "Yoga Statue" quest available starting on Chapter 9. Talk to Anik in Bayside Park in Metro City. Complete the quest to unlock Dhalsimer Temple on the World Map, where you can enroll with Dhalsim.
Zangief
The sidequest for Zangief also spawns when you hit Chapter 9. This time, you need to go to the stadium to find the "Hither and Thither" mission from some wrestlers. Finish up the quest and the Barmaley Steelworks will be added to your map. Zip on over and meet the master grappler.
Juri
Not available until much later in Chapter 11-4, you're looking for the "A Hardboiled Adventure" sidequest in Nayshall from Govind in the Bazaar. You will need to wait until Chapter 12 before you can fully finish this quest, but once done, you can ask to study under Juri.
JP
The last master you will find can only be encountered once you've fully finished World Tour mode. Once everything is wrapped up, go to Old Nayshall at night and go to the Suval'hal Arena Entrance. JP will be there waiting by the stairs around back for someone to come asking to train.

Read more
Where to farm Zonite in Zelda: Tears of the Kingdom
Link with a created mining rig in Tears of the Kingdom.

The Legend of Zelda: Breath of the Wild introduced many survival elements into the Zelda formula, and The Legend of Zelda: Tears of the Kingdom only expands on those concepts. Things like cooking and crafting return in new-and-improved forms, but what hasn't changed much is the need to gather tons and tons of resources. From food to materials, weapons, and ores, Link's pockets will quickly become jam-packed with these materials. Zonite is a new form of resource that is vital for anyone who is enjoying the new Ultrahand ability and creating all types of wacky vehicles and contraptions. If you're hitting the limit on your creations due to a lack of Zonite, here are the best places to farm it in Tears of the Kingdom.
What is Zonite?
Zonite is tied to the ancient Zonai and their technology, which you will be using to build various machines in Tears of the Kingdom. Zonite itself is a material you can collect that, when you have enough, can be used with a Forge to make one of two things: Zonite Charges or Crystallized Charges. Zonite Charges are used to immediately refill any Energy Cell's power, while Crystallized Charges expand those Energy Cells' maximum capacity.
Best places to find Zonite

The best places to find Zonite, like any raw material, are down in the Depths. Here are a few hotspots we've found to have a good supply for you to plunder.
Great Abandoned Central Mine
The Great Abandoned Central Mine is an easy spot to recommend for farming Zonite since it is quite easy to access. You can find it at coordinates -0728, -1860, -0503. Simply drop inside with a hammer or explosives and break the deposits to gather up the Zonite.
Lindor Canyon Mine
If you've drained the Central Mine clean, Lindor Canyon Mine is another spot rich in Zonite. You can find it at the coordinates -2004, 1310, -0715.
Enemies in the Depths
If you're not as much into mining, another method for getting Zonite is to collect it from enemies in the Depths. While not every enemy drops this material, plenty do, so fighting off these tougher enemies can be worth your time. Korok Grove, found at 006, 2521, -0623, has two encampments to raid if you're feeling up to the challenge.

Read more
How to get Autobuild and all schema locations in Zelda: Tears of the Kingdom
Link using autobuild to build a fanplane.

At first, you might be disappointed to see that Link has lost all his core abilities from Breath of the Wild when you first begin The Legend of Zelda: Tears of the Kingdom. While those moves were great, what replaces them is even better, and you will likely forget all about those old ones in a matter of hours. Ultrahand in particular is essentially limitless in what you can do with it. Building contraptions, most often vehicles, is easy and intuitive. Still, sometimes you know what you want to build and would rather skip the process of, you know, building it. For that, the game offers you Autobuild.

However, like so many things in Tears of the Kingdom, you have to seek it out in order to utilize it, and the game is perfectly fine with you never stumbling upon it. To save you time building those common contraptions, here's everything you need to know about Autobuild, plus where to find all the Schema Stones in Tears of the Kingdom.
What is Autobuild?

Read more