Microsoft Word is an important part of many of our daily work lives, but that doesn’t mean we’re always using it for all it’s worth. Over time, Microsoft has added new features that make Word more robust, but you don’t always have insight into new features or even those useful hidden tools.
To improve your workflow when using Microsoft Word, here are five tricks that dramatically improved my own time with the application. Over the years, these have saved me time, reduced the risk of errors, and enhanced my efficiency at using Word.
Track only your changes
If you collaborate with others on your Word documents, then you may be familiar with Track Changes. This handy feature lets you see everyone’s additions or changes to the document easily.
With an update to Word in late 2021, Microsoft added the ability to track only your changes. For those times when you don’t need everyone to keep track of theirs and you just want to see your own, this is a great feature.
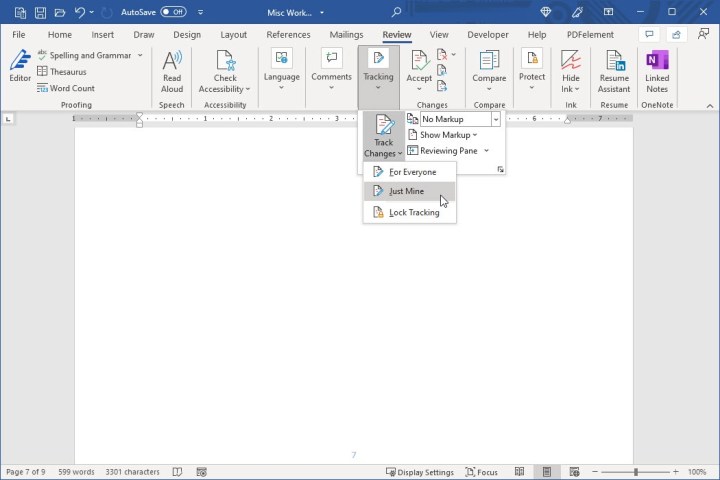
Step 1: Open your Word document and go to the Review tab.
Step 2: Click the Tracking drop-down arrow.
Step 3: Then, click the Track Changes arrow and select Just Mine.
You can then make your document edits, add comments, and accept changes you make yourself without your collaborators involved.
Take greater advantage of the clipboard
The Office Clipboard is a feature you can use in other Office applications like Excel and Outlook in addition to Word. With it, anything you copy remains on the clipboard until you copy something else.
What makes the clipboard such a useful tool is that you can reuse what’s in its history up to 24 items. This includes text as well as images. Plus, it works whether you use Edit > Copy, right-click and Copy, or the keyboard shortcut Ctrl+ C.
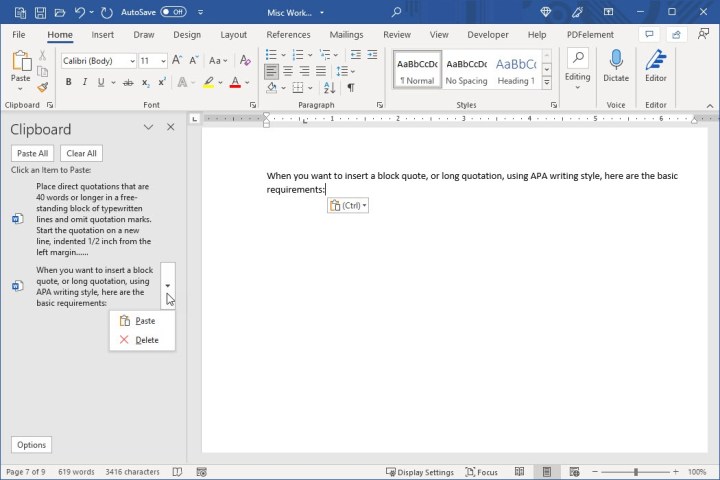
To view the clipboard, go to the Home tab and click the Clipboard dialogue box launcher. This is the tiny arrow at the bottom-right corner of the Clipboard section of the ribbon.
You’ll see the Clipboard task pane open on the left side with a list of items you’ve copied. Select an item to paste it into your document. You can also click the arrow to the right of an item and select Paste or, to remove it, select Delete.
At the top of the task pane, you’ll see additional actions to Paste All or Clear All items, both of which are convenient.
This is a real time-saver if you use copy-and-paste actions often in your Word documents.
Insert random text for placeholders
If you’ve ever had to spend time creating a document without the text, you’ll appreciate this next trick for Microsoft Word. You can type a simple line and Word will insert random text for you. This is ideal for placeholders until you have the text you need.
There are two ways to add this text to your document.
Method 1: For random text, where P is the number of paragraphs and S is the number of sentences you want, type the following:
=RAND(P,S)
For example, =RAND(2,3) gives you two paragraphs with three sentences each.
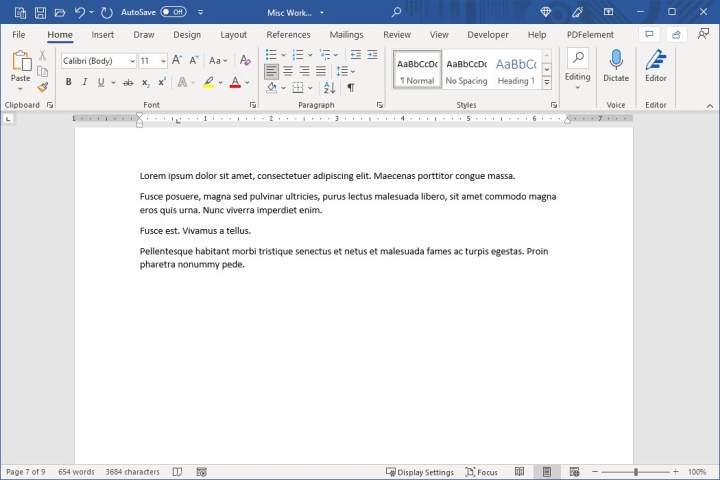
Method 2: For lorem ipsum (common placeholder text), type the command below. Like RAND, use numbers for the amount of paragraphs (P) and sentences (S) you’d like to insert.
=LOREM(P,S)
So, =LOREM(4,2) provides you with four paragraphs containing two sentences each.
Immediately upon typing the command, the text will pop into your document, ready for you to use as a placeholder in your Word template or document.
Save and reuse text, images, and more
Anytime you can reuse something when creating a document, like the clipboard above, it’s a welcome feature.
Microsoft Word offers Quick Parts and AutoText that work similarly, allowing you to save and reuse text, images, tables, signatures, and other items. If you find yourself typing or inserting the same thing over and over, then these tools are for you.
Step 1: Select the text, image, or other element that you want to save.
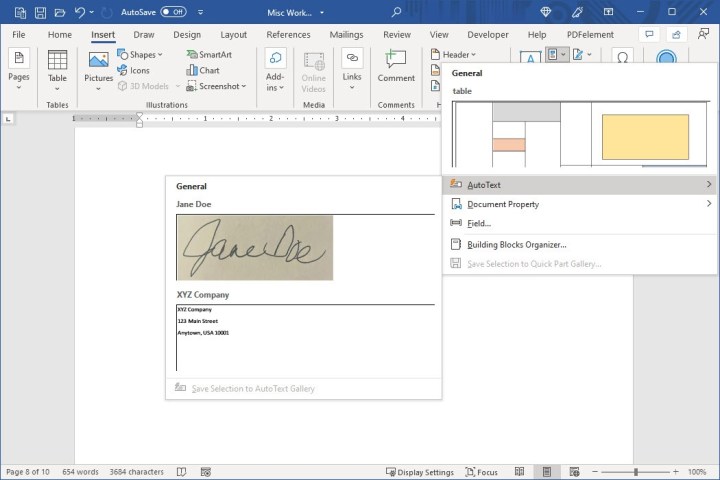
Step 2: Go to the Insert tab and click the Quick Parts drop-down arrow.
- To save it as a Quick Part, select Save Selection to Quick Part Gallery.
- To save it as AutoText, move to AutoText and select Save Selection to AutoText Gallery.
Step 3: In the pop-up window that appears, you can give it a meaningful name, choose which Gallery to save it to, add a category, and fill in any other details as you like.
Step 4: Click OK to save your entry.
When you’re ready to use your saved selection, place your cursor in the document where you want it. Return to the Insert tab, click the Quick Parts drop-down arrow, and choose the item. It then pops into your document in the spot you specified with your cursor.
The main differences between Quick Parts and AutoText are that AutoText is part of the Quick Parts feature and they each have their own Gallery for saved items.
Whichever you decide to use, or maybe both, you’ll appreciate this awesome way to save time and reduce errors from retyping or readding the same content.
Capture and insert screenshots
One more productivity trick for Word worth mentioning is the Screenshot tool. With it, you can quickly and almost effortlessly insert a screenshot in your document. You can choose from another open window on your desktop or insert a screenshot of something you capture manually.
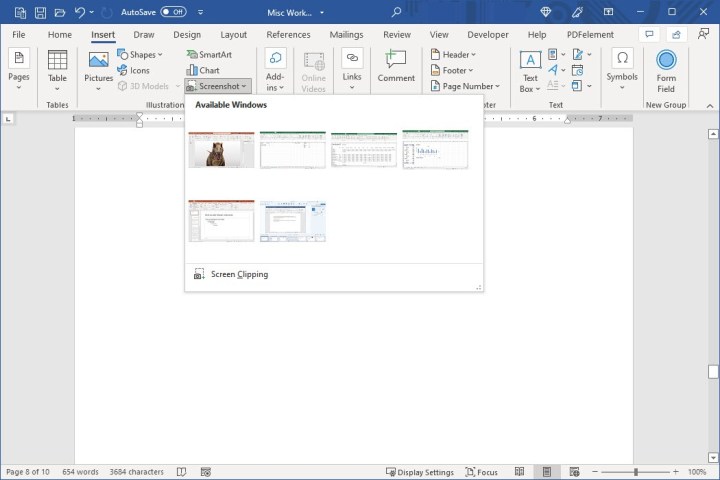
To use the tool, go to the Insert tab and click the Screenshot drop-down arrow.
At the top of the box, you’ll see the other open windows. Select one to pop it into your document and then format or edit it like any other image in Word.
Alternatively, you can capture a specific portion of your screen or another window. Select Screen Clipping. You’ll see your cursor change to crosshairs. Drag to capture the portion you want and release when you finish. The clipping will automatically appear in your document as a static image.
When you need screenshots from your computer, you can eliminate the need to open a screenshot tool, capture what you need, size and save it, and then return to the document to insert it. Just use Word’s built-in Screenshot tool.