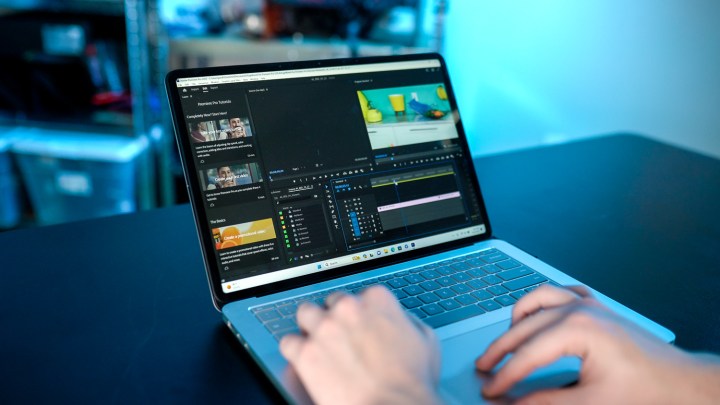
Premiere Pro is one of the most taxing applications you can run on your PC. The humble video editing suite is something of an ecosystem, giving you the power not only to splice a few video clips together but also to edit full, feature-length films with Hollywood levels of quality. Not every PC is up for the task of handling Premiere Pro, though.
If you’ve been struggling on the timeline and feel like you’re just missing something, we have a few tips for you. Here are the steps you should take in Premiere Pro to ensure the application runs as smoothly as possible, as well as how to test the application to see where your PC lands.
Leverage your GPU

Before doing anything in Premiere Pro, you need to make sure you’re using GPU-accelerated rendering. You can find this in your Project Settings under the General section. For the Renderer, make sure you’re using the one that says “GPU acceleration.” The actual hardware acceleration will differ depending on your GPU, but Premiere Pro supports Nvidia, AMD, Intel, and Apple GPUs.
This GPU acceleration works on effects on your timeline, utilizing your GPU to speed up the effects rather than relying on your CPU. Premiere Pro can also leverage your GPU for other tasks, including hardware-accelerated encoding and decoding for H.264 and H.265 formats.
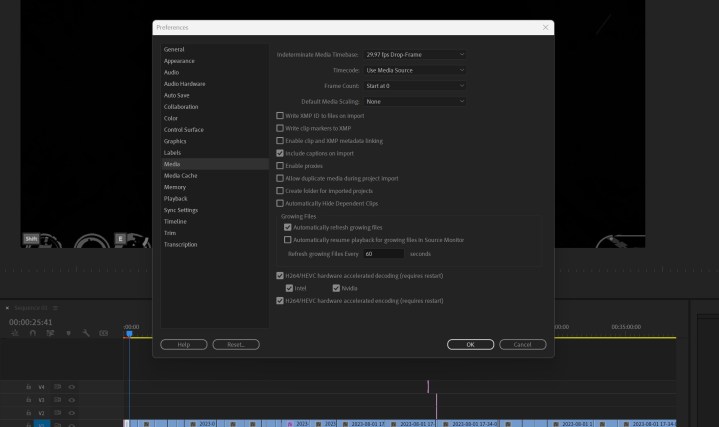
Hardware-accelerated decoding is a big deal for timeline performance. To turn it on, head into your Preferences and go down to the Media section. In this window, check the Enabled hardware accelerated decoding box. If you have a CPU with integrated graphics, you can check it here, along with your discrete GPU. Restart Premiere, and you’re good to go.
That’s hardware-accelerated decoding, but what about encoding? This will speed up your export times out of Premiere. Head to the Export view in Premiere Pro and select Hardware encoding under the Encoding settings sections to enable it. You’ll find these same options if you send your export over to Adobe Media Encoder.
Clear your cache

Premiere Pro maintains a media cache. This is a spot on your hard drive where it stores files that Premiere Pro needs to run, such as the .pek files that contain audio waveform information. Whenever you import files into Premiere, some data is stored in the cache to speed up performance. The problem is that the cache can get too full, and it can actually have an adverse effect on performance.
Thankfully, you can clear the cache from within Premiere. Head into your Preferences window and select Media cache. There, you can select Delete to clear the cache. You can also change the cache location here if you have a separate hard drive with more space. Deleting your cache won’t delete the media files you’re using. If there are media files you’re still working with, Premiere Pro will just need to rebuild the cache for those files.
You can do this process manually, but it’s much easier to set up Premiere to automatically delete cache files. Under Media cache management, you can tell Premiere to automatically delete files either after a certain number of days or when files exceed a certain size.
Adobe recommends you store your media cache on an SSD or NVMe drive, and “ideally on a dedicated drive.” A fast SSD ensures Premiere can quickly read the cache, and spreading out the cache from the drive where you’re storing the project keeps the strain on the drive low. These are further optimization steps you can take, but they aren’t required.
Consider proxies
Working with modern video files in Premiere is tough if you don’t have a beefy computer. 8K video files, RAW files, and HDR content can easily bog down your workflow, but you don’t need to edit your actual video with these files. Instead, you can attach proxies. Proxies in Premiere Pro allow you to edit with lower quality versions of your video files to improve timeline performance. Premiere Pro links the proxies to the original files, so you’ll still get all of the quality when you export your edit.
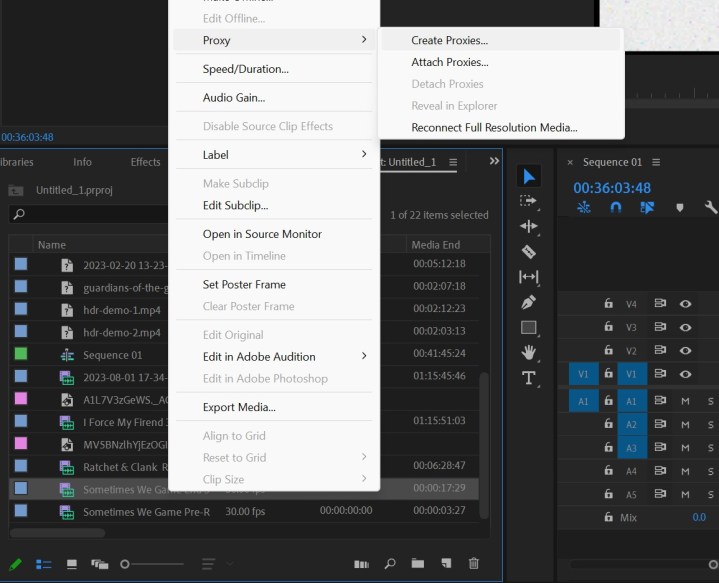
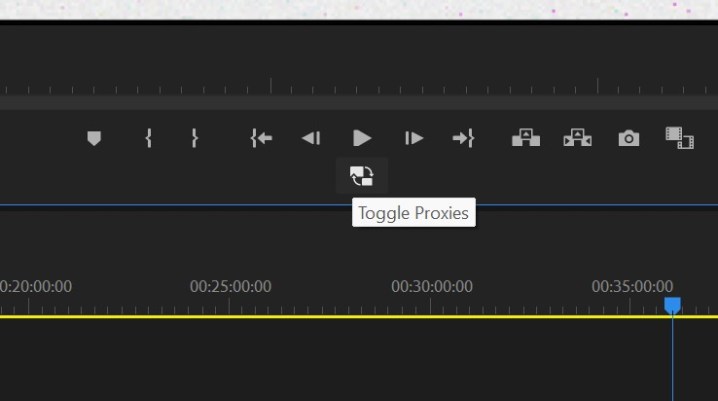
The quick way to make proxies is to select all of your imported files in Premiere Pro, right-click, and select Create proxies. You have options for the quality and codec, and once that’s done, Premiere will send the files to Media Encoder. Render them out, then head back to Premiere and select the Toggle proxies button under your preview window (pictured below). There you have it; you’re using proxies.
That’s the quick and easy way to use proxies, but what if you always want to use proxies? You can set that up. Open your Project Settings and head to the Ingest settings tab. Check the Ingest box to turn on automatic ingest behavior. Then, from the dropdown, select Create proxies. You can also select the proxy destination if you want to store them in a location different from your main media.
With this, Premiere will automatically load up Media Encoder to create proxies every time you import video files. You’ll want to leave proxies on while editing for the best performance — but keep the Toggle proxies button handy. You’ll want to use the full media file for things like checking files for focus or color adjustments.
Tweak your RAM allocation

You’ll commonly hear that Premiere Pro requires a lot of RAM, which is only partially true. It’s very demanding on system memory, but that depends on what type of project you’re working on. If you’re splicing together a handful of 1080p video clips without a ton of effects, you don’t need a ton of RAM. If you have dozens of 4K video clips across an hour or two-long video, you’ll need a lot more. Premiere Pro only requires 8GB of RAM, but you should have at least 16GB. And if you’re dealing with 4K video, at least 32GB.
Premiere Pro isn’t using all of that RAM by itself. You can allocate the amount of
If you’re only running Premiere Pro, allocate away, leaving a few gigs of memory for your operating system. There’s a careful balancing act here if you want to use other applications, though. Maybe you need to send a clip to After Effects for some VFX work, or you need to mock something up in Photoshop. Or, maybe you need to have a browser open to find some stock footage or assets. In any of these cases, you’ll want to make sure you have enough RAM not to slow your system to a crawl.
Unfortunately, there’s no set number here that’s best for everyone. It depends on how you work in Premiere and what other applications are a part of that. Try to experiment with your RAM allocation if you’re noticing slowdowns, however.
Render effects
One of the most powerful things you can do to improve Premiere Pro performance is render your effects. Premiere Pro doesn’t render anything in your timeline while you’re editing. It all happens in real-time, so if you go from a basic video clip to something with heavy visual effects, you’ll notice a slowdown in playback speed. Thankfully, you can render these clips and replace them on your timeline to improve playback.
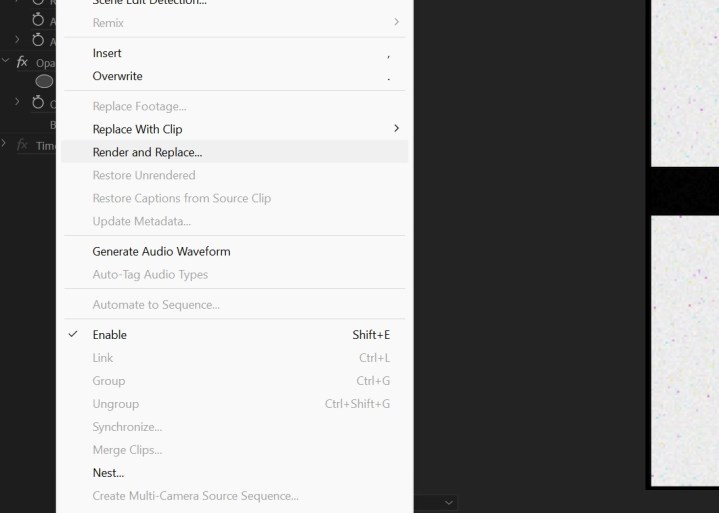
In Premiere, you’ll see a green bar above your timeline. Spots that are red show areas where Premiere Prow will struggle to playback the video, usually in areas where you have multiple effects applied to your videos. Select the clip you want to render below this red line and choose Clip in the top menu. There, you can select Render and replace.
The critical setting you want to check here is Include video effects. This will render out the clip with the effects on top of it, essentially making it a new video file. You won’t be able to edit the effects after you render the clip, but it will make timeline performance much smoother.
You don’t want to do this for all of your footage; apply it where timeline performance slows. And, if you need to make changes or you’re ready to export, you can restore the original clip by selecting it, choosing Clip at the top of the screen, and choose Restore unrendered.
Premiere Pro benchmarks
For our reviews, we use PugetBench for Premiere Pro, a free Premiere Pro benchmark you can run on your system and compare the results to other machines. Unfortunately, the final result is just a number, so it doesn’t tell you much about how it actually feels to use Premiere. In addition, the scope of your project will largely determine your performance. Editing a small video for Instagram is fine on a budget laptop without a GPU, but your timeline would barely function if you were editing a full-length movie on the same machine.
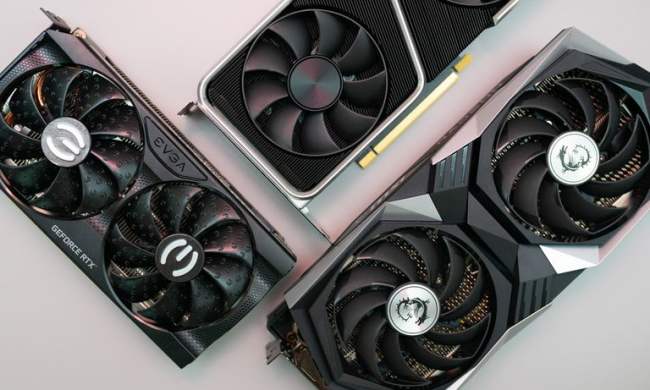
One extremely important area is a discrete GPU, however. As an example, look at the Lenovo Yoga 9i AIO compared to the Dell Inspiron 16 Plus. The Lenovo machine is a desktop using the mobile Intel Core i9-13900H. The Dell is a laptop using an Intel Core i7-13700H and a discrete RTX 4060 graphics card. Despite having a weaker CPU and being a laptop, the Dell machine is more than twice as fast.
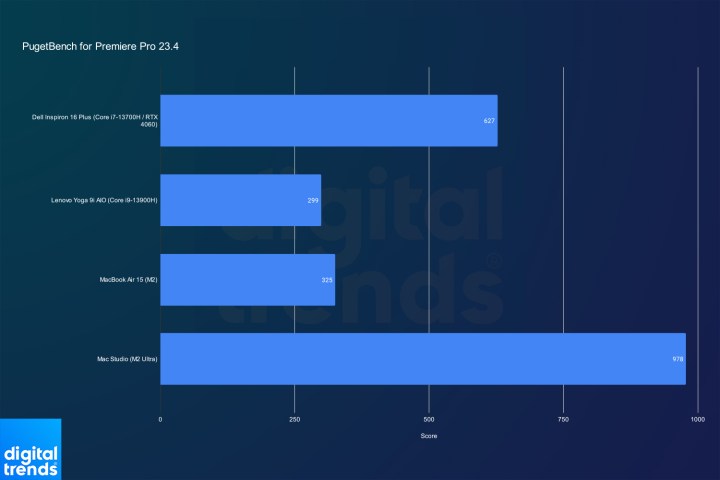
We can see this effect even on some integrated graphics. If you look at the MacBook Air 15 with the M2 chip, it managed a score only slightly ahead of the Lenovo Yoga 9i AIO. The M2 comes with an 8-core CPU and 10-core GPU. The M2 Ultra in the Mac Studio is more than three times as fast with a 24-core CPU and 60-core GPU.
Many elements in Premiere Pro today are accelerated by your GPU, so having a discrete graphics card is a big deal for the best performance. You can still edit on integrated graphics, but an intensive project calls for one of the best graphics cards.
How to run a Premiere Pro benchmark
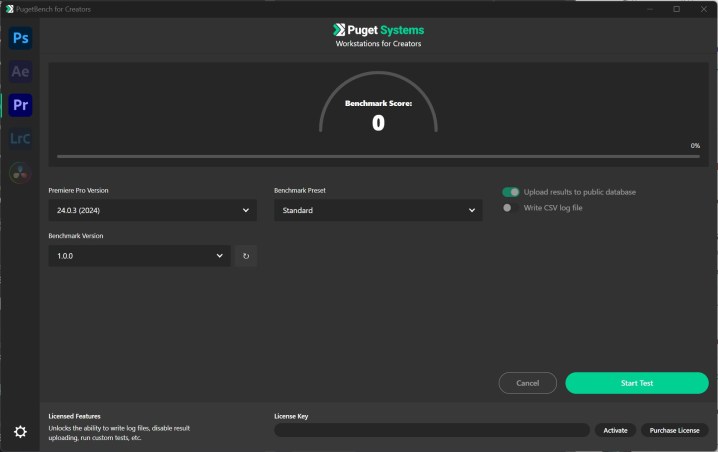
If you want to see how your PC runs Premiere Pro, you can use the PugetBench for Premiere Pro benchmark. This test runs from within Premiere, and it covers a wide swath of tasks, from video encoding to GPU effects. Even better, Puget maintains a public database of scores so you can see how your PC stacks up to others.
Download the file from PugetBench’s website — available for Windows and macOS — and run the file (it’s a .msi for Windows). This will install the PugetBench for Creators application, which includes Photoshop and Premiere Pro tests by default. With the application open, select Download assets to begin.
You’ll need the latest version of Premiere Pro already installed. Select your version from the PugetBench for Creators app, as well as the benchmark version. Each major benchmark version is a little different, so you shouldn’t compare numbers across versions. Finally, select your preset — either standard or extended. With an extended benchmark, you’ll get a standard score along with an extended score, the latter of which is usually a bit lower.
Once that’s all set, select Start test and leave your PC for about 30 minutes. Make sure you’ve closed down all of your background apps for a more accurate score. A browser window will pop up after the test with your score.