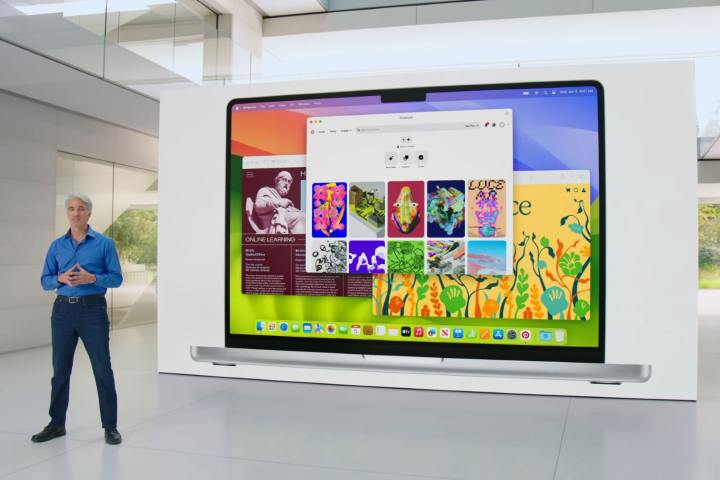
Not everyone loves macOS Sonoma (the latest version of macOS) and there are plenty of reasons you might want to go back to an older edition. The latest macOS might be missing key features you previously enjoyed, for example, or it might have compatibility issues with your apps.
There are a few ways to uninstall the latest version of macOS and downgrade to an older edition, and we’ll take you through them in this guide. Before we start, though, there is something very important you need to do: back up your Mac.
For one thing, that’ll get you out of a tight spot if something goes wrong. As well as that, some of the methods we discuss in this article involve either erasing your Mac’s drive or rolling back to an earlier point in time. In both cases, you could lose recent files. To prevent that happening, save your files to a separate location, whether that’s to the cloud or to one of the best external hard drives.
Now that you’ve done that, you also need to know which versions of macOS your Mac can run. As a rule, it’s unlikely to be able to run anything older than the edition of macOS that was installed when you bought your Mac. It should be fine to roll back to anything that came out within a few years of your Mac’s release, though.
With all that done, let’s get started.

Method 1: Restore from an older Time Machine backup
Step 1: Before you begin, note that restoring from a Time Machine backup will mean you lose any data created after the backup was made, so ensure you have newer documents saved somewhere on a different Mac, an external drive, or in cloud storage.
Step 2: Restart your Mac in Recovery mode. To do this, shut down your Mac, then on an Apple silicon Mac, turn it on by pressing and holding the power button until you see the message “Loading startup options.” On an Intel Mac, turn on your Mac then immediately press Cmd+R together until you see the Apple logo.
Step 3: Select Options > Continue and wait for the progress bar to fill up. Log in with an admin account, then select Restore from Time Machine > Continue > Continue.
Step 4: Pick a backup from before you upgraded to macOS Sonoma (i.e. a backup running macOS Ventura or earlier). Now choose Continue and let your Mac restore from the backup. You Mac will install the older macOS version as part of the backup restoration process.

Method 2: Run a bootable installer
Step 1: Apple still makes older versions of macOS available on the App Store. You can download one, load it onto a USB drive and install it from there. However, this method requires using Terminal and erasing your Mac’s SSD, so make sure you’ve backed up your files somewhere (and are comfortable using Terminal) before starting.
Step 2: Download the version of macOS you want from the App Store using one of the following links: * macOS Ventura * macOS Monterey * macOS Big Sur * macOS Catalina * macOS Mojave
Step 3: In this example, we’re going to use macOS Ventura. When it finishes downloading, do not run the installer. Instead, open your Applications folder in Finder and check the installer is there.
Step 4: Plug a USB drive into your Mac. You will need to make sure it has enough space for the installer and is completely empty before beginning. Name the drive “macOS installer” or something equally memorable.

Step 5: Open the Terminal app on your Mac and type in the following command: sudo /Applications/Install\ macOS\ Ventura.app/Contents/Resources/createinstallmedia --volume /Volumes/MyDrive
Replace “Ventura.app” with the name of the installer file, and “MyDrive” with the name of your USB drive. When you’re done, press Return. You can close Terminal when the process has finished.
Step 6: Now open the Settings app and pick General > Startup Disk, then select the USB drive with the macOS installer on it.
Step 7: Shut down your Mac and boot into Recovery mode by pressing and holding the power button until you see “Loading startup options” (on an Apple silicon Mac), or by pressing and holding Cmd+R as soon as you start your Mac (on an Intel Mac).
Step 8: Now pick Options > Continue. Log in with an admin account, then click Disk Utility > Continue. From here, choose your Mac’s startup disk and pick Erase. This will delete everything on the drive, so it’s your last chance to ensure your files are safely backed up. Wait for the process to finish, then click Disk Utility > Quit Disk Utility from the menu bar.
Step 9: Now pick Reinstall macOS from the menu and follow the on-screen instructions.

Method 3: Revert your Mac to the operating system it shipped with (Intel only)
Step 1: If your Mac was running an older version of macOS when you bought it, you can roll it back to that version. Note that this only works on Intel Macs, so if you have an M-series Apple silicon chip inside your Mac, this method won’t work.
Step 2: Shut down your Mac, then start it up again and immediately hold Shift+Opt+Cmd+R together.
Step 3: Once the Recovery screen loads, choose Reinstall macOS > Continue and follow the on-screen instructions. Then pick your startup disk and click Install.
Step 4: Wait for your Mac to finish installing the version of macOS that came with your Mac.
Now that you’ve managed to downgrade from macOS Sonoma to an older version of Apple’s Mac operating system, you should be good to go. If you ever want to upgrade to a more recent version, you can either download the installer from the App Store or open the Settings app and choose General > Software Update and install the update from there.
Editors' Recommendations
- How to delete messages on your Mac
- How to type an em dash on a Mac
- How to find a Wi-Fi password on Mac
- Does your Mac need antivirus software in 2024? We asked the experts
- These 6 tweaks take MacBooks from great to nearly perfect


