Today, it seems like you get notifications for almost everything. Whether it’s a new text message or an email about your friends’ latest social media posts, the notifications never stop. But if you need to get work done on Windows 10, you need to know how to turn those distracting notifications off.
Keep reading to learn how to turn off notifications so that you can buckle down and focus. You can always reply to those messages and notifications during your next break.
Turn off notifications
Step 1: Open the Windows Settings menu by pressing the Windows Key + I, or search for “settings” in the Windows Search Bar and click the corresponding result. Make sure you choose System in the Settings menu.
Step 2: Click Notifications & Actions in the left-hand menu. This will take you to a screen providing access to all the settings related to notifications and the Action Center.

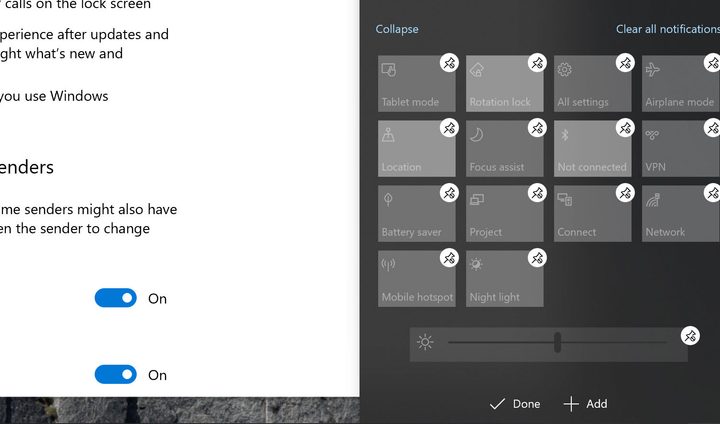
Step 3: If you want to change the Quick Actions or all the actions that appear in your Action Center, you can click Edit Your Quick Actions. This will open a side panel on the right where you can customize the different alerts that show up here. Most of the panel will be filled with recent alerts or actions that you took. But look at the bottom, and you’ll see icons for different “classes” of notifications. Click Expand to get the full view. You can click the little Pin symbols for each type of notification to remove them, or you can go to Add at the bottom to add in more notifications until it’s only what you want to see. Then click Done.
Step 4: Look for the Notifications subheading, where you will see a number of options for various types of notifications. The following is a list of the settings you can check and toggle on or off in this screen:
- Get Notifications From Apps and Other Senders
- Show Notifications on the Lock Screen
- Show Reminders and Incoming VoIP Calls on the Lock Screen
- Allow Notifications to Play Sounds
- Show Me the Windows Welcome Experience After Updates and Occasionally When I Sign In to Highlight What’s New and Suggested
- Suggest Ways I Can Finish Setting Up My Device to Get the Most Out of Windows
- Get Tips, Tricks, and Suggestions As You Use Windows
Turn them off as you need. If you don’t want any, just make sure they are all toggled off or unchecked. You’ll need to install the particular app you want to view notifications for if it’s not already built into your system, and you can receive a notification first before an app will show up in the list.
Temporarily hide notifications
If you want to hide notifications without turning them off entirely, you can always temporarily mute them using Focus Assist.
Step 1: Open up the Action Center by pressing on the Notification icon on the far right-hand side of the Windows taskbar (it looks like a little dialogue box) or by pressing the Windows key + A.
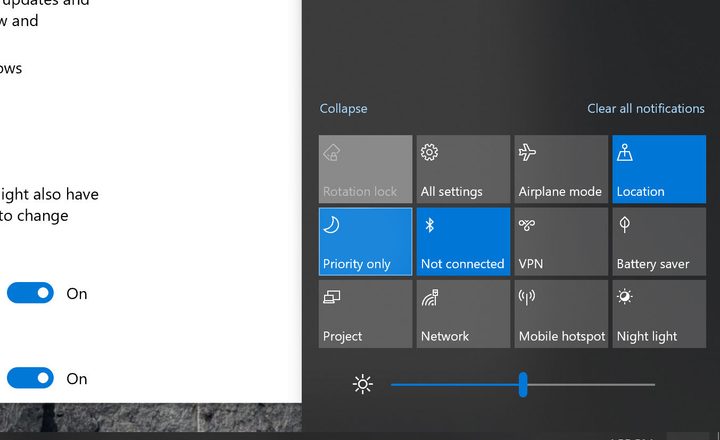
Step 2: Click on the Moon icon that’s labeled “Focus Assist.” The icon will turn blue (or whatever your chosen desktop accent color is) when on and shift between a couple of different modes. First, you will receive Priority Only alerts, and the second mode is Alarms Only alerts. Turn it to whatever works for your current project.
Step 3: You can further customize Focus Assist by adjusting your Automatic Rules for it in your Windows Settings. This will let you change times and priority levels for when you do and don’t want notifications enabled, be it during a more specific time or even when you’re playing a game. You can access these rules by going to the Settings app, selecting System, and then selecting Focus Assist.

Permanently mute notifications
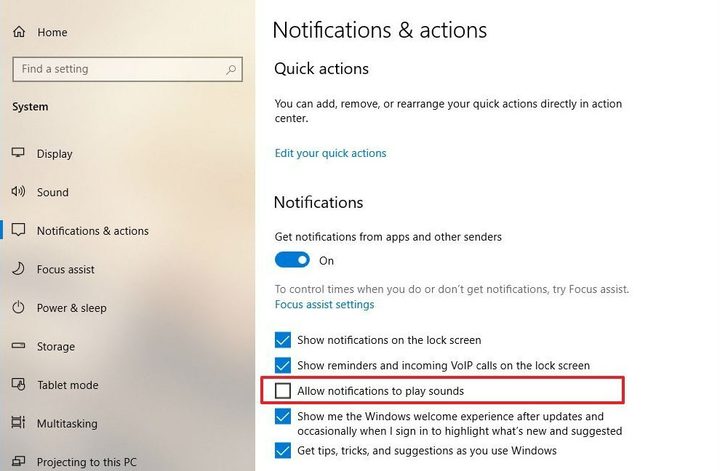
Is it the notification sound that’s primarily annoying to you? Thanks to a late-2019 update from Microsoft, you can turn off all notification sounds on Windows so everything will appear silently from now on. To turn this feature on, head back to Settings, go to System, and go to Notifications & Actions. If your Windows PC is fully up to date, you’ll see a series of checkboxes and see an option among them that says Allow Notifications to Play Sounds.
Simply make sure this box is unchecked, and your notifications won’t make any noise from now on. You can return to having alert noises whenever you want by checking the box again.
How to dismiss notifications
Notifications are a phenomenal tool for keeping up with the hustle and bustle of our digital lives. However, an excess of notifications — especially ones you’ve previously seen — can clutter the Action Center and prevent you from seeing important notifications as they arrive.
To dismiss individual notifications, click the Action Center icon located on the right-hand side of the Windows Taskbar and mouse over the notification that you’d like to dismiss. Then, click the X button directly to the right of the notification. You can also swipe a notification to the right to dismiss it quickly with either touch or by clicking and dragging with the mouse.

You can dismiss all of the notifications for a given app by clicking on the X button to the right of the app group listing. You can also click Clear All Notifications to close every notification for all apps.

In-depth: How to customize notifications for each app
You have a few options for customizing your Windows 10 notifications. You can set banner notifications, which are alerts that pop-up along the lower right corner of your screen, with or without sounds. If you find pop-up alerts more annoying than helpful, you can opt for notifications to only appear in the Action Center. The frequency of your alerts and additional options will vary from app to app.
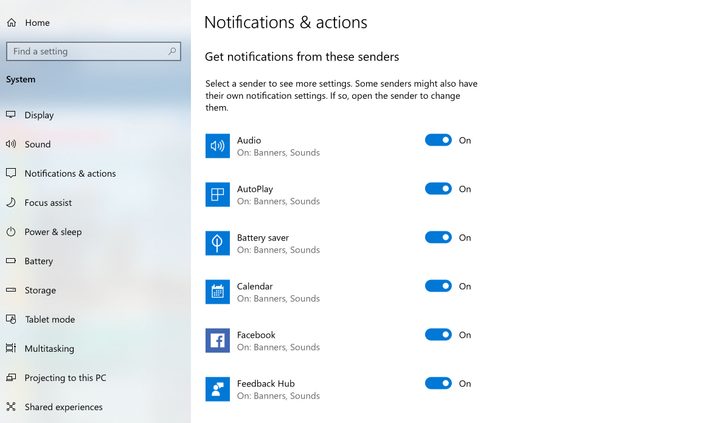
You can modify your notifications under the Notifications & Actions tab in Settings. Once there, scroll until you see the Get Notifications From These Senders section and tap the category. Next, you’ll tap on the name of any app you’d like to change settings for. An advanced notification menu will appear. Toggle your preferred notifications, like sound options and alert style, on or off to customize your alerts.
Here are the types of settings you can configure for most app’s notifications:
- Turn notifications on or off.
- Turn notification banners — the boxes that show up for each notification and then disappear — on or off.
- Determine whether to keep notifications private on the lock screen.
- Turn notifications on or off in the Action Center.
- Determine whether a sound plays for that app’s notifications.
- Indicate how many notifications are visible in the Action Center before the drop-down show more menu appears — either one, three, five, 10, or 20 notifications.
- Determine the priority of notifications, allowing an app’s notifications to show up on top of other less-important app notifications.