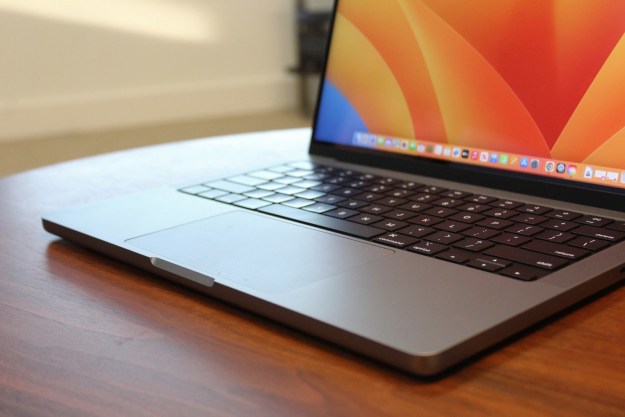
Apple does its best to ensure everyone can use their devices. To assist those with impairments in vision, hearing, mobility, and general accessibility, you have options to create the best experience possible.
Here, we’ll walk through the main motor accessibility features available on MacOS, how to enable them, and the basics of how to use them.
Voice Control
With the Voice Control feature, you can control and navigate your Mac as well as dictate commands for writing and editing text.
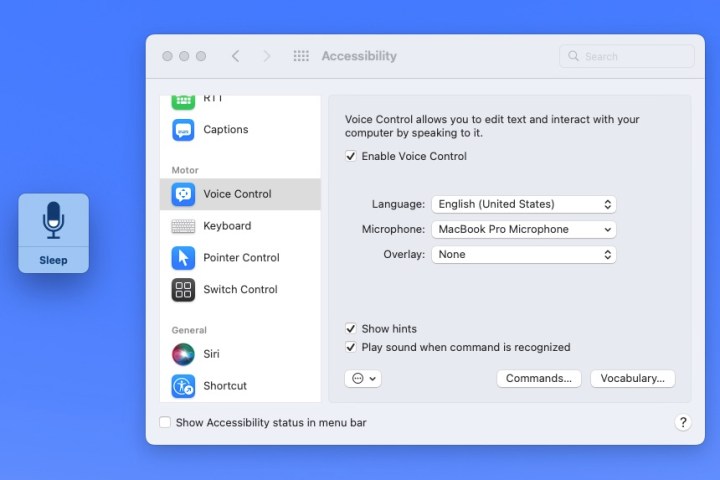
Step 1: To turn on Voice Control, select the Apple icon in the menu bar and open System Preferences.
Step 2: Choose Accessibility and pick Voice Control in the Motor section on the left.
Step 3: Select Enable voice control, and if prompted, enter your MacOS password.
Optionally, you can adjust the settings for Language, Microphone, and Overlay, along with showing hints and playing a sound when commands are recognized.

Step 4: You’ll see the small Voice Control window appear on your desktop, which you can move wherever you like. As you speak your commands, you’ll see the microphone fluctuation to indicate the volume of your voice.
You can use commands such as Open Mail, Quit Photos, Scroll Up, or Close Window.
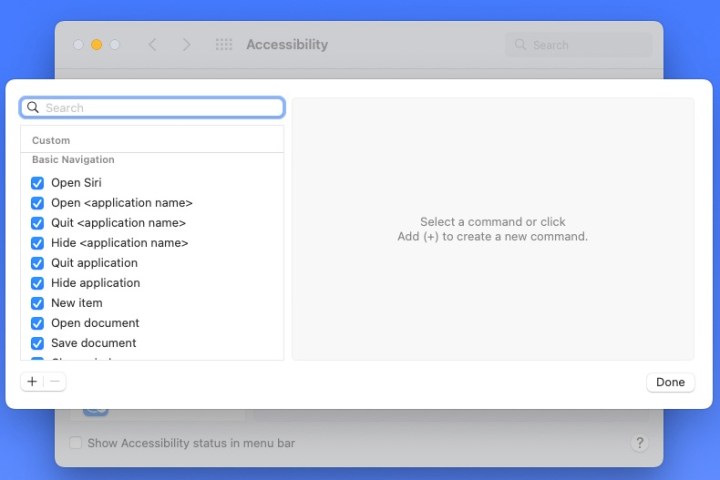
Step 5: To view the entire set of commands as well as create your own, select Commands in the Accessibility window where you enabled the feature.
Step 6: To turn off Voice Control, follow the same steps as above to deselect Enable voice control in the System Preferences > Accessibility section.
Full Keyboard Access
Using Full Keyboard Access, you can control your Mac and move about the desktop and apps using the Tab and arrow keys. This means you can tuck your mouse away and ignore the trackpad.
Step 1: To turn on Full Keyboard Access, select the Apple icon in the menu bar and open System Preferences.
Step 2: Choose Accessibility and pick Keyboard in the Motor section on the left.
Step 3: Use the Navigation tab to select Enable full keyboard access. Note the list of helpful key presses listed directly below the setting.
Optionally, you can adjust the appearance, color, and contrast using the Options button.
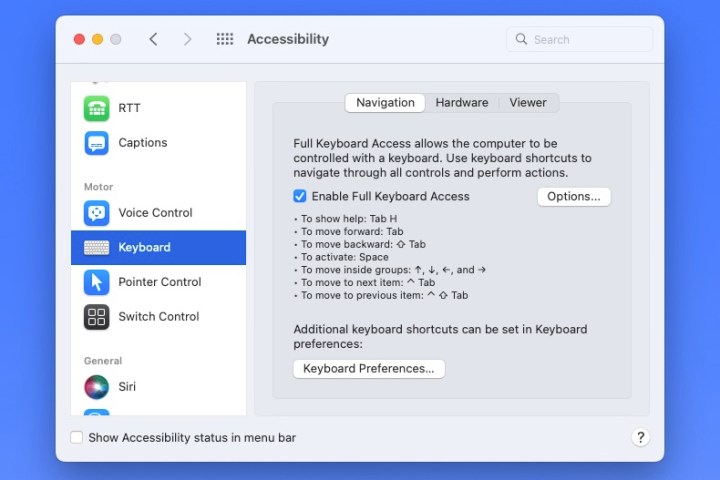
Step 4: You can then use the additional tabs in the Keyboard System Preferences for Hardware and Viewer to adjust the settings for each of those items while using the Full Keyboard Access feature.
Step 5: To view the entire list of key presses you can use, select Options and the Commands tab in the Accessibility window where you enabled the feature.
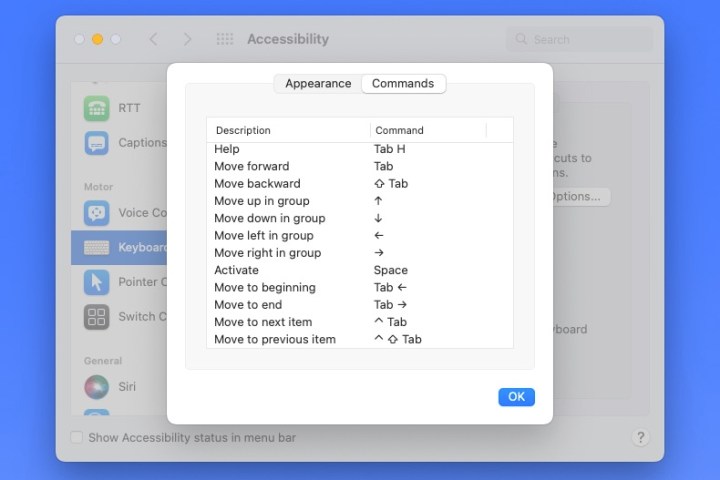
Step 6: To turn off Full Keyboard Access, follow the same steps as above to deselect Enable full keyboard access in the System Preferences > Accessibility section.
Pointer Control
As an alternative or in addition to the Full Keyboard Access feature, you can adjust the Pointer Control settings to make your mouse and trackpad easier to use.
Step 1: Select the Apple icon in the menu bar and open System Preferences.
Step 2: Choose Accessibility and pick Pointer Control in the Motor section on the left.
Step 3: On the Mouse & Trackpad tab, adjust these settings:
- Double-click speed: Reaction time for the mouse or trackpad when you double-click.
- Spring-loading delay: Timing for dropping items into folders, including how long to hover an item over a folder before the folder opens.
- Ignore built-in trackpad: Disable the trackpad when you have a mouse or wireless trackpad connected to your Mac.
- Trackpad options: Set the scrolling speed, scrolling with or without inertia, and enable dragging with or without a drag lock.
- Mouse options: Set the scrolling speed and scrolling with or without inertia.

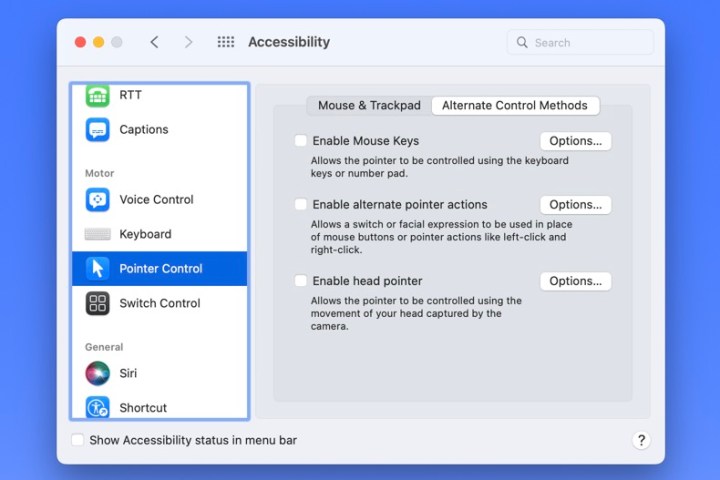
Step 4: On the Alternate Control Methods tab, adjust these settings:
- Enable mouse keys: Control the pointer using your keyboard or number pad.
- Enable alternate pointer actions: Use a switch or facial expressions instead of mouse buttons or pointer actions.
- Enable head pointer: Control the pointer using head movements via MacOS camera access.
If you enable one or more of these features, you can select Options to the right and customize the controls.
Switch Control
If you own an adaptive device that allows you to enter text and interact with your computer, you can enable Switch Control on Mac. This lets you use controls in the Switch Control Home Panel to select items and perform tasks.
Step 1: To turn on Switch Control, select the Apple icon in the menu bar and open System Preferences.
Step 2: Choose Accessibility and pick Switch Control in the Motor section on the left.
Step 3: Use the General tab to select Enable Switch Control.
Optionally, you can adjust the settings for appearance, hide the panel, and allow platform switching. You can also select Panel Editor to customize the Switch Control panel.

Step 4: To connect a device, go to the Switches tab, select the plus sign button, and then press your switch. Follow the subsequent prompts to complete the setup.
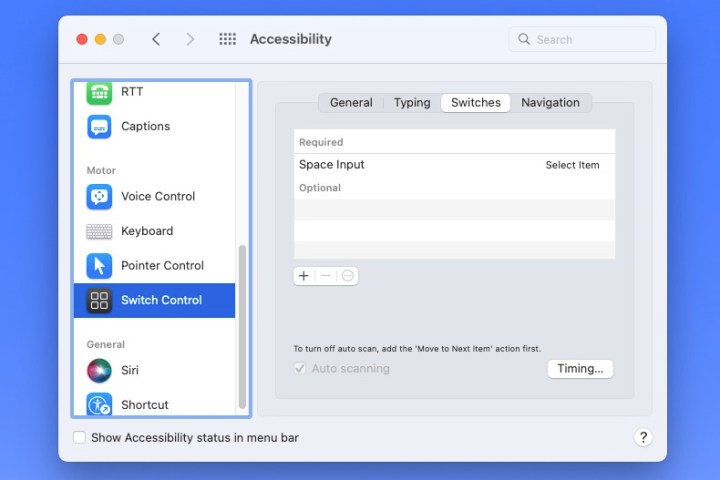
Step 5: You can then use the additional tabs in the Switch Control System Preferences for Typing and Navigation to adjust the settings for each of those items while using an adaptive device with Switch Control.
Step 6: To turn off Switch Control, follow the same steps as above to deselect Enable Switch Control and then confirm in the System Preferences > Accessibility section.
If you could use a little help navigating your Mac, performing tasks, and working with apps, consider using one or more of these MacOS motor accessibility features.
Editors' Recommendations
- How to delete messages on your Mac
- How to type an em dash on a Mac
- How to find a Wi-Fi password on Mac
- Does your Mac need antivirus software in 2024? We asked the experts
- These 6 tweaks take MacBooks from great to nearly perfect


