
All gestures in Lies of P and how to get them

Even though there’s no multiplayer component in Lies of P, there are still plenty of ways you can express your version of Pinocchio. Most people will be interested in getting all the outfits, but there are also plenty of different gestures to unlock that let you perform different little actions around the world for some fun. Being a puppet, it kind of makes sense that you need to learn how to do these poses, but even so, you can’t learn them all in a single playthrough. Many are tied to just going through the main story, but most are locked behind sidequests, letters, and how you answer certain questions. Here’s the truth behind getting every gesture in Lies of P.

How to get all gestures

A description of an emote in Lies of P.
Neowiz

There are 17 gestures in total to learn, with one of them specifically locked to one NPC. We will note any requirements or ways to miss a gesture in their description.

Sit

Available by default.

Show off clothes

Speak to Antonia at Hotel Krat.

Remembrance

Read the Frozen Man’s Letter found in Elysion Boulevard Entrance.
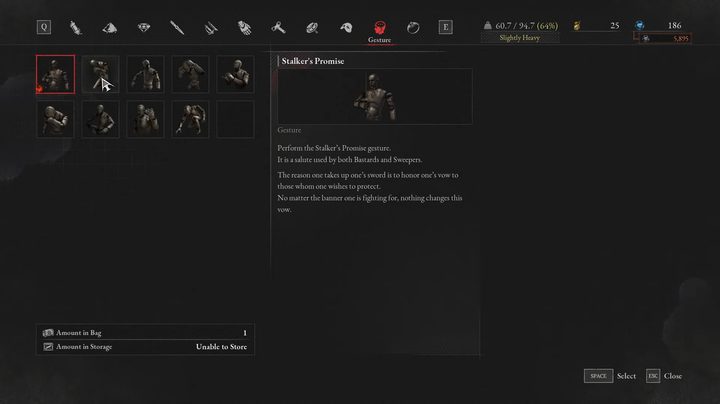
Stalker’s Promise

Defeat the Survivor you can find in Workshop Union Culvert after meeting Red Fox and Black Cat.

Fear

Unlocked when you first speak to Venigni in his control room.

Swagger

After you beat King’s Flame, Fuoco, keep talking to Venigni until he runs out of dialogue.

Pray

First, speak to Sister Cecile in St. Frengelico Cathedral Library with the Holy Mark. After this, defeat Fallen Archbishop Andreus and return to where she was to collect Cecile’s Written Confession letter. Read it to learn the gesture. If you do not, also bring the Holy Mark to Cecile before beating this boss.

Taunt

Learned after beating The Eldest of the Black Rabbit Brotherhood boss.

Clap

After defeating the prior boss, bring the Portrait of a Boy into the Black Rabbit Brotherhood’s hideout.

Sad

This is the reward for finishing Julian the Gentleman’s sidequest. This can only be obtained if you lied to Julian.

Respect

Collect the Saintess of Mercy Hall Key from Simon Manus and use it to open the gate at the greenhouse and interact with the statue.

Beg

Give Red Fox and Black Cat some Gold Coin Fruit when they ask at the Grand Exhibition Conference Room stargazer.

Greet

Go back to Hotel Krat after beating the Puppet-Devouring Green Monster of the Swamp and talk to Antonia.

Anger

Talk to Antonia after beating the Corrupted Parade Master.

Happy

Talk to Subject 826 at the Arch Abbey Outer Wall.

Entreat

Go to Sophia’s bedroom after beating Laxasia The Complete and speak to her to learn the final gesture.

Editors' Recommendations

Jesse Lennox
Jesse Lennox loves writing, games, and complaining about not having time to write and play games. He knows the names of more…
How to open Prowler Stashes in Spider-Man 2
Spider-Man Peter Parker and Miles Morales fighting Kraven and henchmen

The Prowler, aka Miles Morales' uncle, has hung up his hood and retired from his life of crime by the time Marvel's Spider-Man 2. Even so, after a talk with Miles, it is revealed that he left quite a few stashes of materials around the city that, since he is under house arrest, he can't access anymore. Rather than let them go to waste, you're sent out to collect these little resource caches to use for yourself. These are an easy way to earn yourself some Rare Tech Parts, but the Prowler didn't just leave them out in the open. Here is a breakdown of how you can access Prowler Stashes in Spider-Man 2.
How to open Prowler Stashes

Once you get into the area where a Prowler Stash is, the hunt begins. The first step is locating the stash, which is camouflaged, so you need to use your mask to track it down. By holding down L2, you can scan the area and follow the sounds until you narrow down the correct spot. You have to aim at the right spot and be close enough to reveal it.

Read more
How to get tech parts in Spider-Man 2
Spider-Man attacks enemies in Marvel's Spider-Man 2.

Amid all the different tokens, memories, and photo-ops you need to collect in Marvel's Spider-Man 2, the one material that is both the most common and most necessary is Tech Parts. With the exception of your abilities, which only require skill points you earn by leveling up, essentially everything you can unlock or upgrade in the game will cost Tech Parts alongside one other material. You might think you will never run low early on when you start getting them in batches of over 100 at a time, but once you start unlocking all the slick new suits and styles and gadgets you want to upgrade, you'll realize just how desperate you are to get more. Your spider-sense can't help you with this one, so here are the best ways you can get Tech Parts in Spider-Man 2.
Best ways to get Tech Parts

Tech Parts are the most basic upgrade component in Spider-Man 2, and the city is full of them. But you're better off using these methods to get them rather than others.

Read more
How to get Rare Tech Parts in Spider-Man 2
Peter and Miles perched next to each other in Marvel's Spider-Man 2.

The amount of upgrade materials in Marvel's Spider-Man 2 can make your head spin at times. From all the different tokens, parts, and plain skill points, it can be hard to keep them all straight, let alone where you find each one. The game does a decent job of letting you know what rewards any activity on the map will give you by highlighting it, but when you're hunting for Rare Tech Parts it can be a pain to slowly scroll around looking for a way to snag some. Plus, if you want to be efficient in getting them, it will take even longer. Here is how you can get Rare Tech Parts in Spider-Man 2 so you can get your upgrades done and save the day.
Best ways to get Rare Tech Parts
Technically Rare Tech Parts aren't any harder to get than other collectables like City Tokens, but are "rare" because you get them in much smaller quantities than normal Tech Parts. If you're hunting for them, your first stop should be any of the Prowler Stashes. These unlock very early in the story after Miles talks to his uncle and is sent to one to demonstrate how they work. Once you know how to solve the little environmental puzzles, they won't take you too long to get through, and they continue to appear as you move through the story. You get three for each you open.

Hunter Blinds are your next best source for Rare Tech Parts, giving five for any you complete, and are basically the opposite of Prowler Stashes. Instead of a little environmental puzzle to solve, these are combat (or stealth) focused encounters, so you can swap between them to add some variety to your Rare Tech Parts grind!

Read more