When and where to find Animal Crossing’s rarest fish

The rare fish in Animal Crossing: New Horizons will be the bane of your completionist career. Whether trying to fill out your museum or critterpedia, or to just make stacks of bells from C.J., there’s bound to be a finned friend or two that’ll stop you in your tracks.

New Horizons is already the most successful entry in the entire franchise. It’s also the most extensive release by far, adding intricacies on top of familiar challenges.
how to plant money tree animal crossing new horizons glowing spot

Animal Crossing doesn’t throw every fish at you at once. They often show up during certain months or even at specific times of the day. Knowing when and where each rare fish spawns can save you a lot of time and frustration. To help, here’s a list of the rarest fish in Animal Crossing: New Horizons, when and where they spawn, and how many bells you can expect to get for them from the Nook twins.

Animal Crossing hemispheres explained

When beginning your Animal Crossing: New Horizons adventure, you’re asked whether you want an island on the Northern or Southern Hemisphere. The idea is to choose the one to match where you live, but you’re free to choose whichever you like.

Your choice of hemisphere dictates seasonal changes, ultimately affecting the months in which fish and bugs spawn on your island, so it’s important to know which area your island is in.

Here’s a quick reference sheet of which months comprise the four seasons on both sides of the world.

  • Spring: Northern = March, April, May | Southern = September, October, November
  • Summer: Northern = June, July, August | Southern = December, January, February
  • Autumn: Northern = September, October, November | Southern = March, April, May
  • Winter:  Northern = December, January, February | Southern = June, July, August

Animal Crossing rare fish times and locations

Animal Crossing rare fish guide
Image used with permission by copyright holder

Northern Hemisphere

  • Golden Trout: River (Cliffside), March-June/Sept.-Nov., 4 p.m. to 9 a.m.
  • Oarfish: Sea, Dec.-May, all day (9,000)
  • Stringfish: River (Clifftop), Dec.-March, 4 p.m. to 9 a.m. (15,000)
  • Coelacanth: Ocean, all year, rain (15,000)
  • Barreleye: Ocean, all year, 9 p.m. to 4 a.m. (15,000)
  • Blue Marlin: Pier, July-Sept./Nov.-April, all day, (10,000)
  • Snapping Turtle: River, April-Oct., 9 p.m. to 4 a.m. (5,000)
  • Tuna: Pier, Nov.-April, all day (7,000)
  • Mahi-Mahi: Pier, May-Oct., all day (6,000)
  • Giant Snakehead: Pond, June-Aug., 9 a.m. to 4 p.m. (5,500)
  • Giant Trevally: Pier, May-Oct., all day (4,500)
  • Ranchu Goldfish: Pond, all year, 9 a.m. to 4 p.m. (4,500)
  • Ocean Sunfish: Ocean, July-Sept., 4 a.m. to 9 p.m. (4,000)
  • Saw Shark: Ocean, June-Sept., 4 p.m. to 9 a.m. (12,000)
  • Great White Shark: Ocean, June-Sept., 4 p.m. to 9 a.m. (15,000)
  • Whale Shark: Ocean, June-Sept., all day, (13,000)
  • Hammerhead Shark: Ocean, June-Sept., 4 p.m. to 9 a.m. (8,000)
  • Blowfish: Ocean, Nov.-Feb., 6 p.m. to 4 a.m. (5,000)
  • Napoleonfish: Ocean, July-Aug., 4 a.m. to 9 p.m. (10,000)
  • Koi: Pond, All year, all day (4,000)

Southern Hemisphere

  • Golden Trout: River (Cliffside), March-May/Sept.-Dec., 4 p.m. to 9 a.m.
  • Oarfish: Sea, June-Nov., all day, largest shadow (9,000)
  • Stringfish: River (Clifftop), June-Sept., 4 p.m. to 9 a.m., largest shadow (15,000)
  • Coelacanth: Ocean, all year, rain, largest shadow (15,000)
  • Barreleye: Ocean, all year, 9 p.m. to 4 a.m., small shadow (15,000)
  • Blue Marlin: Pier, Jan.-March/May-Nov., all day, largest shadow (10,000)
  • Snapping Turtle: River, Oct.-April, 9 p.m. to 4 a.m., extra-large shadow (5,000)
  • Tuna: Pier, May-Oct., all day, largest shadow (7,000)
  • Mahi-Mahi: Pier, Nov.-April, all day, large shadow (6,000)
  • Giant Snakehead: Pond, Dec.-Feb., 9 a.m. to 4 p.m., extra-large shadow (5,500)
  • Giant Trevally: Pier, April-Nov., all day, very large shadow (4,500)
  • Ranchu Goldfish: Pond, all year, 9 a.m. to 4 p.m. (4,500)
  • Ocean Sunfish: Ocean, Jan.-March, 4 a.m. to 9 p.m., fin shadow (4,000)
  • Saw Shark: Ocean, Dec.-March, 4 p.m. to 9 a.m., fin shadow (12,000)
  • Great White Shark: Ocean, Dec.-March, 4 p.m. to 9 a.m., fin shadow (15,000)
  • Whale Shark: Ocean, Dec.-March, all day, fin shadow (13,000)
  • Hammerhead Shark: Ocean, June-Sept., 4 p.m. to 9 a.m., fin shadow (8,000)
  • Blowfish: Ocean, May-Aug., 6 p.m. to 4 a.m., medium shadow (5,000)
  • Napoleonfish: Ocean, Jan.-Feb., 4 a.m. to 9 p.m., largest shadow (10,000)
  • Koi: Pond, All year, all day, large shadow (4,000)

Crafting and using bait to catch fish

Animal Crossing manila clam bait
Image used with permission by copyright holder

If you were intrigued enough by those little spouts of water coming from your beach to dig them up, you likely pulled up a manila clam and learned how to make bait. Bait, crafted with a single manila clam, is used to spawn fish in nearby waters.

Stand near a body of water and sprinkle the bait from your inventory into the pond, river, or sea. A shadow should spawn almost immediately.

There are no secret spawn rates triggered by this particular item. Not that we can reliably claim with current data, anyway. It’s just a way to speed up random fish spawns.

What it can be used for, however, is to hopefully reduce the amount of time needed to catch something like the stringfish, koi, or golden trout due to their limited spawn points. Toss bait into cliffside pools, and you’ll dramatically speed up the fishing process, hopefully allowing you to reel in a rare fish in less time.

What’s the dock or pier for?

Animal Crossing rare fish dock pier
Image used with permission by copyright holder

You also pick from a handful of island layouts when you first begin the game. These are randomly generated so no two look the same right off the bat. However, there are a few features every island has, even if the exact location varies. The important one for fishing is the pier. The pier can attract unique, hard-to-find ocean fish — namely the tuna, blue marlin, mahi-mahi, and giant trevally.

Editors' Recommendations

Josh Brown
Josh Brown is a UK-based freelancer with devoted interests in video games, tech, film, and anime/manga. Just don't talk to…
All Legendary Schematics in Palworld and where to find them
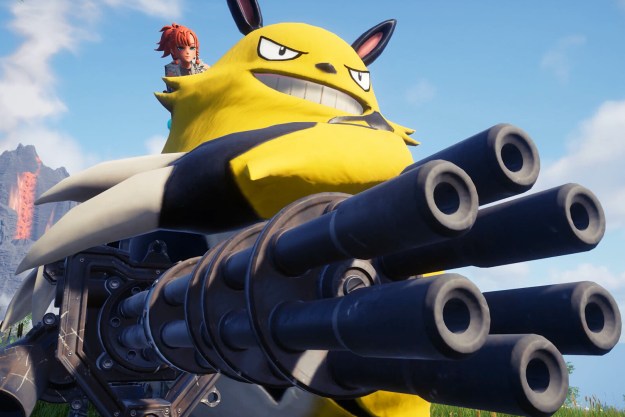
A giant pal uses a minigun in Palworld.

Despite featuring all the various types of Pals in Palworld so heavily, they are not actually the most effective way to fight. Sure, they will help you out, and a Legendary can certainly pull its weight in a battle, but you will mostly be relying on your own character to do the work. This is what makes crafting new weapons and armor so important. Most of these you can access simply by leveling up and getting the required materials to make them, but the best of the best can only be made after finding their schematics. If you want only the top-tier gear in Palworld, then you will be hunting for the Legendary Schematics. These will give you access to a range of otherwise unobtainable weapons and armor that can make you all but invincible. Here is how you can get these blueprints for yourself in Palworld.
All Legendary Schematics

There are only nine Legendary Schematics in Palworld, with six dedicated to weapons and the remaining three for armor. Each one is a drop from a specific Alpha Pal in the open world. Note that you are not guaranteed a Legendary Schematic drop. These are rare, probably below 10%, so you will almost certainly have to repeat these battles to get the schematics. Here is a list of your targets and where to find them.
Crossbow Legendary Schematic
The crossbow upgrade boosts your attack to 490 and can be picked up by defeating the level 23 Bushi. It is located at coordinates 1116, 491.
Handgun Legendary Schematic
The Legendary handgun completely transforms the nearly useless base model by upping its attack to 625. Get it by defeating the level 29 Beakon at coordinates 345, -253.
Assault Rifle Legendary Schematic
Who doesn't love the Assault Rifle? Make it deal 560 damage after taking down a level 49 Blazmut waiting at coordinates 434, 532.
Old Bow Legendary Schematic
If you want a bow that smacks enemies with 247 damage arrows, you need to grind out Kingpaca at coordinates 50, -460.
Pump-Action Shotgun Legendary Schematic
If you're a fan of CQC, the shotgun schematic will buff your damage to 385. Suzaku will hold it and is a level 45 Pal found at coordinates 404, 255.
Rocket Launcher Legendary Schematic
Look, sometimes you just need a problem-solver. A Rocket Launcher dealing 14,000 damage can't be argued with in that regard. You'll have to take on the level 50 Jetragon at coordinates 788, 320.
Cloth Armor Legendary Schematic
Not quite on the level as the following two, this schematic is great for the mid game with 112 HP, 24 Defense, and 250 Durability. You only need to beat a level 11 Chillete at coordinates 175, -420.
Pal Metal Helmet Legendary Schematic
This shiny new helmet offers 560 HP, 1,200 Durability, and 240 Defense. Grab it early to make getting the rest of the schematics easier, but you will have to overcome level 50 Frostallion at coordinates -355, 55.
Heat and Cold Resistant Pal Metal Armor Legendary Schematic
Both the Legendary Heat and Cold Resistant Pal Metal Armor drop from the same target. Both have equal stats and give 1,200 HP, 11,000 Durability, and 400 Defense. And, of course, they resist hot and cold weather respectively. You will need to take down the level 50 Paladius up north at coordinates 445, 680.

Read more
Like a Dragon: Infinite Wealth: Dondoko Island tips and tricks
Ichiban and mascots on dondoko island.

Mini-games and side activities are by no means new to the Like a Dragon franchise, but Dondoko Island in Like a Dragon: Infinite Wealth almost feels like an entire second game packed inside. Once you're introduced to the titular island and shown the ropes, you never have to interact with it again if you don't want to, but on the other hand, you could sink dozens of hours into doing nothing else. You're tasked with trying to return this once-thriving resort to glory, but there's quite a bit that needs to get done before that dream can become a reality. The key here is to get up to a 5-Star ranking, which may initially seem very daunting. Time to grab your bat, net, and harpoon so we can bring Dondoko Island back to glory with these key tips.
Best Dondoko Island tips and tricks

When you're just getting your feet wet with Dondoko Island, try to focus on the simple things first to get your first star. Start your days clearing out all the trash you can with your bat, collecting basic resources like rocks and wood, and snagging any bugs and shiny objects you happen upon. Following that, do all your daily tasks to start saving up some Dokobucks. The goal in this stage is to increase the satisfaction meter by building DIY objects with the highest satisfaction value, which will also raise your building skill. By clearing the track each day, you will reduce the cost of renovating that area for use down the line. Try to wait until they are A or S rank to save cash.

Read more
Where to find the Black Marketeer in Palworld
The black marketeer in Palworld.

Guns aren't the only darker subject matter Palworld takes on that may surprise those who see it as just a Pokemon clone. Beyond collecting Pals and resources like Ancient Civilization parts to craft buildings, you will also be able to procure some rather dubious items, such as people. While you can put them to work for you, there is an entire network of black market sales that you can participate in that can be very lucrative if you don't mind doing some morally grey business deals. If you're ready to participate in the dark underbelly that is Palworld, here is where you can find all the Black Marketeers to buy and sell rare items.
All Black Marketeer locations
There are five different Black Marketeers to find hidden in the wilds of Palworld. They are all well-hidden, and some you won't be able to reach until later in the game, but thankfully all seem to buy and sell the same stock at the same prices. Note that they do have a limited stock of items for sale, but will refresh if you leave and come back after some time.
Abandoned Mineshaft

From the Desolate Church fast travel point, head west to find the Abandoned Mineshaft location. Venture into the mine and you will run into the first Black Marketeer dead ahead.
PIDF Tower Entrance

Read more