
How to get the Blood Rage weapon in Dead Island 2

It isn't a full-on loot game, but Dead Island 2 does have its fair share of rare and powerful weapons to collect. There are random drops and blunt objects you'll pick up off the ground, but the best of the best are going to be the Legendary weapons. If you're a fan of the more lightweight, fast-attacking weapon types, then the Blood Rage dagger is one you'll certainly want to get your hands on. You won't find this Legendary dagger just laying around, though. Here's how to get the Blood Rage in Dead Island 2.

Difficulty

Easy

Duration

15 minutes

What You Need

  • Reach the Santa Monica Pier

Looking at a zombie named Dante by a truck.
Image used with permission by copyright holder

How to get the Blood Rage dagger

Like all the Legendary weapons in Dead Island 2, the Blood Rage dagger is tied to a specific quest. In this case, you're looking for the "Fools Gold" Lost and Found mission you can get by killing a specific zombie on the Santa Monica Pier.

Step 1: Go inside the Lifeguard HQ and find a Crusher zombie named Dante nearby the truck outside the HQ.

Step 2: Kill Dante and loot the key he drops.

Step 3: Use the key on the locker just inside the building to collect a note about a buried safe. The code to it has been split in two.

Step 4: The first half is in an ally on the far northeast corner of the map by some trash.

Step 5: The second part of the code is all the way at the back of a pier behind the ice cream shop on a wooden bench.

A safe half buried in the sand.
Image used with permission by copyright holder

Step 6: With the full code in hand, go to the right side of the Lifeguard HQ down the ally (facing quite a number of zombies) and loot the safe stuck in the sand to claim your Blood Rage dagger.

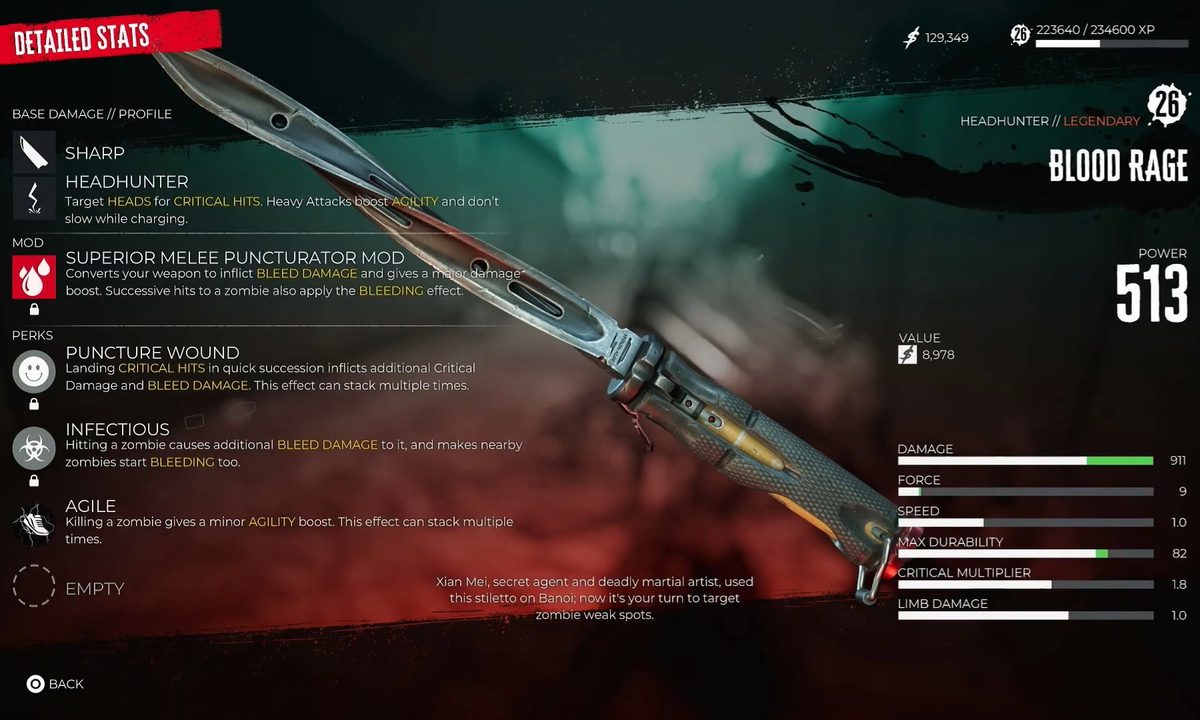
The Blood Rage comes with Superior Melee Puncturator, meaning it inflicts Bleeding damage and get a big damage boost, as well as the Agile perk for stacking Agility boosts with each kill, Puncture Wound to increase crit damage for each one you do in a short time, and Infectious, which that causes nearby zombies to start bleeding just by hitting one.

Editors' Recommendations

Jesse Lennox
Jesse Lennox loves writing, games, and complaining about not having time to write and play games. He knows the names of more…
How to open Prowler Stashes in Spider-Man 2
Spider-Man Peter Parker and Miles Morales fighting Kraven and henchmen

The Prowler, aka Miles Morales' uncle, has hung up his hood and retired from his life of crime by the time Marvel's Spider-Man 2. Even so, after a talk with Miles, it is revealed that he left quite a few stashes of materials around the city that, since he is under house arrest, he can't access anymore. Rather than let them go to waste, you're sent out to collect these little resource caches to use for yourself. These are an easy way to earn yourself some Rare Tech Parts, but the Prowler didn't just leave them out in the open. Here is a breakdown of how you can access Prowler Stashes in Spider-Man 2.
How to open Prowler Stashes

Once you get into the area where a Prowler Stash is, the hunt begins. The first step is locating the stash, which is camouflaged, so you need to use your mask to track it down. By holding down L2, you can scan the area and follow the sounds until you narrow down the correct spot. You have to aim at the right spot and be close enough to reveal it.

Read more
How to get tech parts in Spider-Man 2
Spider-Man attacks enemies in Marvel's Spider-Man 2.

Amid all the different tokens, memories, and photo-ops you need to collect in Marvel's Spider-Man 2, the one material that is both the most common and most necessary is Tech Parts. With the exception of your abilities, which only require skill points you earn by leveling up, essentially everything you can unlock or upgrade in the game will cost Tech Parts alongside one other material. You might think you will never run low early on when you start getting them in batches of over 100 at a time, but once you start unlocking all the slick new suits and styles and gadgets you want to upgrade, you'll realize just how desperate you are to get more. Your spider-sense can't help you with this one, so here are the best ways you can get Tech Parts in Spider-Man 2.
Best ways to get Tech Parts

Tech Parts are the most basic upgrade component in Spider-Man 2, and the city is full of them. But you're better off using these methods to get them rather than others.

Read more
How to get Rare Tech Parts in Spider-Man 2
Peter and Miles perched next to each other in Marvel's Spider-Man 2.

The amount of upgrade materials in Marvel's Spider-Man 2 can make your head spin at times. From all the different tokens, parts, and plain skill points, it can be hard to keep them all straight, let alone where you find each one. The game does a decent job of letting you know what rewards any activity on the map will give you by highlighting it, but when you're hunting for Rare Tech Parts it can be a pain to slowly scroll around looking for a way to snag some. Plus, if you want to be efficient in getting them, it will take even longer. Here is how you can get Rare Tech Parts in Spider-Man 2 so you can get your upgrades done and save the day.
Best ways to get Rare Tech Parts
Technically Rare Tech Parts aren't any harder to get than other collectables like City Tokens, but are "rare" because you get them in much smaller quantities than normal Tech Parts. If you're hunting for them, your first stop should be any of the Prowler Stashes. These unlock very early in the story after Miles talks to his uncle and is sent to one to demonstrate how they work. Once you know how to solve the little environmental puzzles, they won't take you too long to get through, and they continue to appear as you move through the story. You get three for each you open.

Hunter Blinds are your next best source for Rare Tech Parts, giving five for any you complete, and are basically the opposite of Prowler Stashes. Instead of a little environmental puzzle to solve, these are combat (or stealth) focused encounters, so you can swap between them to add some variety to your Rare Tech Parts grind!

Read more