With FFXIV Patch 5.21, the dreaded Diadem is back with a vengeance. This slice of the Sea of Clouds first arrived during the Heavensward expansion as a large-scale PvE activity where huge groups would fight incredibly dangerous monsters for loot with randomized stats. Since those early days, it was removed and retooled a few times essentially to fill a content gap. With PvE having so much on its plate these days, the 5.21 Diadem update is a gatherer’s paradise.
Disciples of the Land can pile into the virtually unchanged floating isles to gather the items crafters need to whip up whatever they need to help in the Restoration of Ishgard mission. It gives gatherers a new way to pitch in with the goings-on over at The Firmament, and it’s considered — at least for now — the gathering end-game. Is there money to earn here? Absolutely. The time-limited appeal of the activity will eat into profits pretty quickly, but you can net both scrips and gil simultaneously with the Diadem 5.21 items. You’ll only lose half of your proceeds as interest dips.
The Diadem Explained and How to Unlock It
What is the Diadem?
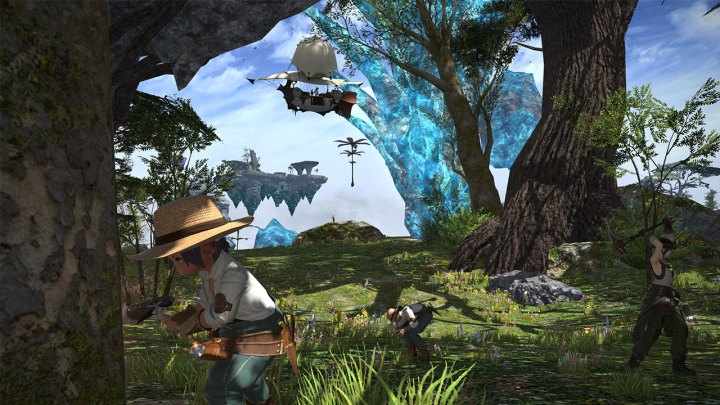
The Diadem is a large instanced zone made up of countless floating islands. There’s almost always one above and below you. Each island is teeming with not only very dangerous monsters than no gatherer can take on in mortal combat, but a veritable bounty of nodes to pull materials from. Similar to the Ocean Fishing mini-game introduced just a few short weeks ago, there’s something for gatherers of every level — well, 10 and above, at least.
Assuming you fit into that level range, every node on the island will have something for you to gather. You’ll be fairly limited in choice if you’re just starting out, but the aether cannon can net you tens of whatever you might not be able to gather yourself. No matter your level, the cannon will KO any mob you fire it at, and you won’t charge it any slower than higher-level or more well-equipped players, either.
How to Unlock the Diadem – FFXIV 5.21 guide
If you’re coming back to The Firmament and The Restoration of Ishgard for this new round of fixing up, unlocking the new 5.21 Diadem should be as simple as talking to Aurvael at the left-most tent as you enter The Firmament. He’ll give you the low-down, tell you how to work the new Aetheromatic Auger, and send you on your way. From then on, just talk to him when you can want to enter the Diadem.
If you’re a late-comer to the Restoration of Ishgard, things are a bit more involved. First off, you’ll need to have completed the Litany of Peace quest from Patch 3.3. That’s around the middle point of the Heavensward expansion when things in The Holy See of Ishgard are beginning to calm down. With relative peace returned to the city, you can then head back to The Jeweled Crozier and accept the quest “Towards the Firmament” from the poster on a nearby wall.
Follow that quest until you gain access to The Firmament, introduce yourself to the workers with icons above their heads, and talk to Aurvael a couple more times. Assuming there are no more markers left above other NPCs, you should get the unlock notice from Auevael once he shuts his mouth.
What to do in the Diadem
Whether you go in alone or with a group, everyone entering the Diadem starts off at the same place. From there, it’s completely up to you where you go. Each island, for the most part, can play host to the same materials, so you won’t have to seek out a specific island to find whatever it is you’re looking for. Though when it comes to blasting down enemies with the aether cannon for more specific loot, there are some places where they’re most densely packed than others. It’s something to keep in mind if you’re going for efficiency.
At the end of the day, what you gather from the Diadem is what you get to keep. Most of the materials are worth the same amount of scrips, so unless you’re gathering materials you’ll personally craft with, it doesn’t really matter what you decide to collect. A good way to play it is to check out the market boards before heading in and aim to gather whatever is currently fetching a high price. On my server at launch, Lv 80 Grade 2 Skybuilders’ Cloud Drop Water was the one to aim for. It’s used for a top-level recipe on numerous crafting classes and seemed to be in short supply. Your own server can differ, though, so it’s best to check out the recipes in the crafting menu and throw its required items into a market board search to see what’s going to be most worth your time.
Getting Around the Diadem
In the old days, the Diadem was a bit of a free for all. Each time you entered, you’d have to scout out aether currents on each island before you could take to the skies on your flying mount. It was hell.
Nowadays, you’re free to fly the moment you zone in, but you might not always want to use them. Twisters placed around the edges of each island can fling you to another much more quickly than any flying mount can, so there’s something to be said about efficiently making your way around the diadem by flying to the closest twister and getting shot to another island like a missile.
With several hours on the clock, you’ll hardly need to rely on these to get around, but hyper-focused gatherers can absolutely save their sanity by making use of these jets.
Diadem Weather Types and Times
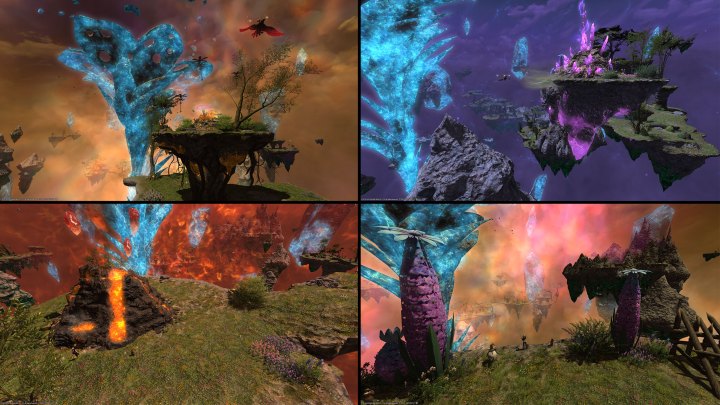
Out there in the Diadem, the weather will change fairly frequently. With how repetitive the actions can get in there, 10 minutes can feel like a whole hour, but that’s how long each weather effect lasts. It won’t mean much unless you’re level 80, but the four different Umbral weather conditions spawn a different single-use node in a pre-determined location on the map. These weather effects kick in every 20 minutes and last for 10, so not only do you have plenty of time to find your way to the node, you won’t have to wait too long to grab another.
The four umbral weather types are as follows:
- Umbral Flare
- Umbral Tempest
- Umbral Levin
- Umbral Duststorm
Currently, there seems to be no way to influence the type of weather that will appear. I was lucky enough to cycle through all four Umbral varients cleanly in my first run, but it’s possible you’ll have the same weather type crop up three times in a row. Of course, your “luck” depends entirely on what you’re hoping to gather from these time-limited meteorological conditions. Maybe you want Umbral Flare and nothing else.
Given everyone in there could want a completely different weather type to take effect, it’s most likely impossible to influence the weather yourself. You also can’t predict it through a skywatcher either. This isn’t Eureka, brothers and sisters, but it might feel just as harsh if you’re after fat stacks of Umbral Flarestone. Then again, aiming for anything one specific thing will land you in this position.
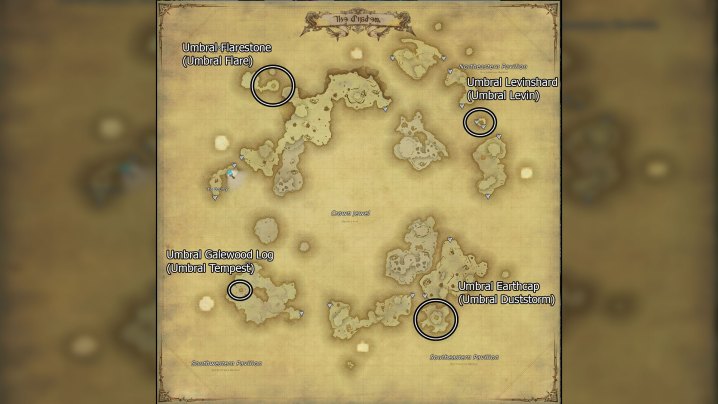
Umbral Node Location Coordinates
So what can you gather during each of these weather types? A rock, a log, another rock, and a mushroom! If you haven’t gathered already, it’s two nodes for Botanists and two nodes for Miners. If you have both classes at level 80, you’re an all-weather gatherer. Good job.
Here are all the Diadem Umbral node location coordinates and the weather you’ll need for them to appear:
- Umbral Flare = Umbral Flarestone (x13 y9)
- Umbral Tempest = Umbral Galewood Log (x9 y30)
- Umbral Levin = Umbral Levinshard (x34 y13)
- Umbral Duststorm = Umbral Eathcap (x29 y33)
Diadem Nodes
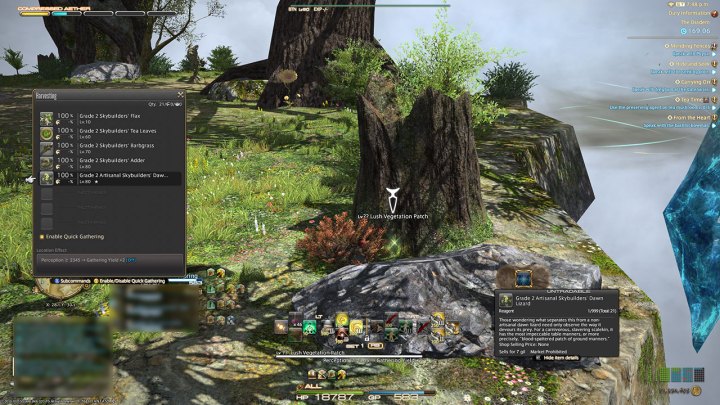
Of course, you’re not limited to gathering just the Umbral nodes in the Diadem 5.21 update. Crafters are going to need a lot more than mushrooms to rebuild the Firmament. Whenever Umbral nodes aren’t available, you want to spend your time whacking the stones and trees of the isles for its 50 (yes, fifty) other available items.
With only five of these in any one node, it’s not a matter of off-hand tools getting you the rest. Each class has five different item lists they can gather from, so it’s not a simple matter of every shrub having Cotton Bolls or every boulder having Cobalt Ore. It’s pure luck of the draw, so be sure to hit up every node applicable node you can.
Here are all the gathering materials you’ll find in each node. They’ll spawn anywhere:
Mature Tree
- Set 1
Grade 2 Skybuilders’ Maple Log
Grade 2 Skybuilders’ Mistletoe
Grade 2 Skybuilders’ Feather
Grade 2 Skybuilders’ Resin
Grade 2 Artisinal Skybuilders’Hardened Sap - Set 2
Grade 2 Skybuilders’ Maple Sap
Grade 2 Skybuilders’ Beehive
Grade 2 Skybuilders’ Feather
Grade 2 Skybuilders’ Resin
Grade 2 Artisinal Skybuilders’ Hardened Sap - Set 3
Grade 2 Skybuilders’ Switch
Grade 2 Skybuilders’ Teak Log
Grade 2 Skybuilders’ Oak Log
Grade 2 Skybuilders’ Walnut Log
Grade 2 Artisinal Skybuilders’ Log
Lush Vegetation
- Set 1
Grade 2 Skybuilders’ Hemp
Grade 2 Skybuilders’ Straw
Grade 2 Skybuilders’ Vine
Grade 2 Skybuilders’ Wheat
Grade 2 Artisinal Skybuilders’ Wheat - Set 2
Grade 2 Skybuilders’ Flax
Grade 2 Skybuilders’ Tea Leaves
Grade 2 Skybuilders’ Toad
Grade 2 Skybuilders’ Cotton Boll
Grade 2 Artisinal Skybuilders’ Cotton Boll
Mineral Deposit
- Set 1
Grade 2 Skybuilders’ Zinc Ore
Grade 2 Skybuilders’ Pigment
Grade 2 Skybuilders’ Spring Water
Grade 2 Skybuilders’ Crystal-clear Rock Salt
Grade 2 Artisinal Skybuilders’ Rock Salt - Set 2
Grade 2 Skybuilders’ Rock Salt
Grade 2 Skybuilders’ Asphaltum
Grade 2 Skybuilders’ Alumen
Grade 2 Skybuilders’ Cloud Drop Water
Grade 2 Artisinal Skybuilders’ Spring Water - Set 3
Grade 2 Skybuilders’ Ore
Grade 2 Skybuilders’ Cobalt Ore
Grade 2 Skybuilders’ Mythrite Ore
Grade 2 Skybuilders’ Darksteel Ore
Grade 2 Artisinal Skybuilders’ Cloudstone
Rocky Outcrop
- Set 1
Grade 2 Skybuilders’ Copper Sand
Grade 2 Skybuilders’ Mythril Sand
Grade 2 Skybuilders’ Rock
Grade 2 Skybuilders’ Lutinite
Grade 2 Aurum Regis Skybuilders’ Sand - Set 2
Grade 2 Skybuilders’ Iron Sand
Grade 2 Skybuilders’ Mica
Grade 2 Skybuilders’ Silex
Grade 2 Skybuilders’ Basalt
Grade 2 Artisinal Skybuilders’ Jade
The Aetheromatic Auger
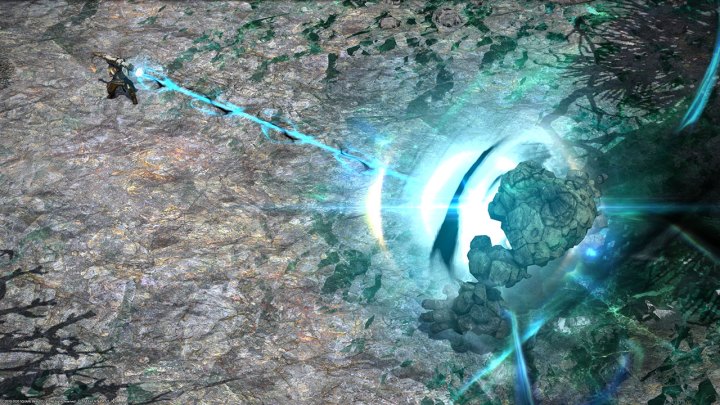
The Aetheromatic Auger is a huge laser cannon Botanists and Miners get given each and every time they enter the Diadem. It’s the Spartan Laser of FFXIV. Created by the Machinist class master, this defensive tool solves the problem of sneaking around mobs when your lowly pickaxe can’t fend them off. You can just blow them up now instead.
But this big blaster is more than just a way out of a sticky situation. After all, it wouldn’t serve much use to level 80 gatherers given the denizens of the Diadem leave them alone. Instead, it’s actively used to harvest large quantities of materials from the 10 different monsters you’ll find roaming the isles. You can’t just beam down every monster you see, though. That would be a massacre. Instead, the Aetheromatic Auger charges as you gather. It can hold five charges at a time, with a single charge taking around 40 swings of a gathering tool to accumulate – that’s around 8 complete nodes at the standard five-swing harvest.
Once you’ve charged the gun, just target a monster you want to blow up and hit the active skill icon on-screen or, if you’re using a controller, press LT and R3. Once executed, you’ll see five different items flood your inventory in multiples of 10. These aren’t random, either, so if you’re after large quantities of a certain item that you’re struggling to find in nodes, charge your cannon and hunt down the applicable monster for a nice boost.
The Diadem monster drops are as follows:
- Diadem Wood Golem
Grade 2 Skybuilders’ Vines
Grade 2 Skybuilders’ Maple Logs
Grade 2 Skybuilders’ Wheat
Grade 2 Skybuilders’ Beehives
Grade 2 Artisinal Skybuilders’ Hardened Sap - Diadem Bulb
Grade 2 Skybuilders’ Toads
Grade 2 Skybuilders’ Maple Sap
Grade 2 Skybuilders’ Straw
Grade 2 Skybuilders’ Cotton Boll
Grade 2 Artisinal Skybuilders’ Cotton Boll - Diadem Melia
Grade 2 Skybuilders’ Switch
Grade 2 Skybuilders’ Teak Log
Grade 2 Skybuilders’ Oak Log
Grade 2 Skybuilders’ Walnut Log
Grade 2 Artisinal Skybuilders’ Log - Cloudtrap
Grade 2 Skybuilders’ Feathers
Grade 2 Skybuilders’ Hemp
Grade 2 Skybuilders’ Resin
Grade 2 Skybuilders’ Mistletoe
Grade 2 Artisinal Skybuilders’ Hardened Sap - Proto-noctilucale
Grade 2 Skybuilders’ Flax
Grade 2 Skybuilders’ Tea Leaves
Grade 2 Skybuilders’ Barbgrass
Grade 2 Skybuilders’ Adders
Grade 2 Artisinal Skybuilders’ Dawn Lizard - Diadem Beast
Grade 2 Skybuilders’ Zinc Ore
Grade 2 Skybuilders’ Alumen
Grade 2 Skybuilders’ Asphaltum
Grade 2 Skybuilders’ Cloud Drop Water
Grade 2 Artisinal Skybuilders’ Rock Salt - Diadem Urolith
Grade 2 Skybuilders’ Rock Salt
Grade 2 Skybuilders’ Rocks
Grade 2 Skybuilders’ Lutinite
Grade 2 Skybuilders’ Mythril Sand
Grade 2 Artisinal Skybuilders’ Aurum Regis Sand - Diadem Golem
Grade 2 Skybuilders’ Ore
Grade 2 Skybuilders’ Cobalt Ore
Grade 2 Skybuilders’ Mythrite Ore
Grade 2 Skybuilders’ Darksteel Ore
Grade 2 Artisinal Skybuilders’ Cloudstone - Islekeeper
Grade 2 Skybuilders’ Spring Water
Grade 2 Skybuilders’ Copper Sand
Grade 2 Skybuilders’ Pigment
Grade 2 Skybuilders’ Crystal Clear Rock Salt
Grade 2 Artisinal Skybuilders’ Rock Salt - Diadem Coblyn
Grade 2 Skybuilders’ Iron Sand
Grade 2 Skybuilders’ Mica
Grade 2 Skybuilders’ Silex
Grade 2 Skybuilders’ Basalt
Grade 2 Artisinal Skybuilders’ Jade
Diadem Monster Locations
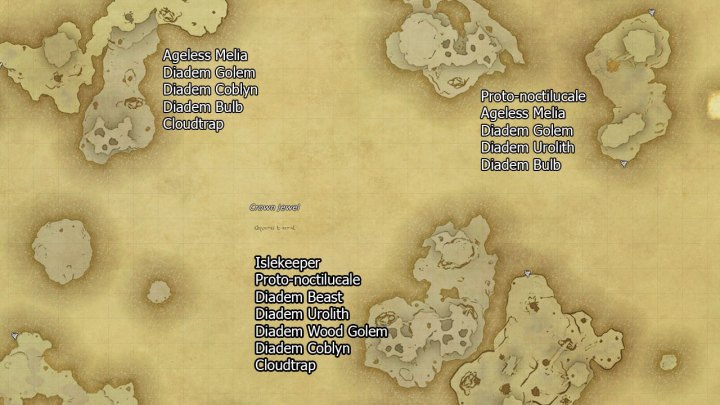
When it comes time to blast monsters with the Aetheromatic Auger, you can either fire it at any nearby monster, or target a specific one for specific loot. If you’re aiming to stockpile or sell a certain material, you’ll want to know where to find the monster that’s known to drop it. Sadly, Diadem monster locations aren’t that clear-cut.
The islands that make up the Diadem house numerous different species of monster. It’s harder to track where they don’t appear. Instead of a complicated list here, heed this advice – don’t sweat it. You’ll come across the specific monster on your travels. If you’ve maxed out your auger meter and don’t want to see charge go to waste as you swing, take yourself down to the gray islands below. These large landmasses have monster camps for this very purpose.
Rather than one stray Diadem Wood Golem on an island up above, you’ll find a good half dozen virtually hugging each other here. And the same goes for the other 10 Diadem monster species. Find them down there, take note of their location, and come back each time you’ve capped out your auger.
Fishing in the Diadem
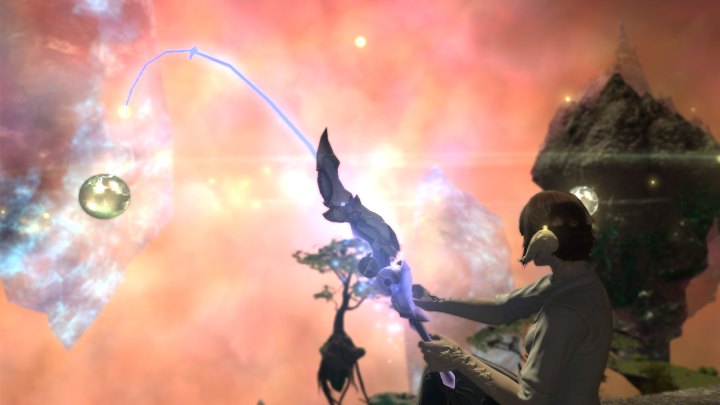
Fishing gets treated a little differently to its gathering brethren in the Diadem. It only makes sense given you can’t just choose which fish to reel in like you can through mining etc. Instead, fishing is a mostly solitary activity. You buy bait from the vendor as you enter, perch yourself in one of four distinct locations, cast your rod, and reel in fish as normal.
At the end of the day, each fish is worth a different amount of Skybuilder’ Scrips. Like the other classes, you have these inspected by Flotpassant back in The Firmament. Once that’s done, you’re free to keep the fish; which you can then desynth for the same approved materials miners and botanists gather to sell or craft with.
Fish can be gathered in the following locations, with Umbral weather allowing for a unique fish to be caught in each:
- Blustery (x30, y9)
Cloud Cutter
Tupuxuara
Vampiric Tapestry
Rhomaleosaurus
Cometfish (Umbral Flare) - Calm (x29, y31)
Blind Manta
Cloud Cutter
Vampiric Tapestry
Gobbie Mask
Anomalocaris (Umbral Duststorm) - Swirling (x13, y23)
Cloud Cutter
Tupuxuara
Vampiric Tapestry
Pterodactyl
Rhamphorhynchus (Umbral Levin) - Windswept (x25, y16)
Blind Manta
Cloud Cutter
Vampiric Tapestry
Skyfish
Dragon’s Soul (Umbral Tempest)
Two other fishing locations are available, namely Southern Lake and Northern Lake at x10, y29 and x10, y9, respectively. The fish award fewer scrips than the rest, suggesting they’re spots for low-level Fishers to grind.
For a full breakdown of fishing locations and bait requirements, Reddit user CuriousBlackMage has a very helpful spreadsheet available here.
Leveling in the Diadem
It’s true that a maxed-out gathering class is required to truly reap the rewards of the Diadem when it comes to gil and scrips, but that isn’t to say it’s useless for anyone else. Far from it, in fact. The Diadem is a great place to level your gatherers. It may not be the most engrossing method, but you won’t have to wrestle with your inventory space, either. I personally prefer the older methods — a mix of touring the land and grinding guildleves, but you won’t have to scout out complicated and typically outdated leveling guides, either. It’s a simplified experience with a more predictable payout. Given you need to be quite far into the FFXIV storyline to unlock the Firmament, and thus, the Diadem itself, it’s not an option for new players, but it’s there for if you’re playing catch-up after years of fighting and crafting only.
So how does it work? Simple. Just gather the highest level item you can. That’s it. It’s a true mindless grind. Grab some Survival Manuals from your Grand Company, chuck some raisins into your mouth, maybe grab the cordials, and just go to town on nature.
Rewards and Earning Scrips
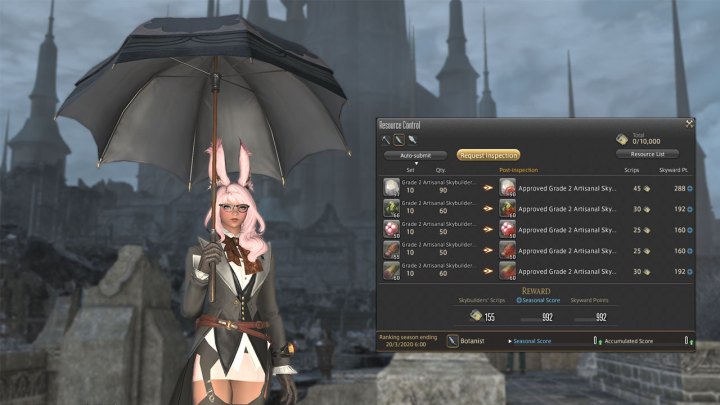
The Diadem in 5.21 doesn’t hold any hyper-specific rewards. You won’t be unlocking some exclusive mount by devoting your time to chipping away at the earth. Instead, it’s a way for gatherers to earn the same Skybuilders’ Scrips crafters by turning our materials into tea and stepladders. Ideally, you’ll want to use this as an excuse to level your own crafters to accelerate your scrip earnings, but it’s not wholly necessary. Sought-after rewards from the Restoration of Ishgard content require quite a lot of scrips, so you’ll have to spend a few hours in the Diadem each time you want something like the Albino Karakul mount or a nice new Ishgardian furniture piece.
You earn scrips for each set of 10 Diadem gathering items you have appraised by Flotpassant back in the Firmament. The higher the level requirement of the item, the more scrips you earn, meaning higher-level gatherers have a naturally easier time getting scrips. It’s typically single-digit scrips for each set of items, but Fishers can hit double digits for single fish given the unpredictability of casting your rod into a cloudy abyss.
Once you’ve had your items appraised, they’re yours to keep. You can either sell them onto crafters or, if you have the right class, work them into items yourself to bump up your scrips and net some extra experience points on a crafting class of your choosing.
Patch 5.21 FAQ
- Where do I get the Parasol in FFXIV?
The Parasol can be bought from Enie in The Firmament for 1800 Skybuilder’s Scrips
- Where do I get the Albino Karakul mount?
The Albino Karakul mount can be bought from Enie in The Firmament for 8,400 Skybuilders’ Scrips
- How do I unlock the Read emote in FFXIV?
The Read emote is unlocked by purchasing the Ballroom Etiquette – Intelligent Impressions item from Enie in The Firmament for 1,800 Skybuilders’ Scrips
- How do I unlock the Insist emote in FFXIV?
The Insist emote is unlocked by purchasing the Ballroom Etiquette – Emphatic Elucidation item from Enie in The Firmament for 1,800 Skybuilders’ Scrips
- How do I unlock the new FFXIV 5.21 Controlled Chaos hairstyle?
The Controlled Chaos hairstyle is unlocked with the Modern Aesthetics – Controlled Chaos item bought from Enie in the Firmament for 1,800 Skybuilder’ Scrips
- Where do I get the Cerberpup minion in FFXIV?
The Cerberpup minion can be bought from Enie in The Firmament for 1,200 Skybuilders’ Scrips
- How do I unlock the Pteranodon mount?
That’s a tough one. You’ll need to amass 500,000 Skyward points on every land/hand class
- How do I unlock the Dhalmel mount?
The FFXIV Dhalmel mount is a rare prize from the Kupo of Fortune scratchcard
Editors' Recommendations
- New PS5 update makes the DualSense’s mic and speaker even better
- How long is Final Fantasy 7 Rebirth?
- Final Fantasy 7 Rebirth: Queen’s Blood tips and tricks
- Dave the Diver: most valuable items and how to sell them
- The best skills in Final Fantasy 16